Why Trickle Charger Not Charging Your Battery Anymore?
Figuring out why trickle charger not working can feel tricky, especially if you’re just starting with car maintenance. Don’t worry, it’s a common issue! Many things can go wrong, but the good news is you can usually fix it yourself. We’ll explore the common causes and how to troubleshoot them, breaking down the process into easy steps. Keep reading for a simple solution to get your battery charging again.
Possible Issues When Your Charger Fails
If your trickle charger isn’t working, it can be frustrating, especially when you need a reliable way to keep your vehicle’s battery in top condition. This is a prevalent problem that many car owners encounter. From simple loose connections to more complex internal issues, there are several reasons why your trickle charger might fail to function as expected. Before you replace the charger, it’s essential to examine the potential problems. Knowing these common causes will help you diagnose the problem and take the correct steps to get your trickle charger back in working order.
Power Supply Problems
One of the most frequent reasons your trickle charger may not work is a problem with the power source. This can include a non-functioning electrical outlet or a tripped circuit breaker. It is also possible that there’s an issue with the power cord of the charger itself. A damaged or worn-out cord can interrupt the flow of electricity, preventing the charger from operating correctly. This might seem simple, but it’s a common issue that many people overlook. Checking the power supply is always the first place to start when your trickle charger doesn’t seem to be working.
- Testing the Outlet: Use another device to check if the outlet is supplying power. A lamp or a phone charger can quickly help you determine if the outlet is active.
- Checking the Circuit Breaker: Locate your home’s circuit breaker box and verify that the circuit corresponding to the outlet where you plug in the charger hasn’t tripped. If it has, reset it.
- Inspecting the Power Cord: Look closely at the charger’s power cord for any visible damage like cuts, frays, or exposed wires. Replace the cord if any damage is found.
- Using a Different Outlet: Try plugging the charger into a different outlet in your house. This helps eliminate the outlet as a potential problem.
- Checking for Loose Connections: Ensure the charger’s power cord is firmly connected to both the charger and the outlet. A loose connection can interrupt the power supply.
Battery Connections and Compatibility
Another factor in why trickle charger not working could be an issue with the battery connections or compatibility between the charger and the battery. If the charger isn’t properly connected to the battery terminals, it won’t be able to deliver the necessary charge. Furthermore, some chargers might not be suitable for specific battery types, such as lithium-ion batteries. Knowing the type of battery you have and ensuring your charger is compatible are key steps in fixing the problem. This part of the troubleshooting process involves examining both the physical connections and the technical specifications of your charging equipment.
- Cleaning Battery Terminals: Corrosion or buildup on the battery terminals can block the flow of electricity. Clean the terminals with a wire brush or a baking soda and water solution.
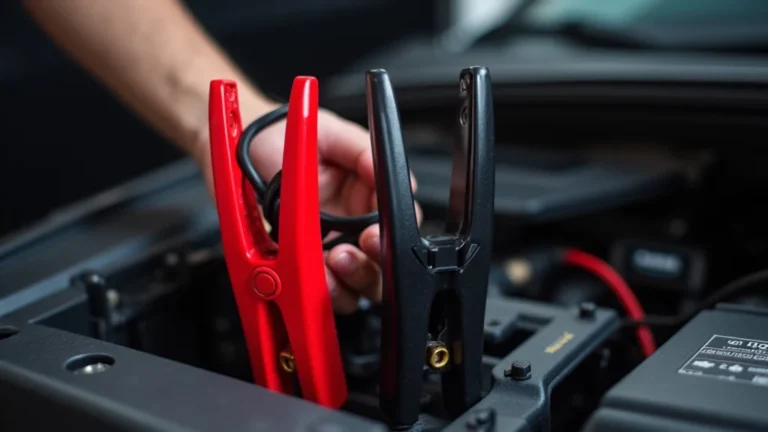
- Checking Cable Connections: Make sure the charger’s clamps are properly attached to the battery terminals. The red clamp goes on the positive (+) terminal, and the black clamp goes on the negative (-) terminal.
- Verifying Battery Type Compatibility: Confirm that your trickle charger is compatible with the type of battery you have. Some chargers are designed specifically for lead-acid, AGM, or lithium-ion batteries.
- Examining for Damaged Cables: Look for breaks or loose connections in the charger cables that connect to the battery clamps. Replace any damaged cables to ensure a proper connection.
- Proper Clamp Placement: Confirm the clamps are firmly fixed and touching clean metal surfaces on the battery terminals. Improper placement prevents effective charging.
Internal Charger Failures
Sometimes, the issue isn’t with the power source or the battery connection, but with the charger itself. Internal component failures are a less frequent problem, but they can render a trickle charger useless. These failures might include blown fuses, malfunctioning circuits, or other internal damage. Diagnosing these problems typically involves more advanced troubleshooting techniques, which may require opening the charger to examine its internal parts. If you are not comfortable doing this or don’t have the necessary tools, it’s best to consult a professional.
- Checking the Fuse: Many trickle chargers have an internal fuse that protects them from electrical surges. Check this fuse and replace it if it’s blown.
- Inspecting the Circuitry: Look for any signs of damage like burnt components or loose wires inside the charger. This is often difficult to do without specialized equipment.
- Testing the Charger with a Multimeter: A multimeter can measure voltage and current to see if the charger is supplying power.
- Professional Repair or Replacement: If you find internal damage, it is usually better to replace the charger or have it professionally repaired.
- Reviewing the Charger’s Manual: Refer to the manufacturer’s instructions for any specific troubleshooting steps related to internal failures.
Common Troubleshooting Steps
So, your trickle charger is not performing as expected? Let’s explore several practical troubleshooting methods you can employ to identify and rectify the issue. This systematic procedure will assist you in narrowing down the possible causes and implementing the most effective solutions. From checking basic power supplies to examining internal components, each step is designed to guide you through the process of restoring your trickle charger’s functionality. This makes it easier to figure out what’s causing the problem and what you need to do to fix it.
Safety First: Before You Start
Before you begin troubleshooting your trickle charger, safety should always be your top priority. Following the proper safety precautions can help you avoid injury or damage to equipment. This includes wearing the appropriate safety gear and working in a well-ventilated area. Make sure to disconnect the charger from the power source and the battery before starting any examination or repairs. Additionally, review the charger’s user manual for specific safety instructions.
- Wear Eye Protection: Always wear safety glasses or goggles to protect your eyes from any potential hazards, such as battery acid or debris.
- Work in a Well-Ventilated Area: Charge batteries in a well-ventilated space to prevent the buildup of explosive gases, which can be produced during charging.
- Disconnect Power and Battery: Always disconnect the charger from the power outlet and the battery terminals before you inspect or conduct maintenance.
- Check for Damaged Components: Inspect all wires and connections for signs of damage or wear before you start. Do not operate a charger with damaged parts.
- Review the User Manual: Examine the manufacturer’s safety precautions and recommendations within the user manual.
Step-by-Step Diagnostic Procedures
Now, let’s explore a step-by-step diagnostic procedure to examine your trickle charger. This systematic approach is designed to guide you through the troubleshooting process, helping you to identify and fix the issue. We’ll start with the basics, like inspecting the power supply and connections, and then move on to more complex checks if needed. Using this straightforward procedure, you can diagnose the problem with your trickle charger and have it running again in no time.
- Check the Power Source: Plug the charger into a known working outlet. Test the outlet with another device, such as a lamp or a phone charger, to confirm it is functioning correctly. If the outlet is not working, try a different one.
- Inspect the Power Cord: Examine the charger’s power cord for any damage. Look for cuts, frays, or exposed wires. Replace the cord if any damage is visible.
- Verify Battery Connections: Make sure the charger clamps are correctly connected to the battery terminals. The red clamp should be on the positive (+) terminal, and the black clamp should be on the negative (-) terminal. Clean any corrosion off the terminals.
- Examine the Charger’s Fuse: Many trickle chargers have a built-in fuse. Check the fuse for any signs of damage. If the fuse is blown,
- Test with a Multimeter: Use a multimeter to test the charger’s output voltage. If the voltage is zero, the charger may be faulty. If you are not comfortable using a multimeter, seek help from a professional.
Tools You Might Need
To accurately troubleshoot a trickle charger and find why trickle charger not working, having the right tools is essential. A few basic tools can help you check the power supply, connections, and internal parts of the charger. Investing in these tools can enable you to fix minor problems and help you maintain your trickle charger for optimal performance. The right tools can make a significant difference in how effectively you can resolve any issues with your charging device.
- Multimeter: Used to test the voltage, current, and continuity of the charger.
- Wire Brush: For cleaning battery terminals.
- Safety Glasses: To protect your eyes.
- Screwdrivers: For opening the charger, if necessary.
- Replacement Fuses: Always good to have on hand.
Battery Problems That Might Cause Trickle Charger Issues
Sometimes, the issue isn’t with the charger itself but the battery. A battery in poor condition can prevent a trickle charger from working properly. Understanding the condition of your battery is key when figuring out why trickle charger not working. A battery that has internal damage or has reached the end of its life may not accept a charge, which can lead you to mistakenly believe the charger is the problem. A battery’s health is just as important as the charger’s functionality.
Battery Health and Performance
A battery’s health significantly impacts its ability to accept and retain a charge from a trickle charger. Batteries degrade over time due to several factors, including usage patterns, environmental conditions, and age. Sulfation, which occurs when lead sulfate crystals build up on the battery plates, is a common issue that reduces a battery’s capacity to hold a charge. Another factor is internal component breakdown, which can lead to reduced performance.
- Check Battery Age: Batteries typically last 3-5 years. If your battery is older, it may not be able to hold a charge.
- Test the Battery Voltage: Use a multimeter to check the battery voltage. A fully charged 12V battery should read around 12.6V or higher.
- Look for Battery Swelling: Physical changes, such as a swollen battery case, can indicate internal damage and render the battery unusable.
- Examine Battery Terminals: Corroded terminals can interrupt the charging process. Always make sure they are clean for an effective charge.
- Consider a Load Test: A load test helps determine the battery’s capacity to deliver power under a load.
Battery Sulfation
Battery sulfation is a condition where lead sulfate crystals form on the battery plates, reducing the battery’s ability to hold a charge. This happens when a battery is left in a discharged state for an extended period. The crystals obstruct the chemical reactions needed to produce electricity, effectively lowering the battery’s capacity. Addressing sulfation can sometimes revive a battery, but it usually involves specialized charging or desulfation equipment.
- Prevention is Key: The best approach to prevent sulfation is to keep the battery charged and avoid letting it sit in a discharged state.
- Use a Desulfation Charger: These chargers send a high-frequency pulse to break down the sulfate crystals.
- Regular Charging: Consistently use a trickle charger or regular charger to keep the battery fully charged.
- Proper Storage: If storing a battery, ensure it’s fully charged and stored in a cool, dry place.
- Professional Help: Severe sulfation may require the attention of a battery specialist for reconditioning.
Battery Short Circuits
Internal short circuits within a battery can also cause charging problems. Short circuits occur when the positive and negative plates within the battery touch each other, often due to physical damage or age. This can lead to rapid discharge and prevent the battery from accepting a charge. When a short circuit happens, the battery may show signs of rapid discharge or excessive heat. Such damage generally necessitates replacing the battery because a short circuit can’t be fixed by charging it.
- Check for Rapid Discharge: If the battery loses charge very quickly, a short circuit might be present.
- Inspect for Swelling: A swollen battery case can indicate internal damage, including a short circuit.
- Test for Voltage Drops: A multimeter can show if the voltage drops quickly.
- Professional Inspection: A battery specialist can perform tests to confirm an internal short circuit.
- Replace a Damaged Battery: A short-circuited battery usually requires replacement.
Understanding Trickle Charger Technology
A good knowledge of trickle chargers can help you figure out why trickle charger not working and solve the issue. These chargers are engineered to keep batteries charged over long periods without causing harm. They give a steady, low-level charge to maintain the battery’s health. The design and function are quite different from those of standard chargers, which charge batteries more quickly. Understanding the basics helps you troubleshoot and maintain your charging devices.
How Trickle Chargers Work
Trickle chargers deliver a small, consistent current to the battery. This current is typically less than 2 amps. The objective is to keep the battery charged and counteract the self-discharge rate, which is the natural process where a battery loses its charge over time. These chargers are useful for vehicles that aren’t used often, such as motorcycles, classic cars, or seasonal equipment. The chargers are designed to stop charging when the battery is fully charged.
- Low Current Output: They supply a low amperage to avoid overcharging the battery.
- Voltage Regulation: Many models have built-in voltage regulation to prevent overcharging.
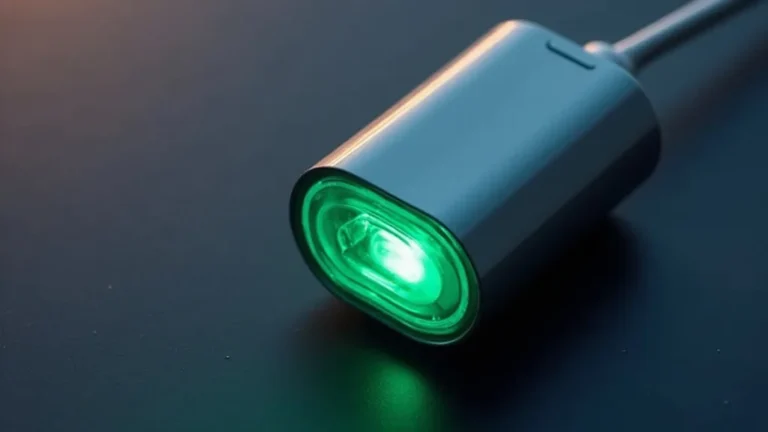
- Automatic Shut-Off: Smart chargers automatically stop charging when the battery is full.
- Monitoring: Some models constantly monitor the battery’s voltage and adjust the charge.
- Maintenance Mode: The charger goes into maintenance mode after the battery is fully charged, which keeps it topped off.
Trickle Charger vs. Standard Charger
Trickle chargers and standard chargers are different in their charging rates and intended uses. Standard chargers offer a quicker charge, making them suitable for situations where you need to quickly charge a depleted battery. However, they can potentially overcharge and damage a battery if left connected for too long. Trickle chargers are designed for continuous charging and are less likely to overcharge the battery due to their low output. Choosing the right charger depends on your requirements and how often you will be charging.
| Feature | Trickle Charger | Standard Charger |
|---|---|---|
| Charging Rate | Low (typically 1-2 amps) | High (varies, but can be 10 amps or more) |
| Charging Time | Longer, for slow and steady charging | Shorter, for fast charging |
| Intended Use | Long-term maintenance, keeping batteries topped up | Charging discharged batteries quickly |
| Overcharge Risk | Low, thanks to low output | Higher, if left connected too long |
| Automatic Shut-Off | Often equipped with automatic shut-off and maintenance modes | May or may not have these features |
Smart Chargers vs. Dumb Chargers
The main difference between “smart” and “dumb” chargers lies in their intelligence and features. Dumb chargers are the simpler, older types of chargers, that deliver a constant charge without any built-in safeguards. Smart chargers, on the other hand, have microprocessors that monitor the battery’s condition and adjust the charging process accordingly. They typically have multiple charging modes, automatic shut-off, and overcharge protection.
- Smart Chargers: These chargers have features like overcharge protection, multiple charging modes, and automatic shut-off, making them safer and more efficient.
- Dumb Chargers: These are simpler chargers that deliver a constant charge and lack the advanced features of smart chargers.
- Monitoring the Battery: Smart chargers monitor the battery’s voltage and adjust the charging current as needed.
- Charging Modes: Smart chargers offer various modes to match different battery types and conditions.
- Safety Features: Smart chargers include protections to prevent overcharging and damage to the battery.
Frequently Asked Questions
Question: Why is my trickle charger not turning on?
Answer: Check the power source (outlet and cord), the fuse on the charger, and ensure the charger clamps are correctly connected to the battery terminals. A damaged power cord can also prevent the charger from turning on.
Question: Can I leave a trickle charger connected all the time?
Answer: Yes, especially with smart trickle chargers, as they monitor the battery’s state and stop charging when it’s full, preventing overcharging.
Question: My battery is not charging with the trickle charger. What should I do?
Answer: Start by inspecting the battery terminals for corrosion, checking the charger’s fuse, verifying the power supply, and ensuring the charger is compatible with your battery type.
Question: How long does it take for a trickle charger to fully charge a battery?
Answer: The time varies depending on the battery’s capacity and how depleted it is, but it can take several hours to a few days, as trickle chargers provide a slow, steady charge.
Question: Can a trickle charger fix a dead battery?
Answer: A trickle charger can bring a moderately discharged battery back to life, but if the battery is severely damaged or has internal issues, it may not be able to fix it.
Final Thoughts
When you’re trying to figure out why trickle charger not working, it’s best to take a step-by-step approach. By checking the power source, battery connections, and the charger itself, you can solve many common issues. Remember to prioritize safety by following precautions like wearing eye protection and working in a well-ventilated area. Addressing power supply issues, cleaning battery terminals, and verifying compatibility are all essential steps. If the problem is internal, checking the fuse or using a multimeter may help. For more complex issues, consider professional repair or