Which Clamp Goes First Jump Starting? A Simple Guide
Figuring out which clamp goes first on jump starter can be tricky, especially if you’ve never done it before. It’s a common concern; getting the order wrong could damage your car or the jump starter. But don’t worry, it’s easier than it seems! This guide will break down the steps in a clear, straightforward way. We’ll show you exactly how to connect the clamps safely and get your car running. Let’s get started to make sure you’re ready to tackle a dead battery!
Understanding Jump Starting: A Basic Overview
Jump starting is the process of using another vehicle’s battery or a portable jump starter to provide power to a car with a dead battery. This process allows you to start your car’s engine when the original battery doesn’t have enough power. It’s a temporary solution to get your vehicle running again, but it’s important to understand the correct procedures to prevent damage or injury. Following the correct steps is crucial for your safety and the safety of your vehicle’s electrical system. Before attempting a jump start, it’s always a good idea to ensure you have the proper equipment and are in a safe environment.
One of the initial steps involves identifying the positive and negative terminals on both the dead battery and the jump source (another car or jump starter). These terminals are usually marked with “+” (positive) and “-” (negative) symbols. Incorrectly connecting the jumper cables can create a short circuit and damage the electronics of the vehicles involved, or even cause a fire. When using a jump starter, it has specific instructions and often built-in safety features like reverse polarity protection to help prevent these issues, but it’s still good to know how everything works.
Safety First: Things to Prepare
Before connecting anything, safety is the top priority. Always wear eye protection and avoid wearing loose clothing or jewelry that could come into contact with the battery terminals. A car battery contains sulfuric acid, which can cause severe burns. Make sure the vehicles are in park (or neutral with the parking brake engaged) and the engines are off. Ensure that all electrical accessories like headlights, the radio, and the air conditioning are turned off to minimize the electrical load when the jump start is initiated. Working in a well-ventilated area is also important to prevent the buildup of explosive hydrogen gas that batteries can emit during charging.
- Wear Safety Gear: Always wear safety glasses or goggles and gloves. This helps protect your eyes and skin from battery acid.
- Check the Cables: Make sure your jumper cables are in good condition. Look for any fraying, damage, or corrosion on the clamps or wires. Replace any damaged cables before attempting a jump start to prevent electrical shorts or other hazards.
- Park Correctly: Position the vehicles so the jumper cables can reach both batteries without stretching or straining. Ensure the vehicles are not touching each other to avoid a potential electrical short.
- Ventilation is Key: Ensure the area is well-ventilated to avoid the accumulation of hydrogen gas. Batteries can release this flammable gas when they are charging or discharging.
Battery acid is a corrosive substance that can cause serious burns if it comes into contact with your skin or eyes. Safety glasses or goggles will shield your eyes from any splashes or fumes, while gloves will protect your hands. Always handle batteries with care and follow safety instructions.
Jumper cables need to be in good working order to safely transfer power between the batteries. Worn or damaged cables can lead to poor connections, overheating, and potential electrical fires. Inspect the clamps to ensure they are clean and capable of making solid contact with the battery terminals. If the cables show any signs of damage, don’t use them; they may not transfer electricity effectively or safely.
Proper vehicle positioning is important for ensuring the safety and efficiency of the jump-starting process. The vehicles should be close enough to allow the jumper cables to easily reach the batteries without getting tangled or stretched, as overstretched cables can cause connection issues. Make sure the vehicles are not touching each other to prevent unwanted electrical contact.
Good ventilation is important to avoid a buildup of hydrogen gas, which can be released by the battery. Hydrogen gas is extremely flammable and can create a fire hazard if it concentrates in an enclosed space. Opening the hood and working in a well-ventilated area can help dissipate any potentially hazardous fumes.
Identifying Positive and Negative Terminals
Car batteries have two terminals, a positive (+) and a negative (-). The positive terminal is usually marked with a plus sign (+) and is often red or has a red cover. The negative terminal is marked with a minus sign (-) and is typically black or has a black cover. Knowing which is which is essential for safely connecting the jumper cables. In most cars, the positive terminal is slightly larger than the negative terminal. If you are unsure, consult your car’s owner’s manual for confirmation.
When using a jump starter, the terminals on the jump starter are also clearly marked with (+) and (-). It is equally important to make sure you correctly match these terminals with the correct terminals on your vehicle’s battery. Double-check before making any connections. The terminals are made of lead and can sometimes develop corrosion (a white, powdery substance). If you see any corrosion, you can clean it off with a wire brush and a solution of baking soda and water to improve the connection.
- Look for the Symbols: The positive (+) terminal is clearly marked. It’s often red. The negative (-) terminal is also marked. It’s typically black.
- Check the Colors: Pay attention to the colors of the terminals and the cable clamps. The red clamp goes on the positive (+) terminal. The black clamp goes on the negative (-) terminal.
- Consult the Manual: If you’re unsure, check your car’s owner’s manual for a diagram or explanation of your battery terminals.
- Clean the Terminals: If you see any corrosion on the battery terminals, use a wire brush and baking soda solution to clean them before connecting the cables.
Car batteries, and jump starters, use clear symbols to prevent confusion and errors during the jump-starting process. The positive (+) terminal is distinguished from the negative (-) terminal, and knowing this distinction is essential to avoid damage. The color-coding (red for positive, black for negative) reinforces this identification. These markings help ensure that the cables are connected correctly, preventing short circuits and electrical damage.
The color-coding of the cables and clamps helps users remember the correct order to connect them, and the color coordination simplifies the process. The standard is red for positive (+) and black for negative (-), which helps avoid errors that could damage the car’s electrical system or pose a safety risk. This consistency helps ensure that the cables are connected correctly, preventing short circuits and electrical damage.
The owner’s manual provides essential details about your car, and it often includes specific information on the battery terminals. Consult the manual if you are unsure about the location of the battery, or the polarity of the terminals. Referencing the manual ensures accurate identification of the terminals, especially on newer models with unique configurations. The manual is an invaluable resource for correct connections.
Corrosion can build up on battery terminals, and it interferes with making a good electrical connection. The mixture of baking soda and water can neutralize the acid and dissolve the corrosion. Cleaning the terminals ensures that the jumper cables can transfer power efficiently. Good contact is critical for a successful jump start, so cleaning the terminals is a good idea if the battery connections appear corroded.
Step-by-Step: Connecting the Jump Starter Clamps
Now, let’s get to the main question: which clamp goes first on jump starter? The order of connecting the clamps is important for safety and the effective transfer of power. Here’s a clear, step-by-step guide to help you do it right. Following these instructions will minimize the risks and help you get back on the road safely.
Always have the jump starter turned off before you begin. Place the jump starter close to your car’s battery, but make sure it won’t interfere with the vehicle or any moving parts. Remember that you are working with electricity, so avoid any unnecessary contact with the clamps or terminals during the process. Keep in mind that some jump starters have built-in protection features, but it’s still good practice to follow the right steps.
- Connect the Positive Clamp to the Dead Battery: First, attach the red positive (+) clamp from the jump starter to the positive (+) terminal on your car’s dead battery.
- Connect the Positive Clamp to the Jump Starter: Then, connect the other red positive (+) clamp to the positive (+) terminal on the jump starter.
- Connect the Negative Clamp to the Jump Starter: Connect the black negative (-) clamp from the jump starter to the negative (-) terminal on the jump starter.
- Connect the Negative Clamp to the Car: Finally, attach the black negative (-) clamp to a clean, unpainted metal surface on your car’s engine block or chassis, away from the battery.
This is the initial step for establishing the power flow. The red clamp is specifically designed to connect to the positive terminal. It provides the initial connection to introduce the current needed to start the car. Connecting the red clamp first establishes the initial power flow from the jump starter to the car’s battery.
This step makes sure that the power source is connected to the jump starter. Always double-check that the clamps are securely attached to avoid sparks and ensure a good connection. Making sure the positive cables are connected correctly between the jump starter and the dead battery completes the positive circuit, setting the stage for power transfer.
This completes the negative circuit with the jump starter. Make sure the black clamp is securely attached to avoid sparks. By completing the negative circuit with the jump starter, you are preparing to connect the negative clamp to the car’s engine block or a grounded metal surface, ensuring a safe connection and a completed circuit.
This is the last step in creating a complete electrical circuit, which is crucial for jump-starting. Instead of connecting to the negative terminal of the dead battery, the negative clamp is connected to a clean metal surface. This helps avoid sparks near the battery, which could ignite any hydrogen gas that may be present.
After you have made the connections, turn on the jump starter. Follow the jump starter’s instructions, and then try starting your car. If the engine starts, remove the clamps in the reverse order of how you attached them: negative clamp from car, negative clamp from jump starter, positive clamp from jump starter, then positive clamp from the car. If your car does not start, wait a few minutes and try again. If it still doesn’t start, there might be a problem with the car’s battery or starting system, and you might need professional help.
What to Do After Connecting the Clamps
After you’ve connected the clamps correctly, there are a few extra steps you should take to safely jump start your car. These additional actions ensure that you’re minimizing potential risks and maximizing the chance of a successful start. You want to make sure the jump-starting process proceeds smoothly and safely, which depends on carefully following these extra steps.
- Check the Connections: Make sure all clamps are securely attached to the terminals and the grounding point.
- Turn On the Jump Starter: Before starting your car, switch on the jump starter to supply power.
- Attempt to Start the Car: Once the jump starter is on, try starting your car. If the engine doesn’t start immediately, wait a few minutes, then try again.
- Disconnect the Cables: After your car starts, carefully disconnect the jumper cables in the reverse order. Remove the black clamp from the car’s chassis first.
- Run the Engine: After disconnecting the cables, let your car’s engine run for at least 15-30 minutes to help recharge the battery.
Secure connections are vital for the jump-start to work correctly, as loose connections can interrupt the flow of electricity. It’s important to double-check that the clamps are properly seated on the terminals and grounding point. Tight connections minimize the chance of sparks and guarantee that the transfer of power is efficient and safe. Confirming that all connections are secure helps prevent any unexpected issues, maximizing your chances of a successful jump start.
Turning on the jump starter is essential to supply power to the dead battery. This step confirms that the jump starter is active and can provide the electricity necessary for the jump start. Following this step allows the jump starter to do its job, which is to help bring a dead car battery back to life. This action is the key to ensuring that your car is receiving the electricity it needs to start.
The goal is to get your car running. It’s possible that the initial attempt to start the car won’t be successful. Waiting allows the jump starter to supply the car with electricity. If it doesn’t work the first time, a second attempt may be successful. However, if the car still won’t start after a few tries, there could be a deeper issue, like a problem with the starter motor or the car’s electrical system, that might require professional attention.
Once the car has started, you must disconnect the jump starter cables in the reverse order to maintain safety. It’s essential to disconnect the clamps in the correct order to prevent any risk of electrical surges or short circuits. Removing the black clamp from the car’s chassis first prevents sparks during disconnection. Disconnecting the cables properly ensures that you avoid any unexpected electrical issues, preserving both the car and jump starter systems.
After jump-starting your car, it is a good idea to let the engine run. This allows the car’s alternator to recharge the battery. Running the engine ensures that the car’s electrical system can support itself and reduces the chances of the battery dying again soon. Following this step is a simple way to confirm that your car’s battery has adequate power to function correctly and will run reliably.
Common Mistakes to Avoid
Avoiding common mistakes when jump-starting is crucial for both safety and effectiveness. The most frequent errors can lead to electrical damage or injuries, so it’s a good idea to know what to avoid. Learning about the common mistakes helps prevent them and makes the whole process smoother. Being aware of the risks allows you to execute the jump-start process correctly and confidently.
- Connecting the Clamps in the Wrong Order: Mixing up the order of connecting the clamps is a leading cause of damage.
- Connecting to the Wrong Terminals: Connecting to the wrong terminals on the battery can cause significant damage.
- Touching the Clamps Together: Allowing the clamps to touch each other while connected to a power source can create a short.
- Ignoring Safety Precautions: Failing to wear safety gear or working in an unsafe environment can lead to injuries.
- Assuming the Battery is the Only Issue: Assuming the battery is the only problem can lead to further issues.
Connecting the clamps in the wrong order can cause a short circuit or damage sensitive electrical components. For example, connecting the negative clamp to the positive terminal, or vice versa, could cause a short circuit. Always follow the correct sequence for connecting and disconnecting the cables to avoid sparks and damage.
Connecting the jumper cables to the wrong terminals can easily result in sparks, short circuits, and damage. It’s critical to identify the positive and negative terminals properly to avoid damaging the car’s electrical system. Making sure you connect the cables to the right terminals is a fundamental safety step for jump-starting.
If the clamps touch each other while connected to the jump starter or the car’s battery, it creates a short circuit. This can quickly damage the jump starter or the car’s electrical system. Avoid letting the clamps touch anything except their intended terminals and grounding points to prevent the risk of sparking or damage.
Ignoring safety precautions can result in injury, such as burns from battery acid or electric shock. Using safety gear like eye protection and gloves, and working in a well-ventilated area, can reduce the risk. Safe practices protect you from preventable harm. Paying attention to safety will enhance your experience.
If a jump-start doesn’t work, other issues might be the cause, like a faulty starter or alternator. It’s important to acknowledge that the battery may not be the root cause of the problem, especially if the car won’t start after a jump. Other car systems could have a malfunction. If a jump start is unsuccessful, seek professional assistance to evaluate and diagnose the car.
Jump Starter vs. Jumper Cables: Which to Choose?
Deciding between a jump starter and jumper cables depends on your needs. Both serve the purpose of starting a vehicle with a dead battery, but they have distinct differences in functionality, convenience, and cost. Exploring the pros and cons of both can help you make a decision that matches your individual requirements and preferences.
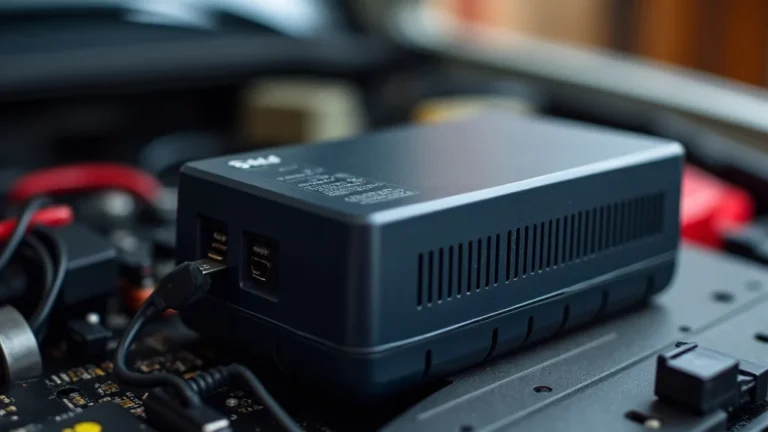
Jumper cables need another car with a functioning battery to work. This can be a problem if you’re stranded somewhere without assistance. Jump starters, on the other hand, are portable power sources that operate independently. They contain their own batteries and can start your car without needing another vehicle. Jump starters often include extra features, such as USB ports for charging devices, and built-in safety mechanisms to protect against reverse polarity. Both options have benefits and drawbacks.
| Feature | Jump Starter | Jumper Cables |
|---|---|---|
| Portability | Highly portable; doesn’t need another car. | Requires another vehicle with a working battery. |
| Ease of Use | Simple to use, often with clear instructions. | Requires two vehicles and someone to assist. |
| Safety Features | Typically includes reverse polarity protection. | Less inherent safety features, risk of incorrect connection. |
| Cost | Generally more expensive. | Less expensive, but requires a functional assisting vehicle. |
| Additional Features | Often includes USB ports and other features. | No additional features. |
- Independence: A jump starter doesn’t need another car, unlike jumper cables.
- Convenience: Jump starters offer more convenience because they are self-contained.
- Cost: Jump starters can cost more than jumper cables.
- Safety: Jump starters include safety features to prevent damage, unlike jumper cables.
- Maintenance: Jump starters require periodic recharging.
One of the biggest benefits of a jump starter is its ability to operate independently. This means you do not need to rely on the presence of another vehicle. If you’re on your own, this self-sufficiency gives you the freedom to jump-start your car anywhere. This independence eliminates the need to seek help, providing a valuable sense of security.
Jump starters are easier to use because they don’t require the assistance of another vehicle or driver. Jump starters come ready to use, including the necessary cables. This convenience simplifies the jump-starting process. You can quickly bring your car back to life with a minimum of fuss. This convenience saves time and effort, making jump starters a practical choice.
Jump starters are typically more costly than jumper cables due to their self-contained power source and extra features. The higher price is offset by the convenience and the ability to operate without relying on another vehicle. Considering the convenience and self-sufficiency, many drivers find the cost worth the advantages. Jump starters provide peace of mind in roadside emergencies.
Jump starters often have built-in safety mechanisms, such as reverse polarity protection, which can minimize the risk of damage. Jumper cables, on the other hand, require careful handling to avoid mistakes. Safety features in jump starters offer an added layer of protection. These features minimize potential electrical hazards. The safety mechanisms make jump starters a safer option.
Unlike jumper cables, jump starters need regular recharging to stay functional. Jump starters require you to manage the power, so they will be ready when you need them. This requires some upkeep, but it ensures that the jump starter is always prepared. The battery must be charged up to guarantee that your jump starter works well and is a dependable tool.
Which is Better for You?
Choosing between jumper cables and a jump starter depends on your lifestyle. If you’re often in areas without access to other vehicles, or you value independence, a jump starter might be better. If you regularly have access to another vehicle and want to save money, jumper cables could be fine. Consider your circumstances when deciding.
- Frequent Solo Driving: If you often drive alone or in areas where help is not easily accessible, a jump starter is a smart choice.
- Budget Considerations: If you are on a budget, jumper cables are a less expensive solution.
- Safety Preferences: If you want the added safety features of reverse polarity protection, a jump starter is the better option.
- Frequency of Use: Consider how often you expect to jump start your car.
- Overall Convenience: Jump starters are more convenient since they don’t need another car.
If you often drive alone, a jump starter allows you to quickly address a dead battery without the need for assistance. This eliminates the need to depend on other vehicles. A jump starter offers independence and peace of mind. A jump starter will give you the confidence to manage car troubles independently.
Jumper cables are generally more affordable than jump starters. This makes them a cost-effective option if you don’t mind relying on another car or have one. Jumper cables can be a good choice if you regularly drive with friends or family. For those who want to save money, jumper cables remain a practical option.
Jump starters frequently come with safety features, like reverse polarity protection, to minimize risks. These features can avoid damage to your car’s electrical system. For drivers who want added safety, a jump starter offers peace of mind. Jump starters can help you handle a dead battery confidently.
If you rarely experience battery issues, the initial cost of a jump starter might not be the most practical choice. In this situation, purchasing a set of jumper cables might be the better option. However, if dead batteries are a common issue, a jump starter will provide convenience and reliability. If frequent jump-starting is a problem, a jump starter will likely be worth the investment.
Jump starters have a convenience advantage. They are self-contained and don’t need another car for assistance. They provide a quick solution without needing any additional help. Jump starters eliminate the need to seek help and offer more flexibility. For those who value their time and like to handle issues quickly, the convenience is very valuable.
Frequently Asked Questions
Question: What should I do if my car doesn’t start after jump-starting?
Answer: If your car still doesn’t start, there might be a problem with the battery or other components. Check the battery connections, and if everything seems fine, it’s best to call a professional for help.
Question: Can I jump start a hybrid vehicle?
Answer: Yes, but you must follow the manufacturer’s recommendations. Usually, you connect to the 12-volt battery, which may be in a different location.
Question: How long should I let my car run after jump-starting?
Answer: Let your car run for at least 15-30 minutes to help recharge the battery fully after a jump start. This will help prevent it from dying again soon.
Question: Are there any risks involved in jump starting?
Answer: Yes, there are risks, such as electrical shorts, sparks, or explosions. It’s important to follow safety instructions, wear protective gear, and ensure proper connections to avoid any issues.
Question: Can I use a jump starter on any type of car?
Answer: Most jump starters work on gasoline and diesel vehicles. However, it’s essential to check the jump starter’s specifications to ensure it’s compatible with your vehicle’s voltage requirements and engine size.
Final Thoughts
Knowing which clamp goes first on jump starter is a fundamental skill that can help you when facing a dead battery. The essential idea is to connect the positive clamps first, then the negative clamps. Always make sure the jump starter is off and that you are wearing safety glasses and gloves. Remember, always connect the positive (+) clamp to the dead battery first, then connect the other positive (+) clamp to the jump starter. After this, connect the negative (-) clamp to the jump starter and the final negative (-) clamp to a metal part of the car’s frame. If done properly, you’ll be on your way. You now have the knowledge and confidence to handle a dead battery and quickly get back on the road. Embrace what you’ve learned and stay prepared for the future. You’ve got this!