Jump Starter Won’t Start Car? Troubleshooting Guide Now!
Having a jump starter won’t start car can be a frustrating experience, especially when you’re in a hurry. Many people, particularly new drivers or those unfamiliar with car maintenance, find it challenging to diagnose the problem. This can be due to various reasons, such as improper usage or underlying issues with the car itself. Don’t worry, though; it’s often a fixable issue. We’ll explore the common reasons why this happens and give you a simple, step-by-step solution to get your car running again. Let’s get started and explore how to troubleshoot this problem!
Common Reasons Your Jump Starter Fails
One of the most immediate reactions when a jump starter won’t start car is, “Why isn’t this working?” The causes can range from simple user errors to more complex internal issues with the jump starter or the car’s battery. Recognizing these potential problems is essential for effective troubleshooting. Often, these issues can be resolved with a few simple checks and adjustments, allowing you to get back on the road without needing to call for roadside assistance. The following sections will guide you through some of the most common causes and how to address them.
Improper Connection of Jumper Cables
One of the most frequent reasons a jump starter fails is incorrect connection of the jumper cables. The proper order and firm attachment of the clamps are essential for the current to flow correctly. Many people get confused, and even a slight mistake can prevent the jump starter from working. If the connections are loose or the order is wrong, the car won’t start, leading to frustration and wasted time. Make sure you are following the correct sequence, connecting the positive (red) clamp to the positive terminal on both the jump starter and the car battery, followed by connecting the negative (black) clamp to the negative terminal on the jump starter and then to a grounded metal surface on the car. Don’t connect the negative clamp directly to the car battery’s negative terminal.
- Incorrect Order: Connecting the cables in the wrong order can result in sparks and a non-functioning jump start. The positive cables must be connected first, followed by the negative cables.
- Loose Connections: Loose connections prevent the flow of electricity, causing the jump starter to appear non-functional. The clamps need to be firmly attached to the terminals to ensure a solid connection.
- Incorrect Terminal Identification: Mistaking the positive and negative terminals is a common error. This can cause significant damage to the car’s electrical system, including the jump starter.
- Using Damaged Cables: Damaged cables can have internal breaks that disrupt the electrical current. This will stop the jump starter from working correctly.
Connecting the positive clamps first forms a complete electrical circuit, while any mistakes in the sequence are safer. The negative clamp is connected last because it closes the circuit and completes the flow of electricity. Remember, always connect positive to positive and negative to ground, or you will cause a short.
If the clamps aren’t firmly attached, the current flow is interrupted. This can happen due to corrosion on the terminals, worn clamps, or the clamps not being designed for the battery’s terminal type. A simple wiggle test can check for this. Make sure that the clamps are tightly fastened to the terminals and are making proper contact.
The positive terminal is usually marked with a “+” symbol and is often red, while the negative terminal is marked with a “-” symbol and is typically black. Always double-check these before attaching the clamps. If the terminals are dirty or corroded, they might be difficult to identify. Clean them if necessary before making the connections.
Check the cables for any cuts, frays, or damage. Replace any cables that show signs of wear. Damaged cables can be hazardous and can also cause a short circuit, potentially harming the car’s electrical components and the jump starter itself. Ensure the cable insulation is intact and the cable is in good working order before connecting.
Jump Starter Issues
Sometimes, the problem lies not with the car, but with the jump starter itself. Jump starters are electronic devices and can experience various failures. Regular maintenance and proper usage are vital for ensuring that the jump starter functions correctly when needed. The battery inside the jump starter might be depleted, the device itself could have internal issues, or external factors could be at play. Identifying these jump starter-related issues is crucial when troubleshooting why a jump starter won’t start car.
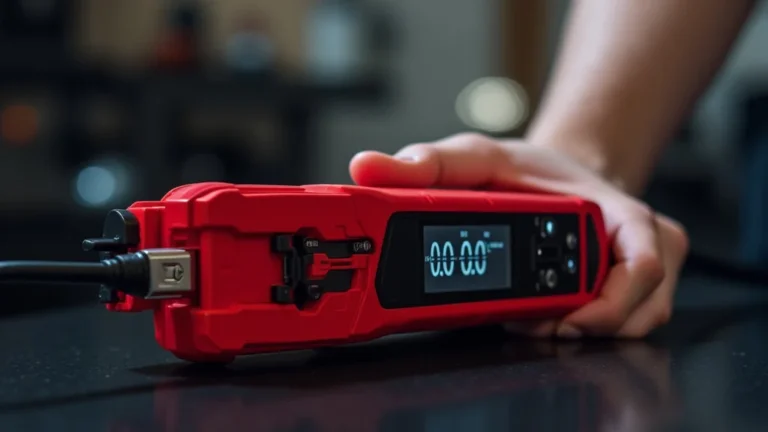
- Low Battery Charge: The jump starter’s internal battery may be discharged, requiring a recharge. A fully charged jump starter is essential to supply sufficient power to start a car.
- Faulty Internal Components: Internal components, such as the circuit board, might fail. This can render the jump starter inoperative.
- Improper Storage: Extreme temperatures can damage the jump starter’s battery. Keep it stored in a moderate temperature setting.
- Age and Usage: Over time, jump starters degrade. Frequent use or age will impact their ability to perform correctly.
If the jump starter’s battery is low, it won’t be able to provide the necessary current to start your car. Always check the jump starter’s charge level before you need to use it, and recharge it as recommended by the manufacturer. Keep the jump starter charged, and make sure it is ready to use when needed.
Like any electronic device, jump starters are susceptible to internal failures. If the jump starter doesn’t show any signs of life when you turn it on, and you have fully charged it, there may be internal damage. You may need to take it to a professional or replace it.
Storing the jump starter in extreme heat or cold can degrade its battery. Follow the manufacturer’s storage instructions to extend its lifespan and maintain its functionality. Avoid direct sunlight or freezing temperatures. A stable, moderate environment is ideal for long-term storage.
Jump starters, like all batteries, have a limited lifespan. Consider replacing your jump starter every few years, depending on how often you use it. Frequent use can wear down the internal components and reduce its effectiveness. Regularly check the jump starter’s performance to ensure it still operates reliably.
Car Battery Issues
While the jump starter is meant to provide an initial boost, the underlying problem may still be with the car’s battery itself. Even if the jump starter seems to work, the car’s battery could be severely damaged or have other problems. Understanding the conditions of the car’s battery is critical in figuring out why a jump starter won’t start car. It’s important to note that the jump starter isn’t always the culprit; the car’s battery could be the issue.
- Dead or Severely Discharged Battery: The car battery may be completely drained, which means it will not take a jump. Check for power to the lights and accessories.
- Corroded Terminals: Corrosion on the battery terminals can disrupt the electrical connection. Clean the terminals before attempting to jump-start the car.
- Internal Battery Damage: Internal damage, such as a short circuit within the battery, can make it impossible to jump-start the car. Check for signs of battery bulging or leakage.
- Alternator Problems: If the alternator is not charging the battery, a jump start might only provide a temporary solution. The car might start initially, but it could stall once the jump starter is removed.
If the car battery is completely dead, the jump starter might struggle to start the car. The jump starter supplies the initial current, but if the car’s battery cannot hold the charge, the car won’t start. This often happens in older batteries or those left unused for extended periods. Try charging the car’s battery for a longer period.
Corrosion forms a barrier between the battery terminals and the jumper cables. This prevents the electricity from flowing correctly. Cleaning the terminals is a simple but essential step. Use a wire brush or battery terminal cleaner to remove the corrosion before making the connections. This will ensure proper contact and improve the chances of a successful jump start.
Internal damage can make a battery unable to hold a charge. This is more common in older batteries. Inspect the battery for any physical damage like swelling or leakage. If you find any of these signs, the battery needs to be replaced immediately. A damaged battery could be a fire hazard.
The alternator is responsible for charging the car’s battery when the engine is running. If it’s not working, the battery won’t recharge. After jump-starting, run the engine for a while to see if the car will start again on its own. If the car stalls shortly after removing the jump starter, the alternator likely has an issue. Have the alternator tested by a mechanic.
Step-by-Step Troubleshooting Guide
When you’re faced with a situation where the jump starter won’t start car, it’s easy to feel overwhelmed. Fortunately, a systematic approach can help diagnose and resolve the problem. By following a structured process, you can quickly identify the root cause and get your car running. Here is a simplified guide that will walk you through the troubleshooting process step by step, ensuring you don’t miss any critical details.
Safety First: Preparation and Inspection
Safety is the primary concern when dealing with car batteries and jump starters. Preparing the work area and inspecting both the equipment and the vehicle are the first steps to take. Make sure the location is well-ventilated and free from potential hazards, such as flammable materials. This will reduce any chance of harm during the jump-start procedure. Following these steps helps reduce the risk of accidents and ensures the process is done correctly.
- Park in a Safe Location: Choose a level, well-ventilated area away from traffic.
- Gather Necessary Equipment: Make sure you have your jump starter, jumper cables, gloves, and safety glasses ready.
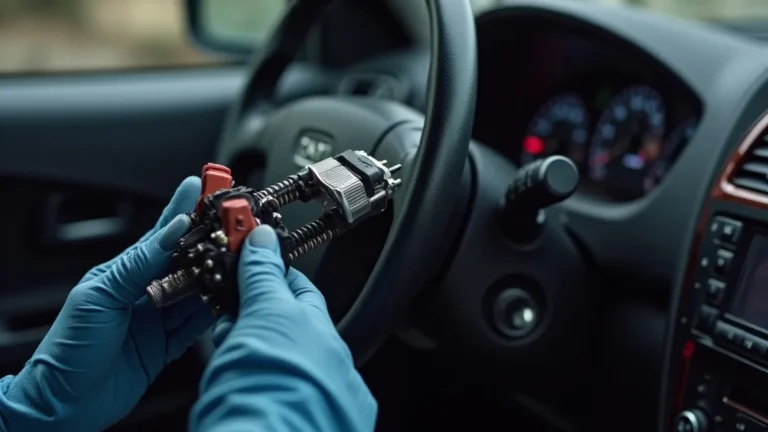
- Inspect the Jump Starter: Check the charge level of the jump starter and the condition of the cables. Look for any signs of damage.
- Check the Car’s Battery Terminals: Examine the car battery terminals for corrosion. If corrosion is present, clean the terminals before proceeding.
Ensure the car is parked safely on a flat surface away from moving traffic and any potential hazards. This gives you enough space to work. The flat surface also ensures the car is stable, and it allows you to get access to all parts of the engine. A well-ventilated area is important because car batteries can release gases during the jump-start procedure.
Always have the right equipment before you start. This includes the jump starter, which should be fully charged. Jumper cables should be in good condition. Gloves will protect your hands, and safety glasses will shield your eyes from any sparks or battery acid splashes. Having the right equipment ensures your safety while doing this.
Verify that your jump starter has sufficient charge to start the car. Check the cables for any cuts, damage, or corrosion, as these can impact performance and safety. Before connecting the jump starter, confirm it is ready to use and is free from any visible damage.
Corrosion can hinder the flow of electricity, preventing the jump starter from working. If the terminals appear corroded, remove the corrosion with a wire brush or battery terminal cleaner. Cleaning the terminals ensures a solid connection, which improves the chances of starting the car.
Connecting the Jump Starter Correctly
The sequence of connecting the jumper cables to the correct terminals is crucial. If the connection isn’t done right, the jump start may fail, and you risk damaging the car’s electrical system. Carefully following these steps ensures you’re connecting the cables safely and correctly, thus optimizing the chances of a successful jump start. Always double-check each connection before moving on to the next step.
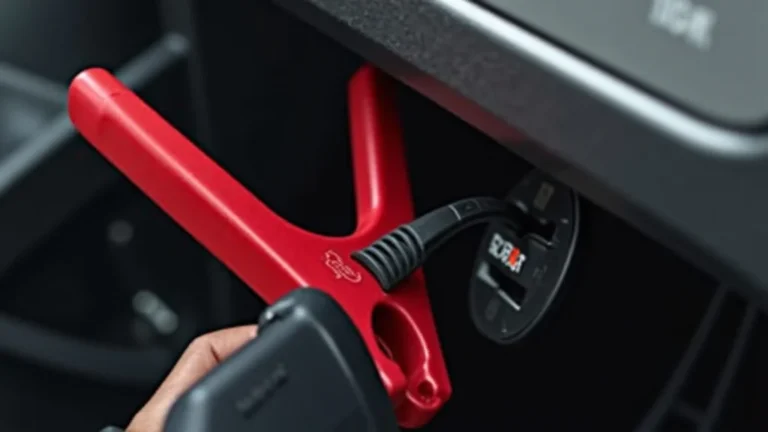
- Connect the Positive (Red) Clamp: Attach the red clamp to the positive (+) terminal of the jump starter.
- Connect the Positive (Red) Clamp: Connect the other red clamp to the positive (+) terminal of the car battery.
- Connect the Negative (Black) Clamp: Attach the black clamp to the negative (-) terminal of the jump starter.
- Connect the Negative (Black) Clamp: Connect the other black clamp to a bare metal surface on the car’s frame, away from the battery.
The positive terminal is usually marked with a “+” sign. Make sure the clamp is firmly attached to the terminal to ensure a secure connection.
Like the jump starter, the car battery’s positive terminal is also usually marked with a “+” sign. Double-check to ensure you are connecting the red clamp to the correct terminal. This is one of the most critical steps, so pay close attention.
The negative terminal is typically marked with a “-” sign. Make sure the clamp is securely attached. Double-check that all connections are snug and not loose.
The final connection is made to the car’s frame or a grounded metal surface. This avoids potential sparks near the battery, which could ignite flammable gasses. Make sure this connection is secure. Choose a metal part that is away from the battery to be safe.
Attempting to Start the Car and Troubleshooting
After all the connections are made, it is now time to try and start the car. If the jump starter won’t start car, you may need to take steps to identify the problem. The following steps will guide you through this process, helping you diagnose any issues and increase the chances of getting your car started. Persistence and patience are important; take your time, go through each step carefully, and you should be able to determine the problem.
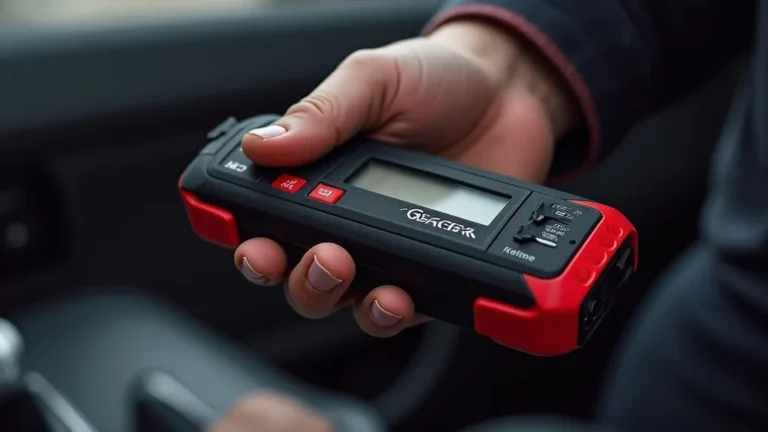
- Turn on the Jump Starter: Turn on the jump starter. This will prepare it to deliver power to the car battery.
- Attempt to Start the Car: Try to start the car, following the car’s normal starting procedure.
- Wait and Retry: If the car doesn’t start immediately, wait a few minutes and try again. Sometimes, the battery needs a little more time to accept the charge.
- Check Connections: If the car still won’t start, double-check all cable connections for tightness and proper placement.
- Test Another Vehicle (If Available): If possible, test the jump starter on another car to determine if the problem is with the car or the jump starter.
Make sure the jump starter is switched on before attempting to start the car. This activates the jump starter and ensures it is ready to supply the required power. Check the indicator lights on the jump starter to confirm it is ready.
Attempt to start the car as you normally would. If it starts, the jump start was successful. If the car does not start, proceed to the next step for troubleshooting.
If the car doesn’t start right away, give the jump starter a few minutes to charge the car’s battery. After a few minutes, try starting the car again. This may give the car enough time to get the power it needs.
If the car still won’t start, go back and carefully inspect each connection to see if any clamps are loose or incorrectly connected. Make sure the clamps are making good contact with the terminals. Loose connections will prevent the jump start from working. Make any necessary adjustments.
If another vehicle is available, use the jump starter on that car to determine if the problem lies with your car or the jump starter. If the jump starter works on another vehicle, the problem is most likely with your car’s battery or electrical system. If the jump starter does not work on another car, the jump starter itself might have an issue.
Addressing Common Problems
Even after following the previous steps, a jump starter won’t start car might happen. Several scenarios may cause this issue, and it’s essential to approach each one with a specific strategy. This helps ensure that the issue is identified and dealt with effectively. Here are some of the most common issues and some steps you can take to try and address them.
Dealing with Battery Corrosion
Corrosion on the car battery terminals can be a frequent problem that stops a jump start from working. Corrosion forms a barrier that prevents the electric current from flowing. Taking quick action to address this issue is key to making sure a successful jump start can be done.
- Remove the Cables: Carefully remove the jumper cables, starting with the negative (black) clamp from the car’s frame.
- Prepare a Cleaning Solution: Mix a solution of baking soda and water to clean the corrosion from the terminals.
- Clean the Terminals: Use a wire brush to scrub away the corrosion from both the terminals and the cable clamps.
- Rinse and Dry: Rinse the terminals with clean water, and dry them thoroughly before reattaching the cables.
Once you are ready to remove the cables, remove them in the reverse order in which they were connected. First, detach the negative clamp from the car’s frame to prevent any potential sparks. Handle the clamps with care to avoid any accidental contact with metal parts.
The baking soda solution will help neutralize the battery acid and remove the corrosion. Use a mixture of baking soda and water to make a cleaning solution. Pour the mixture onto the terminals. Let the solution work for a few minutes to loosen the corrosion.
Using a wire brush or battery terminal cleaner, scrub away the corrosion from both the battery terminals and the cable clamps. Make sure you remove all visible corrosion. Cleaning the terminals ensures a solid, electrical connection.
After cleaning, rinse the terminals with clean water to remove any remaining baking soda solution or loose debris. Use a clean cloth or towel to dry the terminals. This helps prevent any future corrosion. Allow the terminals to dry completely before reattaching the cables to ensure they are clean and dry.
Diagnosing and Addressing Alternator Issues
If the alternator is damaged or not working correctly, a jump start might provide a temporary solution, but the car will stall once the jump starter is removed. The alternator is responsible for charging the battery while the engine is running. Therefore, you will need to determine whether the alternator is working correctly.
- Start the Car and Monitor: After the jump start, start the car and observe how it runs.
- Check for Stalling: If the car stalls shortly after removing the jump starter, the alternator may not be charging the battery.
- Test the Battery Voltage: Use a multimeter to check the battery voltage while the engine is running. If the voltage does not increase, the alternator is not charging the battery.
- Seek Professional Assistance: Have a mechanic inspect the alternator and charging system if you suspect an alternator issue.
After the car starts using the jump starter, let the engine run. Listen for any unusual noises or performance issues. Monitor the car’s electrical systems. A failing alternator may not provide enough power to keep the engine running, leading to stalling or diminished performance.
If the car stalls after removing the jump starter, there may be a problem with the alternator. This means that the battery is not getting charged when the engine is running. A failing alternator won’t be able to provide the current to the battery. If this happens, your alternator probably needs to be inspected or replaced.
A multimeter can test if the alternator is working by reading the battery’s voltage. Connect the multimeter to the battery terminals, set to the DC voltage setting. With the engine running, the voltage should be higher than when the engine is off. This indicates that the alternator is charging the battery. If the voltage does not increase, the alternator needs to be inspected.
If the car stalls or the battery voltage test reveals an alternator problem, it’s best to have a professional mechanic inspect the vehicle. An experienced mechanic can properly diagnose and repair or replace the alternator, restoring the car’s electrical system and ensuring the car starts reliably.
Handling Jump Starter Limitations
Jump starters, though useful, do have limitations. It’s crucial to understand these limits to avoid damaging either the jump starter or the car’s electrical system. This ensures the best results and maximizes the jump starter’s lifespan. Knowing when to stop using a jump starter and when to seek professional assistance protects both you and your vehicle.
- Engine Size and Jump Starter Capacity: Ensure the jump starter has enough capacity to start the car’s engine. Check the specifications for the jump starter to determine its peak amps, and ensure it is suitable for your vehicle’s engine size.
- Cold Weather Performance: Cold temperatures reduce battery efficiency. Jump starters can have limitations in extremely cold weather.
- Multiple Attempts: Avoid making excessive attempts to jump-start the car. Give the jump starter time to cool down between attempts.
- When to Call for Professional Help: If the jump starter fails repeatedly, or if you suspect more complex electrical issues, it’s time to call a professional.
Check the jump starter’s specifications. It lists the peak amps and engine displacement it supports. An underpowered jump starter may struggle or fail to start larger engines. Match your car’s engine size to the jump starter’s capacity to ensure it can supply the necessary power. If the jump starter isn’t powerful enough, it may not be able to provide sufficient current to crank the engine.
Cold weather can reduce the efficiency of both the car’s battery and the jump starter. Extremely cold temperatures can make it even harder to start the car. Always store your jump starter at moderate temperatures and follow the manufacturer’s recommendations for cold weather usage. If it’s very cold, consider preheating the engine before attempting the jump start.
Multiple attempts can strain the jump starter and possibly damage its internal components. If the car does not start after a few attempts, there is an issue. Do not continue to try. Give the jump starter time to cool down. Excessive use can cause the jump starter to overheat. Overheating can lead to internal damage. Address the underlying car problem rather than repeatedly trying to jump-start.
If the jump starter consistently fails to start the car or if you suspect there is a more complex electrical issue, consult a mechanic. A professional mechanic can diagnose and fix more complex issues like alternator problems or internal battery damage. Do not keep trying to jump start if the problem persists. Get help from an expert.
Frequently Asked Questions
Question: Why won’t my jump starter work at all?
Answer: There are several reasons. The jump starter may have a low battery, damaged internal components, or incorrect connections. The car battery might also be completely dead or have significant corrosion.
Question: How long should I let the jump starter charge the car’s battery?
Answer: Let the jump starter charge the car’s battery for at least 5-10 minutes before attempting to start the car. This gives the battery time to gain enough power to start the car.
Question: Can I jump-start my car if the battery terminals are corroded?
Answer: It’s best to clean the battery terminals before attempting to jump-start. Corrosion can prevent a good connection, and that makes it harder for the jump starter to supply the needed power.
Question: What if my car starts but then stalls shortly after I disconnect the jump starter?
Answer: This may be an indication of an alternator problem. The alternator might not be charging the battery. Have the alternator inspected by a mechanic.
Question: Is it safe to leave the jump starter connected for an extended period?
Answer: It’s not necessary to leave the jump starter connected for extended periods. Once the car starts, disconnect the jump starter. Leaving it connected longer may not offer any additional benefits and could be unnecessary.
Final Thoughts
When you encounter a situation where your jump starter won’t start car, it can be a challenging moment. However, by exploring and understanding common issues, like incorrect cable connections, depleted jump starter batteries, or underlying battery problems, you’re better prepared to address the issue. Following a step-by-step troubleshooting guide, you can identify and solve the problem, getting your car up and running efficiently. Remember to prioritize safety and never hesitate to seek professional assistance if the issue persists or if you suspect serious problems with your vehicle’s electrical system. Equip yourself with the knowledge and the proper tools, and you’ll be prepared for anything. Stay calm, and keep driving!