Jump Starter Troubleshooting: When It Won’t Power On
Having a jump starter not powering up can be frustrating! It’s a common problem, especially for people new to car maintenance. You might feel stuck, wondering if you’ve done something wrong. Don’t worry, many things can cause this, and fixing it is usually easier than you think. This guide will help you figure out what’s going on with your jump starter, and provide you with a step-by-step method to get it working again.
Possible Reasons for a Jump Starter Failing to Power On
If your jump starter isn’t turning on, the first thing to remember is not to panic. Often, the issue is something simple, like a dead battery or a loose connection. Before you assume it’s broken, there are a few common culprits to check. Knowing these common problems can help you figure out the issue, and hopefully fix it without buying a new jump starter. You might be surprised at how easy the solution is.
Dead Battery
One of the most frequent reasons a jump starter won’t power up is a depleted internal battery. Jump starters rely on built-in batteries to store the power needed to start a car. Over time, these batteries lose their charge, even when the jump starter isn’t being used. This self-discharge rate varies depending on the type of battery (lithium-ion or lead-acid) and the environmental conditions (temperature and humidity). To ensure optimal performance, it’s necessary to regularly charge the jump starter to maintain its readiness. Neglecting to charge it can lead to a completely discharged battery, making the device inoperable.
- Battery Chemistry: Jump starters use different battery technologies, primarily lithium-ion or lead-acid. Lithium-ion batteries have a lower self-discharge rate than lead-acid batteries, meaning they hold a charge longer. Lead-acid batteries need more frequent charging.
- Charging Indicator: Most jump starters have indicator lights that show the battery’s charge level. These lights can be a good clue that the battery is dead. Check this before troubleshooting further.
- Charging Procedure: Proper charging is critical for battery longevity. Overcharging can damage the battery, while undercharging can prevent it from working. Always use the charger provided with the jump starter, following the manufacturer’s instructions to the letter.
- Battery Life Expectancy: The lifespan of a jump starter battery depends on usage, charging habits, and battery type. Lithium-ion batteries typically last longer than lead-acid ones. Replacing a dead battery can be a simple fix.
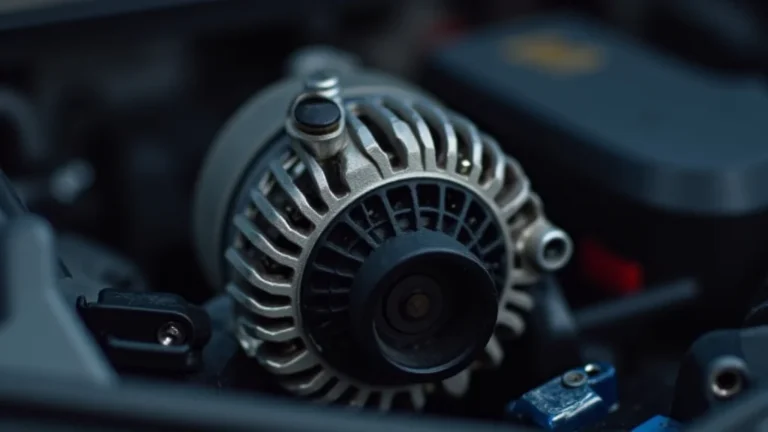
Loose Connections or Internal Faults
Another common cause of a jump starter malfunction is a bad connection. Internal components, like wires, switches, and connectors, can become loose over time due to vibrations or mishandling. In addition to a bad connection, internal faults can occur when the circuitry within the jump starter gets damaged. The damage might be caused by a power surge, overheating, or a manufacturing defect. This can interrupt the flow of electricity, preventing the device from powering up. These issues are generally not easily detected without opening the device, but checking the external connections is something everyone can do.
- Checking External Connections: Carefully inspect the terminals where the clamps connect to the jump starter. Make sure the cables are securely fastened. Use a flashlight if needed to get a clear view. Any loose connection can interrupt the flow of power.
- Internal Circuitry Components: The internal circuit of a jump starter is complex. It includes various components that manage charging, discharging, and safety functions. These components can fail over time.
- Opening the Jump Starter: It’s not usually a good idea to open a jump starter, unless you know what you are doing. The manufacturer’s warranty could be voided by opening the device, and there could be safety risks.
- Overheating: Excessive heat can damage internal components. Jump starters can overheat during use, especially if they are used for long periods or repeatedly without adequate cool-down time. Make sure you are using the device as intended.
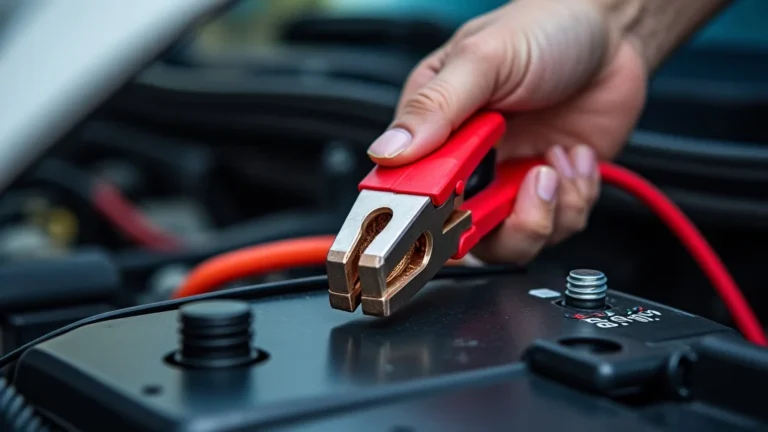
Clamp Issues
The clamps on a jump starter are vital for transferring power to the car’s battery. If the clamps are not making a solid connection, the jump starter will not work. These clamps may become corroded, damaged, or simply not fit correctly. Corrosion buildup on the clamps prevents effective contact with the car’s battery terminals, blocking the flow of electricity needed to start the vehicle. Clamps need to be clean and making contact in order for the power to flow and start the engine.
- Corrosion: Corrosion on the clamps is a common issue. It typically appears as a white or green buildup. This corrosion acts as an insulator, stopping the electrical current from flowing efficiently.
- Clamp Condition: Inspect the clamps for damage. Look for broken parts, loose components, or any signs of wear and tear. If a clamp is damaged, it might not grip the battery terminal securely.
- Proper Placement: Make sure the clamps are correctly attached to the battery terminals. Red is positive (+), and black is negative (-). Avoid touching the clamps together while the jump starter is turned on, as this could lead to a short circuit.
- Spring Tension: Clamps need to have enough spring tension to grip the terminals tightly. If the spring mechanism has weakened, the connection might not be strong enough.
Step-by-Step Troubleshooting for a Non-Functional Jump Starter
If your jump starter not powering up, don’t worry! Troubleshooting is like solving a puzzle, and it often leads to a quick fix. Start with the basics and work your way through these steps to pinpoint the problem. Remember, safety first! Always make sure the jump starter is disconnected from any power source before you start your assessment. By following these steps, you’ll be well on your way to getting your jump starter back in action.
Step 1: Visual Inspection
The first step in troubleshooting a jump starter is a visual inspection. Carefully examine the device for any obvious signs of damage, which could point to the problem. Look for anything out of the ordinary, and take your time to thoroughly investigate the entire unit.
- External Damage: Check for any physical damage to the jump starter. Look at the casing for cracks, dents, or signs of impact. Any damage to the housing could indicate internal problems that prevent it from working.
- Cable and Clamp Condition: Inspect the cables and clamps. Make sure they are not frayed, cut, or damaged in any way. Also, check the clamps for corrosion or any signs of wear.
- Charging Port: Examine the charging port. Make sure it is free from debris, dust, or damage. A blocked or damaged charging port can prevent the device from charging properly.
- Power Button and Indicators: Check the power button and indicator lights. Ensure that the power button is not stuck or broken. Observe the indicator lights to get a hint about the device’s status.
Step 2: Check the Battery Charge
A dead battery is the most common reason for a jump starter not powering up. Therefore, checking the battery charge is a priority in the troubleshooting process. This step involves assessing the current charge level and determining if the battery is the cause of the issue.
- Charge Indicator Lights: Locate the battery charge indicator lights on your jump starter. These lights typically show the battery’s charge level. If the lights indicate a low or zero charge, the battery is the likely issue.
- Test with a Multimeter: If your jump starter doesn’t have a charge indicator, use a multimeter to measure the battery voltage. Set the multimeter to DC voltage, and test the voltage across the jump starter’s terminals.
- Charging Process: Connect the jump starter to its charger. Allow it to charge for a period as specified in the owner’s manual. After charging, check the indicator lights to see if they reflect a full charge. If the battery does not charge, then it may need to be replaced.
- Time to Charge: The time it takes for a jump starter to fully charge varies by the model and battery capacity. However, if the device does not hold a charge, there is likely a problem. Refer to the manual for specific charging times and instructions.
Step 3: Charging and Testing
Charging and testing is a critical step in troubleshooting a jump starter that will not power on. This method confirms whether a low battery is the problem and assesses the effectiveness of the charging system. By connecting to a power source, you can determine if the device is able to store energy and operate as intended. Carefully following the proper charging procedures is vital to avoid damaging the device or causing personal injury.
- Connect to a Charger: Plug your jump starter into a compatible charger. Ensure the charger is working correctly and plugged into a functioning power outlet. Be sure to use the charger that came with the jump starter, or a charger that meets the manufacturer’s requirements.
- Charge Time: Charge the jump starter for the period specified in the owner’s manual. This usually ranges from a few hours to overnight. Allow enough time for the jump starter to fully recharge.
- Indicator Check: After charging, check the battery indicator lights to see if the device has charged. If the lights show a full charge, the device should now have enough power. If the lights do not indicate a charge, and the jump starter will not power on, then the battery or charging system may be damaged.
- Power On Test: Try powering on the jump starter. If the jump starter is now working, the problem was likely a low battery. If it still doesn’t power on, then look for other potential issues.
Step 4: Inspect the Clamps and Connections
Making sure the clamps and connections are in good shape is a necessary part of troubleshooting. Loose or corroded connections are a common cause of jump starter failure. This step involves visually inspecting and physically checking all points of connection to ensure they’re secure and free from issues.
- Clamp Condition: Examine the clamps for corrosion, rust, or damage. Corrosion can prevent a good electrical connection. Use a wire brush or sandpaper to clean any corrosion.
- Cable Inspection: Check the cables for any signs of damage, such as fraying or cuts. Damaged cables can prevent the transfer of power. Replace damaged cables.
- Terminal Connections: Make sure the cable connections to the jump starter and battery terminals are secure. If any connections are loose, tighten them carefully.
- Testing Continuity: Use a multimeter to test for continuity between the clamps and the jump starter’s terminals. This confirms that electricity can flow through the cables.
Step 5: Testing the Jump Starter’s Functionality
Testing the jump starter is the final stage. This includes using the device to start a car and observing its performance to determine if it is functioning correctly. If you have followed all previous steps and the jump starter will still not power on, you need to conduct a functionality test to assess its capability.
- Prepare the Car: Ensure the car’s battery is in a good position, or choose a car whose battery you are willing to use for testing. Be sure that the car’s ignition is turned off before connecting the jump starter.
- Connect the Clamps: Attach the positive (red) clamp to the positive (+) terminal of the car battery and the negative (black) clamp to the negative (-) terminal. Make sure the clamps are securely connected.
- Attempt to Start the Car: Turn on the jump starter if it isn’t already on. Then, try starting the car. If the car starts, the jump starter is working properly. If the car doesn’t start, then recheck all connections and try again.
- Troubleshooting if the Car Doesn’t Start: If the car doesn’t start, double-check all connections, and make sure the jump starter is fully charged. If the car still doesn’t start, there might be a problem with the car’s battery or other electrical components.
Common Problems and Solutions
Sometimes, even after you’ve checked everything, the jump starter not powering up. This section will walk you through solutions for the most frequent issues. We’ll explore the problems, and show you some fixes that you can try at home. If you’re willing to do some basic checks, you can often save yourself time and money.
Problem: Jump Starter Won’t Charge
If your jump starter won’t charge, it could be a few different things. Start by looking at the charger. A damaged or faulty charger is a common issue. If the charger seems fine, the jump starter’s charging port might be the issue. If the battery is completely depleted, it might not accept a charge. A faulty battery can prevent the device from taking a charge. Troubleshooting these steps will help you determine the problem.
- Faulty Charger: Test the charger by connecting it to another device. If the charger works on the other device, the problem may lie elsewhere. If it doesn’t work, replace the charger.
- Charging Port Issues: Check the charging port on the jump starter for any damage. Debris or corrosion in the port could prevent it from charging. Clean the port carefully with a small brush or compressed air.
- Dead Battery: If the battery is deeply discharged, it might not accept a charge right away. Try leaving the jump starter connected to the charger for an extended period, or use a “boost” function if it has one.
- Internal Battery Problems: A faulty internal battery is another possibility. In this case, the battery might not be able to hold a charge. This is a common failure, and the battery may need to be replaced.
Problem: Clamps Not Making Good Contact
If the clamps on your jump starter are not making good contact, this can prevent your device from working. The clamps must be clean, correctly attached, and able to firmly grip the battery terminals. Corrosion on the clamps or terminals can form a barrier, preventing electricity from flowing. If the clamps are loose, the connection might be interrupted. Proper contact is essential for transferring power. This is the reason why your jump starter not powering up.
- Clean the Terminals: Use a wire brush or sandpaper to clean the car battery terminals and the jump starter clamps. This removes any corrosion or debris that could be preventing a good connection.
- Clamp Position: Ensure the clamps are correctly attached to the terminals. The red clamp goes on the positive (+) terminal, and the black clamp goes on the negative (-) terminal.
- Spring Tension: Check the spring tension in the clamps. The clamps must be gripping the terminals tightly. If the spring is weak or broken, the clamp might not make a good contact.
- Replace Damaged Clamps: If the clamps are damaged or broken, replace them. Damaged clamps will not provide a reliable connection, making it impossible for the jump starter to function.
Problem: Internal Circuit Failure
If a jump starter won’t power on, a problem with the internal circuits can be to blame. This typically means there’s an issue with one or more of the many components inside the device, like transistors, resistors, or the charging module. These components are vulnerable to power surges, overheating, and aging. It’s difficult to identify internal circuit failures without specialized tools and skills. This is the reason why your jump starter not powering up.
- Overvoltage Protection: Some jump starters have protection circuits to prevent damage from power surges. Check if the device has such a feature, and if it’s been triggered.
- Component Failure: One or more internal components may have failed. This can happen due to overheating, electrical stress, or manufacturing defects. Replacing these components requires technical expertise.
- Manufacturer Defect: Sometimes, a jump starter might fail due to a manufacturing defect. If the device is relatively new, and you suspect a defect, contact the manufacturer or retailer.
- Repair or
Problem: Overuse or Misuse
Overuse or improper use can damage a jump starter. Constantly using the device or attempting to jump a vehicle with a severely drained battery can cause excessive stress on the jump starter’s components, leading to a failure. Failing to follow the instructions, such as connecting the clamps incorrectly or failing to allow for cooldown periods, can also result in malfunctions. It’s important to understand the device’s limitations, and to handle it in a safe manner to avoid issues.
- Follow Instructions: Always follow the manufacturer’s instructions. This includes the proper way to connect the clamps, the recommended charging times, and any safety precautions.
- Avoid Overuse: Do not use the jump starter repeatedly in a short period. Allow the device to cool down between attempts. Overuse can cause the internal components to overheat and fail.
- Correct Clamp Connection: Ensure the clamps are attached correctly. The red clamp connects to the positive (+) terminal, and the black clamp connects to the negative (-) terminal. Incorrect connections can cause sparks and damage.
- Environmental Conditions: Do not use the jump starter in extreme temperatures. Both high and low temperatures can negatively affect the performance of the device and damage its components.
Real-World Examples and Scenarios
Here are some real-world examples and scenarios that might help you better understand what to expect. These cases show the practical application of troubleshooting methods.
- Scenario 1: Dead Battery. A user has a jump starter, and their car battery dies. They go to use the jump starter, but the device won’t turn on. After following the steps, they discover the device hasn’t been charged for a while. After charging the device overnight, the car starts right up.
- Scenario 2: Clamp Connection Issue. Another user tries to jump-start their car. The jump starter powers on, but the car will not start. They inspect the connections and find corrosion on the clamps. Cleaning the clamps, reconnecting them firmly, and then their car starts without a problem.
- Scenario 3: Internal Failure. An individual uses their jump starter often. After a while, they notice the jump starter will not power on even after being fully charged. After troubleshooting, they determine there is likely an internal circuit failure. The device is still under warranty, so the manufacturer is contacted to take advantage of the warranty.
Jump Starter Comparison Table
| Feature | Lithium-Ion Jump Starter | Lead-Acid Jump Starter |
|---|---|---|
| Weight | Lighter | Heavier |
| Size | Smaller | Larger |
| Lifespan | Longer | Shorter |
| Charging | Faster Charging | Slower Charging |
| Temperature Performance | More Sensitive to Temperature | Less Sensitive to Temperature |
The table compares lithium-ion jump starters with lead-acid versions. Lithium-ion devices are lighter, smaller, and have a longer lifespan. They usually charge faster. Lead-acid models are generally heavier, larger, and have a shorter lifespan. Both types have their own strengths and weaknesses.
Frequently Asked Questions
Question: Why won’t my jump starter charge?
Answer: Several factors can prevent charging. Check the charger, charging port, and battery. If the charger is faulty, replace it. If the charging port is damaged, clean it. A deeply discharged or damaged battery might not accept a charge.
Question: How long does it take to charge a jump starter?
Answer: The charging time varies by model and battery capacity. It typically takes a few hours to overnight. Refer to your jump starter’s manual for specific charging times and instructions.
Question: What do I do if my jump starter’s clamps are corroded?
Answer: Clean the clamps with a wire brush or sandpaper to remove corrosion. This will ensure a good connection to the car battery terminals. Replace the clamps if they are severely damaged.
Question: Can I use my jump starter in any weather condition?
Answer: Most jump starters have temperature limitations. Avoid using them in extreme heat or cold. Check the manufacturer’s guidelines for temperature operating ranges.
Question: What should I do if my jump starter still won’t work after troubleshooting?
Answer: If you’ve tried everything and the jump starter still won’t work, consider contacting the manufacturer’s support or a professional repair service. The device may have internal problems requiring specialized knowledge.
Final Thoughts
Troubleshooting a jump starter not powering up can seem challenging. However, by taking a step-by-step approach and checking the basics, you can often identify and resolve the issue. Often the solutions are easy fixes such as recharging the battery, cleaning the clamps, or making sure the connections are secure. If you’ve worked through the steps, and the jump starter still won’t start, it may have a more complex problem. Armed with the information and strategies in this guide, you’re now better equipped to diagnose the problem. If all else fails, consider professional help. Good luck with getting your jump starter working again!