Jump Starter Troubleshooting If It’s Not Detecting the Battery
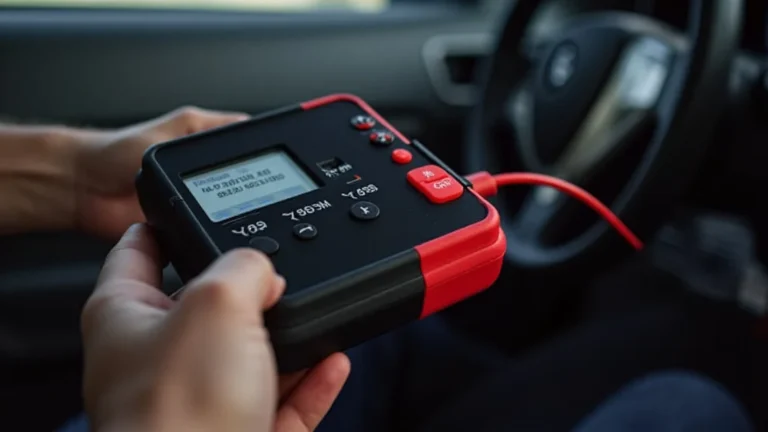
Having a jump starter not detecting battery can be frustrating, especially when you’re stuck with a dead car. It’s something that can happen to anyone, whether you’re a beginner or have some experience with cars. The good news is, it’s often a fixable issue, and you don’t need to be a mechanic to solve it. We’re going to explore the common causes and guide you through simple, easy-to-follow steps to get your jump starter working correctly. Let’s start and get you back on the road!
Possible Reasons for a Jump Starter Issue
When your jump starter isn’t sensing the battery, several things could be the issue. It’s often not a major problem but rather a connection issue or a setting you might have overlooked. Sometimes, it could be the battery’s condition itself, or even the jump starter’s internal components. The goal is to carefully examine each area, starting with the simple fixes and then moving on to the more involved ones. These steps will help you quickly find the problem and bring your car back to life.
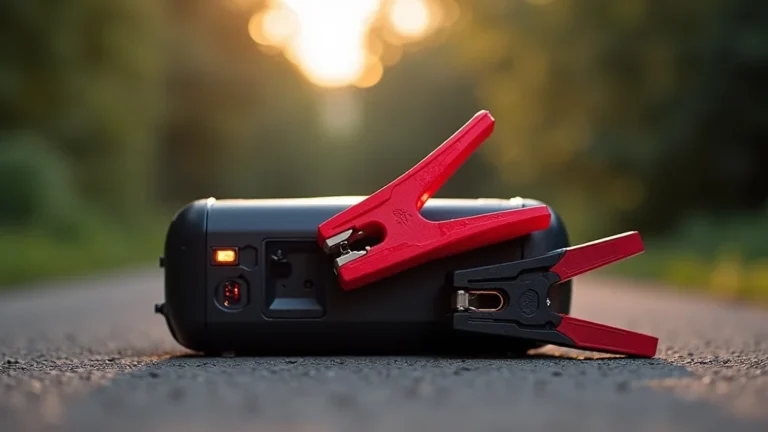
Faulty Connections and Loose Cables
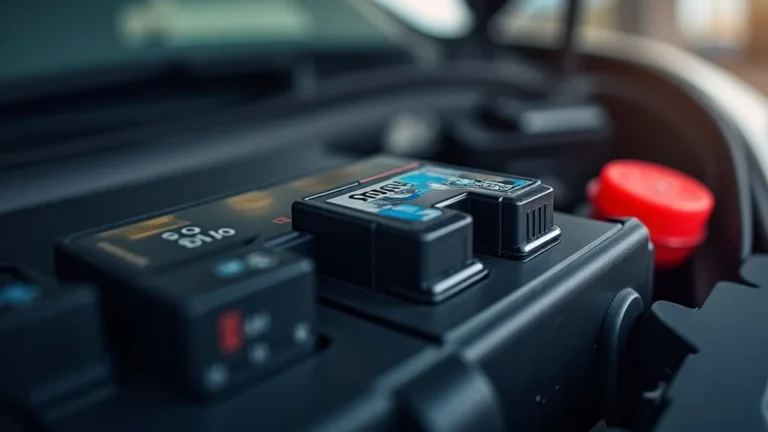
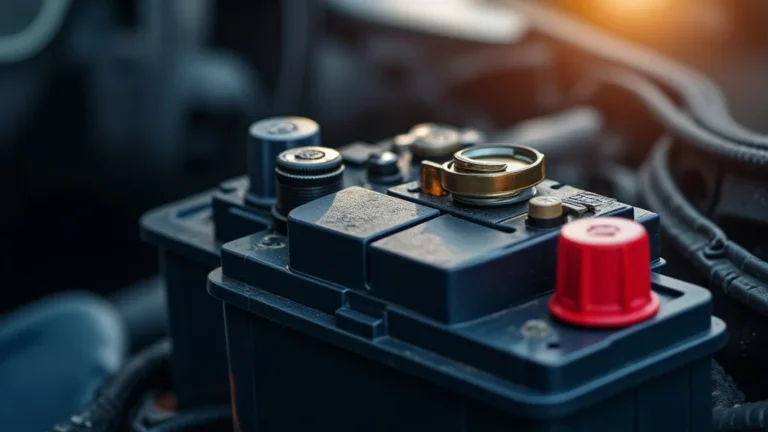
One of the most frequent reasons a jump starter fails to detect a battery is because of bad connections. The clamps might not be correctly attached to the battery terminals, or there could be corrosion preventing a good connection. Additionally, internal wiring within the jump starter could have issues. These cable and connection issues can significantly hinder the flow of electricity, causing the jump starter to indicate it’s not detecting the battery, even if it’s there. A careful visual check and simple cleaning can often resolve the issue.
- Clamp Placement: Make sure the positive (red) clamp is securely fastened to the positive (+) terminal and the negative (black) clamp to the negative (-) terminal. Both clamps should have solid contact with the metal.
- Corrosion Check: Corrosion is a white or greenish buildup on the battery terminals. Use a wire brush or a solution of baking soda and water to clean the terminals before attaching the clamps. This improves electrical flow.
- Cable Inspection: Examine the jump starter’s cables for damage like cuts, frays, or loose wires. Damaged cables can prevent proper electrical transmission, so they should be repaired or replaced.
- Internal Cable Check: If your jump starter has a power switch or LED display, ensure there’s no loose connection internally. Open the jump starter to inspect for loose wires; consult the user manual before disassembling.
Battery Problems and Voltage Levels
The battery itself can be the source of the problem when the jump starter doesn’t detect it. If the car’s battery is severely discharged, it might not be able to provide enough voltage for the jump starter to recognize it. Extreme temperatures can also affect battery performance, making it harder for the jump starter to function. If you’re experiencing problems with your car’s battery, you may need to replace it. Additionally, a battery that has been drained too many times can also fail.
- Low Voltage: A dead battery often has a voltage reading below a certain threshold. Most jump starters require a minimum voltage to operate correctly. Use a voltmeter to check your car battery’s voltage before attempting a jump.
- Battery Age and Condition: Older batteries might have internal issues that affect their ability to accept a charge. A battery test can reveal internal issues, like shorted cells. Consider replacing batteries older than three to five years.
- Temperature Impact: Cold temperatures can decrease battery performance. If you’re trying to jump-start a vehicle in cold weather, allow the jump starter and battery to warm up a bit before starting.
- Battery Chemistry Considerations: Some jump starters might not be compatible with certain battery types. Ensure your jump starter is appropriate for your battery’s chemistry, whether it’s lead-acid, AGM, or another type.
Jump Starter Malfunction and Power Issues
Sometimes, the issue isn’t the car’s battery; instead, the jump starter itself may have problems. A depleted internal battery, faulty charging mechanisms, or even internal component failures can prevent the jump starter from correctly sensing a battery. Regular maintenance and proper usage are vital to keep your jump starter in good shape. Make sure to regularly check the jump starter and charge it fully before it is needed.
- Internal Battery Condition: If the jump starter has an internal battery, check its charge level. A low internal battery might cause it to fail to function correctly. Charge the jump starter fully before use.
- Charging Issues: Ensure the jump starter charges correctly when plugged in. A malfunctioning charger or charging port can prevent the jump starter from being ready when you need it. Inspect the charging cable and the port for damage.
- Internal Component Failure: Jump starters contain electronic components that can fail. If the jump starter shows no signs of life, despite being charged and connected correctly, there may be an internal hardware issue.
- Overload or Overheating: Using a jump starter continuously or for extended periods can trigger overload protection, causing it to shut down. Let the jump starter cool down before attempting to jump-start again.
How to Troubleshoot a Jump Starter That Fails
Getting your jump starter working again involves some systematic troubleshooting. Begin by confirming all connections are secure and clean. Then, examine the battery’s condition, focusing on its voltage and overall state. If the problem persists, you can try resetting the jump starter or contacting the manufacturer for help. Following these steps can help identify and resolve the cause of your jump starter problem.
Step-by-Step Troubleshooting Guide
A systematic process will help you diagnose the root problem. Using this guide ensures you check each potential issue thoroughly, leading to the correct fix. It also prevents you from overlooking simple solutions. By following the steps, you can save time and get your car running without any unnecessary stress.
- Check the Connections: Start by making sure both the positive (red) and negative (black) clamps are firmly attached to the correct terminals on your car’s battery. Ensure there’s no corrosion on the terminals that would prevent a good connection.
- Examine Battery Voltage: Use a voltmeter to test the voltage of your car’s battery. A fully charged battery should show about 12.6 volts. If the battery is below 10 volts, it may be too discharged for the jump starter to recognize.
- Test Jump Starter’s Internal Battery: Make sure the jump starter itself has enough charge. Many jump starters have an indicator. If it’s low, fully charge it before attempting to use it to jump-start your car.
- Inspect for Damage: Look for any physical damage on the jump starter’s cables, clamps, and housing. Any visible damage could indicate a malfunction. Check the charger and charging port for damage.
- Reset the Jump Starter (If Applicable): Some jump starters have a reset function. Consult your manual for the exact procedure.
Tools and Equipment Needed
To properly troubleshoot your jump starter, you’ll need a few essential tools. These tools will help you identify the problem and make the necessary adjustments. Gathering these items before you begin will help make the process smoother and more efficient.
- Voltmeter: This is used to test the voltage of your car’s battery to see if it is too low to accept a jump.
- Wire Brush or Terminal Cleaner: This is used to remove corrosion from the battery terminals, allowing the jump starter to connect properly.
- Gloves and Safety Glasses: These protect you from battery acid and other hazards.
- User Manual: This contains specific instructions about your jump starter and its functions.
- A Clean Cloth: For wiping up any spills or cleaning the jump starter components.
Advanced Diagnostics and Solutions
If you have already followed the standard troubleshooting steps and still cannot resolve the issue, you might need to explore more advanced diagnostic steps. This can involve checking the jump starter’s internal components, especially if you have experience working with electronics. It’s often helpful to consult the manufacturer’s user manual or contact customer service for help. If the problem is not resolvable at home, consider professional assistance to make sure your car is in good working order.
Best Practices and Prevention
Proper care and use of your jump starter will help ensure it works when you need it. By practicing preventative maintenance, you can reduce the chances of encountering problems and ensure it is always ready to go. Consider these practices to make sure your jump starter stays in great shape.
Regular Maintenance Tips
Regular maintenance is vital for maintaining the performance and extending the lifespan of your jump starter. Simple, regular checks can prevent many problems, ensuring your device will be operational when needed. Follow these steps regularly.
- Charge Regularly: Even if you don’t use your jump starter often, recharge it every few months. This prevents the internal battery from becoming depleted.
- Inspect Cables and Clamps: Examine the cables and clamps for any damage, like cuts or corrosion. Replace any damaged parts.
- Clean the Jump Starter: Keep the jump starter clean and dry. Wipe it down with a clean cloth to prevent the accumulation of dirt and moisture.
- Proper Storage: Store your jump starter in a cool, dry place. Avoid extreme temperatures, as they can damage the internal battery and components.
Proper Usage and Safety Precautions
Safe use is essential to prevent injury or damage to your jump starter and your vehicle. Understanding and following these safety measures will protect you and your equipment. Using a jump starter safely ensures you can get back on the road safely and without any unnecessary risks.
- Read the Manual: Before using your jump starter, always read the user manual. This will provide you with specific instructions and safety guidelines for your model.
- Connect Correctly: Always connect the clamps to the correct terminals. Red to positive (+) and black to negative (-). Incorrect connections can cause sparks or damage.
- Ventilation: Always operate your jump starter in a well-ventilated area. This helps to prevent the buildup of explosive gases that batteries can emit.
- Avoid Overuse: Do not use your jump starter for extended periods. If a jump-start does not work immediately, wait a few minutes before trying again. Repeated attempts can damage the jump starter.
Jump Starter Features and Technologies
Modern jump starters incorporate various features and technologies that improve their functionality and make them more user-friendly. Knowing these features can help you select the most suitable jump starter for your needs and ensure you use its features to their fullest. Understanding these technologies will help you make the best use of your jump starter.
Advanced Features to Look For
When selecting a jump starter, consider models with advanced features that enhance performance and usability. These features can improve the jump-starting process and offer extra functions. The right features can add value to your device and offer a safer and more efficient jump-starting experience.
- Reverse Polarity Protection: This prevents damage to the jump starter and vehicle if the clamps are connected incorrectly.
- LED Display: Displays the battery’s voltage and other critical information, making it easier to troubleshoot.
- USB Charging Ports: Allows you to charge your phone or other devices.
- Built-in Flashlight: Provides illumination in low-light conditions, which can be essential when working on your car at night.
Emerging Technologies in Jump Starters
Jump starter technology is always improving, with new innovations that enhance their safety, power, and efficiency. From more compact designs to smarter charging systems, these innovations make jump starters even more reliable. Explore the newest technologies in the market.
- Lithium-Ion Batteries: These batteries are lightweight, more compact, and hold a charge longer than older technologies.
- Wireless Charging: Some models offer wireless charging capabilities for your mobile devices.
- Jump Starters with Air Compressors: Some jump starters include an integrated air compressor, which can inflate tires.
- Smart Diagnostics: Some high-end models offer diagnostic capabilities to assess your car’s battery and charging system.
Frequently Asked Questions
Question: What does it mean when my jump starter says it is “not detecting the battery”?
Answer: It means the jump starter’s internal system isn’t registering the presence of a battery, usually due to a poor connection, a very low battery voltage, or an internal issue with the jump starter itself.
Question: Can a dead battery damage my jump starter?
Answer: Not directly, but repeatedly trying to jump a severely discharged battery can overheat the jump starter and potentially trigger its safety features. Ensure the jump starter is rated for the type of battery you are attempting to jump.
Question: How often should I recharge my jump starter?
Answer: Even if you do not use your jump starter, you should recharge it every 2-3 months to keep the internal battery in good condition and ensure it is ready for use.
Question: What do I do if my jump starter won’t start my car?
Answer: First, check the connections to make sure they are secure and clean. Then, check the jump starter’s charge. If it still doesn’t work, wait a few minutes, and try again. If it still doesn’t work, there may be a problem with the battery or the jump starter itself. Consult the user manual or seek professional assistance.
Question: What do the red and black clamps mean when jump-starting my car?
Answer: The red clamp connects to the positive (+) terminal of the battery, and the black clamp connects to the negative (-) terminal. Correctly connecting the clamps is critical for safety and to ensure the jump starter works properly.
Final Thoughts
Encountering a jump starter not detecting battery can be a hiccup, but often, it is a manageable problem. You’ve now explored various reasons behind this, from connection problems to the battery’s condition and even potential jump starter issues. Remember, a thorough review of the connections, battery voltage, and the jump starter’s functionality will help you fix this issue. By following the troubleshooting steps, you’ve equipped yourself with the skills to address common problems and ensure your jump starter is ready when you need it. By using regular maintenance and the provided safety practices, you can improve your chances of success. Now, you can confidently take action to fix your jump starter, getting your car started!