Jump Starter Low Voltage Issues Explained for Beginners
Getting your car started with a jump starter low voltage issue can be a tricky situation. It often happens when your battery is low on power, and your jump starter might not be able to get enough juice to your car. This can be super frustrating, especially if you’re not sure what’s going on. Don’t worry, many people run into this problem, and it’s something you can totally solve. We’ll explore the main causes and provide a straightforward, step-by-step guide to help you fix your jump starter low voltage issue and get back on the road. Let’s start!
What Causes Jump Starter Low Voltage Issues?
The main cause of a jump starter low voltage issue is the battery’s inability to provide enough power to start your vehicle. This can happen for several reasons. One common reason is that the jump starter itself isn’t fully charged. Also, if the jump starter is older, its internal battery might not be as effective as it once was. Corrosion on the battery terminals of your car or the jump starter clamps can create resistance, reducing the current flow. Finally, external factors, like extreme temperatures, can affect battery performance, making it harder for the jump starter to work correctly. Identifying the root cause is the first step.
Low Charge in the Jump Starter
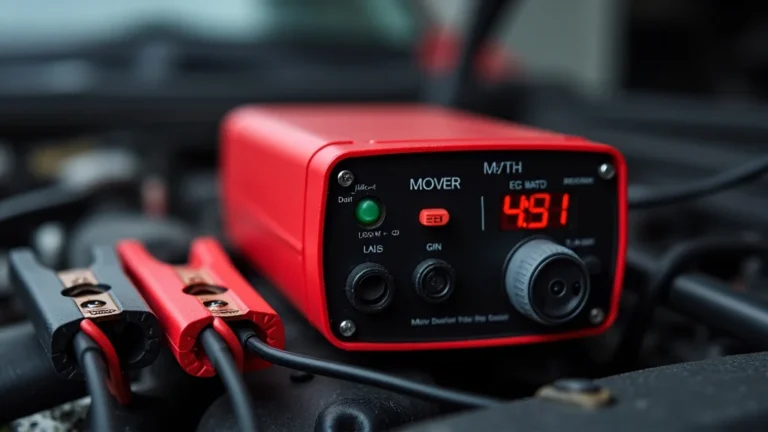
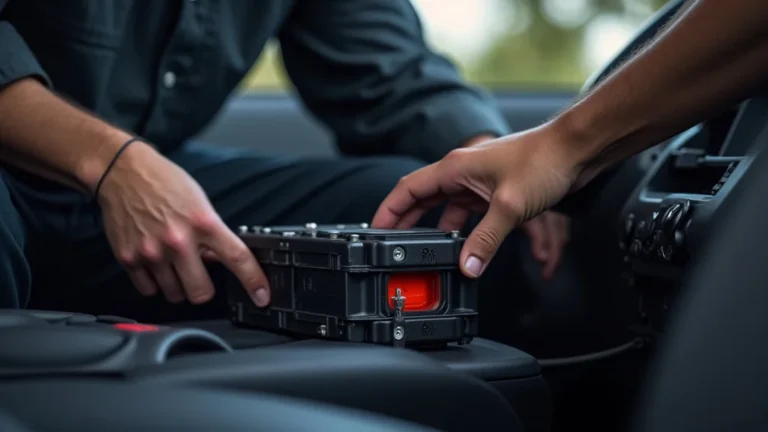
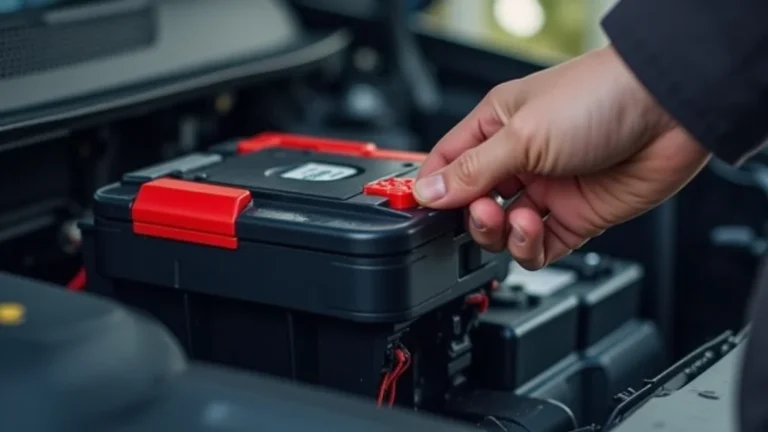
A jump starter’s efficiency relies heavily on its charge level. If the internal battery isn’t fully charged, it won’t be able to deliver the necessary voltage to jump-start a car. Always check the charge indicator on your jump starter before use. Many models have LED indicators that show the battery’s state. Charging your jump starter regularly, especially after each use, helps keep it ready for emergencies. This ensures that you have enough power available when you need it. Ignoring the charge level is a common reason for a jump starter low voltage issue.
- Check the LED Indicators: Most jump starters have indicator lights. Ensure they show a full charge.
- Regular Charging: Charge your jump starter after each use and every few months, even if unused.
- Use the Correct Charger: Make sure you’re using the charger that came with your jump starter or a compatible one.
- Storage: Store your jump starter in a moderate temperature; avoid extreme heat or cold.
Neglecting these simple steps can lead to the device not working when you need it most. Imagine you’re stranded, and your jump starter won’t start your car because it’s dead. This makes things much worse! Taking a moment to check and maintain the charge level can save you a lot of trouble.
Battery Terminal Corrosion
Corrosion on your car’s battery terminals or the jump starter clamps acts like a barrier, preventing a good electrical connection. This build-up of rust or other substances increases resistance, decreasing the voltage. Even a small amount of corrosion can make it difficult for the jump starter to deliver enough power to your car’s battery. This is a common issue, and cleaning the terminals is a simple fix that can often solve the jump starter low voltage issue. It’s an easy step that you can do on your own.
- Visually Inspect the Terminals: Look for any white or green powdery build-up.
- Use a Wire Brush: Gently scrub the terminals and clamps with a wire brush to remove corrosion.
- Apply a Terminal Protector: After cleaning, you can apply a terminal protector to prevent future corrosion.
- Tighten the Clamps: Ensure the jump starter clamps make a firm connection with your battery terminals.
Corrosion isn’t just a problem for your car’s battery; it’s also a problem for your jump starter. Maintaining clean connections on both ends can make a big difference.
Impact of Extreme Temperatures
Extreme temperatures significantly impact battery performance, including jump starters. Cold temperatures reduce a battery’s ability to deliver power, and hot temperatures can speed up the battery’s degradation. This means that if you try to use your jump starter in freezing weather, it might struggle. In very hot weather, the internal components might be more susceptible to damage. Storing your jump starter in a stable temperature environment can help extend its lifespan and maintain its effectiveness. Being aware of the temperature’s effects is a vital step.
- Cold Weather Performance: Batteries lose power in cold temperatures.
- Heat Damage: High temperatures can reduce battery life and efficiency.
- Proper Storage: Keep your jump starter in a garage or similar area, not exposed to extreme conditions.
- Pre-Warming (in cold weather): If possible, keep your jump starter indoors before using it.
Understanding these environmental factors can help you make better decisions about how to use and store your jump starter, ensuring it’s ready when you need it.
Identifying and Solving the Jump Starter Low Voltage Issue
Pinpointing the exact cause of a jump starter low voltage issue involves a systematic approach. First, check your jump starter’s charge level. Then, inspect the connections for corrosion and ensure they are secure. Finally, consider the weather conditions. Once you’ve figured out the issue, you can start troubleshooting. Knowing the steps to take can quickly resolve the problem.
Step-by-Step Troubleshooting Guide
Troubleshooting is all about figuring out what is causing the problem and then taking steps to fix it. This guide helps you go through the main issues one by one. By working through these steps, you can pinpoint and address the root cause, ensuring your jump starter works when you need it.
- Check the Jump Starter’s Charge: Ensure your jump starter is fully charged. Refer to the LED indicators or the user manual to confirm. If the battery is low, charge it before proceeding.
- Inspect the Battery Terminals: Carefully examine your car’s battery terminals and the jump starter clamps for any signs of corrosion. Look for white or green powdery deposits.
- Clean the Terminals (if corroded): If corrosion is present, use a wire brush and a cleaning solution (like baking soda and water) to remove it. Make sure both the car’s battery terminals and the jump starter clamps are clean.
- Make Secure Connections: Attach the jump starter clamps to the correct battery terminals (positive to positive, negative to negative). Double-check that the clamps are securely attached and making good contact.
- Attempt to Start the Car: After making all the necessary checks and connections, try to start your car. If it starts, the problem is solved. If not, go to the next step.
- Check for Incorrect Polarity: If the car doesn’t start, double-check that you’ve attached the clamps correctly, as reversing polarity can prevent the jump starter from working.
- Try a Different Jump Starter: If possible, try using a different jump starter. If the car starts with a different jump starter, the issue might be with your original jump starter.
- Seek Professional Help: If you’ve tried all these steps and the car still won’t start, it’s a good idea to seek help from a professional mechanic. The problem might be more complex than a simple jump starter low voltage issue.
Following these steps helps solve most jump-starting problems and keeps you from being stranded.
Advanced Diagnostic Techniques
Sometimes, the problem isn’t obvious, and you need to dig a little deeper. Advanced diagnostic techniques can help pinpoint the cause of the problem. If simple checks don’t work, more advanced steps are required. These techniques will help you identify what’s truly going on with your jump starter and car battery. This will make it easier to fix any hidden issues.
- Use a Multimeter: A multimeter can measure the voltage of your jump starter and your car’s battery. This helps you identify if the jump starter is delivering enough power and if the car’s battery is accepting the charge.
- Load Test the Car Battery: A load test measures how well your car’s battery can handle a load (like starting the engine). This helps you determine if the battery is capable of holding a charge.
- Check the Jump Starter’s Output: Use the multimeter to measure the voltage coming from the jump starter while it’s connected to your car’s battery. This lets you know if the jump starter is working as intended.
- Inspect the Cables: Check the jump starter cables for damage, loose connections, or internal breaks. These issues can disrupt the current flow.
These advanced methods will help you identify problems that might not be obvious at first glance. For example, if your jump starter shows a full charge, but a multimeter indicates low voltage output, you may have a faulty jump starter.
Choosing and Maintaining Jump Starters for Reliability
The right jump starter and some simple maintenance steps are key to avoiding jump starter low voltage issue in the future. Choosing a jump starter is just the first step. Proper care ensures it works when you need it. By using the right equipment and taking care of it, you’ll be well-prepared for any unexpected car troubles.
Selecting the Right Jump Starter
Choosing the correct jump starter means picking one that fits your car and your needs. Many options exist, each with its own pros and cons. Selecting the appropriate model can save you from a lot of trouble later. Think about what will work best for your car and how often you’ll need to use it.
- Battery Capacity: Choose a jump starter with sufficient cranking amps (CA) or peak amps (PA). More amps mean more power. Higher amp ratings work better for larger engines and colder climates.
- Portability and Size: Consider the size and weight of the jump starter. Smaller, more portable units are easier to store and carry.
- Additional Features: Some jump starters include built-in USB ports, flashlights, or even air compressors. Decide what features are useful for you.
- Reviews and Reputation: Read reviews from other users and research the brand’s reputation. This gives you helpful details.
Picking the correct jump starter is not just about the numbers; it’s about what works for you and your car.
Proper Jump Starter Maintenance
Maintaining your jump starter helps guarantee it is always ready to go. Regular care prevents issues and extends the lifespan of the equipment. If you take good care of your jump starter, it will take care of you. The key is to be proactive.
- Regular Charging: Charge the jump starter after each use and every few months, even if unused.
- Temperature Control: Store the jump starter in a moderate temperature; avoid extreme heat or cold.
- Cable Inspection: Regularly inspect the cables and clamps for damage or corrosion.
- Cleaning: Clean the clamps and terminals to remove any corrosion that may be present.
These simple steps will keep your jump starter in top condition, ready to assist when you need it most.
Addressing Common Jump Starter Problems
Sometimes, even with the best care, problems occur. It’s helpful to know what to do when you run into these issues. This section will walk you through solutions to typical problems, helping you understand how to keep your jump starter running smoothly and avoiding jump starter low voltage issue.
Jump Starter Won’t Turn On
If your jump starter won’t turn on, it means there’s a problem with the device itself. This can be caused by various issues, from a completely drained battery to internal component failure. Finding out the specific reason behind it will help you know how to solve it.
- Check the Power Button: Make sure the power button is functioning correctly. Some buttons may need to be pressed for a certain time.
- Charge the Device: If the jump starter won’t turn on, it may have a completely dead battery. Fully charge it to see if it starts to function.
- Inspect the Charging Port: Make sure the charging port is not damaged and the charger is properly connected.
- Internal Issues: Internal issues may be the reason. If these steps do not help, seek professional assistance.
If your jump starter won’t turn on, start with the simple fixes and work your way up to troubleshooting the device. You might be able to fix the problem by yourself.
Jump Starter Won’t Charge
If your jump starter won’t charge, it’s frustrating, but there are things to try. The charging system is crucial, and it needs to work correctly. Finding the issue can often be fixed with a few checks and some troubleshooting.
- Check the Charger: Make sure you are using the correct charger and that it is functioning. Try a different charger if possible.
- Charging Port Inspection: Inspect the charging port for damage or debris. Ensure the charger is making a solid connection.
- Battery Health: A damaged battery inside the jump starter might not take a charge. If the battery is old or damaged, it might need to be replaced.
- Internal Circuitry: Problems with the internal circuitry could prevent charging. If you suspect this, you need professional assistance.
If your jump starter is not charging, start with the most obvious checks, like the charger and the port. In most cases, you can find the issue quickly.
Jump Starter and Your Vehicle’s Electrical System
Understanding the link between your jump starter and your vehicle’s electrical system is a good way to use and maintain the equipment safely. Knowing how everything works together makes you well-prepared to use the jump starter effectively and avoid any related safety issues. This section explores the details of how jump starters operate with the electrical system in your vehicle.
How Jump Starters Work
Jump starters work by supplying a burst of power, usually through jumper cables, to your car’s battery. This extra power helps overcome the low voltage situation and provides enough energy to start the engine. They’re designed to deliver high current for a short time to crank the engine. Knowing how this works helps you use the jump starter safely and effectively.
- Internal Battery: Jump starters store electrical energy in an internal battery.
- High Current Output: They are designed to deliver a high current (amps) to start the engine.
- Safety Features: Most jump starters have safety features to protect against overcharging, short circuits, and reverse polarity.
- Connection to the Car: The jump starter uses jumper cables to connect to the car’s battery terminals.
The principle is straightforward: when your car’s battery can’t deliver the power needed, the jump starter steps in to give that boost. Knowing this helps you understand the steps involved.
Compatibility and Safety Precautions
Using a jump starter safely means understanding both the equipment and your vehicle. Making sure the jump starter matches your car’s requirements and taking appropriate safety steps can avoid possible risks. Before you use the jump starter, take the time to learn the safety rules.
- Matching the Jump Starter: Select a jump starter that can supply enough power for your engine size.
- Proper Connections: Always connect the jump starter clamps to the correct terminals (positive to positive, negative to negative).
- Prevent Sparks: Avoid letting the clamps touch each other, as this can create sparks.
- Ventilation: Always operate the jump starter in a well-ventilated area to avoid dangerous fumes.
Taking precautions guarantees you can safely and correctly use a jump starter.
Frequently Asked Questions
Question: Why is my jump starter showing low voltage?
Answer: Low voltage can be caused by a depleted internal battery, corrosion on the clamps, or extreme temperatures affecting its performance. Check the charge level, clean the clamps, and store it properly.
Question: Can I use a jump starter on any car?
Answer: Most jump starters work on any car, but it’s vital to match the jump starter’s cranking amps to your car’s engine size. Make sure it’s powerful enough to start your vehicle.
Question: How long should I leave the jump starter connected to my car?
Answer: Connect the jump starter and start your car immediately. If the car starts, disconnect the jump starter right away. If the car doesn’t start, wait a few minutes and try again. Don’t leave it connected for long periods.
Question: Is it safe to jump-start a car with a dead battery?
Answer: Yes, it is safe as long as you follow the correct procedures and ensure the connections are correct. Always connect positive to positive and negative to a good ground.
Question: How often should I charge my jump starter?
Answer: Charge your jump starter after each use and every few months, even if you haven’t used it. This keeps it ready to work when you need it.
Final Thoughts
Dealing with a jump starter low voltage issue can be a frustrating experience, but with the correct information, you can get through it. We’ve explored the main causes, from a dead battery and corrosion to the effects of temperature. You know how to identify the source of the problem and solve it step by step. You’ve also learned how to choose the right jump starter and maintain it. By following the tips we’ve provided, you’ll be well-prepared when you need your jump starter. Remember, always keep your jump starter charged, connections clean, and store it in a cool place, so you can be ready for anything. Stay prepared, and you’ll easily overcome any car troubles.