Jump Starter Frustrations Solved: What If It Doesn’t Work?
It’s super frustrating when your car won’t start, and you grab your trusty jump starter fully charged but not working. You expect instant power, but instead, nothing. This happens more often than you think, especially when you’re just starting to learn about car maintenance. Don’t worry! We’ll explore the common reasons why this might happen and give you easy, step-by-step solutions to get your car running. You’ll soon be a jump-starting pro. Let’s get started and solve this problem together.
Possible Issues When Your Jump Starter Fails
When you’re dealing with a jump starter fully charged but not working, the problem usually isn’t the device’s battery alone. There are several other areas that could cause the malfunction. This could range from problems in the device itself, the car’s battery connection, to internal issues within the vehicle. It’s like a puzzle with several pieces; you’ll need to examine each one carefully to find the missing link. These steps are simple to follow and can help you figure out what’s going on.
Examining the Jump Starter’s Internal Status
Before you troubleshoot your car, check the jump starter. Make sure it’s turned on, and its power button isn’t accidentally switched off. Then, inspect the device for any visible damage, such as cracks or loose parts. Sometimes, an internal issue can prevent it from working even when charged. Check the charging indicator. If the indicator doesn’t show a full charge, the jump starter may not have enough power to start your car, even if it has been plugged in for a long time. Next, check the jumper cables; ensure that the clamps are properly connected to the device and are in good condition without corrosion or damage. A faulty connection will prevent power delivery.
-
Assess the Indicator Lights: These lights tell you the jump starter’s status. A fully charged unit should display a solid green light, while a low battery might show red. If the lights are dim or off, the jump starter may not be fully charged, or an internal fault may exist.
Indicator lights are a simple way to know your jump starter’s health. They communicate the battery status and any potential faults. If you see a warning light or no light, it is time to check the device and the power source.
-
Inspect the Charging Cable: The charging cable links your jump starter to a power source. Examine the cable for any signs of damage like frays, cuts, or loose connections. A damaged cable will prevent the jump starter from charging.
The charging cable is the lifeline for your jump starter’s power. Regular inspections will help prevent charging issues. By taking the time to inspect it, you can keep your jump starter in working order.
-
Test with a Multimeter: If you have a multimeter, you can test the jump starter’s voltage. This is a simple, effective method to ensure the device is producing the right power.
A multimeter can give you accurate data on the jump starter’s voltage, helping you to pinpoint whether the device is functioning correctly. This method is effective in diagnosing a problem quickly.
Checking Car Battery Connections for Issues
Often, the car battery connection itself is the issue. Corrosion is a common enemy. It prevents the jump starter from delivering power to the car’s system. Check the terminals for any greenish or white buildup. Loose connections are another common problem. Make sure the clamps from the jump starter are firmly attached to the battery terminals. Finally, examine the battery itself. A severely damaged battery may not be able to receive a charge, even from a jump starter.
-
Inspect Battery Terminals for Corrosion: Corrosion forms when battery acid reacts with air and moisture. Look for a white or greenish crust on the terminals.
Corrosion is a sign of an electrical problem. If you notice corrosion, you should clean it off using a mix of baking soda and water. This will help remove the obstruction.
-
Ensure Proper Clamp Connection: Clamps that are not correctly attached to the terminals will not allow for a good electrical connection. Ensure you get a strong grip on the terminals.
The clamps need a firm grip on the terminals to deliver power. If the clamps are loose, the car won’t start. This is a common and easy problem to fix.
-
Assess Battery Condition: Check the battery case for cracks or bulges. These issues show the battery has problems. Also, look at the terminals for significant damage.
A battery in bad shape will not work even if it is connected to a jump starter. Inspect it to determine whether it is the source of the issue.
Investigating Vehicle Electrical System Problems
Your car’s electrical system could be the root cause of your jump starter problem. When a jump starter fully charged but not working, a malfunctioning starter, blown fuses, or other electrical issues within the car can prevent it from starting. These problems stop the electrical current from flowing correctly, and this may cause the vehicle not to start. This may not be an issue with the jump starter itself. By looking at the car’s electrical components, you can often identify where the issue lies and start the vehicle.
-
Examine the Starter Motor: The starter motor is what starts the engine. If it fails, the car won’t start, even with a jump. Listen for a clicking sound or no sound when you turn the key.
A malfunctioning starter motor is a common cause of starting issues. The starter motor may be worn out. If it’s making clicking sounds or no noise at all, there might be a problem.
-
Check for Blown Fuses: Fuses protect the car’s electrical system from overloads. A blown fuse will stop power from reaching important parts of the car. Use the car’s manual to identify and inspect the fuses related to starting the engine.
Fuses are easy to inspect and replace. If a fuse has failed, it will need to be replaced. Check all the fuses related to the starting system.
-
Look for Wiring Issues: Damaged or corroded wires can prevent electricity from flowing. Inspect the wiring around the battery and starter motor. If any wires look damaged, they will need to be repaired.
Wiring problems can stop the car from starting. Look for worn or damaged wires, and make sure that connections are solid. These issues need immediate attention.
Step-by-Step Guide to Troubleshoot Your Jump Starter
When your jump starter fully charged but not working, knowing how to proceed systematically is key. Starting with the basics and moving to more complex areas increases your chances of a successful start. You can resolve the issue, from checking the simple on/off switch to assessing the car’s electrical system. This approach prevents you from wasting time on unnecessary steps.
Initial Checks and Safety Measures
Safety should come first when dealing with car batteries and jump starters. Work in a well-ventilated area to avoid dangerous fumes. Wear eye protection and gloves to protect yourself from acid and potential sparks. Check the jump starter itself. Confirm the device is fully charged, and the power button is switched on. Make sure the clamps are clean and free of corrosion. By taking these initial steps, you can avoid accidents and ensure a safe and effective troubleshooting process.
-
Ensure a Well-Ventilated Area: Car batteries release hydrogen gas, which is flammable. Work outside or in a garage with good ventilation to prevent gas buildup.
A well-ventilated space is vital for your safety. Make sure you work outside or in a garage to remove dangerous fumes. This practice can help prevent issues.
-
Wear Protective Gear: Batteries contain sulfuric acid, which is corrosive. Wear eye protection and gloves to protect your skin and eyes. Also, make sure you wear protective clothing to avoid contact with the dangerous elements.
Safety gear is your defense against potential hazards. Eye protection and gloves protect you from acid and other risks. It can help you to avoid accidents.
-
Inspect the Jump Starter’s Condition: Check the device for physical damage. Make sure it is fully charged. Ensure the power button is on, and the clamps are clean and free from corrosion.
A jump starter that is in good shape is essential for starting your car. By inspecting the device, you can get rid of easy-to-fix problems.
Connecting and Testing the Jump Starter
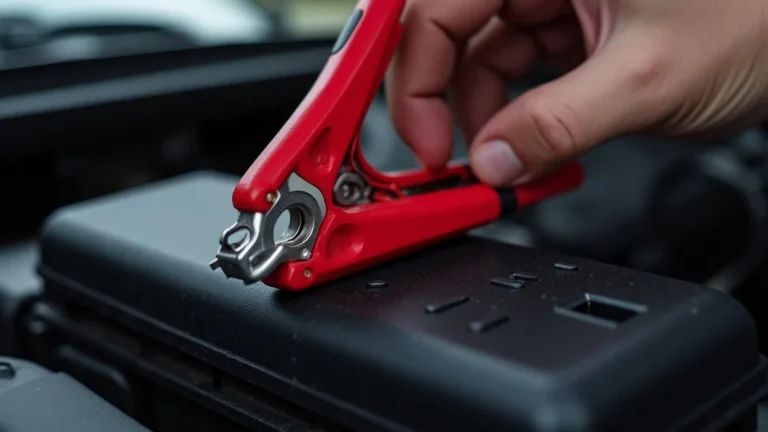
Connecting the jump starter to your car is not hard. Properly connecting it will help to avoid damage and ensure the procedure goes smoothly. Attach the red clamp to the positive (+) terminal of your car battery. Next, attach the black clamp to a suitable ground on the car’s chassis or the negative (-) terminal of the battery. Start the car and wait a few minutes before trying to start the engine. After your car starts, carefully remove the clamps in reverse order: black first, then red. These steps ensure a safe and effective jump-starting procedure. Here’s a quick guide:
-
Connect the Red Clamp: Attach the red clamp to the positive (+) terminal of the car battery. Ensure a firm connection to the terminal. This provides the power needed to start the car.
The red clamp supplies the current to the battery. Securely attaching the clamp will ensure the flow of electricity. This is essential for a successful jump-start.
-
Connect the Black Clamp: Attach the black clamp to a bare metal part on the car’s chassis or the negative (-) terminal of the battery. This creates a ground for the circuit.
The black clamp completes the circuit. Make sure it is connected to a bare metal surface. This is essential to help with power transfer.
-
Try Starting the Car: After waiting a few minutes, try to start your car. If the car starts, let it run to charge the battery. If it doesn’t start, you may need to wait longer.
Starting your car is the goal. Give the engine time to crank over. If it won’t start, make sure all connections are okay and the jump starter is functioning.
Addressing Common Problems During Jump-Starting
Even with careful planning, issues can still arise. The jump starter might not deliver enough power, or the clamps may come loose. If your car still won’t start, go through the steps again. Check that the clamps are tightly connected to the battery terminals, ensuring a solid connection. If the car still won’t start, try waiting longer, as your car may need more time to receive a full charge. Sometimes, the battery is damaged, and the jump starter can’t help. Keep these common problems in mind so you can find solutions.
-
Loose Clamp Connections: Loose clamps stop the flow of electricity. Double-check that they are firmly attached to the battery terminals and are making contact.
Loose clamps cause a break in the circuit. Make sure they are correctly connected to prevent a starting issue. Make sure that they grip the terminals correctly.
-
Jump Starter Not Delivering Enough Power: If the jump starter is not fully charged or if it is too small for your car’s engine size, it won’t deliver enough power. Ensure that the jump starter is properly charged.
The jump starter needs to deliver enough power. A device that isn’t powerful enough won’t start the car. A bigger jump starter may be necessary.
-
Battery Issues: If your car’s battery is damaged or old, it may not accept a charge. In this case, you will need to replace the battery to start your car.
A worn-out or damaged battery won’t hold a charge. This is a common issue with older batteries. If this is the issue, it is time for a replacement.
Jump Starter Maintenance and Prevention
Preventing jump starter fully charged but not working problems means taking care of your device. Proper maintenance helps to keep your jump starter in good shape. Charge your jump starter frequently. This practice prevents the battery from draining completely, which may damage the device. Store your jump starter in a temperature-controlled area. This will help maintain its performance and extend its life. Following these steps helps keep your jump starter ready for emergencies.
Regular Charging and Storage Practices
Maintaining your jump starter involves regular charging. Charge it fully after each use to keep it ready. Over time, batteries lose their charge, even when not in use. Follow the manufacturer’s directions for charging. Keep the device stored in a stable environment. Extreme temperatures will damage the battery and the components. Following these simple steps will ensure that your jump starter works when you need it.
-
Charge After Each Use: Always recharge your jump starter after using it to maintain its full charge. A fully charged device is prepared for the next use.
Recharging immediately ensures readiness. This will help you avoid the frustration of a dead battery. It guarantees that the device is available for any emergency.
-
Check the Charge Regularly: Even if you don’t use your jump starter often, it will lose its charge over time. Check the charge level monthly. Recharge when needed.
Regular charging will keep the jump starter in good working condition. It will help to prevent the device from discharging. This practice protects the device from damage.
-
Proper Storage Conditions: Store the jump starter in a cool, dry place. Avoid extreme temperatures and direct sunlight. Proper storage will extend the battery life.
Correct storage is essential to maintain the jump starter. It will help to maintain the battery’s condition. These practices will prevent early degradation.
Inspecting and Cleaning the Jump Starter
Cleaning and inspecting the jump starter regularly helps to keep it in working order. Before you start, disconnect the device from its power source and remove all clamps from the terminals. Wipe the exterior with a damp cloth to get rid of dust and dirt. Check the clamps for corrosion. If you see corrosion, clean it off with a wire brush or a baking soda solution. Make sure the clamps connect well. These inspections will help you identify issues early. This helps your jump starter function effectively.
-
Wipe Down the Exterior: Use a clean, damp cloth to wipe down the exterior of the jump starter. This removes any dust or dirt. This helps to protect the internal components.
Cleanliness is important for the jump starter. This simple step will help to maintain the device. It will also prevent any grime.
-
Inspect the Clamps: Examine the clamps for corrosion and damage. If you see corrosion, clean it off with a wire brush or a baking soda solution. Make sure the clamps connect well to prevent any issues.
Clamp condition will affect the power transfer. Cleaning and inspection is key for reliable use. Good clamps guarantee a solid connection to the battery terminals.
-
Check for Damage: Examine the device for any signs of damage, such as cracks or loose parts. If you find any damage, replace the damaged components. This action prevents further damage and keeps the device safe.
Checking for damage will stop future problems. This step prevents potential hazards. It’s a key part of maintaining the jump starter’s safety and functionality.
Understanding and Addressing Common Jump Starter Problems
Even with good care, jump starter fully charged but not working problems can happen. Issues include a low or dead battery, damaged or corroded clamps, or internal problems. Knowing how to handle these issues will save you time and frustration. If the device won’t charge, check the charging cable and power source. For clamp problems, clean the corrosion and make sure the connection is solid. For internal issues, you will likely need professional help. Knowing the solutions to common issues allows you to fix small problems and keep your jump starter ready.
-
Low or Dead Battery: If the jump starter won’t turn on or won’t hold a charge, there is a battery issue. Try charging the device for a longer time. If the issue is persistent, the battery may need to be replaced.
Battery life is crucial for a jump starter. If the battery is dead, the device will not work. Replacing the battery is an effective solution.
-
Damaged or Corroded Clamps: Damaged clamps will stop the flow of electricity. Clean any corrosion with a wire brush or baking soda solution. Replace clamps that are damaged beyond repair.
Clamps have a big impact on a jump starter’s performance. Keep the clamps in good condition. You can get a reliable connection with clean, undamaged clamps.
-
Internal Issues: Internal issues are less common but can stop your jump starter from working. If the jump starter has internal problems, like circuit damage, you will need to get help.
Internal problems can be challenging to fix. You may need to take the device to a repair shop. Professional help can get your jump starter back in working condition.
Frequently Asked Questions
Question: Why won’t my jump starter turn on, even when plugged in?
Answer: Check the power source and the charging cable. The outlet might not be working or the cable could be damaged. The jump starter might also have internal issues that require professional help.
Question: What should I do if the jump starter clamps spark when I connect them?
Answer: This is normal. Make sure the clamps are making good contact with the battery terminals. If the sparking is excessive, it could indicate a short circuit or a faulty connection. Immediately disconnect the clamps and check for any wiring issues.
Question: Can I use my jump starter on any type of car battery?
Answer: Most jump starters work with standard lead-acid batteries found in most cars. Check your jump starter’s specifications for compatibility and ensure it is appropriate for the voltage of your car’s battery.
Question: How long should I leave the jump starter connected to my car’s battery before starting?
Answer: Wait for a few minutes to allow the jump starter to transfer enough power to the car’s battery. This will make it easier for the car to start. You can also consult your jump starter’s user manual for the correct timing.
Question: What if the jump starter makes a clicking sound, but the car still won’t start?
Answer: This may mean the starter motor is not working or is in need of replacement. The clicking sound may indicate that the starter motor is trying to engage but cannot.
Final Thoughts
Dealing with a jump starter fully charged but not working can be frustrating, but armed with the right knowledge, you can troubleshoot most issues and avoid being stuck. First, check the jump starter itself to make sure it is functioning and fully charged. Then, inspect the connections to the car battery, looking for corrosion or loose clamps. Investigate your car’s electrical system for problems, like starter issues or blown fuses. This simple, step-by-step approach will help you to identify and fix the issue. Remember to maintain your jump starter by charging it after use and storing it properly. This will ensure that it’s ready when you need it. By taking these steps, you will confidently handle any jump-starting situations.