Jump Starter Clamp Troubleshooting Guide: Getting a Grip!
Having trouble with your car’s battery and finding that your jump starter clamp not gripping properly? It’s a common problem, especially if you’re new to car maintenance. Those clamps need a good connection, or your jump starter won’t work! But don’t worry, you can easily fix this. We’ll explore the main reasons why this happens, plus simple steps to help you get your car started quickly. You’re just a few steps away from solving this problem!
Reasons Why Jump Starter Clamps Struggle to Connect
The first step in fixing the problem is figuring out why the clamps aren’t gripping. Several things can cause this, and it’s essential to check them all. It’s often something simple, like corrosion or a bad connection. Finding the reason will help you fix the issue.
Examining Clamp Corrosion and Buildup
One of the top reasons for a jump starter clamp not gripping is corrosion. Corrosion is the white, green, or blue powdery substance that forms on metal surfaces, usually because of oxidation. It acts as an insulator, stopping the clamps from making a good electrical connection. Think of it like a barrier that prevents the electricity from flowing between the clamp and the battery terminal. This can happen over time from exposure to the elements or battery acid fumes. If you notice a buildup of this, you’ll need to clean it to get the clamps working correctly.
- Visible Corrosion: Check the clamps themselves for signs of corrosion. The clamps often show it first.
- Battery Terminal Corrosion: Look at the battery terminals, too. This is where the cables attach to the battery.
- Cleaning Methods: Learn how to clean corroded clamps and terminals.
- Protective Measures: Think about ways to prevent corrosion.
If you see a powdery, white, or greenish substance on the metal, it’s a sign of corrosion. It’s important to know that corrosion can weaken the metal. Over time, it will make it hard for the clamps to grip the battery terminals.
The terminals can get covered in corrosion as well. This will stop the clamps from making good contact. A clean terminal is essential for a good connection.
You can use a wire brush, sandpaper, or a special battery terminal cleaner. Cleaning removes the corrosion so the clamps can grip securely and conduct electricity.
Applying a terminal protectant spray after cleaning can help stop corrosion from coming back. Consider using felt washers to absorb any battery acid fumes and stop corrosion from happening.
Clamp Jaw Alignment and Spring Strength Issues
Another common reason for issues with your jump starter is clamp jaw issues. The clamp jaws may not align correctly or the spring might not be strong enough. This makes it difficult for them to grip the battery terminals firmly. This is something that is simple to check but very critical to get right. If the jaws don’t open and close properly, they can’t make a good connection. Additionally, a weak spring won’t provide the clamping force needed to hold the clamp securely on the terminal.
- Jaw Misalignment: See if the jaws of the clamps are straight and evenly aligned.
- Spring Weakness: Test how much force the spring has.
- Inspection: Check for any physical damage to the clamps.
- Replacement: When to replace the clamps or the entire jump starter.
If one jaw is bent or out of line, it won’t grip the terminal properly. When the jaws don’t align, it also causes problems with electrical contact. In this scenario, it is very likely you’ll be experiencing that your jump starter clamp not gripping is happening to you.
The spring provides the clamping force. If it’s weak, the clamps won’t grip firmly. You can test it by squeezing the clamps together and seeing how much resistance there is. A weak spring means it’s time to find a replacement.
Look for bends, cracks, or other damage that could affect how they work. Damage could impact the clamp’s ability to grip. Any damage could make it hard for the clamps to maintain contact.
If the clamps are too damaged or the spring is too weak, it’s time to replace them. You might be able to find replacement clamps. Otherwise, you may need a new jump starter.
Battery Terminal Condition and Contact Surfaces
The condition of the battery terminals is important for a good connection. Even with great clamps, if the terminals are damaged or dirty, the jump starter won’t work. The contact surfaces need to be clean and free of corrosion. The terminal’s physical condition is equally important. If the terminals are broken or excessively worn, the clamps won’t get a secure grip. A good electrical connection is impossible without clean and intact terminals.
- Terminal Cleanliness: Ensure the terminals are free from dirt, grime, and corrosion.
- Terminal Damage: Check for any physical damage, such as cracks or broken parts.
- Contact Surface: Confirm a proper contact surface.
- Terminal Tightness: Battery terminal tightness matters.
Clean terminals make sure the clamps can make good contact. That contact is vital for transferring power from the jump starter to the car’s battery. If the terminal is covered in residue, the electrical flow can’t happen.
Damage stops the clamps from getting a secure grip. A damaged terminal makes it hard for the jump starter to work. Any damage needs to be addressed before you attempt to jump-start the vehicle.
The surfaces where the clamps touch the terminals should be clean. Make sure the clamps have a flat, solid surface to grip. This provides the best connection for the electrical current.
Loose terminals can interrupt the flow of electricity. They also can lead to arcing and potential safety hazards. Make sure the battery cables are firmly attached to the terminals.
Step-by-Step Guide to Getting Your Jump Starter Clamps to Grip
Now that you know some causes for jump starter clamp not gripping, it’s time to troubleshoot. Below is a simple process to fix the issue. It focuses on cleaning and ensuring a good connection. These steps will guide you through the process, from checking the clamps to properly connecting them to the battery terminals.
Cleaning the Clamps and Terminals Thoroughly
Cleaning is one of the essential steps. It helps remove corrosion and dirt that prevent the clamps from making a good electrical connection. Use the methods below to clean both the clamps and the terminals for optimal performance. This will often solve the problem and let your jump starter work.
- Gather Your Cleaning Materials: Collect what you’ll need.
- Cleaning the Clamps: Focus on the inside jaws of the clamps.
- Neutralizing Corrosion: Use baking soda to neutralize any acid.
- Terminal Cleaning: Clean the battery terminals.
Get a wire brush, sandpaper (fine grit), or a terminal cleaning tool, along with safety glasses and gloves. You’ll also want some baking soda and water to neutralize any acid. A good cleaning is essential. Proper tools help clean the clamps and terminals.
Use the wire brush or sandpaper to scrub away any corrosion or buildup from the inside surfaces. Make sure to clean the areas that come into direct contact with the terminals. This ensures better electrical contact.
Mix baking soda with water. Use this solution on any areas affected by corrosion. This step prevents the corrosion from spreading or damaging the metal. Let it sit for a few minutes, then rinse it off.
If the terminals are corroded, use the wire brush or terminal cleaning tool to remove the buildup. Clean terminals ensure good contact for the clamps. Make sure to clean the tops and sides.
Proper Clamp Placement and Connection Techniques
The way you attach the clamps is critical for a successful jump start. Doing this correctly can help avoid common issues. You must get the placement and connection techniques right. This will make sure you get a reliable connection every time. Keep in mind: the order of attaching and removing the clamps matters for safety reasons.
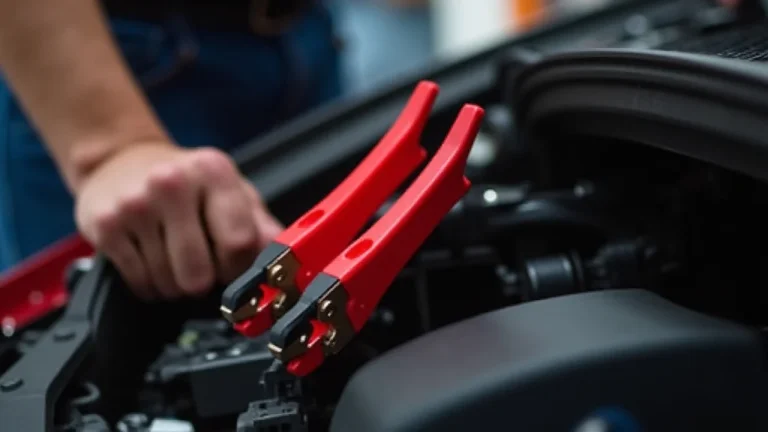
- Red Clamp (Positive): Attach the red clamp to the positive (+) terminal first.
- Black Clamp (Negative): Attach the black clamp to a good ground.
- Secure Connections: Ensure a tight grip.
- Start and Remove: Start the car and remove the clamps carefully.
Make sure the connection is solid and secure. The positive terminal is often marked with a plus sign (+). This step sets up the power connection. A good connection here helps transmit the power from the jump starter.
The ground connection is often a metal part of the car’s frame or engine block. Avoid attaching it directly to the negative (-) terminal of the dead battery. This can create sparks. Make sure the ground is clean.
Wiggle the clamps slightly to confirm they are attached securely. Check for good contact between the clamps and the terminals. It is critical for the clamps to grip the terminals tightly.
Once the car starts, remove the clamps in the reverse order. Remove the black clamp (ground) first, then the red clamp. Avoid letting the clamps touch. This prevents sparks and possible damage.
Troubleshooting If Clamps Still Won’t Grip
Even after cleaning and proper connection, problems can occur. If your jump starter clamp not gripping persists, further troubleshooting steps are necessary. You can also explore different methods to create a good connection. These steps will help you identify and fix the remaining issues.
- Check the Jump Starter: Make sure the jump starter is working.
- Alternative Connection Points: Think about using alternative connection points.
- Clamp Adjustment: Adjust the clamp position to make sure a solid connection.
- Seek Professional Help: Know when to seek expert help.
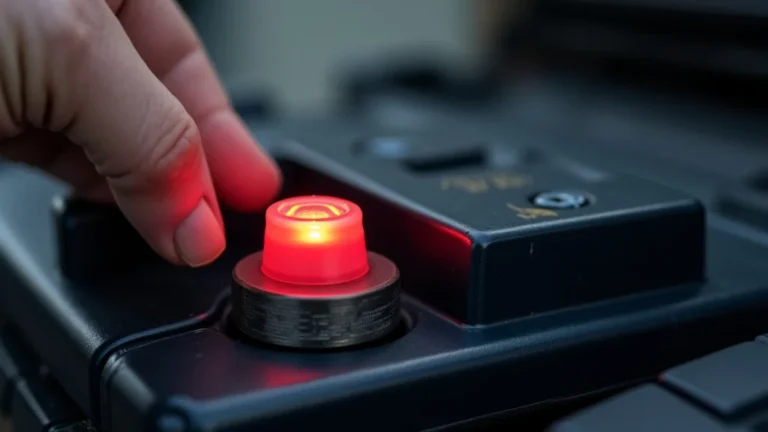
Check the jump starter’s charge. If the jump starter is not charged, it will not work. A charged jump starter is a must. Check the lights on the jump starter to confirm it is working correctly. A working jump starter is required to supply the power to start the vehicle.
If the terminals are too corroded or damaged, find other metal points to connect the ground clamp. The engine block can work. It should be clean. This can improve the connection and solve the problem.
Try moving the clamps slightly on the terminals. Doing this may find a clean spot for a solid connection. The goal is to maximize contact. Doing this may solve the grip issue.
If you have tried all the steps and still have problems, it’s a good idea to seek help from a professional. Sometimes, the problem may be beyond a simple fix. In such situations, professional help is the best option.
Examining Battery Terminal and Clamp Related Issues
The relationship between the battery terminals and clamps is critical. If either one has issues, jump starting can fail. You must address all the issues related to both the terminals and the clamps. This can involve cleaning, replacement, or even repairs. The goal is to create a reliable and safe connection.
Battery Terminal Types and Compatibility
Battery terminals are not all the same. There are different types, and knowing the one your vehicle has can help you. Understanding the terminal types is essential. When you do, you can improve jump-starting efforts. Also, understanding the types can help you find suitable replacement parts. The terminal type impacts how well the clamps grip and transfer power.
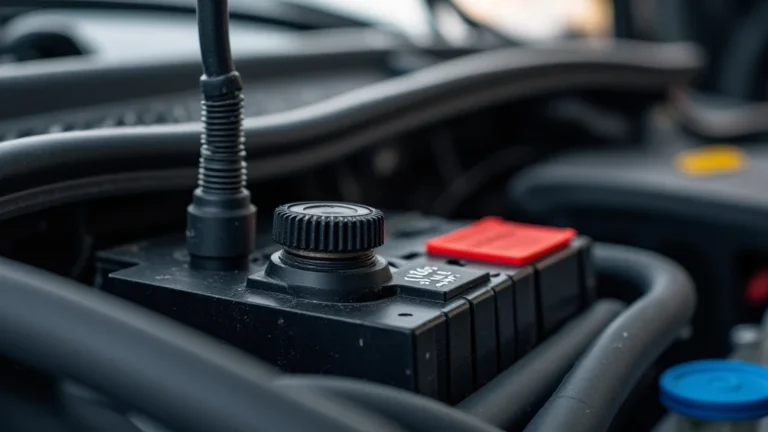
- Top Post Terminals: These are the most common terminals.
- Side Post Terminals: These are less common.
- Terminal Size: Terminal size matters.
- Compatibility: Pick the correct battery for your car.
They have posts on top of the battery where the cables connect. These terminals are easy to reach and connect. They generally provide a good contact surface for the clamps.
Side post terminals have bolts on the sides to connect the cables. They are often found in some vehicles. The clamp design may require a different approach to make good contact.
Car batteries come in different sizes, including different terminal sizes. Ensure the clamps fit the terminals properly. The wrong size can mean a loose connection or the clamps might not grip. Matching the correct size is necessary for safe operation.
Check the owner’s manual or online to identify the correct battery type for your vehicle. Using the right battery helps make sure the terminals are compatible with the clamps. Using the right battery for your car will help guarantee the best and safest function.
Clamp Material and Design Considerations
The material and design of your jump starter clamps play a role in how well they grip. Clamps are often made from different materials, each with its strengths and weaknesses. The design affects how easy they are to use and how reliable they are. The best clamps can provide a firm and safe connection. These characteristics can affect how well they grip the battery terminals. Understanding these factors can help you pick the right clamps for your jump starter.
- Clamp Materials: Consider the materials used in clamp construction.
- Spring Strength: Look at the strength of the spring.
- Jaw Design: Inspect the design of the clamp jaws.
- Handle and Grip: Handle and grip details are important.
Clamps are made from various metals. Copper and brass clamps are superior because they conduct electricity well. Steel clamps may rust. The best material helps ensure good electrical contact and reduces the chances of rust or corrosion.
The spring provides the clamping force that holds the clamps onto the terminals. A strong spring helps ensure a secure connection. A weak spring can lead to connection issues. A strong spring will make a good connection and help the clamps grip firmly.
The jaws should be shaped to grip terminals securely. Jaws with teeth or serrations can improve grip. The right design helps maintain firm contact. Jaws that are designed to grip will make a solid electrical connection.
Clamps with ergonomic handles are easier to use, especially in cold weather. These handles will also give you more control. A good grip will let you safely and efficiently attach the clamps to the battery terminals.
Jump Starter Cable Gauge and Length Impact
The gauge and length of the cables affect the performance of your jump starter. The cable gauge refers to the thickness of the wires. Cable length will affect how far you can reach. The right cables will improve the safety and effectiveness of the jump-starting process. The goal is to provide enough power to start the vehicle. Correctly matching cable gauge and length is an important factor to that goal.
- Cable Gauge: Bigger is typically better.
- Cable Length: The length is an important factor.
- Voltage Drop: Know how voltage drop happens.
- Material Quality: The quality of cable material also matters.
A lower gauge number means the cables are thicker. Thick cables can handle more current and provide a more reliable jump start. Using thicker cables is often essential to delivering adequate power. Thicker cables are generally more efficient.
Longer cables provide flexibility when connecting to vehicles. You might need to reach batteries in different locations. Long cables may have a small voltage drop. The cable length can make a real difference in the effectiveness of the jump start.
Voltage drop is the loss of voltage along the cables. It can happen if the cables are too long or too thin. A lower voltage drop makes sure the car gets enough power. Cable gauge and length affect how much power reaches the car’s battery.
High-quality cables use copper wiring and have good insulation to prevent energy loss and safety issues. Proper insulation will help keep you safe. High-quality cables ensure an efficient transfer of power.
Frequently Asked Questions
Question: Why do my jump starter clamps spark when I connect them?
Answer: Sparks often happen if there is a poor connection or if the positive and negative clamps touch each other. Make sure the clamps have a good grip on the terminals. Also, don’t allow them to touch while connecting.
Question: Can I use my jump starter on any car?
Answer: Most jump starters work on many cars. However, confirm that the voltage of the jump starter matches the car’s battery voltage. Usually, this is 12 volts for standard vehicles. It’s always a good idea to check your car’s owner’s manual.
Question: How can I tell if my jump starter is working?
Answer: The best way is to try it. Before using it, make sure the jump starter is fully charged. Then, connect the clamps to a car battery and see if you can start the engine. You can also look for indicator lights.
Question: Should I jump-start my car if I have a hybrid vehicle?
Answer: For hybrid vehicles, it is best to consult your car’s manual. Some hybrids have specific jump-starting instructions. Never jump start a hybrid vehicle using a standard method.
Question: How long should I let the jump starter charge the dead battery?
Answer: It’s best to connect the jump starter for a few minutes before starting the car. A few minutes might be enough to give the battery a small boost. If the car still doesn’t start, the battery may need to be replaced.
Final Thoughts
Getting your car started with a jump starter when the jump starter clamp not gripping properly can be frustrating. However, by exploring the causes and following our guidance, you can troubleshoot and fix the issue. We started by examining corrosion, clamp alignment, and terminal issues, all of which often prevent a good connection. Next, we explored cleaning, proper connection techniques, and troubleshooting steps. Remember to clean the clamps and terminals thoroughly and make sure the connections are secure. If you’re still having problems, consider other connection points and possibly professional help. Also, think about the battery terminal types, clamp materials, and cable factors for the best results. With a few simple steps, you can have your car running in no time. So, explore and get your vehicle going!