How to Turn On a Portable Jump Starter: A Simple Guide
Getting your car started with a portable jump starter can seem tricky if you’ve never done it before. Many people find themselves puzzled, especially when they’re stuck with a dead battery. But don’t worry! This guide is here to help. We’ll explore how to turn on portable jump starter, breaking down each step in a way that’s easy to grasp. We’ll show you exactly what to do, making the process simple and stress-free. Let’s get started!
What a Portable Jump Starter Does and Why You Need One
A portable jump starter is a lifesaver when your car’s battery gives up. It’s like having a backup power source in your trunk or glove compartment. It provides a boost of electricity to your car’s battery, allowing it to start. This is especially helpful if you’ve left your lights on, or your battery is simply old and failing. Portable jump starters have become increasingly popular because they eliminate the need to flag down another car or wait for roadside assistance. They’re compact, easy to use, and offer peace of mind when you’re on the road. Knowing how to use one is a valuable skill for any driver.
The Key Components of a Jump Starter
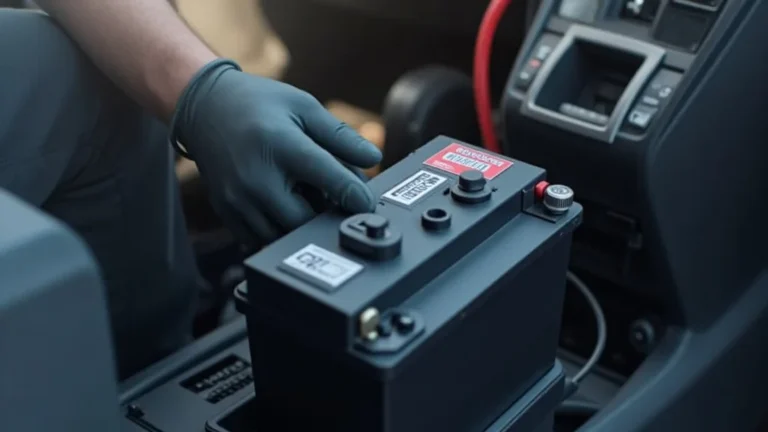
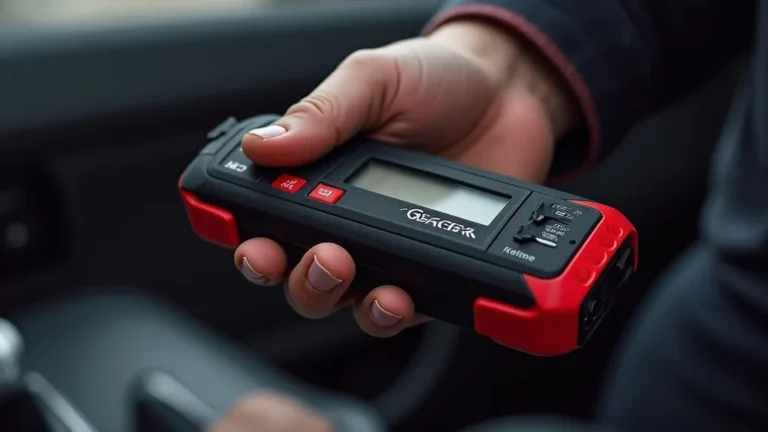
Before exploring how to use the device, it’s beneficial to recognize its parts. The typical portable jump starter includes a battery pack, cables (often with different colored clamps), and safety features like overcharge and reverse polarity protection. The battery pack is what stores the energy. The cables connect the jump starter to your car’s battery. The clamps attach to the battery terminals. It’s good to familiarize yourself with these components before you need to use the device. This makes the process faster and safer when you’re faced with a dead battery. Knowing what each part does will make it much easier to use.
- Battery Pack: This is the main power source, usually a lithium-ion battery. The size of the battery pack determines how many times you can use the jump starter before needing to recharge it. Battery packs range from small, compact units to larger, more powerful ones.
- Jumper Cables with Clamps: These are the wires that connect the jump starter to your car’s battery. The clamps are color-coded (red for positive and black for negative) to make it easy to connect them correctly. Jumper cables come in various gauges; a thicker gauge is preferable for larger engines.
- Safety Features: Most modern jump starters include several safety features. Reverse polarity protection is essential; it prevents the jump starter from sending power if the clamps are connected to the wrong terminals. Overcharge protection prevents the battery from being damaged by too much current.
Lithium-ion batteries are popular in jump starters because they’re lightweight, have high energy density, and can deliver a large burst of power quickly. They also hold a charge well, so they’re ready to use when you need them. Remember to recharge your jump starter regularly, even if you haven’t used it. This helps ensure it’s ready for any situation.
The jumper cables transmit the power from the jump starter to your car’s battery. Properly connecting the clamps is important to avoid sparks or damage. Make sure the clamps have a secure connection to the battery terminals. Inspect the cables regularly for damage, such as frayed wires or broken insulation. Replace damaged cables immediately. Some jump starters also include built-in safety features to prevent sparks during connection.
These safety features protect both the jump starter and your car’s electrical system from damage. Some units have short-circuit protection, preventing the flow of electricity if a short circuit is detected. These safety features are designed to make jump-starting as safe as possible. Always consult the jump starter’s user manual for a complete list of safety features and instructions.
Before You Begin: Safety Checks
Safety should always be your main concern. Before using your portable jump starter, there are a few important checks you need to make. These checks help ensure your safety and the safety of your car’s electrical system. Working with electricity always involves some risks, but taking these precautions can minimize potential problems. A little preparation goes a long way. This includes verifying the jump starter’s charge level, inspecting the cables, and ensuring your car is in a safe location. Doing these things can prevent accidents and ensure your jump-starting experience is successful.
- Check the Jump Starter’s Charge: Before you connect the jump starter, verify that it has enough charge to start your car. Most units have indicator lights that show the battery level. If the battery is low, recharge the jump starter before using it.
- Inspect the Cables and Clamps: Examine the cables and clamps for any damage, like frayed wires or broken insulation. If you find any damage, do not use the jump starter. These problems could lead to a short circuit or electrical shock.
- Position Your Car Safely: Make sure your car is parked in a safe place. Keep the car away from traffic, and on a level surface. Set the parking brake and put the car in park. If you’re working near a public road, use hazard lights to make your vehicle more visible.
A jump starter with a low charge may not provide enough power to start your car. If the charge is too low, the jump starter might shut down during use. Ensure the battery is fully charged to get the best performance. Regular charging is a must, even if you haven’t used the jump starter. This helps maintain its peak performance and extends its lifespan.
Damaged cables can be hazardous and may not deliver power effectively. Regularly check the condition of the cables before use. Replacing damaged cables is essential for safety. Replace the entire jump starter if the cable damage is severe. Also, look at the clamps; ensure they are clean and free of corrosion. Good connections are essential for successful jump-starting.
Safety around your car is essential for your safety and the safety of others. Choose a location where you can safely and easily access the car’s battery. Make sure there is enough space around the car to work. Avoid jump-starting your car in a garage or enclosed area with poor ventilation because of the risk of carbon monoxide poisoning. Prioritize a well-lit area, especially when jump-starting at night.
Step-by-Step Guide to Turning On Your Jump Starter
Turning on your jump starter is easy if you follow the correct steps. The basic process involves connecting the jump starter to your car’s battery, turning on the jump starter, starting your car, and then disconnecting the jump starter. Each step is essential for safe and effective use. This section will guide you through each step. Take your time, pay attention, and you’ll be on your way in no time. If you follow these instructions precisely, you can usually get your car running quickly.
Connecting the Jump Starter
The first step is connecting the jump starter to your car’s battery. This means attaching the jumper cable clamps to the battery terminals. It’s really critical to get the connections right, as connecting the clamps incorrectly can cause damage to the electronics of your car. Most jump starters and car batteries have red (positive, +) and black (negative, -) terminals. This part of the process requires care and patience. Taking your time here can avoid electrical problems. These directions are essential for a successful start.
- Locate Your Car’s Battery: Find your car’s battery. The location varies by car model, but it is typically under the hood or, in some cases, in the trunk. Refer to your car’s owner manual if you cannot find the battery.
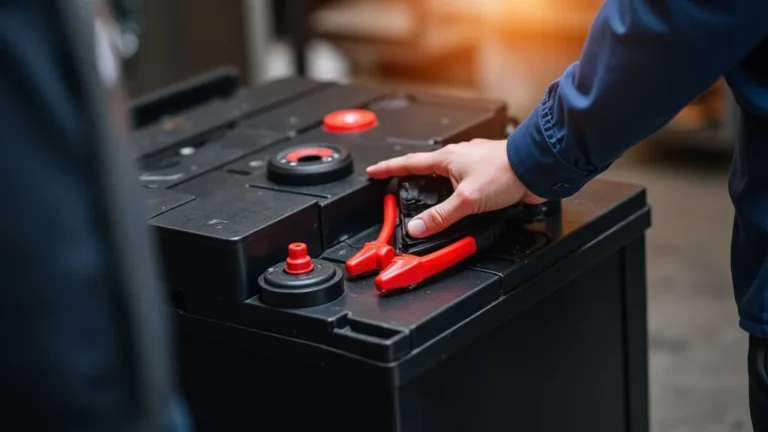
- Connect the Red Clamp to the Positive Terminal: Connect the red (positive, +) clamp from the jump starter to the positive terminal of your car’s battery. The positive terminal is usually marked with a “+” symbol and may have a red cover. Make sure the clamp is making solid contact.
- Connect the Black Clamp to a Ground: Connect the black (negative, -) clamp from the jump starter to a bare, unpainted metal surface on your car’s frame or engine. Avoid connecting the black clamp directly to the negative terminal of the car battery. This reduces the risk of sparks near the battery, which could ignite any gases emitted.
- Check the Connections: Before moving to the next step, double-check all connections. Make sure the clamps are securely attached and that they are not touching each other or any other metal parts of the car. Verify that you have connected the red clamp to the positive terminal and the black clamp to a ground point on the car’s chassis.
Most car batteries are easily accessible, but some may be covered by a protective shield. Sometimes, you need to remove the shield to access the terminals. In some cars, you may need to access the battery through a panel. Knowing where your battery is will save you time and frustration when you need it.
The positive terminal is where the power from the jump starter will enter your car’s electrical system. A good connection here is essential for getting your car to start. You can usually identify the positive terminal by its red color. If you’re unsure which terminal is positive, refer to your car’s owner manual or seek help from a professional.
Connecting the black clamp to a metal surface on the car’s frame provides a safe grounding point. It completes the electrical circuit and allows the power from the jump starter to flow to the car’s electrical system. This connection point should be away from the battery terminals. Always confirm that the grounding surface is metal and that there is no paint or corrosion that would prevent good electrical contact.
A secure connection ensures that electricity flows from the jump starter to your car’s battery effectively. Loose connections can lead to sparks or a failed jump-start attempt. If you notice any issues with the connections, disconnect the clamps and reattach them. Take your time to make sure everything is right before proceeding.
Activating the Jump Starter
Once you’ve connected the jump starter to your car, you’re ready to switch it on. This is usually a simple process, often involving pressing a button or flipping a switch. The activation process starts the flow of power from the jump starter to your car’s battery. The precise steps can differ slightly depending on the specific model. But, they are usually straightforward. Here are the steps to follow after you have connected the jumper cables correctly.
- Turn on the Jump Starter: Locate the power button or switch on your jump starter and turn it on. Many jump starters have an “on” indicator light to confirm they are activated. This step starts the power transfer to your car’s battery.
- Wait Briefly: After turning on the jump starter, wait for a few minutes before trying to start your car. This allows the jump starter to charge your car’s battery enough to give it a boost. The waiting period lets the electrical system stabilize.
- Check the Indicator Lights: Some jump starters have lights that show the status of the jump-start process. Look for these lights to see if the jump starter is functioning correctly. If you see any error lights, consult the manual or turn off the jump starter.
The power button or switch activates the jump starter and makes it ready to supply power to your car. Most jump starters will display a visual cue, such as an LED light, to show that the device is on. Some units require you to hold the power button for a few seconds. If you’re unsure, consult the user manual for your specific jump starter.
The waiting period varies depending on the condition of your car’s battery and the power output of the jump starter. During this time, the jump starter is supplying a small current to your car’s battery. It helps charge the battery enough to provide the necessary power to start the engine. A few minutes is usually enough. You can consult the manual if it gives specific timing suggestions.
The indicator lights provide valuable information about the jump starter’s status. They might show whether the device is charging, if it has a low battery, or if there’s a problem with the connection. Paying attention to these indicators will help you understand the jump-starting process and identify any problems. The user manual contains specifics about these indicators.
Starting Your Car
After you have activated the jump starter, you’re ready to try starting your car. This process involves the regular steps you use to start your car, like turning the key or pushing the start button. It’s important to remember that the jump starter gives a boost, but it doesn’t solve any underlying problems with your car’s battery or electrical system. If your car still doesn’t start, there might be other issues. Carefully follow these actions to start your car. Starting the car is generally straightforward, but there are a few things to keep in mind.
- Attempt to Start the Car: Get into your car and try to start the engine as you normally would. Turn the key or push the start button. If your car starts, the jump starter has done its job. If the engine cranks but does not start, try again after a few minutes.
- Don’t Crank for Too Long: If the car does not start immediately, do not crank the engine for more than 5-10 seconds at a time. Let the starter cool down for a few minutes between attempts. Continuous cranking can damage your car’s starter motor.
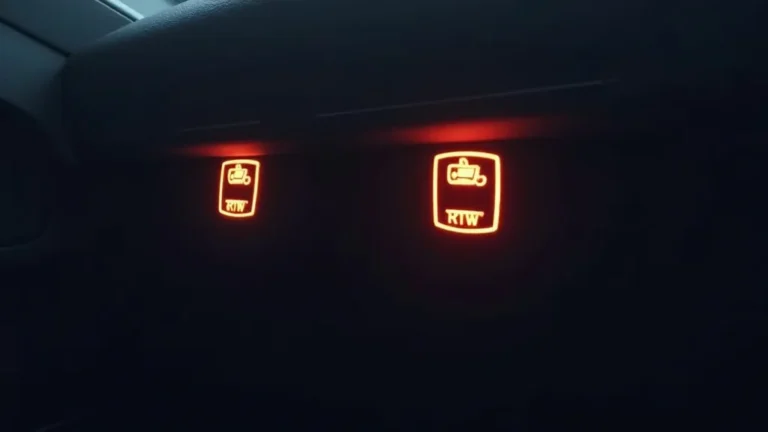
- Check the Dashboard Lights: While starting, observe the dashboard lights. If warning lights appear, such as the check engine light or the battery light, they could indicate an electrical issue. These lights can sometimes give hints about other problems with your car.
If the engine turns over, it is a sign that the jump starter is providing enough power to the car’s starter motor. If the car does not start immediately, do not crank the engine for extended periods. This can damage the starter motor. Try again after waiting a few minutes. If it still won’t start, the problem may be more than just a dead battery.
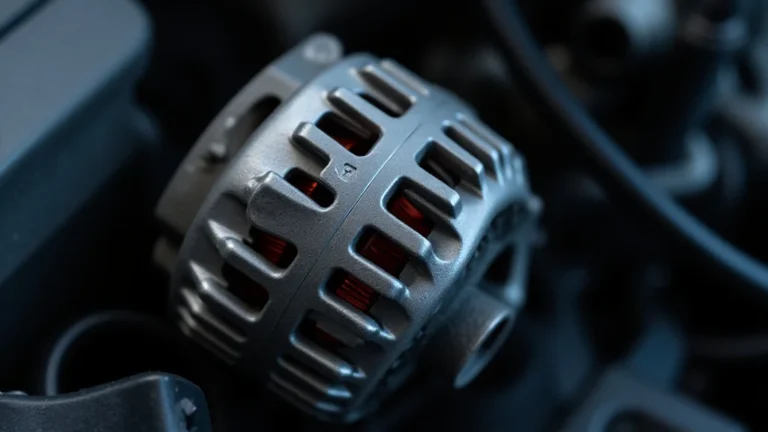
Cranking for too long can overheat the starter motor. This may cause damage. If the car does not start after a few attempts, it suggests a more complex issue. It might be time to call for professional assistance. If the car starts after several attempts, let it run for at least 15-20 minutes to allow the alternator to recharge the battery.
Warning lights can show if there are electrical problems. For instance, the check engine light might show that there’s a problem with the engine. The battery light could indicate a problem with the car’s charging system. If these lights appear after jump-starting, consider having your car checked by a mechanic. Addressing these concerns can prevent more significant problems down the road.
Disconnecting the Jump Starter
Once your car is running, it’s time to disconnect the jump starter. This must be done in the proper order to avoid potential damage or electrical issues. Disconnecting is just as important as the connection process. Carefully disconnecting the jump starter ensures the safety of you, the car, and the jump starter. Remember these steps to avoid potential problems. Once your car is running, it is easy to disconnect the jump starter.
- Remove the Clamps: First, remove the black clamp (the one attached to the car’s frame or engine) from the car. Then, remove the red clamp (the one attached to the positive terminal of the car’s battery). Doing it in this order reduces the risk of sparks.
- Turn Off the Jump Starter: Turn off the jump starter. Most units have an “off” switch or button. Make sure the jump starter is turned off to prevent any unnecessary power drain.
- Store the Jump Starter: After you’ve turned off the jump starter and disconnected it from your car, store it in a safe place. This should be a cool, dry place. Avoid leaving it in direct sunlight or extreme temperatures.
Taking off the clamps in the correct order is a safety measure. Removing the black clamp first prevents any accidental sparks from occurring. Be careful not to let the clamps touch each other or any metal parts of the car while disconnecting them. This is an important part of the process.
Switching off the jump starter ensures that it stops supplying power to your car and prevents the jump starter from discharging unnecessarily. This will also help to preserve the jump starter’s battery life. The jump starter is now ready for storage or its next use.
Proper storage is essential to maintain the jump starter’s functionality. It helps protect the device and makes sure it’s ready when you need it. By keeping the jump starter in a safe place, you can extend its lifespan. Check the device regularly and charge it as needed to keep it ready to go.
Additional Tips and Considerations
Here are some additional tips that will increase your confidence. These pointers will help you use your jump starter more effectively and safely. Consider these suggestions as you handle your jump starter. Additional preparation and awareness can make the process easier and less stressful. Applying these tips will increase the value of your jump starter.
- Check the Manual: Always refer to the user manual that came with your jump starter. The manual contains specific instructions and safety information tailored to your device. It may include unique instructions or advice for your specific model.
- Protect the Jump Starter: Keep your jump starter in a protected spot, such as your glove compartment or trunk. This will help protect it from damage and extreme temperatures. Extreme heat or cold can affect the jump starter’s performance.
- Know Your Car’s Battery Type: If you have a car with a special battery, like an AGM battery, make sure your jump starter is compatible. Using the wrong jump starter can damage your car’s battery or electrical system.
- When to Seek Professional Help: If your car does not start after multiple jump attempts, or if you notice any unusual electrical issues, consult a professional mechanic. Jump-starting is a quick fix, but it does not fix the underlying problems.
The user manual offers detailed information about your jump starter. It shows you the best practices for using, charging, and storing your device. If you’ve lost the manual, you can often find a copy online. If you are having problems, consulting the manual will often give you the answer.
This will help protect your investment and make sure it is ready when needed. Extreme conditions can impact performance and life. A case can protect it from shocks and damage. Always make sure the jump starter is protected from the elements.
Certain car batteries need special charging processes. Not all jump starters support all battery types. If your car has a special battery type, make sure your jump starter supports it. Always consult your car’s manual or a professional to ensure you’re using the right equipment.
If your car still won’t start, the issue might be more complicated than just a dead battery. There could be a problem with the alternator, starter motor, or other electrical components. Attempting to force the issue could lead to more damage. A mechanic can properly diagnose the problem.
Alternative Jump Starting Methods
Aside from using a portable jump starter, there are other methods you can use to start your car if your battery dies. The choice of method often depends on your resources and the availability of equipment. Understanding these alternatives gives you more options in an emergency. In this segment, we will explore some alternative ways to start your car. These methods can be helpful in different scenarios.
- Jump-Starting with Another Car: This is a very common method. You use jumper cables to connect your car’s battery to a working car’s battery. This is an accessible method if another car is available.
- Using a Battery Charger: A battery charger is a device that slowly recharges your car’s battery over time. This method is helpful if you have access to an electrical outlet. It’s a good option if you have time to wait for the battery to fully charge.
- Calling Roadside Assistance: If you don’t feel comfortable jump-starting your car or do not have the necessary equipment, you can call for roadside assistance. This is the safest way if you are unsure of the other methods. Roadside assistance services often provide jump-starting services as a standard offering.
Jump-starting with another car involves connecting the two cars’ batteries with jumper cables. It is essential to correctly connect the cables: red to positive (+) terminals and black to negative (-) terminals. Always follow the proper safety procedures to prevent electrical damage or injury. The other car’s engine should run while you try to start your car.
A battery charger is best used for a full recharge. Battery chargers provide a continuous flow of electricity to your car’s battery. You need to connect the charger to your car’s battery terminals or the car’s charging port. Chargers can take several hours to recharge a completely drained battery. Battery chargers often provide different charging modes for different battery types.
Calling roadside assistance is a dependable choice. Professional technicians arrive at your location to help you. They can jump-start your car and diagnose any other potential problems. Roadside assistance can give peace of mind if you aren’t familiar with car maintenance. It is often a quick and stress-free solution, especially if you have a roadside assistance plan.
| Jump Starting Method | Pros | Cons |
|---|---|---|
| Portable Jump Starter | Convenient and portable; No need for another car; Easy to use. | Requires the jump starter to be charged; Might not work if the battery is severely damaged. |
| Jump-Starting with Another Car | Widely accessible; Doesn’t need any specific device (only jumper cables). | Requires another car; Needs a helping driver; Risk of incorrect cable connections. |
| Using a Battery Charger | Completely recharges the battery; Safer than jump-starting. | Takes a long time; Needs an electrical outlet. |
| Calling Roadside Assistance | Professional service; Includes additional diagnostic service; No personal risk. | May take some time for the service to arrive; Requires a membership. |
Frequently Asked Questions
Question: What do I do if my car won’t start after using the jump starter?
Answer: If your car still doesn’t start, there might be a problem with the car itself, such as a faulty starter motor or a deeper electrical issue. It’s best to have your car checked by a mechanic. There could be other problems than the battery.
Question: Can I jump-start a car with a portable jump starter if the battery is completely dead?
Answer: Yes, you can usually jump-start a car with a portable jump starter even if the battery is completely dead, assuming the jump starter is fully charged. However, a severely damaged battery may need replacement.
Question: How often should I recharge my portable jump starter?
Answer: You should recharge your portable jump starter after each use and at least every three months, even if you haven’t used it. This helps ensure it’s always ready to use.
Question: Are portable jump starters safe to use?
Answer: Yes, portable jump starters are designed with safety features like reverse polarity protection and overcharge protection to make them safe to use. Always follow the manufacturer’s instructions and safety precautions.
Question: What do I do if I see sparks when connecting the jump starter?
Answer: If you see sparks when connecting the jump starter, immediately disconnect the clamps. Then, double-check your connections to make sure the clamps are connected to the correct terminals (red to positive, black to ground). Ensure no clamps are touching each other or any metal parts. If the problem continues, there may be a problem with the car’s electrical system; call a mechanic.
Final Thoughts
Now you have a clear plan for how to turn on a portable jump starter. You’ve reviewed the essential steps to prepare and use it. You’ve also reviewed alternatives, and taken the right measures to be safe. Remember that being ready for a dead battery can save you time and anxiety when you are on the road. Familiarizing yourself with the process and taking the right precautions can make sure you’re ready to face this situation. By remembering these steps, you can confidently turn on your portable jump starter and get your car running quickly. So, the next time your battery fails, you will be prepared to take action with confidence.