Testing Car Alternator With Multimeter: A Step-by-Step Guide
Figuring out how to test car alternator with multimeter can seem tricky, especially if you’re new to car repairs. The alternator keeps your car’s electrical system running, so when it fails, your car can’t start or run properly. Don’t worry, though; it’s a process anyone can explore with the right tools and a little guidance. This guide will provide a clear, step-by-step approach to testing your alternator, helping you easily diagnose any issues. Let’s get started!
What Does an Alternator Do in Your Car?
Your car’s alternator is a vital part of its electrical system. It’s responsible for two main jobs: charging the car’s battery and powering all the electrical components while the engine is running. Think of it like a generator, converting mechanical energy from the engine into electrical energy. This power keeps everything from your headlights and radio to your air conditioning and power windows working smoothly. If the alternator isn’t working right, these components may start to fail, or your car might not even start.
The alternator’s core function revolves around its ability to produce alternating current (AC). Inside the alternator, a spinning rotor generates a magnetic field. This field then interacts with stationary copper coils, called stators, to create electricity. This AC electricity is then converted into direct current (DC) by diodes, making it usable for the car’s electrical systems and to charge the battery. A voltage regulator within the alternator controls the voltage output, ensuring it’s at the correct level to charge the battery without overcharging it.
How the Alternator Works in Detail
Let’s explore the inner workings of an alternator. It is more than just a simple box. It is a carefully engineered device, and the failure of even a single component can impact its operation. To help you to diagnose your car, here is how it works:
- Rotor: The rotor is the rotating part of the alternator. It contains electromagnets, which create a magnetic field as they spin. The spinning is driven by a belt connected to the engine’s crankshaft.
- Stator: The stator is a stationary coil of wires surrounding the rotor. When the rotor’s magnetic field spins inside the stator, it induces an electrical current in the stator wires.
- Diodes: Diodes are electrical components that convert the AC current generated by the stator into DC current, which is what your car’s electrical systems use.
- Voltage Regulator: The voltage regulator is a component that controls the alternator’s voltage output. It ensures the alternator provides the correct voltage to charge the battery and power the electrical systems without overcharging or undercharging.
The rotor is essential because it is the component that generates the magnetic field required for electricity generation. The faster the rotor spins, the stronger the magnetic field, and the more electricity the alternator produces. This speed can be influenced by engine speed, which is why your car’s electrical output may vary slightly at idle versus higher speeds.
The stator acts like the receiver in the electricity production process. The movement of the magnetic field causes electrons in the stator wires to move, creating electrical current. The stator is typically made of copper, a material that is excellent at conducting electricity. The design of the stator is critical for maximizing efficiency.
The diodes serve a crucial role in the operation of the car’s electrical system. Without these components, the electricity generated by the alternator would be alternating current (AC), which is not suitable for most of the car’s components. By converting AC to DC, the diodes allow the alternator to power the car’s electrical systems and charge the battery. These diodes are usually arranged in a bridge rectifier configuration to make the conversion efficient.
The voltage regulator is critical for protecting the car’s electrical system. It prevents overcharging, which can damage the battery and other components, and undercharging, which can lead to a dead battery. The voltage regulator works by monitoring the voltage output of the alternator and adjusting the field current (the current that creates the magnetic field in the rotor) to maintain a stable voltage. This ensures a consistent supply of power to all of the car’s electrical systems.
Common Problems with Alternators
Alternators can fail due to various issues, making it important to identify the problem accurately. There are a few key areas where issues frequently occur.
- Worn-out Brushes: The alternator brushes, which transfer current to the rotor, are often the first to wear out.
- Failed Diodes: Diodes can fail, preventing the conversion of AC to DC, leading to problems.
- Faulty Voltage Regulator: A faulty voltage regulator can cause overcharging or undercharging, which can also cause major issues.
- Bearing Failure: The bearings inside the alternator can wear out, causing noise and mechanical issues.
The brushes’ friction against the slip rings within the alternator will wear them down over time. As they wear, they lose contact with the slip rings, resulting in decreased or no charging. Replacing brushes is a relatively simple and inexpensive fix for these kinds of problems.
Diodes will sometimes fail from excessive heat, voltage spikes, or just from wear and tear. A failed diode can cause the alternator to produce low voltage or to discharge the battery even when the engine is off. Replacing diodes is typically more complex than brush replacement and often requires removal and repair.
The voltage regulator keeps the alternator’s output within the proper voltage range. If it fails, the alternator may provide too much or too little voltage, damaging the battery and other electrical components. A damaged regulator can sometimes be replaced on its own, but it is often part of a larger alternator repair.
The bearings keep the rotor spinning smoothly. If they wear out, the alternator can make a grinding or whining noise, and the rotor may not spin correctly. Bearing failure often requires replacing the entire alternator.
Getting Ready to Test the Alternator
Before you begin the test, it’s essential to prepare the car and gather the needed tools. Proper preparation ensures accurate results and avoids any damage. Make sure you’re working safely and have everything you need before you start.
First, make sure the car is parked on a level surface and the parking brake is engaged. This will prevent any movement during the test and enhance your safety. Open the hood to get easy access to the battery and the alternator. Also, remember to wear safety glasses to protect your eyes. Work in a well-ventilated area to avoid inhaling any potential fumes from the battery.
Gathering Your Tools
You’ll need a few essential items to perform the test. You probably already have a lot of this at home.
- Multimeter: A multimeter is the key tool. Ensure you have one that can measure DC voltage, which is what you’ll need for testing.
- Gloves: Wear gloves to protect your hands.
- Safety Glasses: Protect your eyes from any debris or splashes.
- Jumper Cables (Optional): Keep jumper cables nearby in case the battery is dead.
A multimeter measures multiple electrical properties, but in this case, we’ll only focus on voltage. Digital multimeters are the easiest to read, and they will help you measure the voltage of the battery before and after you start the car. A working multimeter is essential.
Working around car batteries can be messy and potentially hazardous. Gloves provide a barrier against any potential spills or leaks.
Safety glasses are a necessity when working on a car, especially around the battery and the alternator. They offer crucial protection against potential splashes or accidental contact with hazardous materials.
It’s always smart to have jumper cables on hand when you are doing electrical work on your car. If the battery is dead, you’ll need the cables to jump-start the car for testing.
Checking Battery Condition Before Testing
Before testing the alternator, start by checking the battery. The alternator can only charge a good battery. If the battery is bad, testing the alternator won’t be accurate.
Start by inspecting the battery for any visible damage, such as cracks or leaks. Ensure the terminals are clean and free of corrosion. Corrosion can interfere with the electrical connections. If you find any corrosion, clean it off with a mixture of baking soda and water.
You can also perform a voltage test on the battery. With the car off, use your multimeter to check the battery voltage. A fully charged 12-volt battery should read around 12.6 volts. If the voltage is significantly lower (below 12 volts), you’ll need to charge the battery before testing the alternator, or the test results may be misleading.
Step-by-Step Guide on How to Test Car Alternator With Multimeter
This section provides a clear, detailed guide on how to test car alternator with multimeter, making the process easy to explore. You’ll learn how to measure the voltage output and evaluate your alternator’s performance. The process is broken down into simple steps.
The most important steps for testing your car alternator are straightforward, and all you need is a multimeter and a little time. This is a common test, so don’t be worried! Let’s get started:
Step 1: Setting up the Multimeter
Begin by preparing your multimeter. This is the first step to test your alternator.
- Turn on the Multimeter: Power on your multimeter. Most have an on/off switch.
- Set the Multimeter to DC Voltage: Rotate the dial to the DC voltage setting. This is usually indicated by a “V” with a straight line or “DCV” symbol.
- Select the Voltage Range: Choose a range slightly higher than the expected voltage. For car batteries, set the range to 20 volts.
Turning on the multimeter is the first step. Make sure the battery is good and that the display comes on clearly. Make sure the display is working correctly before you begin.
The DC voltage setting is crucial, as car batteries and alternators use direct current. Look for the “V” symbol with a straight line or “DCV” symbol. This will allow the multimeter to measure the voltage correctly.
Setting the right voltage range helps ensure an accurate reading. Setting it too low can damage the meter. The 20-volt setting will be the right choice.
Step 2: Testing Battery Voltage (Car Off)
With the multimeter set up, you can now start testing the battery.
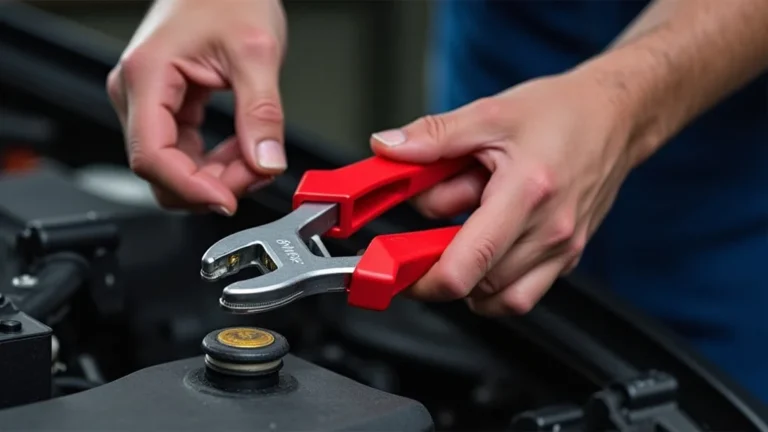
- Locate the Battery Terminals: Find the positive (+) and negative (-) terminals on your car battery.
- Connect the Multimeter Probes: Connect the red probe to the positive terminal and the black probe to the negative terminal. Make sure you have a good connection.
- Read the Voltage: Note the reading on the multimeter. This is the battery’s voltage when the car is off.
Locating the battery terminals is an important step. The positive terminal is usually marked with a “+” symbol and may have a red cover, while the negative terminal is marked with a “-” symbol and is typically black.
Make sure the probes are firmly touching the terminals. This ensures you get an accurate reading of the battery’s voltage. If the probes aren’t making good contact, the reading may fluctuate or be inaccurate.
The voltage reading should be around 12.6 volts for a fully charged battery. If the reading is significantly lower (below 12 volts), the battery may need charging before continuing the test.
Step 3: Testing Battery Voltage (Car On)
The next step is to start the car and check the alternator’s output. This is a good way to test the car alternator with multimeter.
- Start the Car: Start the car and let it run. Ensure the engine is idling.
- Measure Voltage: Place the probes on the battery terminals again, just like before.
- Read the Voltage: Check the multimeter reading. The voltage should be higher now, typically between 13.5 and 14.5 volts.
Make sure the car starts and runs without any issues. The engine should run smoothly. Let the car idle while you test the voltage to get an accurate reading.
Connect the probes to the battery terminals, red to positive and black to negative. Ensure you maintain good contact, just like you did when the car was off.
A healthy alternator should raise the voltage as it charges the battery. The voltage should typically increase to between 13.5 and 14.5 volts. If the voltage is within this range, the alternator is likely working correctly.
Step 4: Load Testing the Alternator
Load testing helps to determine the alternator’s performance under stress. You can explore how well the alternator can maintain voltage while powering electrical loads.
- Turn on Electrical Loads: Turn on high-load electrical components, such as the headlights, air conditioning, and radio.
- Check Voltage While Loaded: Observe the voltage reading on the multimeter.
- Evaluate Results: If the voltage drops significantly (below 13 volts), the alternator may be failing.
Turning on electrical loads simulates the demands the alternator faces during normal driving. This tests its ability to maintain voltage under heavy use. Make sure all the components are running.
Monitor the multimeter while all the electrical components are running. The voltage should remain relatively stable, though it may drop slightly. If it drops significantly, the alternator may not be able to handle the load.
A significant voltage drop indicates that the alternator is struggling to meet the electrical demands. This can indicate a problem with the alternator that may lead to further issues.
Analyzing the Results and What They Mean
After performing your tests, you’ll need to interpret the results to see if your alternator is working correctly. This information will help you to explore if your alternator needs any repairs or replacement.
Interpreting the multimeter readings is essential for diagnosing alternator problems. Here’s a quick guide to what the readings mean and what actions you should take.
Understanding the Voltage Readings
Understanding the voltage readings you get from your tests is key to diagnose a car alternator.
- Battery Voltage (Car Off): About 12.6 volts. This indicates the battery is fully charged.
- Battery Voltage (Car On): 13.5 to 14.5 volts. This suggests the alternator is charging the battery.
- Voltage Drop Under Load: A slight drop is normal, but a significant drop (below 13 volts) indicates a potential problem.
A battery that reads around 12.6 volts when the car is off is generally in good condition. If the reading is lower, the battery might need charging.
When the engine is running, the alternator should increase the voltage to between 13.5 and 14.5 volts. This demonstrates that the alternator is providing power to the car’s electrical systems and charging the battery.
When you turn on electrical components, the voltage may decrease slightly. However, if the voltage drops substantially, it could mean the alternator is struggling to handle the electrical load.
Diagnosing Common Problems
After reviewing the voltage readings, you will be able to diagnose common alternator issues.
- Low Voltage (Car On): If the voltage reading is below 13.5 volts with the engine running, the alternator may not be charging correctly.
- High Voltage (Car On): Readings above 14.5 volts could indicate overcharging.
- No Change in Voltage: If the voltage remains the same with the engine running, the alternator is likely not charging at all.
- Battery Draining: If the battery drains even after charging, the alternator might have a problem.
Low voltage output suggests that the alternator is not producing enough power. The voltage regulator may be faulty, or the alternator may have internal issues.
Excessively high voltage can damage the battery and other electrical components. A faulty voltage regulator can cause this issue.
If the voltage doesn’t increase when the engine is running, the alternator is likely failing or not working. The alternator may have a dead diode, a bad rotor, or worn-out brushes.
If your car battery continually dies, even after charging, the alternator may not be charging it properly. This can also indicate issues such as a parasitic drain elsewhere in the electrical system.
According to data from the National Highway Traffic Safety Administration (NHTSA), alternator failures are a relatively common cause of vehicle breakdowns. Their data suggests that approximately 10% of all vehicle failures relate to alternator or battery problems, highlighting the importance of regular checks.
Advanced Troubleshooting and Considerations
While the basic tests provide a good assessment, some situations may require more advanced troubleshooting. You may need more advanced tools. Here are some of those considerations:
If the initial testing doesn’t give you a clear answer, further checks might be needed. This can help you to explore a more complete diagnosis of any issues.
Checking the Alternator Belt
The alternator belt transfers power from the engine to the alternator. If the belt is loose, worn, or broken, the alternator won’t be able to generate electricity. Visually inspect the belt for cracks, wear, or fraying. Check the tension to ensure it’s tight enough. You can do this by pushing down on the belt between the pulleys.
A loose or worn belt can cause problems even if the alternator is working. Make sure your alternator belt is in good shape. Otherwise, your alternator will not work correctly.
Inspecting Wiring and Connections
Check the wiring and connections for any signs of damage or corrosion. Loose or corroded connections can prevent the alternator from charging the battery effectively. Inspect the terminals on the alternator and the battery for corrosion. Clean any corrosion off with a wire brush or a specialized cleaner.
Wiring problems and corroded terminals can prevent the alternator from working, even if it is producing electricity. Make sure all the wires and connections are in good shape. Otherwise, you might think you have an alternator problem when the issue is actually in the wiring.
Using a Clamp Meter
A clamp meter can measure the current output of the alternator. This can provide a more precise measure of its performance under different loads. Place the clamp meter around the positive cable coming from the alternator.
Using a clamp meter can confirm the output of the alternator under load. Clamp meters give a more detailed picture of how your alternator performs. They help in a complete diagnosis and exploration of potential problems.
Professional Inspection vs. DIY
For more complex issues, it’s a good idea to seek help from a professional mechanic. Mechanics have specialized tools and expertise to explore and fix these issues.
If you’re not comfortable with electrical work or are unsure about any of the tests, it’s best to have a qualified mechanic assess the issue. They can perform more in-depth tests and confirm the problem. This can protect you from further car damage.
Frequently Asked Questions
Question: What is the typical lifespan of a car alternator?
Answer: The lifespan of a car alternator varies but is typically between 80,000 to 150,000 miles, or about 7 to 10 years.
Question: Can I drive my car if the alternator is failing?
Answer: You can drive a car with a failing alternator for a short time, but the battery will drain quickly. It’s best to repair or replace the alternator as soon as possible.
Question: What are the signs of a failing alternator?
Answer: Common signs include dimming headlights, a flickering dashboard, a dead battery, and trouble starting the car.
Question: Is it safe to work on the car’s electrical system?
Answer: Working on the car’s electrical system can be safe if you take precautions. Always disconnect the negative battery terminal and wear safety glasses.
Question: Can a bad battery damage the alternator?
Answer: Yes, a bad battery can overwork the alternator, causing it to fail. The alternator has to work harder to charge a bad battery, which can lead to premature failure.
Final Thoughts
Now you’ve explored how to test car alternator with multimeter, and you have the knowledge to check the functionality of your car’s alternator. Remember, testing is important because it can help you maintain your car. By following the steps outlined, you can easily diagnose issues with your alternator. Armed with a multimeter and this guide, you can quickly assess the alternator’s performance and identify potential problems. If the tests suggest a problem, consider further exploration, such as checking the belt and connections or consulting a mechanic. With this knowledge, you are equipped to explore the health of your car’s electrical system. So, the next time your car shows electrical issues, you’ll know exactly where to begin.