How to Test a Jump Starter: Simple Steps for Battery Boosting
Figuring out how to test a jump starter can seem tricky, especially if you’re new to car maintenance. Don’t worry, many people feel unsure about it at first. But, it’s actually pretty simple once you know the steps. This guide will walk you through everything, making it easy to test your jump starter and make sure it’s ready when you need it. We’ll break down the process step by step, so you can feel confident in your battery boosting skills. Let’s get started!
Checking Your Jump Starter Before Use
Before you even think about using your jump starter, there are a few important things you should check. Think of it like a safety check before a flight. You want to make sure everything is in working order. This will help keep you safe and ensure that your jump starter works when you need it the most. These initial inspections will tell you if your jump starter is ready to go or if it needs some attention.
Examining the Jump Starter’s Physical Condition
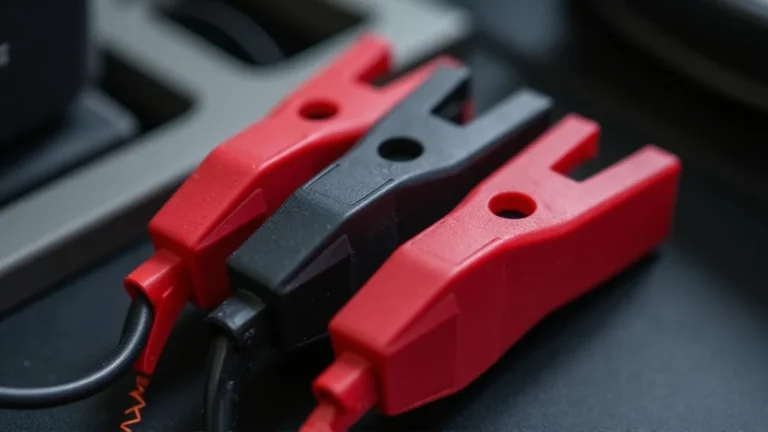
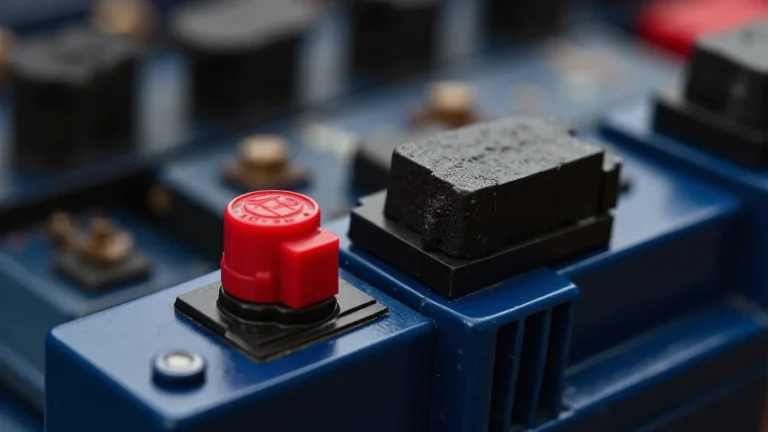
First, give your jump starter a good look-over. Check the casing for any cracks or damage. This is important because the housing protects the internal components, and any damage could affect how it works. Next, inspect the cables and clamps. Make sure the cables aren’t frayed or cut, as this could cause a short circuit. The clamps should be clean and not corroded. Corrosion prevents a good connection, and that means your jump starter might not work properly. The cables are the lifeblood, carrying the power, and the clamps are the connectors. Any problems here could be dangerous or ineffective.
- Look for Physical Damage: Cracks or damage can expose internal components and make the jump starter dangerous.
- Inspect Cables and Clamps: Frayed cables or corroded clamps can prevent a good connection and may cause a short.
- Check for Leaks: If your jump starter is an older model with a lead-acid battery, watch for any leakage.
- Examine the LED Indicators: Ensure the indicator lights are functioning and show the correct charging status.
If you see anything that looks off, like a damaged case, frayed cables, or corroded clamps, it’s best to stop. You’ll need to repair or replace those parts before using the jump starter. Remember, safety first! Also, if the jump starter is an older model that uses a lead-acid battery, look for any signs of leaks. These batteries contain acid, which is corrosive and dangerous. If you detect a leak, stop and take appropriate safety precautions.
Battery Health and Power Levels
Now, let’s look at the battery. A jump starter’s battery is its core, so its health is paramount. Most jump starters come with LED indicators. These lights tell you the battery’s current charge level. Make sure the jump starter is fully charged before you test it. If the indicator shows low power, you’ll need to charge it. Following the manufacturer’s instructions is crucial. Many jump starters won’t work correctly if they aren’t fully charged. Over time, batteries can lose their ability to hold a charge, which is known as battery degradation. This means your jump starter might not deliver the power it is supposed to. A fully charged unit is your best bet for a reliable boost.
- Check the LED Indicators: These lights show the battery’s charge level.
- Fully Charge the Jump Starter: Make sure the battery is at 100% capacity before testing.
- Understand Battery Degradation: Over time, batteries lose their ability to hold a charge.
- Consult the Manual: Follow the manufacturer’s charging instructions.
Battery capacity is generally measured in Ampere-hours (Ah). This tells you how much current the battery can supply for a specific duration. Another important factor is the peak amperage, which indicates the maximum current the jump starter can deliver for a short time. Jump starters are typically rated to handle different engine sizes. Make sure your jump starter is suitable for the vehicle you intend to use it with. You don’t want to use a jump starter that doesn’t have enough power. Checking the voltage is also crucial. Most car batteries are 12 volts, and jump starters should be compatible with that voltage.
How to Test a Jump Starter’s Performance
Once you’ve done your initial checks, you can begin testing the unit. Testing ensures it can handle the load. This involves using the jump starter to start a vehicle with a known dead or weak battery. It gives you the chance to assess how quickly the starter delivers power and how well it does the job. This step is about putting your jump starter to work in a safe setting. It allows you to find out if it functions correctly and is ready for use in a real emergency.
Simulating a Dead Battery
To really put your jump starter to the test, you can simulate a dead battery. One way to do this is to disconnect your car’s battery and connect the jump starter to the vehicle. However, it’s safer to test the jump starter on a battery that’s already in bad shape. This would mean it struggles to start the car on its own. It’s important to use safety measures when dealing with batteries. Wear eye protection and gloves to protect yourself from any acid or sparks. Keep a fire extinguisher close at hand, just in case. Do this test in a well-ventilated area, away from sparks and flames. This step helps create a situation where you can gauge the performance of the jump starter.
- Use a Vehicle with a Weak Battery: It’s safer than disconnecting a good battery.
- Safety First: Wear eye protection, gloves, and work in a well-ventilated area.
- Keep a Fire Extinguisher Handy: This is a precaution for emergencies.
One common way to assess a jump starter’s capabilities involves using a multimeter to monitor the voltage drop during the starting process. You can connect the multimeter to the vehicle’s battery terminals. This allows you to measure the voltage before and during the jump. A healthy battery should maintain a voltage above 10V during cranking. A jump starter that is functioning properly should help the voltage rise above that level, allowing the engine to start. In addition, you can use a load tester. A load tester puts a strain on the battery. This test simulates the load the starter motor places on the battery when you start the car. It helps you see how well the jump starter can perform under pressure.
Steps for a Jump Start Test
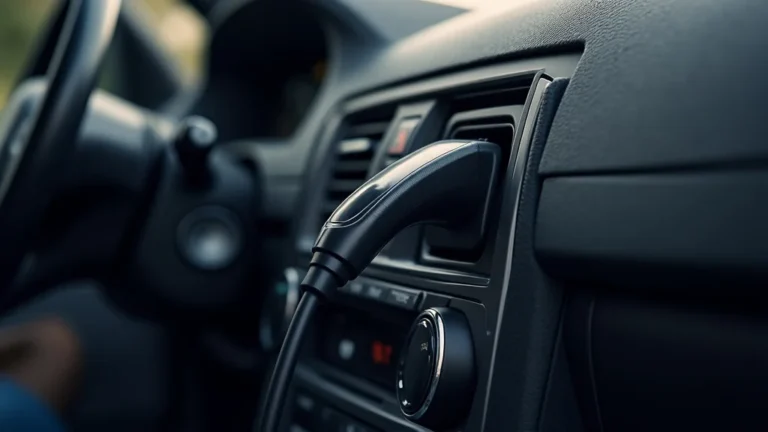
Let’s go through the practical steps to test your jump starter. First, make sure both the jump starter and the vehicle’s battery are turned off. Next, connect the red (positive) clamp of the jump starter to the positive terminal (+) of the car’s battery. Then, connect the black (negative) clamp to a grounding point on the vehicle’s chassis, away from the battery. After these connections are set up, start the car. Observe how quickly it starts. If it starts quickly and without any struggles, that’s a good sign. If it struggles or doesn’t start, there might be a problem.
- Turn Everything Off: Make sure both the jump starter and vehicle are off.
- Connect the Positive: Attach the red clamp to the positive (+) battery terminal.
- Ground the Negative: Attach the black clamp to a grounding point on the chassis.
- Start the Car: See how quickly the car starts.
- Observe Results: Note if it starts right away or struggles.
When the car starts, disconnect the clamps in the reverse order. Remove the black clamp first, then the red clamp. This order is safer and reduces the chance of sparks. After the test, observe the jump starter’s indicator lights again. Check if it’s still at the same charge level or if it’s lost some power. Note the time it took to test the unit. It also helps to perform this test a couple of times. This helps determine whether the jump starter performs consistently or if the output declines over repeated use. This can reveal if the battery is starting to show its age or has other underlying issues.
Troubleshooting Common Issues
Sometimes, your jump starter might not work as expected. Knowing some common issues and how to deal with them will help. You can save time and frustration by quickly finding out what is happening. The troubleshooting process will help you diagnose whether the problem comes from the jump starter, the vehicle’s battery, or another part. Let’s explore some frequent problems and their possible solutions.
Jump Starter Won’t Turn On
If the jump starter doesn’t turn on, start by checking the power button. Make sure it’s turned on, and that the switch is not damaged. Next, check to see if the battery is charged. Many jump starters won’t work if they don’t have enough charge. Plug the jump starter into a wall outlet to see if it charges. If it won’t charge, the charging adapter could be faulty. Inspect the adapter for damage, and try using a different one. The jump starter itself could be damaged, if none of these things work. This can happen with age or overuse. Consider contacting the manufacturer or taking it to a repair shop.
- Check the Power Button: Ensure the button isn’t damaged or faulty.
- Assess the Battery’s Charge: Low battery is the most common cause of failure.
- Inspect the Charging Adapter: The adapter could be broken. Try a different one.
- Check the Jump Starter Itself: If nothing else works, it may be broken internally.
Internal components, like the circuit board, might have issues. Many jump starters have an overcharge protection system to prevent damage from overcharging. If the protection system fails, the jump starter might not function. If the jump starter has been stored in extreme temperatures, it may also fail to start. Very hot or cold temperatures can affect the performance of the internal battery. In cold temperatures, the internal resistance of the battery increases. This makes it harder for the jump starter to deliver power. It’s also wise to check the fuses. Some jump starters have built-in fuses. If a fuse is blown, the jump starter won’t work.
Car Won’t Start With the Jump Starter
When the car doesn’t start even with the jump starter connected, start with the connections. Make sure the clamps are securely attached to the correct terminals of the car battery. Loose connections are one of the most common reasons for jump start failure. Next, check the battery itself. The car battery may be too damaged. The jump starter may not be able to overcome the damage. If the car still doesn’t start, the jump starter might be unable to provide enough power. Confirm the jump starter has a sufficient cranking amperage rating for the vehicle’s engine size. The engine may have another issue that the jump starter cannot resolve.
- Check Connections: Make sure the clamps are tight and on the correct terminals.
- Assess the Car Battery: It may be too damaged for the jump starter to help.
- Consider Power Output: The jump starter may not be strong enough for the vehicle.
- Look for Other Issues: Problems like a bad starter motor can’t be fixed by a jump start.
Inspect the fuses in your car’s electrical system. A blown fuse might prevent the car from starting. If the fuse for the starter motor is blown, the jump starter won’t fix the problem. Additionally, examine the starter motor. If the starter motor is faulty, a jump start won’t work. You can verify if the starter motor is working by listening for a clicking sound. If you hear a click, but the engine doesn’t turn over, there might be a problem with the starter. Make sure the jump starter has the correct voltage. Most cars use 12 volts, but some heavy-duty vehicles use 24 volts. Make sure your jump starter matches your car’s voltage needs.
Choosing the Right Jump Starter
Picking the right jump starter can seem like a chore, with so many options to explore. But choosing the proper one depends on your needs and your car. Let’s delve into what to keep in mind to make the best choice. This includes key features, power ratings, and other considerations that will help you decide. Choosing the right jump starter can give you peace of mind.
Key Features to Consider
When choosing a jump starter, look at several key features. The most important one is the cranking amps (CA) or peak amps. This tells you how much power the jump starter can deliver at once. You should make sure the jump starter has enough power for your vehicle’s engine. Consider the engine size and type. Diesel engines need more power than gasoline engines. A jump starter with higher peak amps is generally better, but it may also be more costly. Portability is also a critical factor. Compact and lightweight jump starters are easier to carry and store in your car.
- Cranking Amps (CA) and Peak Amps: The more, the better, but consider your vehicle.
- Portability: Look for a size and weight that is easy to manage.
- Safety Features: Overcharge protection, reverse polarity protection, etc. are important.
- Additional Features: Consider USB ports, LED flashlights, and other extras.
Look for safety features, like reverse polarity protection. This feature prevents damage if you connect the clamps backwards. Many jump starters also have overcharge protection, which prevents the battery from being damaged by overcharging. The best jump starters come with a built-in LED flashlight. This helps when connecting the jump starter in low-light conditions. Some jump starters also include USB ports, so you can charge your phone or other devices in an emergency. Read the reviews and compare the different options. Look for customer feedback on the jump starters’ performance, reliability, and ease of use. This feedback gives you helpful insights.
Power Ratings and Compatibility
The power rating is a critical factor when choosing a jump starter. It determines the size of the engines it can handle. Jump starters are typically rated for peak amps, and cranking amps. Peak amps are the maximum current the unit can deliver for a short time. Cranking amps are the power delivered during the start. Match the jump starter’s ratings to the needs of your vehicle. The engine size is essential. A larger engine requires a jump starter with a higher power rating. The vehicle’s manual will offer a suitable guideline.
| Engine Size | Recommended Peak Amps |
|---|---|
| Small Engines (Up to 2.0L) | 400-600 Amps |
| Mid-Size Engines (2.0L – 3.5L) | 600-800 Amps |
| Large Engines (3.5L+) | 800+ Amps |
Before purchasing, confirm the jump starter is compatible with the type of battery in your car. Most cars use 12-volt batteries, but some commercial vehicles may use 24-volt systems. Check the specifications. Be sure to consider the temperature range. Jump starters work less effectively in cold weather. Some units are specifically built to operate in low temperatures. Another factor is the battery chemistry. The best jump starters use lithium-ion batteries. Lithium-ion batteries are lighter, more compact, and hold a charge longer than older technologies. In addition to the power rating, you should consider the safety features. Reverse polarity protection is essential to prevent damage if you connect the clamps backwards.
Frequently Asked Questions
Question: What’s the main difference between cranking amps and peak amps?
Answer: Cranking amps (CA) measure the power a jump starter provides to the car’s engine at 32°F (0°C). Peak amps are the maximum amount of current the jump starter delivers for a very short period.
Question: How often should I charge my jump starter?
Answer: Regularly! It’s best to charge it every 1-3 months. This helps to keep the battery in good condition and ensures it’s ready when you need it.
Question: Can I use a jump starter on a motorcycle?
Answer: Yes, but you need a jump starter designed for motorcycles. Look for a unit that provides less power than those for cars.
Question: What does reverse polarity protection mean?
Answer: Reverse polarity protection is a safety feature that prevents damage to the jump starter and your car if the clamps are connected backwards.
Question: Is it safe to leave a jump starter in a hot car?
Answer: No. Extreme temperatures can damage the battery. Store the jump starter in a cool, dry place to maintain its performance and lifespan.
Final Thoughts
Testing your jump starter is an essential step, helping you confirm that it will work when you need it. By checking the physical condition, assessing the battery health, and following the steps for a jump start test, you can make sure your unit is prepared. You can also identify and fix any potential problems before an actual emergency. Remember, if your car won’t start, the jump starter is a crucial tool. Also, choosing the appropriate jump starter for your vehicle is key. Considering the power ratings, compatibility, and extra features ensures you’re prepared. You can now approach car troubles with confidence and have a reliable way to get back on the road. So, test your jump starter, keep it charged, and enjoy peace of mind!