How to Revive a Dead Jump Starter: A Simple Guide
Getting your jump starter to give up the ghost is a common problem. It can feel frustrating when you’re stuck with a battery that won’t start your car and a jump starter that seems useless. Many people find the topic of how to revive a dead jump starter a bit tricky at first. Don’t worry, though! It’s usually fixable. This article will show you step-by-step how to get your jump starter back in working order. We’ll explore the common reasons for jump starter failures and break down simple ways to get it charged up and ready to go.
Reasons Why Jump Starters Die
Jump starters, also known as portable power banks, are incredibly handy tools. They offer a quick and convenient way to jump-start your vehicle when your car battery is flat. However, just like any electronic device, they can fail. There are several reasons why your jump starter might stop working. One of the most common issues is simply lack of use. These devices need to be charged regularly, even if you don’t use them. Leaving them discharged for long periods can damage the internal battery. Another factor is extreme temperatures. Heat and cold can affect the battery’s performance and lifespan. Finally, repeated use without proper maintenance can also lead to a jump starter’s demise.
Battery Health
The battery is the heart of your jump starter. It stores the energy needed to give your car a boost. Most jump starters use lithium-ion batteries, similar to those found in smartphones and laptops. These batteries have a limited lifespan and degrade over time. The number of charge cycles they can handle is finite, meaning that each time you charge and discharge the battery, its capacity slightly reduces. Factors like temperature, depth of discharge, and charging practices affect this process. The battery will eventually lose its ability to hold a charge and may not be able to deliver enough power to start your vehicle. Regularly checking the battery’s health and following the manufacturer’s charging guidelines is essential for keeping your jump starter in good shape.
- Battery Age: Over time, the internal chemistry of the battery degrades, leading to reduced capacity. A jump starter that is several years old may not perform as well as a new one, even with proper care.
- Overcharging: Leaving the jump starter plugged in for too long after it’s fully charged can damage the battery. Modern jump starters usually have safety features that prevent overcharging, but it’s still best to disconnect it once it’s full.
- Deep Discharge: Completely draining the battery repeatedly can significantly shorten its lifespan. Try to recharge your jump starter before it reaches a very low charge level.
- Extreme Temperatures: Hot and cold temperatures can negatively impact battery performance. Avoid storing your jump starter in places exposed to extreme heat or cold, like the inside of a car during summer or winter.
Internal Component Failure
Beyond the battery, various internal components can also cause a jump starter to fail. These include the charging circuit, the output protection circuit, and the internal wiring. The charging circuit is responsible for safely charging the battery, while the output protection circuit safeguards the device and your car from potential electrical damage. Internal wiring connects all these parts. Problems with any of these can lead to the jump starter not functioning correctly. For example, a faulty charging circuit might prevent the battery from charging, while a damaged output protection circuit could stop the jump starter from delivering power. Identifying and repairing these issues typically requires technical expertise and potentially specialized tools.
- Charging Circuit: Damage to the charging circuit can prevent the jump starter from receiving power from an external source. This might result in the device not charging at all, or charging very slowly.
- Output Protection Circuit: This circuit protects both the jump starter and the vehicle’s electrical system from voltage spikes or short circuits. A fault here could mean the jump starter won’t provide any power to start the car.
- Internal Wiring: Loose or broken wires can disrupt the flow of electricity within the jump starter, leading to malfunction. The wiring can be affected by physical damage or prolonged use.
- Overload Protection: Jump starters have protection against overloads. If you try to use it to start a car that has a significantly discharged battery or has other electrical issues, the jump starter might shut down to protect itself.
Overuse and Improper Usage
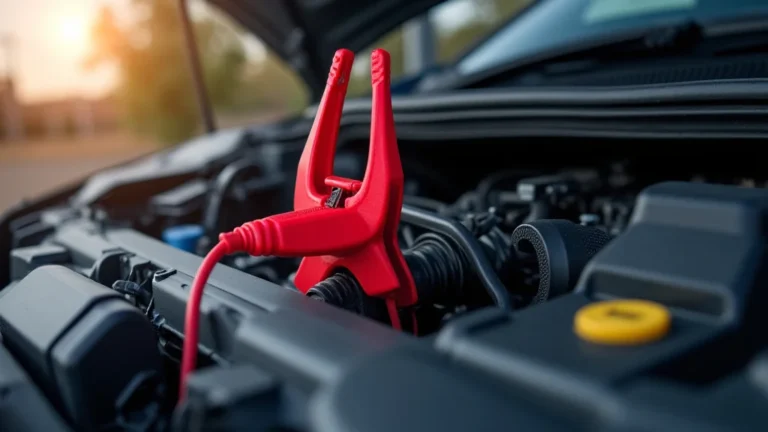
Using a jump starter improperly or too frequently can also shorten its lifespan. Connecting the jump starter to the wrong terminals on the car battery, or attempting to jump-start a vehicle with a severely damaged electrical system, can cause problems. Overuse, like trying to start a car repeatedly without allowing the jump starter to cool down between attempts, can put a strain on the battery and other components. It’s essential to follow the manufacturer’s instructions for use. This includes properly connecting the clamps, allowing sufficient cool-down time between attempts, and using the device only for its intended purpose. Misuse is a leading contributor to a jump starter’s failure.
- Incorrect Connections: If the clamps are connected to the wrong terminals on the car battery (positive to negative and vice versa), this can cause a short circuit and potentially damage the jump starter. Always double-check your connections.
- Overheating: Attempting to jump-start a car for too long or repeatedly without allowing the device to cool down can cause the jump starter to overheat, potentially damaging the internal components.
- Using the Wrong Charger: Always use the charger that came with your jump starter or a charger that meets its specifications. Using an incompatible charger can damage the battery and the charging circuit.
- Ignoring Warning Signs: If the jump starter displays error messages, doesn’t hold a charge, or shows any signs of malfunction, stop using it immediately. These could be indicators of a more serious problem.
How to Revive a Dead Jump Starter: Step-by-Step
Reviving a jump starter is often possible. This section offers a practical guide to help bring your jump starter back to life. It explores common troubleshooting steps, charging methods, and important safety considerations. While not all jump starters can be fixed, these steps can help you diagnose the problem and potentially restore its functionality. Remember, if you are unsure about any steps, it’s best to consult a professional. Safety comes first, so always use caution when working with electrical devices. These tips can help you determine the reason your jump starter stopped working and guide you on what you can do to get it back up and running.
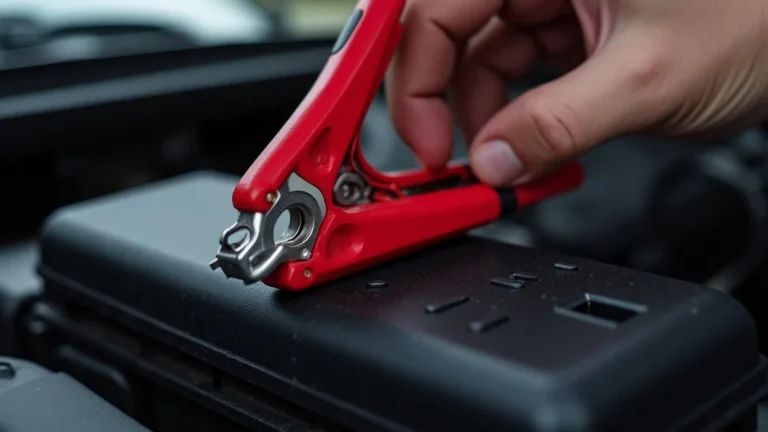
Initial Checks and Visual Inspection
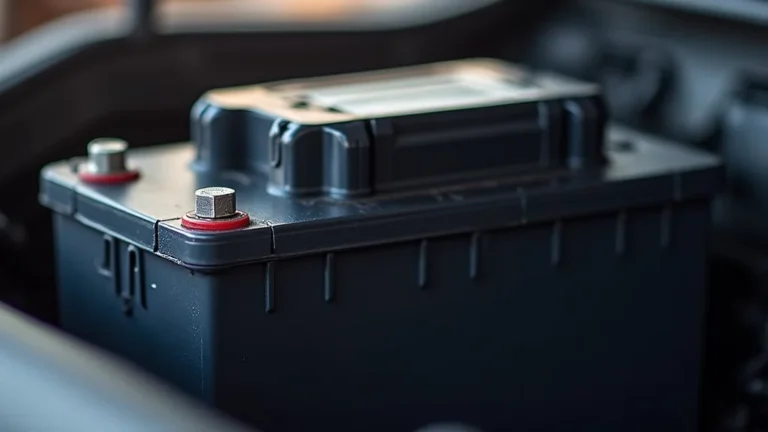
Before doing anything, give your jump starter a thorough visual check. Look for any signs of physical damage, like cracks, bulges, or leaks. Also, check the charging port for any debris or damage. These are easy, quick checks that can provide initial clues. Open the jump starter to examine the battery for any unusual swelling or corrosion. Also, inspect the wires and connections. These early checks can often highlight the problem before you attempt a more in-depth approach. If you notice any of these issues, consider if it’s safe to continue. Sometimes, damage can be obvious, and it’s best to replace the jump starter if it looks unsafe to use.
- Examine the Exterior: Look for cracks, bulges, or signs of liquid leakage. Any damage to the casing could indicate internal problems that make the jump starter dangerous to use.
- Check the Charging Port: Inspect the charging port for debris or damage. Clean out any dust or obstructions that could prevent a proper connection. A damaged port may require repair or replacement.
- Inspect the Cables and Clamps: Examine the cables and clamps for any signs of damage or corrosion. Loose or damaged connections can prevent the jump starter from delivering power correctly.
- Look for Error Messages: If your jump starter has a display screen, check for any error messages. These messages can indicate specific problems, like overcharge or internal faults.
Charging and Recharging Methods
Once you’ve done your visual inspection, the next step is to attempt to recharge the jump starter. Make sure you use the appropriate charger that came with the device. If you’ve lost the original charger, use a
- Use the Correct Charger: Always use the charger specifically designed for your jump starter. It will deliver the appropriate voltage and amperage, ensuring safe and effective charging.
- Check the Power Outlet: Make sure the power outlet is working correctly. Try plugging in another device to confirm. A faulty outlet can prevent your jump starter from charging.
- Observe the Charging Indicator: Pay attention to any LED lights or display indicators on the jump starter. They can provide important information about the charging process, like whether it’s charging, fully charged, or if there’s an error.
- Give it Time: Allow the jump starter to charge for the recommended time, as stated in the manual. This will ensure that the battery has enough time to fully charge.
Advanced Troubleshooting Techniques
If the jump starter still doesn’t work after charging, you might have a deeper problem that requires more advanced troubleshooting. You can test the voltage output of the jump starter using a multimeter. Ensure it provides the voltage needed for jump starting a car. If it doesn’t, the battery may be completely dead or damaged, and it might need to be
- Test the Voltage Output: Use a multimeter to measure the voltage output of the jump starter. This can help determine whether the battery is providing any power.
- Check for Blockage: Some jump starters include safety features to prevent them from jump starting if a blockage is present. Consult the manual to diagnose and remove the blockage, which may revive your jump starter.
- Inspect the Internal Components: If you’re comfortable doing so, open up the jump starter and visually inspect the internal components for damage or corrosion. Carefully check the wiring and connectors.
- Seek Professional Help: If you’re not comfortable working with electronics, or if you’ve exhausted all other troubleshooting steps, consider taking your jump starter to a qualified repair technician. They have the expertise and equipment needed to diagnose and repair more complex problems.
How to Revive a Dead Jump Starter: Safety First
When working on your jump starter, your safety should be the top priority. Always wear appropriate safety gear, like safety glasses. Work in a well-ventilated area to prevent the build-up of harmful fumes. Avoid any contact with the internal components of the jump starter unless you are experienced in electronics repair. If the jump starter shows signs of damage or malfunction, stop immediately. Never try to disassemble or repair the device if you are not sure what you’re doing. Handling lithium-ion batteries improperly can lead to fire or explosions. If you notice any signs of overheating or unusual odors, disconnect the jump starter from the power source and let it cool down before attempting to troubleshoot. Following these safety guidelines can help you stay safe while trying to revive your dead jump starter.
Safety Precautions to Keep in Mind
Working with electronics, especially batteries, requires extra care. Lithium-ion batteries can be dangerous if mishandled. Always keep safety top of mind. Make sure you work in a well-lit and well-ventilated space to avoid inhaling potentially harmful fumes. Always disconnect the jump starter from the power source before performing any repairs or inspections. If you see smoke, swelling, or any unusual changes, immediately stop. Consider these factors when deciding to repair your jump starter and make sure you have the proper tools and understand the risks. Remember, you can always take the jump starter to a professional repair service if you’re uncomfortable with any part of the process.
- Wear Safety Gear: Protect your eyes by wearing safety glasses. This protects against debris and potential splashes if the battery is damaged.
- Work in a Well-Ventilated Area: Ensure that you’re working in a well-ventilated space to avoid the build-up of potentially harmful fumes.
- Avoid Contact with Internal Components: Unless you have experience in electronics repair, it’s best to avoid contact with the internal components.
- Dispose of Damaged Batteries Properly: If the battery is damaged beyond repair, dispose of it properly according to your local regulations. This protects the environment.
When to Seek Professional Help
Deciding when to ask a professional for help is critical. If your jump starter is still under warranty, it is almost always best to contact the manufacturer or an authorized service center. They can provide repairs or
- Warranty Coverage: If your jump starter is still under warranty, contact the manufacturer or an authorized service center for repairs.
- Lack of Expertise: If you’re not comfortable working with electronics or don’t have the necessary skills and tools, seek professional help.
- Safety Concerns: If you notice a strong smell or visual changes, such as smoke or swelling, seek professional help immediately.
- Complex Issues: If you’ve tried all basic troubleshooting steps and the jump starter still doesn’t work, there may be a complex internal issue that requires a technician.
Frequently Asked Questions
Question: Why won’t my jump starter charge?
Answer: There are several reasons. The charger may be faulty, the charging port may be damaged, or the battery itself may be dead or damaged. Check the charger, the power outlet, and the charging port. If those appear okay, the battery might need to be replaced.
Question: Can I use any charger to charge my jump starter?
Answer: No, it is critical to use the charger that came with your jump starter, or a
Question: Is it safe to try to revive a jump starter myself?
Answer: It depends. If you’re comfortable with basic electronics and have the right tools, you can try some troubleshooting steps. However, if you notice any signs of damage or malfunction, it’s safer to seek professional help.
Question: How often should I charge my jump starter?
Answer: It’s best to charge your jump starter every 1-3 months, even if you don’t use it. This helps to keep the battery in good condition and prevents it from completely discharging.
Question: Can a dead jump starter be fixed?
Answer: Sometimes, yes. Depending on the issue, you might be able to revive a dead jump starter by charging it, replacing a fuse, or performing some basic troubleshooting steps. However, some problems, like battery failure, may require professional repair or replacement of the entire unit.
Final Thoughts
Reviving a jump starter can be straightforward with the right information. This guide has explored the reasons why jump starters stop working. These include battery failure, component issues, and improper use. We’ve shown you how to inspect your device, charge it safely, and troubleshoot potential problems. Keep in mind safety first. If you’re uncomfortable with any step, seeking help is best. Understanding the issues and following our step-by-step approach may extend the life of your device. By regularly charging your jump starter, storing it properly, and following the tips outlined above, you can increase its lifespan. Armed with this knowledge, you can increase the chances of successfully getting your jump starter back in working condition and ready to provide that essential boost when you need it.