How to Jump Start a Car Using a Jump Box Safely and Easily
Getting your car battery to die is a common frustration. Knowing how to jump start a car with a jump box can feel tricky if you’ve never done it before. Don’t worry, many people feel the same way! This guide breaks down the process into simple steps, so you’ll be back on the road quickly. We’ll show you exactly what to do. Prepare to learn.
What Is a Jump Box and How Does It Work?
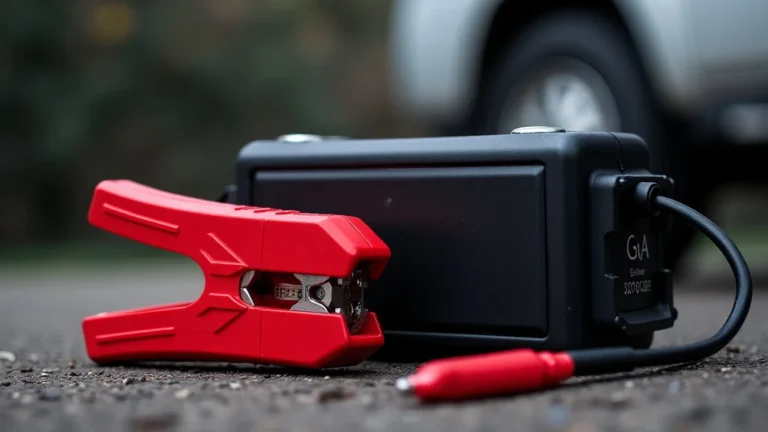
A jump box, also known as a portable jump starter, is a handy device that can help you start a car with a dead battery. It’s like a portable power source. The jump box has its own internal battery. When you connect it to your car’s battery, it gives the car a boost of power, allowing it to start. This is a lot easier than needing to find another car and jumper cables, especially if you are stranded somewhere without help. This makes jump boxes super useful, especially in emergencies.
Parts of a Jump Box
A typical jump box consists of a few essential parts. Knowing these parts makes the process easier.
- The Battery: The heart of the jump box. This internal battery stores the energy needed to start your car. Jump box batteries are usually lithium-ion or lead-acid.
- Clamps: These are the red and black connectors that attach to your car’s battery terminals. They are usually made of metal and covered in rubber or plastic for insulation.
- On/Off Switch: A switch that controls the flow of power. This helps prevent accidental sparking.
- Indicator Lights: These lights tell you the status of the jump box. You can see the battery charge level and if there is any problem.
Lithium-ion batteries are known for being lightweight and holding a charge for a long time. They are popular in modern jump boxes. Lead-acid batteries are often heavier, but are still a reliable option and often more affordable.
The clamps are designed to securely grip the battery terminals. They allow the jump box to transfer power to your car’s battery. Color-coding (red for positive, black for negative) helps prevent mistakes.
The switch usually turns the jump box on and off. You’ll typically find this switch on the jump box itself. It controls the power flow from the jump box to your car’s battery.
Indicator lights may show the remaining charge, any errors, or when the box is charging. This is very useful. These lights tell you the jump box’s readiness to jump-start your car.
How a Jump Box Differs from Jumper Cables
Jump boxes and jumper cables both serve the same basic purpose: to start a car with a dead battery. However, there are some key differences.
- Power Source: Jumper cables require another car with a working battery to provide the power. A jump box has its own battery.
- Convenience: Jump boxes are more convenient because you don’t need another vehicle. Jumper cables require another car and space to park it safely.
- Safety: Both can be safe if used correctly. However, a jump box’s built-in safety features can sometimes be more advanced, reducing the risk of sparks or damage.
- Portability: Jump boxes are portable. Jumper cables are portable, too, but require you to carry the battery source along.
With jumper cables, you need a second vehicle. With a jump box, you don’t. Jump boxes give you more independence.
A jump box removes the need for another car, making it easier in crowded spaces.
Many jump boxes have built-in safeguards, such as reverse polarity protection and surge protection, which can minimize the chance of errors.
You can use a jump box anywhere. Jumper cables need another car nearby.
Step-by-Step Guide: How to Jump Start a Car with a Jump Box
Starting a car with a jump box is usually a straightforward process. Following these steps carefully will help you get your car running again safely.
Preparing for the Jump Start
Before you start, there are a few things you should do to prepare. Doing these things can make the whole process a lot easier.
- Safety First: Make sure you are in a well-ventilated area to avoid any dangerous fumes.
- Gather Your Supplies: You’ll need your jump box. Check that it is fully charged.
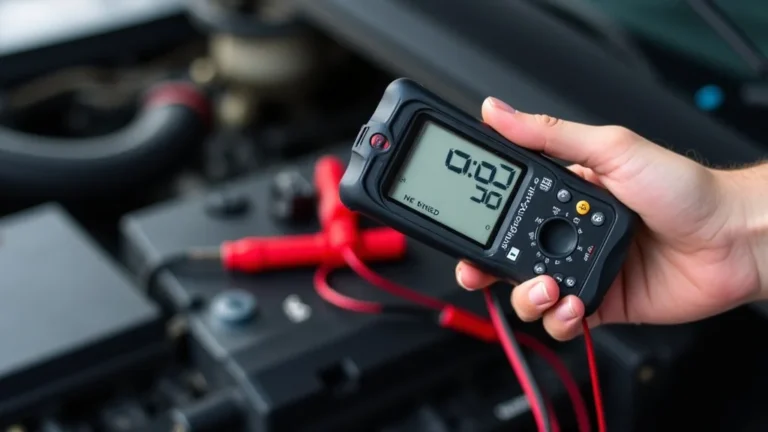
- Check Your Battery Terminals: Locate your car’s battery and check the terminals. Look for corrosion or dirt. If needed, clean them with a wire brush or a solution of baking soda and water.
- Read the Jump Box Manual: Before connecting anything, read the instructions on your jump box. All models can vary.
Working outdoors is usually best. If you’re inside, open doors and windows.
Make sure you have your jump box and a clean cloth for wiping the battery terminals.
Clean terminals make better connections. Cleaning can also prevent any resistance to the flow of electricity.
Familiarize yourself with the specific features and safety precautions for your jump box.
Connecting the Jump Box to Your Car Battery
Follow these steps to safely connect the jump box to your car’s battery.
- Turn Everything Off: Make sure your car’s ignition is off and all accessories (lights, radio, etc.) are turned off.
- Connect the Red Clamp: Connect the red (positive) clamp of the jump box to the positive (+) terminal of your car battery.
- Connect the Black Clamp: Connect the black (negative) clamp of the jump box to a clean, unpainted metal surface on your car’s chassis (frame). Avoid the negative (-) terminal of the battery.
- Check Your Connections: Double-check that both clamps are securely attached and making good contact.
This prevents any electrical surges during the jump-start process. This is for the safety of both the equipment and yourself.
The positive terminal is usually marked with a ‘+’ sign and often has a red cover. Make sure the clamp makes good contact.
Connecting to the car’s frame is usually safer than the negative battery terminal. This helps reduce the risk of sparks near the battery, which can be dangerous.
Loose connections can prevent the jump box from working correctly.
Starting the Car and Disconnecting the Jump Box
Once everything is connected, it’s time to start your car. If it does not work right away, don’t worry.
- Start Your Car: Turn the key in the ignition to start your car. If it doesn’t start right away, wait a few minutes and try again.
- Disconnect the Jump Box: Once your car is running, carefully disconnect the jump box clamps in reverse order of how you connected them (black clamp first, then red clamp).
- Let the Car Run: Allow your car to run for at least 15-20 minutes to give the battery time to recharge.
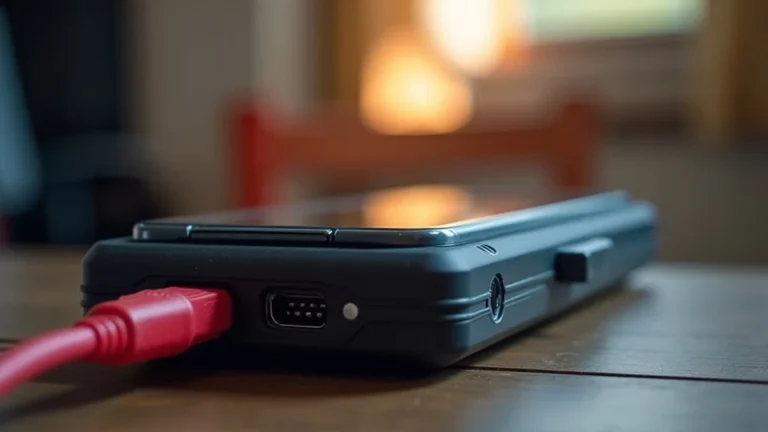
- Recharge the Jump Box: After using the jump box, recharge it immediately to prepare it for the next time you need it.
The jump box should provide enough power to start your car. If the car still doesn’t start, check the connections or consult the jump box’s manual.
Disconnecting in the correct order helps prevent any sparks or electrical issues.
This allows your car’s alternator to recharge the battery. Then, you can drive your car.
This ensures your jump box is ready for the next time you need it.
Safety Tips for Using a Jump Box
Using a jump box involves electrical components. It’s important to follow certain safety precautions to minimize risks.
Avoiding Sparks and Explosions
Batteries produce hydrogen gas, which can be explosive. Following these precautions is important.
- Wear Safety Glasses and Gloves: Protect your eyes and hands.
- Avoid Smoking or Open Flames: Never smoke or have any open flames near the battery.
- Connect the Ground Clamp Last: Attach the negative (black) clamp to a metal part of the car chassis away from the battery.
- Remove Clamps Carefully: Disconnect the clamps in reverse order: negative (black) first, then positive (red).
This prevents any accidental splashes of battery acid. Always wear safety glasses and gloves.
Hydrogen gas is flammable. Open flames can cause an explosion.
This lessens the risk of sparking near the battery.
Disconnecting in the right order lessens the chance of sparks.
Preventing Damage to Your Car and Jump Box
Protecting your equipment and your car is essential.
- Check Battery Terminals: Clean any corrosion.
- Don’t Connect to the Wrong Terminals: Make sure you connect the positive clamp to the positive terminal and the negative clamp to a ground.
- Follow Jump Box Instructions: Read and follow the manufacturer’s directions for your specific jump box model.
- Avoid Overcharging: Don’t overcharge your jump box.
Corrosion can prevent a good connection and damage the battery.
Connecting the clamps to the wrong terminals can damage your car’s electrical system and the jump box.
Different jump boxes can have different features or requirements.
Always follow the charging instructions for your jump box. Overcharging can damage the battery.
Troubleshooting Common Jump Box Issues
Sometimes, things don’t go perfectly. Understanding what can go wrong and knowing how to fix it is important.
Jump Box Won’t Turn On
If your jump box won’t turn on, there might be a few reasons for that.
- Low Battery: The jump box might need to be recharged.
- Power Switch Issue: The power switch might be faulty.
- Internal Failure: The jump box might have an internal problem.
Connect your jump box to a power outlet to charge it fully. Make sure the charging light is on.
Try moving the switch on and off a few times to make sure it’s working.
If the jump box doesn’t work after charging and switching it on and off, it may need to be replaced. Check the manufacturer’s warranty.
Car Won’t Start
Sometimes, your car won’t start even when the jump box seems to be working. There are several reasons this could happen.
- Weak Battery: The car battery may be too damaged.
- Bad Connections: The clamps may not be making a good connection.
- Other Electrical Problems: Your car may have a separate electrical problem.
The jump box might not be able to provide enough power to start a deeply discharged or damaged battery. You may need a new battery.
Wiggle the clamps to see if the car starts. Clean the battery terminals. Make sure the clamps have a solid grip.
There may be a problem with the starter motor, ignition system, or another electrical component. Consult a mechanic.
Choosing the Right Jump Box for Your Car
Not all jump boxes are the same. Selecting the right one for your car depends on its size and power requirements.
Ampere Rating
The “amps” are the key number to look at. Amps determine how much power the jump box can provide to the car’s battery.
- Starting Amps: This is the most critical number. It indicates the amount of power the jump box can provide to start your car. Choose a jump box with enough starting amps for your car’s engine size.
- Peak Amps: This is the maximum amount of power the jump box can deliver at its peak. While important, the starting amps are usually more important.
- Engine Size: Larger engines require more power to start. Smaller engines require less power.
Look at your car’s manual to find the recommended starting amps.
A higher peak amp rating can provide an extra boost.
Cars with larger engines (like trucks or SUVs) need jump boxes with higher amp ratings. If you have a small car, you may need a jump box with a lower amp rating.
Jump Box Features
Besides power ratings, jump boxes have features that add convenience and safety.
- Portability: Look for a jump box that is easy to carry and store.
- Built-in Safety Features: Look for reverse polarity protection, overcharge protection, and short-circuit protection.
- Additional Features: Some jump boxes have extra features like a USB port for charging devices.
Consider the size and weight of the jump box.
These features help to prevent damage to your car and the jump box.
These extras can be very useful.
Sizing Up Jump Box Options
When picking a jump box, consider these factors to choose the correct size.
| Vehicle Type | Engine Size | Starting Amp Recommendation |
|---|---|---|
| Small Cars | Up to 2.0L | 400-600 Amps |
| Sedans | 2.0L to 3.5L | 600-800 Amps |
| SUVs and Trucks | 3.5L and Larger | 800+ Amps |
Always refer to your car’s manual for specific requirements.
Frequently Asked Questions
Question: Can I use a jump box on a hybrid car?
Answer: Yes, but it is best to consult your car’s manual first, as the procedures might be different. Some hybrids have special instructions for jump-starting. Always connect the jump box to the 12-volt battery.
Question: How long does a jump box last?
Answer: The lifespan of a jump box depends on its quality and how often it is used. With proper care, a good jump box can last for several years. Following charging instructions is important.
Question: What if my car still doesn’t start after using the jump box?
Answer: If your car still doesn’t start, the battery may be too damaged, or there could be another problem, such as a bad starter. Have your car checked by a mechanic. Make sure your jump box is fully charged.
Question: Can I jump start multiple cars with the same jump box?
Answer: Yes, but be sure to let the jump box recharge in between each jump-start. Repeated use without recharging can drain the battery and reduce its effectiveness. Always recharge the box after use.
Question: What is the best way to store a jump box?
Answer: Store your jump box in a dry, cool place, away from extreme temperatures. Avoid leaving it in direct sunlight or in a vehicle. Regularly check the charge level and recharge it every few months.
Final Thoughts
Now you have the essentials of how to jump start a car with a jump box, so you can handle a dead battery confidently. Remember to always put safety first, starting by making sure the jump box is charged before use. Follow the steps we covered, connecting the clamps correctly, and then getting your car running. Keep in mind important details such as ensuring you have a jump box suitable for your engine size, and always read the manual for your specific model. Remember the need for regular maintenance, and follow the precautions. You’ve now gained an ability that can keep you going. So the next time your car won’t start, don’t stress, use what you’ve learned.