How to Fix Car Alternator Not Charging: A Beginner’s Guide
Having a car that won’t start is frustrating, and one common culprit is a faulty alternator. Figuring out how to fix car alternator not charging can seem hard if you’re new to car repair. Don’t worry, many people have faced this issue, and the solutions are often simpler than you think. We’ll break down the process step by step, so you can get your car back on the road. Let’s start with the basics and what you need to know.
What Causes an Alternator Not To Charge?
The alternator is vital for your car because it’s responsible for charging the battery and powering the electrical systems while the engine is running. When the alternator fails, the battery drains, leading to starting problems, dim lights, and other electrical issues. Various factors can cause an alternator to stop charging. Identifying the root cause is the first step in finding the right fix. Common culprits include worn-out brushes, a failing rectifier, a damaged stator, or loose or corroded wiring connections. Belts that are worn or loose are also often to blame, along with the battery itself.
Common Alternator Problems
Diagnosing an alternator issue can be tricky, but knowing the typical problems can get you closer to finding the solution. Many issues involve electrical components that are unseen, but the symptoms will usually tell you what is going on. Using a multimeter, you can run some basic checks to determine if the alternator is working correctly. Checking the voltage at the battery terminals will usually be your first clue. It should be around 12.6 volts when the car is off and increase to around 13.5 to 14.5 volts when the engine is running. Knowing some of the common issues will help in your exploration.
- Worn Brushes: The alternator uses carbon brushes to transfer electrical current to the rotor (spinning part). Over time, these brushes wear down, losing contact and preventing proper charging.
- Rectifier Failure: The rectifier converts AC (alternating current) generated by the alternator into DC (direct current) that the car’s battery and electrical system can use. When the rectifier fails, the battery won’t charge correctly.
- Stator Damage: The stator is a stationary coil of wires inside the alternator that generates electricity. If the stator is damaged, it will not produce enough power to charge the battery.
- Belt Issues: The serpentine belt (or V-belt) drives the alternator. If the belt is loose, worn, or broken, the alternator won’t spin, and the battery won’t charge.
Carbon brushes are small, rectangular pieces of carbon that make contact with the spinning rotor inside the alternator. They conduct electricity to the rotor, creating the magnetic field that’s essential for generating power. As the rotor spins, the brushes slide against it, and this friction causes the brushes to slowly wear away. Once the brushes get too short, they lose contact with the rotor, cutting off the electrical flow. This results in the alternator failing to charge the battery. Replacing brushes is a relatively simple and inexpensive fix, making it a good starting point for diagnosing charging issues. The lifetime of these brushes varies, but it is common to replace them after 50,000 miles.
The rectifier is a set of diodes inside the alternator that are responsible for converting AC to DC. Diodes act like one-way valves for electricity, allowing current to flow in only one direction. This conversion is crucial because the alternator generates AC power, while your car’s electrical systems require DC power. If the rectifier fails, it can either prevent the conversion entirely or allow the current to flow in the wrong directions, causing the battery to discharge instead of charge. Rectifier failures often lead to erratic charging behavior, such as the battery being charged unevenly or not at all. Testing the rectifier involves checking the diodes with a multimeter to ensure they’re functioning correctly. Rectifier failure often means a complete alternator replacement.
The stator consists of copper wires wound into a specific pattern and placed around the rotor. As the rotor spins, the magnetic field it creates interacts with the stator windings, inducing an electric current. This electric current is the power that the alternator sends to your car’s electrical systems. Damage to the stator, such as burnt insulation or broken wires, can disrupt this process. Such damage can be caused by heat, age, or electrical overloads. The result is reduced or no power generation. Replacing the stator can be a complex task, and often the whole alternator needs to be
The serpentine belt is a long, rubber belt that snakes around the engine pulleys, including the one on the alternator. Its job is to transfer the engine’s power to the alternator, allowing the alternator to generate electricity. When the belt becomes worn, cracked, or frayed, it can slip on the pulleys, reducing the alternator’s speed and its ability to charge the battery. A loose belt can also cause this slipping. In the worst case, the belt can break completely, leaving the alternator (and other accessories, such as the power steering pump or air conditioner) without power. Regularly checking the belt for wear and proper tension is a crucial maintenance task. If there are any signs of damage or slippage, replacing the belt is a simple and inexpensive solution to prevent charging problems. Belts typically last 30,000 to 50,000 miles.
How to Test Your Alternator
Before you start replacing parts, you need to find out for sure if your alternator is the issue. There are a few easy tests you can do to determine whether or not it’s working. You will need a multimeter, a device that tests electrical voltages, currents, and resistances. If your alternator is dead, it will not be able to charge the battery.
Testing With a Multimeter
Using a multimeter is the most reliable way to test an alternator. It will quickly tell you if the alternator is generating the proper voltage and if the battery is holding a charge. It is inexpensive to acquire, and using it is not complicated. If you are going to work on your car, a multimeter is essential equipment. Here’s how to do it:
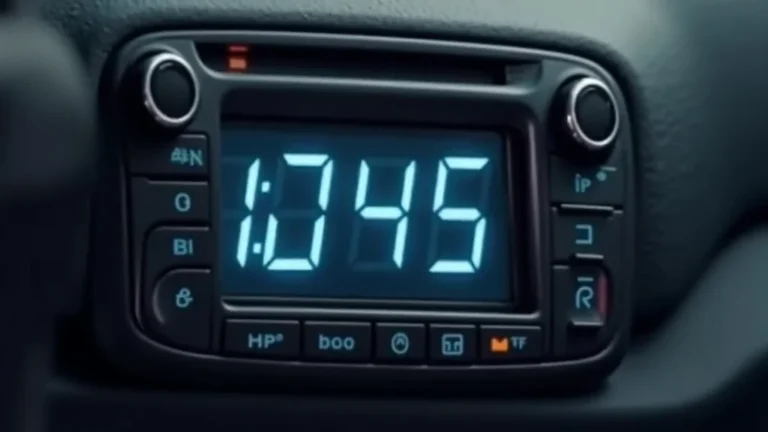
- Check the Battery Voltage (Engine Off): Set your multimeter to DC voltage (usually 20V or higher). Touch the red probe to the positive (+) battery terminal and the black probe to the negative (-) terminal. The reading should be around 12.6 volts when the car is off. This tells you the state of your battery. If it’s significantly lower, the battery may be discharged, but this doesn’t tell you the alternator’s condition yet.
- Check the Battery Voltage (Engine Running): Start the engine and let it idle. The voltage reading should now be higher, typically between 13.5 and 14.5 volts. This higher voltage shows that the alternator is now providing power to the car’s electrical systems and charging the battery.
- Load Test (Lights On): Turn on the headlights and other electrical accessories (like the radio and AC). This puts a load on the alternator. The voltage should remain relatively stable, not dropping significantly. If the voltage drops a lot, the alternator might struggle under load.
- Battery Test: You can also have your battery tested independently. A battery test determines if the battery can hold a charge and is not the problem.
Checking the battery voltage before starting the engine is a crucial first step. It gives you a baseline for comparison. A fully charged battery should read around 12.6 volts. Anything lower suggests the battery might be weak or that something is draining it. This initial reading is important because it tells you whether the battery is in a condition that would allow the alternator to charge it correctly. If the voltage is very low, it might be due to a parasitic drain, a problem with the battery itself, or a sign that the alternator isn’t charging it. This reading will help you decide on the next steps to diagnose the problem.
When the engine is running, the alternator should increase the voltage to charge the battery. A voltage reading between 13.5 and 14.5 volts confirms that the alternator is functioning correctly and is working to keep the battery charged. If the voltage remains near the battery’s resting voltage (about 12.6 volts), it suggests the alternator is not charging. In this case, there could be a faulty alternator, a damaged wire, or a problem with the belt driving the alternator. If the voltage is too high (above 15 volts), it indicates the alternator might be overcharging the battery, which can damage it and other electrical components.
Performing a load test is important for evaluating the alternator’s performance under stress. Turning on the headlights, radio, and other accessories increases the demand on the alternator. If the voltage drops sharply or the lights dim, it indicates the alternator can’t keep up with the electrical load. This might mean the alternator is weak, its rectifier is failing, or there is some other issue, such as a problem with the wiring or internal components. If the voltage remains stable, the alternator is likely functioning correctly. This test helps you find out if the alternator is able to provide enough current. If it fails, it might need to be replaced.
The battery stores the power generated by the alternator, so it’s essential to determine its condition. If the battery is old or damaged, it might not hold a charge, even if the alternator is functioning correctly. A battery test checks the battery’s ability to hold a charge, its cold cranking amps (CCA), and its overall health. If the battery fails the test, it must be replaced. A failing battery can mimic an alternator problem. If the battery is bad, it won’t take a charge. It is always wise to rule out the battery as a source of problems.
Visual Inspection
In addition to electrical tests, a visual inspection can reveal some of the problems. Checking the belt and wiring is often the easiest thing to do and should be your first step. Even if the belt looks fine, it might be stretched and not working as well as it could. Sometimes problems are obvious, so don’t miss the opportunity to look.
- Check the Serpentine Belt: Look for cracks, wear, or glazing on the belt. A worn belt can slip, preventing the alternator from spinning at the right speed.
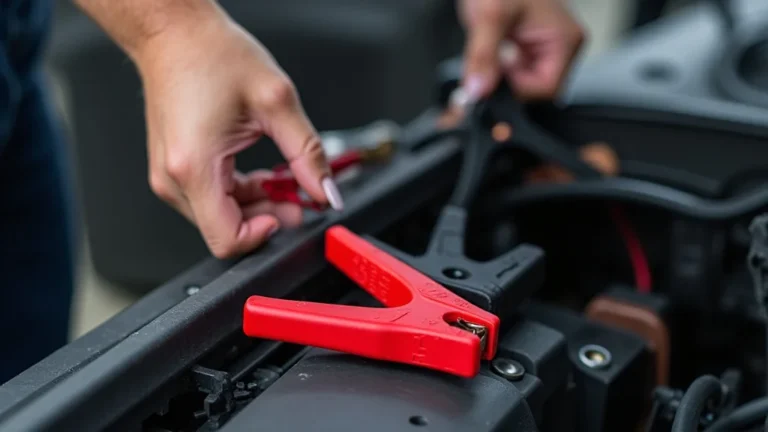
- Inspect Wiring and Connections: Look for corrosion, loose connections, or damaged wires at the alternator and battery terminals.
- Check for Obvious Damage: Look for any physical damage to the alternator itself, such as broken housings or leaking fluids (though this is less common).
The serpentine belt is a critical component for driving the alternator. A visual check can quickly reveal many problems. Look for cracks, fraying, or any signs of wear that indicate it is not in good condition. Glazing, which looks like a shiny surface on the belt, shows the belt has become smooth and can no longer grip the pulleys effectively. Any of these problems can cause the belt to slip, reducing the alternator’s ability to charge the battery. If you find any of these issues, replacing the belt is a simple fix to improve charging performance. Regularly check the belt for wear and proper tension to catch issues early.
Checking the wiring and connections is important because these are essential parts of the charging system. Inspect the wiring for any signs of damage, such as cuts, exposed wires, or burned insulation. Corrosion at the terminals or other connections can create resistance, reducing the flow of current. Loose connections can interrupt the electrical flow, causing charging problems or voltage fluctuations. Inspect the connections at both the alternator and the battery. Cleaning any corrosion and making sure all connections are secure can fix many electrical problems. Checking your wires will prevent potential shorts. Wiring can degrade over time.
Physical damage can occur from accidents, impacts, or wear and tear. A broken housing could compromise the internal components. Damage that allows fluid leaks can create shorts. Any damage to the pulley can stop the belt from driving the alternator. Although less common, physical damage can directly impact the alternator’s performance, leading to charging failures or other electrical problems. A thorough visual inspection can catch any serious issues before the alternator completely fails. Damage like this often leads to replacement.
How to Fix a Car Alternator Not Charging
Once you’ve done your tests, you can get to work. Fixing an alternator depends on what is wrong. You might be able to repair it, or you may need to
Basic Troubleshooting Steps
After you have done the tests, you will have a better idea of what is happening. Use these steps to guide you in the process. The first steps are simple, but the process gets more complicated.
- Check the Battery First: Before you start, ensure the battery has a good charge. If it’s completely dead, charge it first or have it tested to ensure it’s not the primary problem.
- Inspect the Serpentine Belt: Check the belt for wear, cracks, and proper tension. A loose or damaged belt can prevent the alternator from spinning correctly.
- Check Wiring and Connections: Look for corroded, loose, or damaged wires at the alternator and battery terminals. Clean and tighten all connections.
- Test the Alternator: Use a multimeter to test the alternator’s output voltage. With the engine running, you should measure between 13.5 and 14.5 volts at the battery terminals.
Checking the battery before any alternator work is crucial because the battery provides the initial power to start the car and power the electrical systems. A dead battery can mimic symptoms of a bad alternator, causing confusion and wasted effort. If the battery is completely discharged, charge it using a battery charger before starting any other tests. If the battery fails to hold a charge, it may be the primary issue and needs replacing. Ensuring the battery is functional at the outset will allow you to determine if the alternator is charging it correctly. Always verify the battery’s condition first. This will help you know whether a battery-related problem is causing starting or electrical issues.
The serpentine belt connects to the crankshaft to the alternator pulley, transferring rotational motion that allows the alternator to function. Inspect the belt for signs of wear, such as cracking, fraying, or glazing. Also check for proper tension, as a loose belt might slip on the pulleys, reducing the alternator’s ability to charge the battery. If you find a worn or damaged belt, replace it immediately. Proper belt tension is also important. Some belts have tensioners, but on others, it must be adjusted manually. If the belt looks good, but the alternator isn’t charging, you can be more certain that the problem is not a simple belt problem.
Electrical connections are often the source of charging problems. The alternator must be properly wired to the battery for electricity to flow. Inspect the wiring and terminals at both the alternator and battery. If you see corrosion, use a wire brush and a terminal cleaner to remove it, as corrosion can increase resistance and reduce current flow. Make sure all connections are tight. Loose connections can cause intermittent charging issues or completely prevent charging. A visual check and cleaning of the connections can often resolve charging problems without requiring any alternator repair.
The alternator’s output voltage confirms that the alternator is charging the battery effectively. With the engine running, place the multimeter probes on the battery terminals. A healthy alternator should produce between 13.5 and 14.5 volts. If the voltage reading is lower, the alternator may not be charging adequately. If the voltage is too high, the alternator could be overcharging. These voltage readings indicate if the alternator is doing its job. A low voltage may mean a bad alternator, or it could be a bad wire or connection. High voltage can damage your car’s electrical systems. Checking this voltage will help guide your next steps to fix the charging problem.
Replacing the Alternator
If the tests show the alternator is the problem, you may need to replace it. This is a common and often cost-effective repair. Follow these steps:
- Disconnect the Negative Battery Terminal: This is a crucial safety step to prevent electrical shocks. Use a wrench to loosen the nut and remove the cable from the negative terminal of the battery.
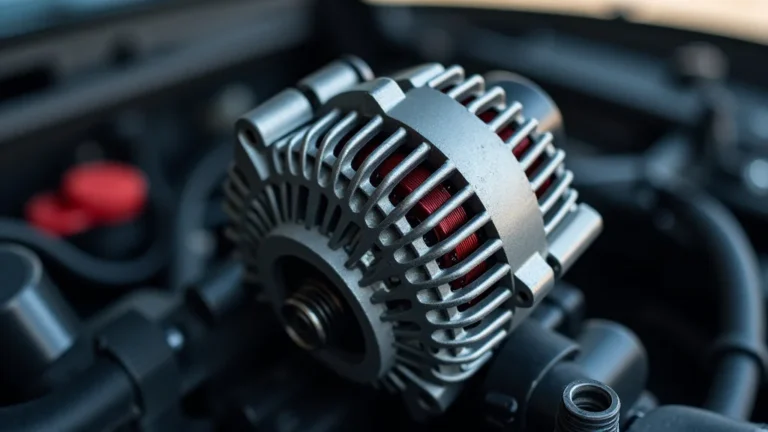
- Locate the Alternator: Find the alternator under the hood. It’s usually a large, cylindrical component with a pulley attached. It is usually towards the front of the engine, but its position can vary depending on the car model.
- Remove the Belt: Use a wrench or belt tensioner tool to release the tension on the serpentine belt and slip it off the alternator pulley. This may involve turning a tensioner to loosen the belt.
- Disconnect Electrical Connectors: Unplug the electrical connectors from the alternator. These connectors usually include a charging wire and a smaller wire for the voltage regulator.
- Remove Mounting Bolts: Loosen and remove the bolts that hold the alternator to the engine block. These bolts can often be tight, so use a socket set with the right size.
- Remove the Alternator: Carefully remove the alternator from the engine bay. It might be a tight fit, so you may have to wiggle it. The alternator can be heavy, so be careful.
- Install the New Alternator: Place the new alternator in the same position and secure it with the mounting bolts. Tighten the bolts to the manufacturer’s specifications.
- Reconnect Electrical Connectors: Plug the electrical connectors back into the new alternator. Tighten the charging wire connector. Make sure all connectors are secure.
- Reinstall the Belt: Route the serpentine belt back around the pulleys. Use a wrench or belt tensioner tool to tighten the belt. Make sure the belt is properly aligned.
- Reconnect the Battery: Reconnect the negative battery cable. Tighten the nut securely.
- Test the Alternator: Start the engine and use your multimeter to check the voltage at the battery terminals. It should be between 13.5 and 14.5 volts with the engine running.
Disconnecting the negative battery terminal is the first and most important safety measure when working on any car electrical system. It prevents the risk of accidental electrical shocks. If you were to accidentally touch a positive wire to ground while working on the alternator, it could create a short circuit and potentially damage the car’s electrical system. This step is a standard practice for all car electrical work. This procedure will protect you and your car.
Locating the alternator is usually straightforward, but the location can be different in each car. The alternator is often near the engine’s front, connected to the engine by a serpentine belt. It should have a pulley for the belt. Refer to your car’s owner’s manual or an online diagram if you have trouble finding it. A diagram can show you where the alternator is, along with all the other related components. Knowing its location will help you find the bolts and connections. Once located, you can begin the removal process.
Removing the serpentine belt is necessary to detach the alternator. Usually, a belt tensioner will need to be used to release the tension. This tensioner is a pulley system that keeps the belt tight. The tensioner is released by using a wrench or a special tool. Some tensioners have a hole to insert a tool. The exact method will depend on the car. Once the tension is released, the belt can be slipped off the alternator pulley and any other pulleys in the system. The serpentine belt runs other accessories, such as the power steering pump and air conditioning compressor. Be sure to note the belt routing before removing it, so you can reinstall it correctly.
Disconnecting the electrical connectors is the next step to removing the alternator. There are usually two or three electrical connectors attached to the alternator. The main wire is the heavy-duty charging cable, which is connected with a nut. It sends high-amperage electricity to the battery. There is usually a smaller connector for the voltage regulator and other control circuits. If you don’t disconnect the wires, the alternator can’t be removed, and you risk damaging the wiring or the alternator. Use a wrench to remove the nut on the charging cable and then unplug the smaller connectors. It is helpful to label the wires.
Mounting bolts secure the alternator to the engine. These bolts can often be tight due to their location and the forces they have to withstand. Use a socket set with the correct socket size to loosen and remove the bolts. The number of bolts and their locations can vary by car. Ensure you have the correct size socket to avoid stripping the bolt heads. You might also have to support the alternator as you remove the last bolt, since it can be heavy. Removing these bolts allows you to remove the alternator from the engine compartment. Keep the bolts for installing the replacement alternator.
Removing the alternator from the engine bay can be the trickiest part, due to the limited space and the weight of the unit. Carefully maneuver the alternator, taking care not to damage any surrounding components. The space around the alternator can be tight, so you might need to try different angles to get it out. If needed, you might have to remove other components, like hoses or brackets, to provide clearance. The alternator can be heavy, so be cautious to avoid dropping it or injuring yourself. Keep track of any parts you remove to make installation simpler. Have a safe place to put the old alternator while you work.
Putting in the new alternator is often the reverse of taking out the old one, but it is important to install it correctly. Align the new alternator in the exact position of the old one and insert the mounting bolts. Before tightening the bolts fully, ensure the alternator is aligned with the pulleys and other components. Tighten the mounting bolts to the manufacturer’s specifications. It is important to tighten the bolts to prevent vibrations and ensure the alternator is securely mounted. Proper tightening will help ensure the alternator’s lifespan and reliable operation.
Reconnecting the electrical connectors is necessary to provide power to the battery. Reattach the charging wire to the correct terminal on the alternator. Ensure the connection is secure. Reconnect the smaller electrical connectors for the voltage regulator and any other control circuits. Ensure all connections are tight. Check that the charging cable is properly attached to the positive terminal. If these connectors are not properly attached, the alternator will not work correctly. Double-check all connections to ensure they are secure and fully connected. This will help prevent charging problems.
Reinstalling the serpentine belt is essential to transfer the engine’s power to the alternator. Use the belt routing diagram, or the original diagram, to make sure the belt goes around each pulley correctly. Use the same tensioner tool or wrench used for removal to release the tension on the tensioner pulley. Slip the belt over the alternator pulley and any other pulleys. Slowly release the tensioner, ensuring the belt is seated correctly in each pulley groove. Then, check to ensure the belt is properly aligned. Improper alignment or an incorrectly installed belt can result in reduced charging capacity and premature belt wear. You must make certain that the belt is correctly aligned and tensioned for the alternator to work properly.
Reconnecting the negative battery cable is the final step in the installation process. Make sure the negative battery cable is reattached to the negative terminal and tighten the nut securely. This closes the circuit, and electrical power will flow to the car’s electrical system. Be sure to tighten the nut so the cable is secure and will not come loose. Loose connections can lead to electrical issues or even cause a short circuit. After reconnecting the battery cable, you should start the engine and test the alternator. Use the multimeter to measure the voltage at the battery terminals, to ensure it is charging properly.
Testing the alternator after completing the installation is the final way to confirm that the new alternator is working correctly and the charging system is functioning properly. Start the engine and use the multimeter to check the voltage at the battery terminals. With the engine running, a functional alternator will generate a voltage between 13.5 and 14.5 volts. This indicates the alternator is charging the battery effectively. If the voltage is within the specified range, the charging system is working correctly. If the voltage is too low or too high, then there might be a wiring issue or a faulty alternator. In this case, you should go back and recheck all the connections and the alternator.
Real-Life Examples
Here are some examples of what to expect when replacing an alternator:
- Case Study 1: The Suburban’s Sudden Shutdown: A family’s SUV stopped working in the middle of a trip. The lights were dim, and the car barely started. A quick check with a multimeter revealed a low battery voltage, and with the engine running, the voltage barely increased. After inspecting the serpentine belt and connections, the mechanic replaced the alternator. The car started right up, and the charging system was back to normal. The family was relieved to continue their trip.
- Case Study 2: The College Student’s Challenge: A college student’s old car began failing to start in the morning. She couldn’t afford a mechanic and decided to try to fix it herself. After watching videos and reading guides, she tested the alternator and determined that it wasn’t charging. The student got a new alternator and had a friend help her replace it. After a few hours of work, the car started easily, and the battery was charging. She learned a lot about her car and saved money.
This situation shows a classic alternator failure. The dim lights and difficulty starting are common symptoms. The low battery voltage with the engine running is a definite sign that the alternator isn’t charging. This diagnosis is made easier with a multimeter. In this case, a mechanic replaced the alternator, and the car’s charging system was fixed. This case is a common scenario. This quick fix got the family back on the road. This highlights how an alternator issue can disrupt a trip.
This example is about a car owner deciding to tackle the problem themselves. She uses online resources and a friend to get the job done. The example shows how anyone can learn to do basic car repairs. This student not only saved money but also increased their knowledge. The student’s experience shows how anyone can solve car problems with determination and access to online resources. The effort saved money and improved their car knowledge. It is a good example of someone who successfully learned to repair their car.
Frequently Asked Questions
Question: How long does an alternator typically last?
Answer: The lifespan of an alternator can vary, but most last between 80,000 and 150,000 miles, or about 7 to 10 years, depending on use and maintenance.
Question: Can I drive my car with a bad alternator?
Answer: It’s possible to drive a short distance with a bad alternator, but the car will run solely on battery power. This can quickly drain the battery, leading to a breakdown.
Question: What’s the cost to replace an alternator?
Answer: The cost to replace an alternator can range from $300 to $800, including parts and labor. The price depends on the car model and where you take it.
Question: What tools do I need to test an alternator?
Answer: You’ll need a multimeter and a few basic tools to remove the belt and connections, such as a wrench set and a socket set.
Question: What are the signs of a failing alternator?
Answer: Dimming headlights, a dead battery, difficulty starting the car, and warning lights on the dashboard (like the battery light) are common indicators of a failing alternator.
Final Thoughts
Understanding how to fix car alternator not charging can seem hard, but it’s manageable with a step-by-step approach. You’ve now explored how the alternator works, common problems, and how to test it using a multimeter. You can find many issues with a visual check of wires and the belt. You’ve also learned how to