Learn how to disconnect car battery safely like a pro
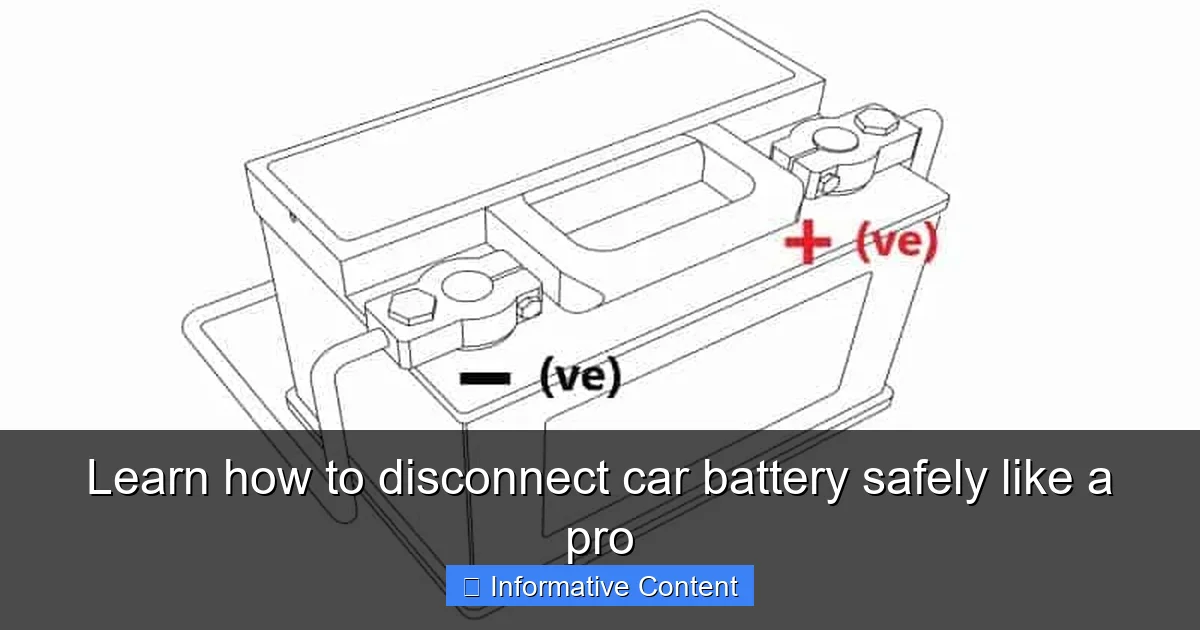
Featured image for how to disconnect car battery safely
Image source: rxmechanic.com
To disconnect your car battery safely and like a pro, always prioritize personal safety by wearing gloves and eye protection. First, unfasten the negative terminal to prevent sparks, then the positive, ensuring removed cables don’t contact any metal surfaces. Reconnect by reversing the order: attach the positive cable first, then the negative, to ensure a secure and safe process.
Ever found yourself needing to perform a bit of DIY car maintenance, troubleshoot an electrical glitch, or maybe even replace your car battery entirely? These tasks often require one crucial first step:
Knowing how to disconnect your car battery safely is a fundamental skill for any car owner. It might seem a bit intimidating at first, especially with all the warnings about electricity and corrosive acid, but trust me, it’s a straightforward process once you understand the safety protocols. Just like learning any new skill, a little guidance goes a long way.
You’re not alone if you feel a tiny spark of anxiety around car batteries. Many people do! But by the end of this comprehensive guide, you’ll not only know the exact steps to
disconnect car battery safely but also understand the ‘why’ behind each action, transforming you into a confident, automotive problem-solver. Let’s get started and learn how to disconnect car battery safely like a pro!
Key Takeaways
- Safety Gear is Essential: Always wear eye protection and insulated gloves.
- Identify Terminals Clearly: Locate both positive (+) and negative (-) posts.
- Disconnect Negative First: Always unfasten the negative cable before positive.
- Disconnect Positive Next: Then, safely remove the positive terminal cable.
- Isolate Cables Safely: Keep disconnected cables from touching anything.
- Use Insulated Tools: Prevent accidental shorts with proper, insulated wrenches.
📑 Table of Contents
Why You Might Need to Disconnect Your Car Battery
Before we dive into the ‘how,’ let’s briefly touch upon the ‘why.’ Understanding the common scenarios where battery disconnection is necessary will reinforce its importance and help you prepare.
Routine Maintenance and Repairs
Many common car repairs or maintenance tasks require you to cut the power to prevent accidental short circuits or electrical shocks. Think about replacing a starter motor, an alternator, or even some more complex headlight assemblies. Any work involving electrical components or moving parts near the engine bay is safer with the battery disconnected.
Resetting Your Car’s Computer (ECU)
Sometimes, your car’s onboard computer (ECU) might throw a mysterious error code or exhibit strange electrical behavior. Disconnecting the battery for a short period (typically 15-30 minutes) can often reset the ECU, clearing temporary glitches and sometimes even resolving minor issues without a trip to the mechanic. This is a common trick, and learning how to disconnect car battery safely is the key.
Preventing Battery Drain During Storage
If you’re storing your car for an extended period – perhaps a seasonal vehicle, a car going into long-term parking, or an antique only driven on sunny Sundays – disconnecting the battery prevents parasitic drains from slowly depleting its charge. This ensures your battery stays healthy and ready to go when you are.
Replacing the Battery Itself
This might seem obvious, but you can’t replace a car battery without first knowing how to disconnect car battery safely. It’s the absolute first step in the battery replacement process.
Essential Safety Gear You’ll Need
Safety is paramount when working with car batteries. They contain corrosive acid and can generate significant electrical current. Don’t skip these steps or tools; they’re your best friends for a safe operation.
Personal Protective Equipment (PPE)
- Safety Glasses or Goggles: This is non-negotiable! Battery acid can splash, and hydrogen gas can be explosive. Protect your eyes from acid and debris.
- Gloves: Acid-resistant rubber or latex gloves will protect your hands from battery acid and general grime.
- Old Clothes: Battery acid can easily ruin clothing, so wear something you don’t mind getting stained or damaged.
Tools of the Trade
- Wrenches: You’ll typically need an open-ended or socket wrench, often 10mm or 13mm, to loosen the battery terminal nuts. Some cars might have specific battery terminal wrenches.
- Wire Brush or Battery Terminal Cleaner: Essential for removing corrosion from terminals, ensuring a good connection later.
- Battery Post Puller (Optional): If your terminals are severely corroded and stuck, this tool can help remove them without damaging the battery posts.
- Memory Saver (Optional but Recommended): This small device plugs into your car’s OBD-II port or cigarette lighter and provides a temporary power source, preserving your radio presets, clock, and other electrical memory settings.
- Rag or Towel: For cleaning up any residue or spills.
- Baking Soda and Water: A mixture of these can neutralize battery acid spills and corrosion.
Safety Precautions
- Well-Ventilated Area: Batteries emit hydrogen gas, which is highly flammable and odorless. Work in an open space.
- No Smoking or Open Flames: Keep all sources of ignition away from the battery.
- Insulated Tools (Ideally): While not always possible, using insulated tools reduces the risk of accidental short circuits. If your tools aren’t insulated, simply be extra careful not to touch anything metal with the wrench while it’s on a terminal, especially the positive one.
The Step-by-Step Guide to Disconnecting Your Car Battery Safely
Now, let’s get down to the practical steps. Follow these instructions carefully to
disconnect car battery safely and efficiently.
Preparation is Key
- Park on Level Ground and Engage Parking Brake: Ensure your car is stable and won’t roll.
- Turn Off Engine and All Accessories: Make sure the engine is off, and all lights, radio, HVAC, and any other electrical components are completely shut down.
- Remove Key from Ignition: This ensures there’s no power being sent to the car’s systems.
- Don Your PPE: Put on your safety glasses/goggles and gloves.
- Locate the Battery: Most batteries are under the hood, but some cars have them in the trunk, under the back seat, or even in the wheel well.
Locate the Battery Terminals
Identify the positive (+) and negative (-) terminals. The positive terminal usually has a red cap or a “+” symbol, and the cable connected to it is typically red. The negative terminal often has a black cap or a “-” symbol, with a black cable. The positive terminal is usually slightly thicker than the negative.
Crucial First Step: Disconnect the Negative Terminal First!
This is the most critical safety rule when you
disconnect car battery safely. Here’s why:
- If you accidentally touch your wrench to the car’s metal frame while it’s on the negative terminal, nothing will happen because the negative terminal is already connected to the car’s chassis (ground).
- If you started with the positive terminal and your wrench touched the car’s metal frame, it would create a direct short circuit, causing a large spark, potential damage to electrical components, and even melting your wrench or battery.
- Using your wrench, loosen the nut on the negative terminal clamp. You usually only need to loosen it a turn or two.
- Twist and pull the negative cable off the battery post.
- Once disconnected, tuck the negative cable away from the battery, ensuring it cannot accidentally swing back and touch the terminal. You can place it in a plastic bag or wrap it in a shop towel for extra safety.
Disconnect the Positive Terminal
- Now that the negative cable is safely out of the way, use your wrench to loosen the nut on the positive terminal clamp.
- Remove the positive cable from the battery post and tuck it away securely, again ensuring it won’t accidentally touch the battery or any metal.
Removing the Battery Hold-Down Clamp (If Necessary)
If you need to remove the battery from its tray, you’ll likely need to loosen or remove the hold-down clamp, which could be a strap over the top or bolts at the base.
Reconnecting Your Car Battery: The Right Way
Just as there’s a specific order to
disconnect car battery safely, there’s a correct sequence for reconnection to prevent sparks and potential damage.
Cleanliness is Next to Electrically Sound
Before reconnecting, it’s an excellent time for some preventative maintenance:
- Clean the Battery Tray: Remove any dirt, debris, or corrosion from the battery tray.
- Clean Terminals: Use a wire brush or battery terminal cleaner to scrub both the battery posts and the inside of the cable clamps until they are shiny metal. This ensures a good, strong electrical connection.
- Apply Anti-Corrosion Grease: After cleaning, apply a thin layer of dielectric grease or anti-corrosion spray to the terminals to prevent future buildup.
Reinstalling the Hold-Down Clamp (If Removed)
If you removed the battery, place it back into its tray and secure the hold-down clamp. The battery must be firmly in place and not shift around while driving.
Crucial First Step for Reconnection: Connect the Positive Terminal First!
This is the exact reverse of disconnection and equally important:
- Place the positive cable clamp back onto the positive (+) battery post.
- Tighten the nut securely with your wrench. It should be snug, not overly tight.
Connect the Negative Terminal Last
- Place the negative cable clamp back onto the negative (-) battery post.
- Tighten the nut securely. It’s common to see a very small spark when making this final connection, which is usually normal as the car’s systems draw initial power.
Final Checks
- Wiggle Test: Gently try to wiggle both cables. They should not move. If they do, tighten them a little more.
- Wipe Down: Clean up any tools or residue.
- Start the Car: Turn on your car and check all electrical components (lights, radio, windows) to ensure everything is functioning correctly. You may need to reset your radio presets or clock.
Common Pitfalls and Troubleshooting Tips
Even when you know how to disconnect car battery safely, you might encounter a few hiccups. Here’s how to address them:
Stuck or Corroded Terminals
If terminals are heavily corroded and stuck, a battery terminal puller can be a lifesaver. For less severe corrosion, pour a mixture of baking soda and water over the corroded areas (it will fizz), let it sit for a few minutes, then rinse with water and scrub with a wire brush. Always wear eye protection!
Overtightening Terminals
Don’t overtighten the terminal nuts. This can damage the battery posts or the terminal clamps themselves. Tighten until the clamp is snug and secure, and the cable doesn’t wiggle.
Forgetting to Reset Car Settings
If you didn’t use a memory saver, don’t be surprised if your radio presets are gone, the clock needs to be reset, or features like automatic window up/down might need reprogramming. Check your car’s owner manual for specific instructions on resetting these features.
Accidental Shorting
Reiterate the golden rule: Always
disconnect car battery safely by removing the negative terminal first, and reconnect the positive terminal first. This prevents dangerous short circuits and sparks.
What to Do if You Get Battery Acid on You
If battery acid splashes onto your skin or clothes, immediately flush the affected area with plenty of water for at least 15 minutes. If it gets in your eyes, flush them thoroughly and seek immediate medical attention. Keep baking soda handy to neutralize spills on surfaces.
You’ve now got all the knowledge and practical tips to
disconnect car battery safely and confidently. We’ve covered why it’s necessary, the essential tools and safety gear, the crucial step-by-step process for both disconnection and reconnection, and even some common troubleshooting advice. Remember, safety always comes first when working on your vehicle’s electrical system. Take your time, follow these steps meticulously, and you’ll be performing this fundamental task like a seasoned pro in no time. Happy wrenching!
Frequently Asked Questions
Why is it important to learn how to disconnect car battery safely?
Learning how to disconnect your car battery safely is crucial for preventing electrical shocks, damage to your car’s electrical system, and potential sparks that could ignite flammable gases. Following the correct procedure ensures both your personal safety and the longevity of your vehicle’s components.
What tools and safety gear do I need to disconnect car battery safely?
You’ll typically need a wrench or socket set (usually 10mm or 13mm), safety gloves, and safety glasses. It’s also highly recommended to have a wire brush for cleaning terminals and a battery terminal puller if the terminals are corroded or stuck.
Which terminal should I disconnect first when disconnecting my car battery?
Always disconnect the negative terminal first when working on your car battery. This critical step prevents accidental short circuits if your wrench touches the car’s metal frame while loosening the positive terminal, which could cause serious sparks or damage.
Can I just pull off the terminals, or is there a specific process to disconnect a car battery safely?
There is a specific, safe process to follow. After disconnecting the negative terminal, you should secure it away from any metal contact points before proceeding to disconnect the positive terminal. Avoid pulling on the cables themselves; always use the proper tools on the terminal clamps.
What are the common mistakes to avoid when attempting to disconnect car battery safely?
A common and dangerous mistake is disconnecting the positive terminal first, which poses a significant short-circuit risk if your tools come into contact with the car body. Another error is not wearing proper safety gear or failing to secure the disconnected terminals, which can lead to accidental reconnection or contact with metal.
How do I reconnect the car battery after it’s been safely disconnected?
When reconnecting, the order is reversed to maintain safety: always attach the positive terminal first, followed by the negative terminal. Ensure all connections are clean and tightly secured to prevent poor electrical contact, power loss, or future issues.