How to Desulfate a Battery Effectively with a Charger
Figuring out how to desulfate battery with charger can feel tricky, especially if you’re just starting out. It’s a common problem for anyone who uses batteries, from car owners to people with power tools. The good news? You don’t need to be an expert. This guide will make the whole process super simple. We’ll break down everything step-by-step so you can get your battery back in top shape. Let’s get started.
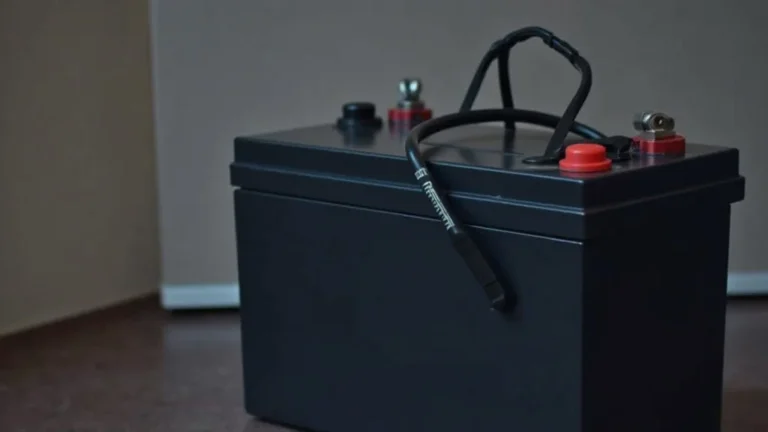
What Is Battery Sulfation and Why Does It Matter?
Battery sulfation is like a bad case of rust inside your battery. It happens when lead sulfate crystals build up on the battery’s plates. This build-up prevents the battery from accepting a full charge, making it less effective over time. If left untreated, sulfation can severely reduce your battery’s lifespan, eventually leading to its failure. This is why learning how to desulfate battery with charger is important.
How Sulfation Forms
Sulfation mainly happens due to two primary reasons: when a battery isn’t fully charged for extended periods, and during high-temperature exposure. When a battery isn’t fully charged, the lead sulfate doesn’t convert back into the active materials (lead dioxide and sponge lead) during charging. This leads to the formation of larger sulfate crystals that accumulate on the battery plates. Furthermore, exposure to high temperatures accelerates the chemical reactions within the battery, increasing the rate at which sulfate crystals form.
- Incomplete Charging: One major cause is when a battery is frequently used and not fully recharged. Partially charged batteries are more prone to sulfation because there isn’t enough voltage to convert the lead sulfate back into its original components.
- Temperature Extremes: Heat and cold have effects. High temperatures speed up the chemical reactions inside the battery, which contributes to sulfation. In contrast, cold temperatures can reduce the battery’s capacity and make it harder to accept a charge.
- Prolonged Storage: Batteries stored for a long time without use can also suffer from sulfation. Even if a battery is brand new, it will lose its charge over time, and if left sitting, sulfation can set in.
If you have a car that mainly does short trips, your battery might never get a full charge. This is a common situation that can accelerate sulfation, especially during cold weather when batteries are less efficient.
For example, if you live in a place with scorching summers, your car battery is likely to sulfate faster. Keep your battery protected from extreme temperatures whenever possible, parking in a garage during summer and winter can help.
If you’re storing a battery for winter, make sure to charge it periodically. Ideally, store batteries in a cool, dry place and use a trickle charger to maintain their charge.
The Effects of Sulfation
Sulfation affects how well a battery functions. The buildup of lead sulfate crystals on the battery plates reduces the battery’s ability to store and deliver electrical energy. This means your battery might not start your car as reliably, or your power tools will run for a shorter time. It can also lead to a complete battery failure, requiring a
- Reduced Capacity: A sulfated battery can’t hold as much charge as it did when it was new. This means it might seem like the battery is constantly losing power, even after being fully charged.
- Difficulty Starting: Sulfation makes it harder for the battery to deliver the power needed to start an engine, particularly in cold weather when the battery’s performance is already reduced.
- Increased Charging Time: Sulfated batteries take longer to charge because the lead sulfate crystals resist the flow of electricity. This will also cause the charger to get very warm.
If your car used to start easily, but now it struggles, sulfation might be the cause. Noticeable declines in performance are key signs.
If your car cranks slowly or clicks when you turn the key, it’s a hint that your battery isn’t providing the necessary amperage. This is a critical indication that it’s time to test and possibly desulfate the battery.
If you’ve noticed that it takes much longer than usual to charge your battery, or if the charger gets unusually hot during the process, sulfation may be present.
Choosing the Right Charger for Battery Desulfation
Not all chargers are created equal, especially when you are thinking about how to desulfate battery with charger. The right charger can make a big difference in how well your desulfation process works. Certain chargers are made to remove the sulfate buildup from the battery plates. Understanding the differences between charger types can ensure that you’re using the right tool.
Types of Chargers
There are different types of battery chargers available, each with its own advantages and suitable uses. Some chargers are very basic, designed only to provide a steady current to charge a battery. Others are more advanced, with features such as desulfation modes, temperature compensation, and multiple charging stages. This will play a key role in understanding how to desulfate battery with charger.
- Basic Chargers: These are the most straightforward chargers. They provide a constant voltage or current to charge the battery. They are often inexpensive and suitable for charging batteries that aren’t badly sulfated.
- Smart Chargers: Smart chargers are designed to monitor the battery’s condition and adjust the charging process accordingly. They have multiple charging stages, often including a desulfation mode. They are a good choice for people trying to figure out how to desulfate battery with charger.
- Desulfation Chargers: These chargers are specifically designed for desulfating batteries. They use a high-frequency pulse to break down lead sulfate crystals. They are the most effective type of charger for reversing sulfation and extending the life of a battery.
Basic chargers are fine for routine charging but might not be effective at desulfating a battery. They might not have the power needed to break down the lead sulfate crystals.
Smart chargers have a built-in desulfation function that delivers high-frequency pulses to break down sulfate crystals. They also usually provide protection against overcharging and overheating, making them safer.
If you want to desulfate a battery, a desulfation charger is a good choice. These chargers can often restore batteries that other chargers can’t.
Features to Look For
When selecting a charger for desulfation, consider a few features that can improve its effectiveness and safety. Understanding what the best tools are will help in successfully figuring out how to desulfate battery with charger.
- Desulfation Mode: This is a must-have feature for any charger used for desulfation. It sends high-frequency pulses to the battery to break down lead sulfate crystals. Look for chargers specifically labeled as desulfation chargers or those that offer a dedicated desulfation mode.
- Multiple Charging Stages: A good charger should have multiple charging stages, like bulk, absorption, and float, to fully charge and maintain the battery. These stages help optimize the charging process and prevent overcharging.
- Automatic Shut-Off: A charger with an automatic shut-off feature will stop charging the battery when it’s full. This will prevent overcharging, which can damage the battery and reduce its lifespan.
This is the most important feature. Make sure the charger you choose has a desulfation mode or function.
Multiple stages ensure the battery is charged safely and efficiently, reducing the risk of damage. Smart chargers often include these.
Automatic shut-off provides a safety feature that prevents overcharging and potential damage.
Steps to Desulfating a Battery with a Charger
Desulfating a battery is a process, but the steps are manageable with the right tools. Successfully learning how to desulfate battery with charger requires a careful approach. Following the steps will increase the chances of getting the battery back to good condition. Keep safety in mind throughout the process.
Preparing the Battery
Before you begin the desulfation process, there are a few important steps to take to ensure safety and effectiveness. This will help get things ready to understand how to desulfate battery with charger.
- Safety First: Put on safety glasses and gloves to protect your eyes and skin from acid spills. Battery acid is corrosive and can cause serious injury. Be sure to work in a well-ventilated area to avoid inhaling any fumes released during the charging process.
- Cleaning the Battery: Clean the battery terminals with a wire brush or a battery terminal cleaner. Remove any corrosion or debris that could interfere with the charging process.
- Checking the Battery’s Condition: Inspect the battery for any physical damage, such as cracks or leaks. If there’s any visible damage, the battery should not be charged.
Safety is the most important thing. Make sure you’re protected before you start.
Good connections are essential. Clean terminals will ensure that the charger can deliver power effectively.
If the battery is damaged, charging it could be dangerous and worsen the problem.
Connecting the Charger
Connecting the charger correctly is vital for the desulfation process. Incorrect connections can damage the battery or the charger, and could be a safety hazard. Always follow these steps carefully when learning how to desulfate battery with charger.
- Placement: Place the charger on a stable, non-flammable surface, away from the battery and any flammable materials. This will reduce the risk of fire or other hazards.
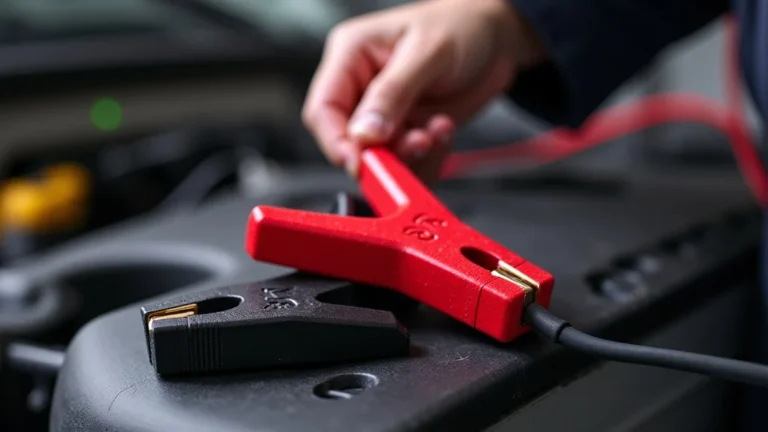
- Connecting the Clamps: Connect the red positive (+) clamp to the positive terminal of the battery. Connect the black negative (-) clamp to the negative terminal of the battery. Make sure the clamps are securely attached to the terminals to ensure a good connection.
- Choosing the Right Mode: Select the desulfation or charging mode on your charger. Most smart chargers have a desulfation mode you can select. If the charger has multiple charging modes, select the one designed for the type of battery you’re using.
A safe location is important. This is to avoid spills or other accidents.
Always connect the clamps in the correct order: positive first, then negative. This helps to prevent sparks.
Make sure to select the correct mode for the battery. This ensures the best results.
The Desulfation Process
The desulfation process involves using the charger to apply a special charging pattern that breaks down the lead sulfate crystals. Understanding this process is important for those exploring how to desulfate battery with charger.
- Initiating the Desulfation: Once the charger is properly connected and the mode is selected, turn on the charger. The charger will then begin the desulfation process. It may take some time before you notice any improvement.
- Monitoring the Process: Regularly check the battery during the desulfation process. Some chargers will provide information, like voltage or current, on a display. Check for any signs of overheating, swelling, or leaks.
- Completing the Charge: Once the desulfation cycle is complete, the charger will switch to the maintenance or float charging stage. This helps keep the battery at its peak. The charger might also provide an indicator that charging is finished.
Be patient and let the charger do its job. It may take several hours, or even days.
Keep a close eye on the battery during charging. If you see anything unusual, disconnect the charger and seek help.
After the desulfation is done, the battery may need to be charged fully.
Troubleshooting and Safety Measures
Desulfating a battery can sometimes present challenges, and it’s important to be prepared. When looking into how to desulfate battery with charger, understanding how to address common issues and ensure safety is crucial. With these tips, you’ll be able to manage any issues that arise and ensure a safe experience.
Common Problems
Even with the best equipment and careful procedures, some problems can occur during battery desulfation. Understanding how to handle these will make learning how to desulfate battery with charger a lot easier.
- Battery Doesn’t Charge: If the battery does not charge, there may be a serious internal problem, such as a short circuit or complete plate failure. If the charger indicates an error or does not register the battery, it might be beyond repair.
- Battery Overheats: If the battery becomes excessively hot during the desulfation or charging process, this indicates a problem. Overheating could be due to internal shorts or other failures.
- Battery Bulges: A bulging battery is another sign of severe internal damage, often due to gas buildup. This might be from overcharging or internal defects.
If the battery does not charge, disconnect it and consult a professional. The battery might be too damaged to be restored.
Disconnect the charger immediately if the battery gets too hot. Let the battery cool down and have it inspected. Overheating can be dangerous.
A bulging battery should never be charged. Dispose of it properly and replace it.
Safety Precautions
Safety should always be the top priority when working with batteries and chargers. Taking some simple steps helps prevent accidents. Here are some key points about how to desulfate battery with charger.
- Wear Protective Gear: Always wear safety glasses and gloves to protect your eyes and skin from battery acid. Make sure the gloves are acid-resistant.
- Work in a Well-Ventilated Area: Charge batteries in a well-ventilated space to prevent the buildup of explosive gases. Make sure there is fresh air to get rid of any fumes.
- Avoid Sparks and Flames: Keep open flames, sparks, and cigarettes away from the battery, as they could ignite the hydrogen gas released during charging.
Protecting yourself is critical. Battery acid can cause serious burns.
Good ventilation minimizes the risk of inhaling harmful gases and reduces the chances of an explosion.
Sparks can ignite flammable gases and cause a fire or explosion.
Real-World Examples and Success Stories
Hearing from others who have successfully desulfated their batteries can give you confidence. These stories show that desulfation can work. These examples also show the practical value of knowing how to desulfate battery with charger.
- The Car That Wouldn’t Start: A car owner found their car wouldn’t start one cold morning. They tested the battery and found it was severely sulfated. They used a smart charger with a desulfation mode to revive the battery. After a couple of days of desulfation and charging, the battery was able to hold a charge again, and the car started without a problem.
- Power Tool Revived: A contractor discovered that their cordless power tool batteries were losing power quickly. They used a desulfation charger and brought the old batteries back to life. They were able to get additional use from batteries that were considered useless.
This is a common issue that shows how desulfation can save a car battery. The owner saved money by desulfating the battery instead of replacing it.
This demonstrates how desulfation can be used for power tool batteries. The contractor avoided having to buy new batteries by learning how to desulfate battery with charger.
Frequently Asked Questions
Question: Can any battery charger desulfate a battery?
Answer: No, not all chargers have a desulfation function. You need a charger specifically designed for desulfation or one with a desulfation mode.
Question: How long does it take to desulfate a battery?
Answer: The desulfation process can take anywhere from a few hours to several days, depending on the severity of the sulfation and the type of charger.
Question: Can I overcharge a battery while desulfating it?
Answer: Yes, it’s possible. Always monitor the battery during the process and ensure your charger has an automatic shut-off feature to prevent overcharging.
Question: Will desulfation always work?
Answer: No, desulfation isn’t always successful. If a battery is severely damaged, has internal shorts, or other problems, desulfation may not work.
Question: Is it safe to desulfate a battery at home?
Answer: Yes, it’s safe if you follow safety precautions like wearing protective gear and working in a well-ventilated area. Always read the charger’s instructions.
Final Thoughts
Successfully learning how to desulfate battery with charger can extend a battery’s life, save you money, and reduce waste. You’ve learned about battery sulfation, why it happens, and how to deal with it. You now understand what type of charger you’ll need, the important safety steps, and how the process works. By using the right charger and following the guidelines, you can restore many batteries to their former glory. Armed with this knowledge, you are equipped to tackle battery sulfation head-on. Don’t hesitate to explore and experiment to revive your batteries.