How to Clean Battery Terminals Step by Step for a Fresh Start
If you’ve ever dealt with a car that won’t start, you might have wondered about the battery. One common problem is dirty terminals, and learning how to clean battery terminals is a skill everyone should have. It can seem tricky at first, but don’t worry! This process is straightforward, and we’ll break it down into easy steps. We will cover the tools you’ll need, the steps to follow, and ways to prevent future corrosion. Get ready to keep your car running smoothly!
Gathering Your Supplies Before Cleaning
Before you get started, it’s vital to have the right gear. This makes the job easier and keeps you safe. You don’t need a lot, but having the correct tools will ensure you do a good job. You’ll find that these items are readily available at your local auto parts store or even in your garage. This way, you won’t get interrupted halfway through.
Essential Tools and Safety Gear
Safety is the most important thing. Always wear safety glasses and gloves when working with batteries. The acid can cause harm to your eyes and skin. Have a well-ventilated area so fumes don’t build up.
-
Safety Glasses: Protect your eyes from acid splashes. Make sure they fit snugly and offer good coverage. A simple pair of safety glasses is usually enough. Remember, eye protection is essential when dealing with batteries.
You can find them at most hardware stores. Safety glasses will prevent any acid splashes from getting into your eyes, which can cause serious damage. This small investment can save you a world of trouble.
-
Gloves: Protect your hands from acid and grease. Gloves are also beneficial if you have sensitive skin or are prone to allergies. Look for gloves made from a resistant material. Make sure they fit well so you can grip tools.
Rubber or nitrile gloves are ideal for this task. They create a barrier, preventing contact with harmful substances. This is a very easy way to protect your hands. Always check the gloves before each use for any rips or tears.
-
Wrench Set: You’ll need the correct size wrench to remove the battery terminals. A wrench set gives you options. Look for a set that includes common sizes. Ensure the wrench fits the terminal bolts properly.
Choose adjustable wrenches if you’re uncertain about bolt sizes. A set that includes both metric and standard sizes is always a good idea. Having the right wrench will make removing the terminals easier and prevent damage.
-
Wire Brush (or Battery Terminal Cleaner): A wire brush is for scrubbing the terminals clean. Choose one with a handle for better grip. Consider a brush specifically for battery terminals. Use the brush to scrub away corrosion and debris.
A battery terminal cleaner is also an option. These tools are designed to fit around the terminals. It is specifically made for battery terminals, making them very effective at removing corrosion. This gives the best possible contact.
-
Baking Soda and Water Solution: A mixture of baking soda and water is a neutralizer. This solution removes acid residue. This will neutralize any acid spills. This is a simple but effective cleaning agent.
Use about a tablespoon of baking soda per cup of water. Mix well until the baking soda dissolves. Keep this mixture handy in case of acid spills. This will neutralize acid and is very safe to handle.
-
Spray Bottle (Optional): A spray bottle can make applying the baking soda solution simple. Fill it with the baking soda and water mixture. This helps you to target the area. This can make cleaning easier and more precise.
This allows you to control the application of the cleaning solution. A spray bottle can prevent excess fluid from dripping. Ensure the spray bottle is clean before use to avoid contamination.
-
Small Container: For mixing the baking soda solution. A plastic cup is fine for the job. Use this to prepare your cleaning solution. Having a container will prevent messes.
Choose a container that you can easily discard. This helps to prevent cross-contamination. This is an important consideration when using a cleaning solution.
The Step-by-Step Guide on How to Clean Battery Terminals
Now that you have your gear, let’s explore the process. Cleaning battery terminals is not difficult. The key is to follow the steps in order. Take your time, and you’ll improve the electrical contact of your battery. It’s a quick process that keeps your vehicle’s electrical system working correctly.
Step 1: Safety First – Preparing for the Job
Your safety is the most important part of this task. Before anything, park your car in a well-ventilated location. Turn off the engine and remove the keys from the ignition. This prevents the car from starting while you are working. Always have a clear area and avoid working near any open flames or sparks.
-
Wear Safety Glasses and Gloves: Protect yourself from acid and debris. These will prevent any injury to your eyes or skin. Make sure they fit properly.
Ensure that your safety glasses and gloves are clean. This keeps you protected while working. It is a fundamental safety precaution. This helps you avoid harmful contact with battery acid.
-
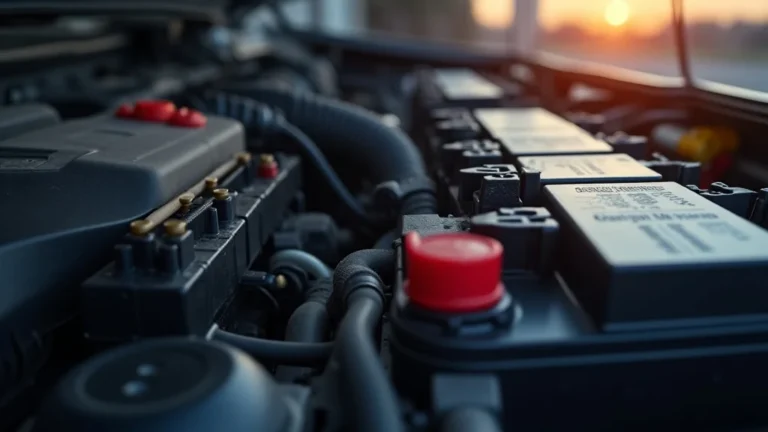
Locate the Battery: Know where your battery is. It’s usually under the hood or sometimes under a seat. Take note of the battery’s location. Knowing the location saves time.
Consult your car’s manual if you’re unsure. Batteries can be in different locations depending on the vehicle model. Identifying the battery’s location is the start of the job. This is an important first step.
-
Gather Your Tools: Have everything ready. Lay out your tools to keep things organized. This will make it easier to follow the steps. Being organized saves time and effort.
Double-check that you have all the required items. This saves trips back and forth. This is an important step to prevent interruptions while you’re working. Make sure you can reach everything.
Step 2: Disconnecting the Battery Terminals
Before you can begin cleaning, you need to disconnect the battery. This ensures there’s no electrical current flowing. This also prevents any accidental shorts. Always disconnect the negative terminal first. Reconnect the negative terminal last.
-
Identify the Terminals: Locate the positive (+) and negative (-) terminals. They are usually marked with plus (+) and minus (-) symbols. Take note of their position. This is the first step.
The positive terminal is red or has a red cover. The negative terminal is usually black. Ensuring you know which terminal is which is extremely important. This will prevent any shorts or damage.
-
Loosen the Negative Terminal: Use a wrench to loosen the nut on the negative (-) terminal. You will probably need to wiggle the clamp to remove it. Avoid touching the wrench to any metal.
If the nut is stuck, use penetrating oil to help loosen it. Work slowly to prevent damaging the terminal. Never force it; use the right tools for the job. Handle the terminal with care once removed.
-
Remove the Negative Cable: Lift the negative cable off the terminal. This completely cuts off power. Avoid the terminal from touching anything. Make sure it cannot make contact.
If you’re unsure about what is happening, consult your car’s manual. Ensure that the cable is fully disconnected. Place the cable away from the battery to avoid accidental contact. Safety first!
-
Loosen and Remove the Positive Terminal: Loosen the nut on the positive (+) terminal. Carefully remove the positive cable. Make sure that the cable also does not touch any metal parts.
Be extra cautious when removing the positive terminal. Avoid touching both terminals at the same time. Check to ensure the terminals are clear before touching them. Always remember to stay safe.
Step 3: Cleaning the Terminals
With the battery disconnected, the cleaning can begin. Use the wire brush or battery terminal cleaner. The baking soda solution will help neutralize the acid. Take your time to clean them correctly for the best results.
-
Prepare the Baking Soda Solution: Mix baking soda and water in your container. Mix until the baking soda dissolves completely. Use warm water to help it dissolve better. This is an important step.
Ensure the solution is mixed well. Always use fresh solution for the best results. Keep the solution away from children. Always stir the solution before use.
-
Apply the Baking Soda Solution: Use a brush to apply the baking soda solution to the terminals. The solution will fizz as it reacts with the acid. Be careful not to spill the solution.
Use a spray bottle for easier application. Ensure that the solution reaches all parts of the terminals. Apply it liberally to ensure the acid is neutralized. Do this carefully to make sure you have coverage.
-
Scrub the Terminals and Clamps: Use the wire brush to scrub away corrosion. Remove all the buildup from the terminals and clamps. Scrub until they are shiny and clean. Work carefully.
Make sure you remove all the corrosion. If the corrosion is severe, you may need to apply more solution. Ensure that you have thoroughly cleaned the terminals. This ensures proper electrical contact.
-
Rinse with Water: Rinse the terminals and clamps with clean water. Use a spray bottle or pour carefully. The goal is to remove the baking soda residue. Make sure everything is clear.
Ensure that all baking soda solution is removed. The baking soda solution can cause corrosion itself. Make sure that you rinse everything properly. Properly rinsing will remove any residues.
-
Dry the Terminals and Clamps: Use a clean cloth to dry the terminals and clamps completely. Remove all moisture to prevent future corrosion. Make sure they are totally dry before reassembling.
This is an important step to avoid future issues. Use a new cloth to avoid leaving any debris. Ensure all moisture is removed before reattaching. Proper drying will prevent future corrosion issues.
Step 4: Reconnecting the Battery
After cleaning, it’s time to put everything back together. Reconnect the battery terminals in the correct order. Check your work to ensure everything is secured. It’s a simple process that completes the job.
-
Attach the Positive Terminal: Place the positive cable onto the positive terminal. Make sure it’s snug, but do not overtighten. It should be secure, but avoid damaging the terminals.
Ensure the clamp fits tightly. If it does not fit snugly, you may need to replace it. A loose connection can cause problems. Always secure the positive terminal first. Remember, safety first!
-
Attach the Negative Terminal: Place the negative cable onto the negative terminal. Make sure it’s secure. Do not overtighten the terminal. Ensure the connection is firm and steady.
Make sure that the clamp fits tightly. A loose connection can cause problems. Tighten the nut until the terminal is secure. Always secure the negative terminal last. Again, check your work.
-
Test the Connection: Try starting your car. Check to ensure the engine starts quickly. Check the lights and radio. Check for any other electrical problems. Test it right away.
If the car won’t start, recheck the connections. Double-check the cable alignment. If you’re still having problems, check your work. If the problem persists, consult a professional. Always double-check.
-
Apply Anti-Corrosion Products (Optional): Apply a terminal protector to the terminals. This is a spray or a grease. It protects against future corrosion. Do this after everything is connected.
This will prevent corrosion from returning. Consider using a battery terminal protector to keep them clean. Make sure the spray or grease does not come into contact with the battery. This is an extra step.
Common Problems and Troubleshooting
Even when following all steps, problems can arise. Here are some of the most common issues. These are easy to fix and prevent more serious problems. Knowing how to handle these issues will improve the lifespan of your battery.
Troubleshooting Battery Issues
Sometimes, things do not go as planned. If you have any problems, it is important to address them. These tips will help you quickly identify and fix any issues.
-
Car Won’t Start: This could be a loose connection. Go back and check your work. Ensure the terminals are secure. If needed, try cleaning them again.
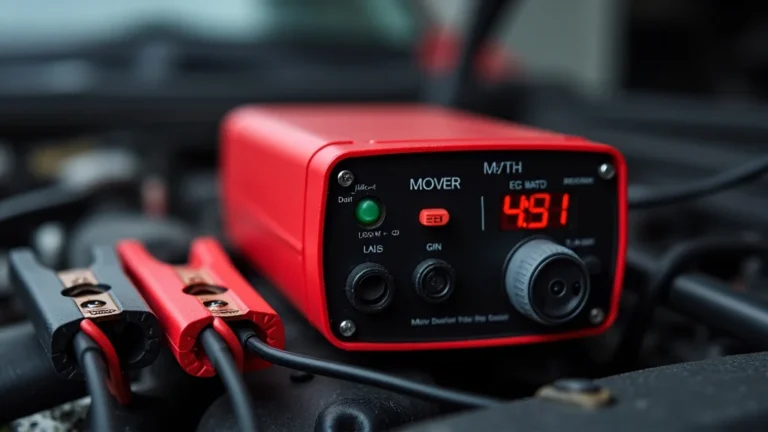
Check the battery’s voltage to ensure it’s not dead. Check the fuses. Also, check the ground connections. Always start with the simple checks first. Remember to stay calm and work through the problem.
-
Corrosion Returns Quickly: The battery might be leaking acid. The battery might be old. You could have a charging issue. Replacing the battery might be needed.
Make sure to clean the terminals more often. Consider using a battery terminal protector. Check the charging system. Consider getting the system checked by a professional. This will provide you the best results.
-
Terminals Still Corroded: The terminals may be severely corroded. Consider a stronger cleaning agent. Try using a battery terminal cleaner tool. The connection might still be weak.
Make sure the wire brush is doing its job. You might need to replace the battery cables. Always check the cables for damage. Consult a professional if you need help. Remember to stay safe.
Preventing Future Corrosion
After cleaning the battery terminals, you’ll want to stop it from happening again. Taking preventive steps will extend the life of your battery. Also, it will prevent any electrical issues. Taking these steps is easy and cost-effective.
Tips to Prevent Corrosion
Preventing corrosion can save you time and money. Here are some easy steps that you can take. These methods will keep your battery terminals in great shape. Simple habits can prevent more extensive cleaning in the future.
-
Use Battery Terminal Protector: Apply a protective spray or grease. This creates a barrier against moisture and corrosion. Apply this after cleaning the terminals. This is an important step.
These products are widely available at auto parts stores. They are easy to use and can be applied quickly. Following the manufacturer’s instructions is the best way to get good results. This helps reduce the buildup of corrosion.
-
Regular Inspections: Regularly check your battery terminals. Make this a habit. Look for signs of corrosion or buildup. Perform a quick check every time you open the hood.
Early detection makes the cleaning process easier. It also will prevent any potential issues. This can keep your vehicle running smoothly. Checking your battery is a proactive approach to vehicle maintenance.
-
Ensure Proper Battery Ventilation: Make sure the battery’s vent is not blocked. This allows harmful gases to escape. Proper ventilation can reduce corrosion. This is a very important step.
If the vent is blocked, gases can build up. This accelerates corrosion. Locate the vent tube and ensure it is free. Check the vent tube and keep it clear. Check this whenever you do maintenance.
-
Keep the Battery Top Clean: Wipe down the battery’s top surface. This prevents any spills. This is a good way to keep everything clean. Also, it will prevent any potential buildup.
Use a damp cloth to clean the battery. Avoid letting water get into the cells. This helps to prevent any future issues. This simple step can prevent the buildup of grime and dust. This is an important consideration.
-
Check for Leaks: Look for any signs of acid leakage. Check for any wetness around the battery terminals. If you see leakage, the battery may need to be replaced.
If you suspect leakage, handle the battery with care. Acid leakage can cause serious damage. If unsure, seek professional help. Leaks can cause corrosion and other damage to your car. Take it seriously.
Battery Terminal Corrosion: A Closer Look
It helps to know what causes corrosion. Then, it will be easier to prevent it. Corrosion damages battery terminals. It also affects the performance of your car. By knowing the factors that cause corrosion, you can take action. You can prevent it from happening in the future.
What Causes Corrosion?
Corrosion forms because of a chemical reaction. The reaction occurs between the battery terminals. Also, it happens with the environment around them. Understanding these reasons will give you a better way to prevent this from happening.
-
Acid Leaks: Battery acid can leak from the battery. This often happens because of age or damage. Any leakage can cause corrosion. This will impact the terminals.
Acid is highly corrosive. It can eat away at the terminals. It is also harmful to the surrounding parts. If you notice any leaks, it’s critical to take action. Also, it’s a good idea to seek help from a professional.
-
Hydrogen Gas: Batteries produce hydrogen gas during charging. The gas mixes with the air. It reacts with other components. This can create corrosion on the terminals.
Hydrogen gas is a natural byproduct of the charging process. Proper ventilation helps remove this gas. Proper ventilation is very important in preventing the buildup of corrosion. Always check for this. This is a good habit.
-
Humidity and Temperature: High humidity speeds up corrosion. Extreme temperatures can also contribute to the issue. Both of these contribute to the issue. This creates the perfect conditions for corrosion.
These conditions are difficult to control. Always try to store your car in a temperature-controlled area. This will help to reduce the impact of these factors. This will also help to extend the life of your battery.
-
Overcharging: Overcharging batteries can produce more hydrogen gas. This accelerates corrosion. This also damages the battery’s internal components. This is a situation you want to avoid.
Make sure your charging system is functioning correctly. Avoid charging your battery for long periods. Do not use chargers that may damage the battery. Having a properly working system can prevent problems. This prevents issues.
Real-Life Examples and Case Studies
Seeing how this applies in the real world can be helpful. These examples can give you a better feel for the impact. These stories show the importance of clean terminals.
-
The No-Start Situation: A driver found their car would not start. After checking, they found corrosion on the terminals. After cleaning, the car started right up. The cleaning process was very simple.
The corrosion prevented the proper flow of electricity. Cleaning the terminals resolved the issue. This restored the connection, and the car started immediately. This simple maintenance fixed the issue quickly.
-
Intermittent Electrical Problems: Another driver had issues with their car’s electrical system. This included the lights dimming. After cleaning, all issues disappeared. This also improved performance.
The corrosion created a weak connection. Cleaning the terminals improved the connection. The car’s electrical system started functioning properly. This simple step restored the system to its best performance.
-
Preventing a Tow: A car owner cleaned their battery terminals regularly. They were always able to avoid any starting issues. They never had to call for a tow truck.
Regular cleaning prevented any electrical failures. This saved them time and money. This simple maintenance prevented them from the inconvenience of breakdowns. This regular maintenance is a game changer.
Frequently Asked Questions
Question: How often should I clean my battery terminals?
Answer: It’s a good idea to inspect them at least every few months, or with every oil change. Clean them whenever you see corrosion.
Question: What if the corrosion is really bad?
Answer: For severe corrosion, you might need a stronger cleaner. You may need to replace the battery cables.
Question: Can I use tap water instead of distilled water for the baking soda solution?
Answer: Distilled water is recommended to avoid introducing impurities. Tap water may contain minerals that could leave deposits.
Question: Is it safe to touch the battery terminals with my bare hands?
Answer: No, it’s best to wear gloves. Battery acid can cause burns.
Question: What’s the best way to dispose of the old battery?
Answer: Take it to a recycling center or auto parts store that accepts batteries.
Final Thoughts
Now you know how to clean battery terminals. You have the tools, know the steps, and understand how to prevent problems. Regular cleaning improves your car’s electrical performance. This will prevent many issues and help your car start every time. The tips here will help keep your car running smoothly. This will save you time and money. Now, go ahead and keep your battery in top shape!