How to Check Car Alternator Voltage Easily and Accurately
Figuring out how to check car alternator voltage can seem tough for new car owners or those less familiar with car mechanics. It involves some electrical testing, which might sound intimidating. Don’t worry, though! It’s usually a straightforward process. This guide will walk you through the steps in a clear, easy-to-follow way. We’ll simplify the whole process, so you can check your alternator’s voltage and find out if it’s working properly. Let’s get started!
What Your Car’s Alternator Does
The alternator is a vital part of your car’s electrical system, acting as a generator. Its main job is to produce the electricity your car needs to run. It powers all the electrical components, from the lights and radio to the engine’s computer. It also keeps the battery charged. Without a functioning alternator, your car will eventually stall because the battery will drain. This is why knowing how to test it is really important.
The Role of the Alternator Explained
The alternator is driven by a belt connected to the engine’s crankshaft. As the engine runs, the belt spins the alternator’s rotor, which is a rotating magnetic field. This field interacts with the stator, a set of stationary coils. This interaction creates an electrical current through a process called electromagnetic induction. This is how the alternator generates power. The current produced is alternating current (AC). However, your car’s systems run on direct current (DC). This AC current is converted to DC by a component called the rectifier, typically made up of diodes, before it is sent to power the car’s electrical components and charge the battery. The alternator also includes a voltage regulator, which maintains a consistent voltage output, protecting the car’s electrical components from damage.
- Generating Electricity: The alternator converts mechanical energy from the engine into electrical energy to power the car’s electrical systems.
- Charging the Battery: It recharges the car’s battery, so it can start the engine each time.
- Powering Electrical Systems: It provides power for lights, radio, air conditioning, and other electrical components while the engine is running.
- Voltage Regulation: The voltage regulator keeps the output voltage stable to protect electrical components from damage caused by voltage fluctuations.
A car alternator typically produces between 13.5 to 14.5 volts when the engine is running. If the voltage is too low, the battery won’t charge properly, and electrical systems might not work well. If the voltage is too high, it can damage the battery and other electrical components. Regularly checking your alternator’s output helps ensure it’s working correctly and that your car’s electrical systems are functioning as they should.
Symptoms of a Failing Alternator
Several signs can indicate your alternator is starting to fail. These symptoms can appear gradually or quite suddenly, depending on the nature of the issue. Catching these early can save you from bigger problems. If you notice any of these, it’s wise to investigate the voltage output. Ignoring them can lead to a car that won’t start or electrical components that fail. Addressing these issues quickly can prevent you from getting stranded.
- Dim or Flickering Lights: If your headlights, dashboard lights, or interior lights are dim or flicker, the alternator might not be producing enough power.
- Battery Warning Light: The battery-shaped warning light on your dashboard will illuminate if the alternator isn’t charging the battery effectively.
- Difficulty Starting the Car: A failing alternator might not fully charge the battery, making it hard to start the engine, especially in cold weather.
- Electrical Component Failure: Erratic behavior from power windows, the radio, or other electrical devices could be a sign of insufficient power.
- Unusual Noises: Strange noises from the engine compartment, like a whining or grinding sound, might come from a failing alternator.
Understanding these signs will give you a good idea when you should start testing your alternator’s output voltage. Early detection is really important. In many cases, it will save you money and headaches.
Tools You’ll Need to Check Alternator Voltage
Before you begin checking your car alternator voltage, you will need a few basic tools. The right equipment makes the process safe and accurate. Having these items on hand ensures you can test the alternator output properly. You will find that these tools are very simple to obtain. These tools are the essentials for testing your car’s electrical system, and they will enable you to find out if your alternator is working correctly. It is also a good idea to have some safety equipment on hand.
Essential Tools for Testing
The primary tool needed is a multimeter, a device that measures voltage, current, and resistance. A digital multimeter is easy to use and provides clear readings. Besides the multimeter, you might need some basic hand tools to access the alternator or battery terminals. These could include a wrench or socket set, but they are not always required, depending on your car. Safety equipment is important. Protective eyewear and gloves will keep you safe during the testing process.
- Digital Multimeter: This is the main tool you will use to measure voltage. Look for a digital one that’s easy to read and accurate.
- Gloves: Wear gloves to protect your hands when working with the car’s electrical system.
- Safety Glasses: Protect your eyes from any potential hazards.
- Wrench Set (or Socket Set): You might need these to access the battery terminals or the alternator itself.
- Clean Cloth: Keep a clean cloth handy to wipe down the battery terminals.
These tools are readily available at most auto parts stores or online retailers. Having these tools will get you ready to find out if your car’s alternator is working well or not. Knowing what you need upfront saves time and prevents setbacks. Getting the right tools is the first step toward checking your alternator effectively.
Understanding the Multimeter
A multimeter is a versatile tool for measuring electrical values. When using it to check alternator voltage, you’ll mainly use the voltage setting. Familiarizing yourself with the multimeter’s settings, especially voltage measurement, is key. The multimeter usually has different ranges for voltage, such as 20V or 200V. The correct setting depends on what you are testing, so select the one that will measure voltage accurately. Knowing how to set up the multimeter for voltage checks is crucial for getting reliable readings. Most digital multimeters are easy to use. Be sure to carefully read the manufacturer’s directions.
- Voltage Selection: Ensure you select the correct voltage setting (usually DC) on the multimeter.
- Probe Placement: Connect the red probe (positive) to the positive terminal and the black probe (negative) to the negative terminal.
- Reading the Display: The multimeter will display the voltage reading.
- Range Selection: Start with a higher voltage range (e.g., 20V) and adjust down if needed for better accuracy.
- Safety Precautions: Make sure the multimeter’s probes are clean before use and that you are not touching any metal parts.
These multimeter tips will help you make accurate readings when testing your alternator. A correctly set up multimeter gives you precise information about your car’s electrical system. Understanding these steps and precautions will make sure your voltage tests are safe and trustworthy.
Step-by-Step Guide: How to Check Car Alternator Voltage
Checking your car alternator voltage is pretty straightforward when you follow the right steps. This guide will walk you through the process, from preparing your car to taking and interpreting the readings. Understanding the process will allow you to determine if your alternator is doing its job. Regular checks help catch problems early, so you can avoid being stranded with a dead battery. Let’s explore the simple steps involved.
Preparing Your Car for Testing
Before testing the alternator, preparing your car is essential for accurate results. Park on a level surface and turn off the engine. Make sure the parking brake is engaged for safety. Then, open the hood. Locate the car battery and alternator. You may need to consult your owner’s manual. Ensure that the area around the battery terminals is clean, because any dirt can affect your readings. This preparation will help you get accurate voltage readings. A well-prepared car guarantees the best test conditions.
- Park on a Level Surface: This ensures your car is stable and safe to work on.
- Engage the Parking Brake: This prevents the car from rolling while you are working.
- Open the Hood: Gain access to the battery and alternator.
- Locate the Battery and Alternator: Familiarize yourself with their locations in your car.
- Check Battery Terminals: Ensure they are clean and free of corrosion.
Proper preparation lays the groundwork for accurate testing. These simple steps ensure your safety and provide the best conditions for measuring the voltage output from your car’s alternator. Taking these easy steps makes for a trouble-free testing process. This upfront setup guarantees correct readings.
Testing the Alternator Voltage
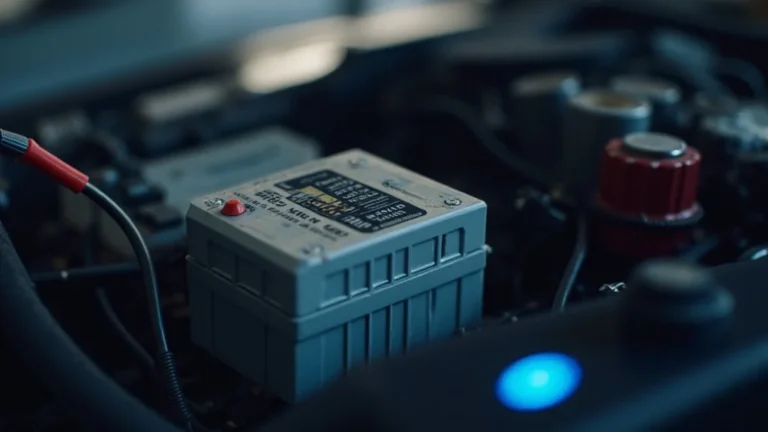
Now, let’s begin the actual testing procedure. The first step involves checking the battery voltage with the engine off. This lets you see the starting point. Next, start your car and check the voltage again. This will show you how well the alternator charges the battery. Knowing these two readings helps determine the alternator’s performance. The voltage readings will give you a clear picture of the alternator’s health and functionality. The process is easy if you are careful to follow instructions.
- Battery Off Test: Turn off the engine and connect the multimeter to the battery terminals. Set the multimeter to DC voltage, usually at a 20V range. Place the red probe on the positive (+) terminal and the black probe on the negative (-) terminal. Take note of the voltage reading. A healthy battery should read around 12.6 volts.
- Battery On Test: Start the car and let it idle. Keep the multimeter connected to the battery terminals, as before. Observe the voltage reading. This reading should be higher than the off reading, usually between 13.5 to 14.5 volts. This indicates the alternator is charging the battery.
- Load Test (Optional): Turn on electrical components like the headlights and air conditioning. Note the voltage reading again. If the voltage drops significantly (more than 0.5 volts) from the previous running test, there might be an issue.
- Alternator Test: Sometimes, the alternator itself has a positive terminal. Test by connecting the red multimeter probe to the alternator positive terminal and the black probe to a ground point.
These steps are designed to check alternator voltage accurately. You’ll be able to tell if your alternator is working correctly or if it is failing. The readings you get will tell you about the health of your car’s charging system. You can then take any steps needed to fix the problem.
Interpreting the Voltage Readings
Understanding what the multimeter readings mean is vital to the process. When the car is off, the battery voltage should be around 12.6 volts, showing that the battery is holding a charge. When the engine is running, the voltage should increase to between 13.5 and 14.5 volts. A higher reading shows that the alternator is charging the battery. Any issues like an undercharging or overcharging alternator will show up here. Knowing how to understand these readings is key to diagnosing alternator issues. It’s really useful to keep these voltage ranges in mind.
- 12.6 Volts (Engine Off): This indicates a fully charged battery.
- 13.5-14.5 Volts (Engine Running): Indicates the alternator is charging the battery.
- Below 12.6 Volts (Engine Running): The alternator is not charging the battery, and a replacement might be needed.
- Above 14.5 Volts (Engine Running): The alternator is overcharging, which can damage the battery and electrical components.
- Significant Voltage Drop During Load Test: This suggests the alternator is struggling to handle the electrical load.
By interpreting your test results, you will know if your alternator is working correctly. These numbers give you a clear picture of what’s happening. The right action depends on the outcome of your tests. If you are unsure, consult a mechanic.
Troubleshooting Common Alternator Problems
Sometimes, even after testing, you might encounter issues. Problems range from low voltage to complete failure. If your tests show problems, there are steps you can take. You might be able to find and fix simple issues. Other issues might need a professional. Troubleshooting will help you pinpoint the cause of the issue. Being aware of these issues will help you resolve them quickly.
Low Voltage Issues
Low voltage is a common issue with alternators, and often, it’s caused by a faulty alternator, a worn-out belt, or bad wiring. If your test results show low voltage while the engine is running, the alternator might not be producing enough power. Here are some likely causes and what you can do about them. A low voltage can lead to a car that doesn’t start, or your electrical components might not work well. Looking at potential causes can help you resolve the problem.
- Faulty Alternator: The alternator might need to be replaced.
- Worn Belt: A worn or loose belt might not be spinning the alternator properly.
- Loose Wiring: Check for loose or corroded connections.
- Dead Battery: If the battery is very old or damaged, it might not hold a charge.
- Parasitic Drain: Sometimes, something in the car is using power when it shouldn’t.
Diagnosing low voltage issues is crucial. These troubleshooting steps will guide you. These solutions can resolve the issue. If the problem persists, it may be time to consult an expert.
Overcharging Issues
Overcharging can also be a problem. This happens when the alternator produces more voltage than needed. Overcharging can damage the battery and other electrical components, making it very important to identify it quickly. If your multimeter shows readings over 14.5 volts while the engine is running, there is a good chance that the alternator is overcharging. The voltage regulator, which is part of the alternator, may have failed. Addressing overcharging promptly can prevent bigger damage. It protects your car’s electrical systems. Checking for overcharging will prevent serious electrical problems.
- Faulty Voltage Regulator: This is a key part of the alternator, and when it fails, overcharging happens.
- Damaged Battery: Overcharging can damage the battery.
- Electrical Component Damage: Overcharging can cause damage to other electrical components.
- Loose Connections: Always double check for any loose wiring.
Taking action can prevent the cost of electrical component failures. Be very careful if you are dealing with a potentially overcharging alternator. Address the problem quickly to keep your car’s electrical systems working properly. Overcharging is dangerous and can create electrical fires.
Advanced Diagnostics and Further Actions
Sometimes, simple tests aren’t enough to solve the problem. If you encounter an electrical issue and the initial tests don’t reveal the cause, further action may be needed. Exploring advanced diagnostics can uncover underlying problems. It helps find the real cause, so you can fix it correctly. These diagnostics provide a more thorough assessment of the electrical system.
Seeking Professional Help
If you’ve performed the basic checks and are unsure of the outcome, or if you don’t feel comfortable, consider asking for professional help. Professional mechanics have specialized tools and the expertise to diagnose and fix complex electrical issues. They can also perform more detailed tests that aren’t possible at home. Taking the car to a mechanic can help avoid guessing and potential damage. Their skill ensures a safe, reliable fix. A professional can quickly pinpoint the issue. Professional help provides expert guidance.
- Complex Electrical Issues: Professionals can handle complex problems beyond simple voltage checks.
- Specialized Tools and Training: They have access to the equipment and experience to do the job right.
- Safety: Mechanics ensure the work is done safely.
- Warranty: Work done by a professional often comes with a warranty.
Knowing when to seek help ensures the issue is resolved correctly. The safety of you and your car is most important. Knowing when to call in the professionals keeps you on the safe side. Asking for help avoids more extensive issues down the road.
When to Replace Your Alternator
Knowing when to replace your alternator is critical to keeping your car working. You should consider getting a new alternator if your tests repeatedly show low or no voltage, the battery warning light stays on, or if the alternator is making strange noises. The cost of a new alternator can be expensive, but is cheaper than the cost of electrical failures. Ignoring these signs can lead to more serious problems and potential breakdowns. If it’s time to replace the alternator, it’s best to act quickly to avoid getting stranded. When your alternator has reached the end of its life, replacement is necessary. The goal is to keep your car running smoothly. Knowing when to replace it is important.
- Consistently Low Voltage: If voltage readings remain below the expected range, even after troubleshooting, replacement is needed.
- Battery Warning Light: A lit battery warning light points to a problem with the charging system.
- Unusual Noises: Grinding or whining sounds may suggest failing internal components.
- Aging: Alternators have a lifespan, and it’s time to replace them after many years of use.
- Professional Recommendation: If a mechanic advises replacement after testing, it is wise to heed their advice.
Knowing the signs for when to replace an alternator keeps your car working. Replace your alternator to keep your car running reliably. A new alternator will ensure your car functions as designed. A failing alternator can cause many problems. Replacement will avoid these issues.
| Feature | Working Alternator | Failing Alternator |
|---|---|---|
| Battery Voltage (Engine Off) | Around 12.6V | Around 12.6V (or lower if the battery is failing) |
| Battery Voltage (Engine Running) | 13.5V to 14.5V | Lower than 13.5V, or fluctuating wildly |
| Lights | Bright and steady | Dim or flickering |
| Battery Warning Light | Off | On |
Frequently Asked Questions
Question: What does a car alternator do?
Answer: The car alternator generates electricity to power the car’s electrical systems and recharge the battery.
Question: What voltage should my alternator produce?
Answer: When the engine is running, your alternator should produce between 13.5 and 14.5 volts.
Question: How do I measure the alternator voltage?
Answer: Use a digital multimeter and set it to DC voltage. Connect the probes to the battery terminals, with the engine both off and running.
Question: What does it mean if the alternator voltage is low?
Answer: Low alternator voltage means the alternator isn’t charging the battery properly and might need repair or replacement.
Question: Can I replace my alternator myself?
Answer: Depending on your skills and the car model, yes, but it often requires some mechanical know-how. If unsure, seek professional assistance.
Final Thoughts
Checking how to check car alternator voltage might seem complex, but it can be done simply with a few tools and some basic knowledge. You now know the role of the alternator, the symptoms of problems, and how to use a multimeter to diagnose issues. You’ve also learned about interpreting voltage readings and what actions to take. Keep in mind that regular checks can help you catch potential problems early. This can save you money and headaches. By understanding these concepts and the steps we’ve explored, you can keep your car’s electrical system in good shape. Stay on top of your car’s maintenance to ensure reliable starts. If you have any doubts, don’t hesitate to seek professional help. Safe driving!