How Often Should You Charge Your Jump Starter?
Figuring out how often to charge jump starter can feel tricky at first. It’s something many new car owners or drivers who want to be prepared wonder about. It’s not always obvious, and it’s easy to worry about keeping your jump starter ready when you need it. Don’t worry, though! This guide will break down everything you need to know in a simple, step-by-step way. We’ll explore the things that affect how often you need to charge and how to make sure your jump starter is always prepared. Let’s get started!
Understanding Your Jump Starter
Before exploring the charging schedule, it’s key to grasp what a jump starter actually is. A jump starter is like a portable power bank specifically for cars. It delivers a quick burst of energy to your car’s battery to get it going when it’s dead. This is useful for many reasons, from cold weather issues to leaving your lights on overnight. Jump starters vary in size, power, and the extra features they have, but their main job is always the same. Learning about the parts and power outputs is a great place to start when learning about battery health.
Key Parts and Functions
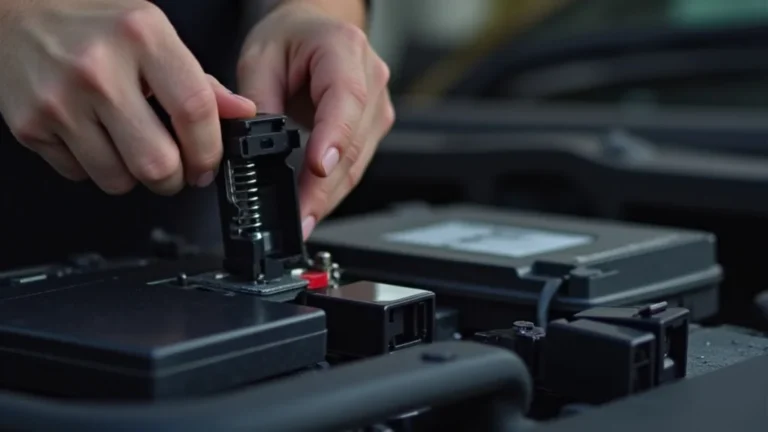
Jump starters are built with several essential parts that enable them to do their job effectively. These components work together to ensure your car gets the power it needs when the battery fails. Knowing these components allows you to diagnose and maintain your device. Understanding these parts allows you to identify when the device is not working correctly.
- Battery: This is the heart of the jump starter. It stores the energy. The battery type impacts performance and lifespan. Common battery types include lithium-ion and lead-acid. Lithium-ion batteries are often preferred for their lighter weight and ability to hold a charge for longer, but lithium-ion batteries may have safety concerns.
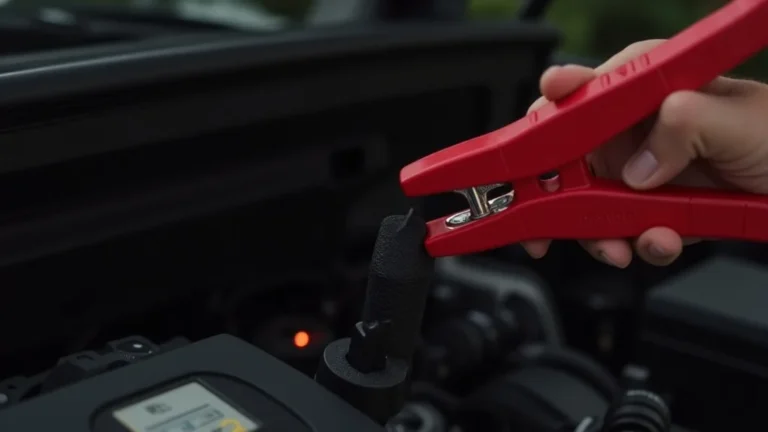
- Clamps: These are the devices you connect to your car’s battery terminals. They’re usually made of metal, often coated in plastic for safety and insulation. The clamps transfer the stored energy from the jump starter to the car battery.
- Safety Features: Jump starters are packed with safety features, like reverse polarity protection and short-circuit protection. These keep you and your car safe. These features ensure that the jump starter does not harm you or your vehicle.
The battery’s capacity (measured in Amp-hours or Ah) determines how many times it can jump-start a car before needing to be recharged. A jump starter with a larger Ah rating can handle more jump starts. A 12V lead-acid battery is designed for starting internal combustion engines and is the standard for most cars, trucks, and SUVs. These batteries provide the initial surge of power. These batteries need to be charged often to remain in peak condition.
Clamps are connected to the positive (+) and negative (-) terminals of the car battery. Make sure the clamps are securely attached to the terminals to ensure proper power transfer. Some jump starters feature smart clamps, which protect against reverse polarity.
Reverse polarity protection prevents damage if you connect the clamps incorrectly. Short-circuit protection prevents damage from internal failures. Over-current protection stops the flow of excessive electrical current, safeguarding the jump starter and the car’s electrical system.
Types of Jump Starters
Different kinds of jump starters are available, each designed to meet different needs and budgets. The choice often comes down to the size of the car, the types of features you need, and how often you will be using the jump starter. Knowing the different options available allows you to pick the best device for your needs. Consider your vehicle’s engine size and the climate you live in before making your choice.
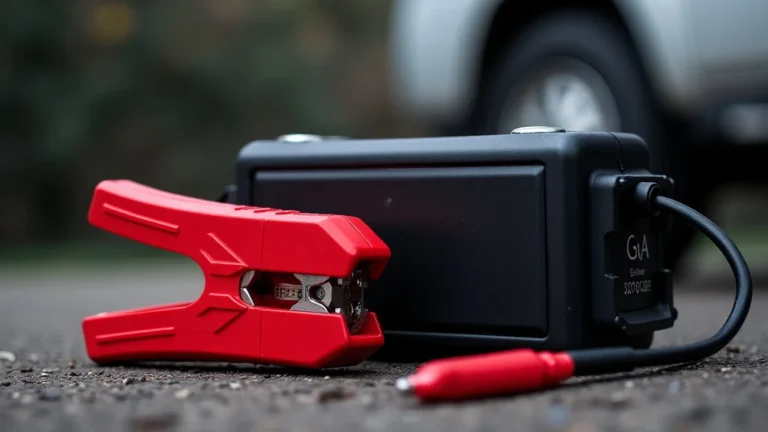
- Lithium-ion Jump Starters: These are very popular because of their compact size and light weight. They hold a charge for long periods, which makes them ideal for infrequent use. They often come with USB ports for charging phones and other devices.
- Lead-Acid Jump Starters: These are usually heavier and bulkier than lithium-ion models. However, they are generally less expensive. They’re a dependable option for those who need a rugged jump starter for heavy-duty use.
- Capacitor Jump Starters: These use capacitors instead of batteries to store energy. They are very fast to charge and can often jump-start a car within minutes of being dead. They can last for several years and require little maintenance.
Lithium-ion jump starters are well-suited for general use. These devices are especially beneficial for people who want a portable and user-friendly jump starter. They often include features such as a built-in flashlight and LCD screens. They are often more expensive than other types.
Lead-acid jump starters are typically used for larger engines and harsh conditions. They are a good choice if you require a device for frequent use. Because of their lower price point, these are also good for people on a budget. However, these batteries need more maintenance.
Capacitor jump starters are a great choice if you need a quick charge in an emergency. These jump starters are best suited for situations where time is critical. They are often used in professional settings, such as auto repair shops. They do have limitations, such as not working if the car battery is completely dead.
Factors Affecting Charging Frequency
Several factors will impact how often to charge jump starter. These involve usage patterns, the type of jump starter, and environmental conditions. Knowing these variables helps you keep your jump starter in peak condition and ready to go. The environment can also play a major role in how long the device retains a charge. Regular care ensures the jump starter works well when needed.
Usage Frequency
How often you use your jump starter has a big impact on how often it needs to be charged. If you only use it a few times a year, it will require less frequent charging. If you use it every week, you will need to recharge it more often. Regularly assessing your jump starter’s charging needs is key. Your typical use helps determine your jump starter’s ideal maintenance schedule.
- Infrequent Use: If you use your jump starter only occasionally, like once or twice a year, charging it every 3-6 months can be enough. Regular checks are also key.
- Frequent Use: If you use your jump starter often, such as weekly or monthly, you should charge it after each use. Frequent use puts more strain on the battery. This way, you ensure that the jump starter is always prepared.
- Emergency Situations: In urgent situations, use your jump starter to get your car started. After using it, fully recharge it to make sure it’s ready for the next time. This ensures the jump starter is always ready when you need it.
If you live in a location where temperatures are consistently moderate, you may be able to extend the charging intervals. Check the device’s charge level periodically to make sure it is ready. This is particularly helpful for those who only use their jump starters for emergency purposes.
Check the device’s battery level to keep track of its charge. Battery levels may vary depending on the device’s usage. It’s important to charge the jump starter after any discharge, even a small one.
If the jump starter is only used in emergencies, the charging schedule should be based on its performance. Consider the type of battery, with lithium-ion batteries holding charges for longer periods of time. Also, you should keep the jump starter in a safe, easy-to-reach place.
Battery Type and Performance
The type of battery in your jump starter has a big effect on charging frequency. Lithium-ion batteries tend to hold a charge longer than lead-acid batteries. The charging recommendations for these batteries vary. Paying attention to the type of battery and its health is key to making sure it’s ready for use. Different types of batteries need different kinds of care to reach their maximum potential.
- Lithium-ion Batteries: These batteries have a good charge cycle and low self-discharge rates. They can hold a charge for many months. The charging recommendations for lithium-ion batteries often involve more simple maintenance.
- Lead-Acid Batteries: Lead-acid batteries lose charge faster and need more frequent charging. These batteries have a higher self-discharge rate. Lead-acid batteries require a little more care and attention to keep working.
- Capacitor Batteries: Capacitor jump starters charge extremely fast and can hold the charge for months. These devices use capacitors instead of batteries to store energy.
You can charge lithium-ion batteries every 3-6 months if the jump starter is not used. Charge these batteries as needed, and do not let the battery drain completely. Lithium-ion batteries often perform better with partial charges.
For lead-acid batteries, charge the device after each use, or every 1-2 months. If you do not use the jump starter, make sure you charge it regularly. Lead-acid batteries perform well when fully charged, and should not be stored in a discharged state.
Capacitors typically require less frequent charging. However, it’s still good to check and charge the jump starter periodically. Capacitors are known for their ability to deliver high current quickly, and they do not degrade as quickly as batteries.
Environmental Conditions
The weather and where you store your jump starter can change how often it needs charging. Extreme temperatures, whether hot or cold, can drain the battery faster. Keeping your jump starter in a controlled environment can help extend the time between charges. Always make sure to store your jump starter properly.
- Temperature Extremes: Heat and cold have an impact on a jump starter’s battery life. In very hot weather, batteries can lose charge more quickly. In cold weather, the jump starter may not work as well.
- Storage Location: Store your jump starter in a cool, dry place away from direct sunlight and moisture. This is key to ensuring that the jump starter stays ready when you need it. A garage or a trunk would be a great choice.
- Humidity: Moisture can affect battery life and performance. Over time, high humidity can cause corrosion and damage. You should consider storing it in a waterproof bag.
If you store the jump starter in an area that is exposed to extreme temperatures, you may need to charge it more often. Keeping the jump starter at a moderate temperature ensures the device retains its charge. Be sure to avoid leaving the jump starter in direct sunlight or freezing conditions.
Keep the jump starter away from things that could damage it. Humidity and moisture can damage the internal components of the device. Following the manufacturer’s suggestions on storage can also help maintain the device’s charging capacity.
If the jump starter will be exposed to moisture, place it in a dry environment. Keep the jump starter away from damp areas, and periodically inspect the case for signs of water damage. Proper storage can help prevent damage.
Step-by-Step Charging Instructions
Charging your jump starter should be a simple process. Follow these steps to keep your jump starter ready to use. This way, you can avoid a dead battery. Each step ensures that your device is charged properly. Following these directions helps keep your jump starter in peak condition.
Charging Process
The charging method is relatively similar for almost all jump starters, but always follow the manufacturer’s specific instructions for your model. Here are the basic steps. These steps ensure your jump starter is fully charged and ready to go.
- Locate the Charging Port: Find the charging port on your jump starter. It’s usually a USB port, but sometimes it may be a DC charging port. Make sure you use the charging cable that came with the jump starter.
- Connect the Charging Cable: Connect the charging cable to the jump starter and plug the other end into a power source. You can usually plug it into a wall outlet or a USB port, like on a computer or in your car.
- Monitor the Charging Indicator: Most jump starters have indicator lights that show the charging status. These lights can tell you how charged the device is and when it is finished charging. Look at the device’s display or lights to get the charging status.
- Charging Time: The charging time will vary, depending on the jump starter’s battery and the charger being used. Lithium-ion jump starters typically charge in a few hours. Check the manufacturer’s directions for estimated charging times.
- Disconnect the Charger: When the indicator shows that the jump starter is fully charged, disconnect the charging cable. Unplug the charger from the power source and the jump starter.
Some jump starters have a built-in AC adapter for charging. When you find the charging port, be sure you use the cable that fits correctly. If you do not have the right cable, you will not be able to charge the device.
If you are using a wall outlet, make sure the outlet is functioning. It’s always good to use a surge protector for added safety. Plug the cable firmly into both the jump starter and the power source.
The indicator lights can be simple, such as a single light that changes color. Some jump starters may have a screen with numbers or symbols showing the battery level. As the jump starter charges, the indicator lights often flash or change color.
Charge your jump starter completely. The manufacturer’s directions will provide the best information. You can use the jump starter while it’s charging. But for best results, wait until the device is fully charged before using it.
Once the jump starter is fully charged, disconnect the device. Store the jump starter in a safe place, like the trunk of your car or a garage. Make sure the charging cable is available so you can recharge the device.
Safety Precautions
Charging a jump starter safely is key to protecting yourself and your device. Following a few simple safety rules can prevent damage and ensure a long life for your jump starter. Keep these precautions in mind to avoid hazards.
- Use the Right Charger: Always use the charger that came with the jump starter. Using a different charger can damage the battery. If you misplace your charger, use the same voltage and amperage ratings that the jump starter calls for.
- Charge in a Well-Ventilated Area: Charge the jump starter in a well-ventilated space. Avoid charging in areas where flammable materials are present. Charging can sometimes generate heat.
- Avoid Overcharging: Do not leave the jump starter plugged in for long periods after it is fully charged. Overcharging can reduce the battery’s lifespan and can pose a safety hazard.
- Inspect the Jump Starter Regularly: Check the jump starter for damage or leaks. If you see any swelling or leakage, stop using the jump starter immediately. Get professional help.
The jump starter’s manufacturer knows what’s best for the device. If you use the wrong charger, it may not charge the battery correctly or overcharge it. Overcharging can reduce the battery’s life, and can cause safety issues.
A well-ventilated area helps disperse any gases that the battery may produce during charging. Always charge the jump starter away from direct sunlight or any heat source. This helps ensure that the charging process is safe.
Once the jump starter is fully charged, disconnect the charger. Some jump starters have features that stop the charging when the battery is full. Regularly check the charging indicators.
Regular inspections are key to keeping the jump starter working well. Look for cracks in the housing or damage to the cables. Never use a damaged jump starter.
Maintaining Your Jump Starter
Proper care is essential to keep your jump starter in peak condition. Regular care and maintenance ensure your jump starter is ready. This approach increases the lifespan of your jump starter. Maintaining your jump starter will help ensure that it works when you need it.
Regular Inspections
Checking your jump starter for wear and tear can prevent issues. Regular inspections help identify any damage. Doing this regularly keeps the device in top shape. Inspecting your jump starter regularly will help you identify any problems.
- Check the Clamps: Inspect the clamps for corrosion, rust, or any damage. Make sure the clamps are clean and firmly attached. Damaged clamps can cause problems when you are trying to jump start your car.
- Inspect the Cables: Check the cables for any cracks, cuts, or fraying. Damaged cables can affect the device’s performance and pose a safety risk. You should
- Check the Housing: Examine the jump starter’s casing for any cracks, bulges, or leaks. A damaged casing can expose the internal components to the elements, and this can lead to damage.
- Test the Jump Starter: Perform regular tests to make sure that the jump starter is working properly. You can test by attempting to start a car with a partially discharged battery. This will show you how well the jump starter works.
Clean any corrosion with a wire brush or baking soda solution. Make sure the clamps have a good connection with the car battery terminals. If the clamps are damaged, you should replace them.
Inspect the cable length for damage. Check all along the length of the cable and at the points where the cables attach to the jump starter and the clamps. If the cables are damaged, you should replace them.
If the casing has a crack, it may not protect the battery and internal parts. Bulging can indicate the battery is expanding. You should stop using the jump starter immediately if the casing is damaged.
Testing the jump starter lets you know it is working properly. Testing the device on a regular basis will help you identify any issues. Replace the jump starter if it does not work.
Proper Storage
How you store your jump starter can make a huge difference in how long it lasts and how well it works. Proper storage will protect your jump starter from environmental damage. Proper storage makes sure that the jump starter is ready when you need it.
- Temperature-Controlled Environment: Store the jump starter in a cool, dry place. Avoid extreme temperatures. Ideally, a temperature between 60°F and 75°F (15°C and 24°C) is key to protecting the battery.
- Protect from Moisture: Keep the jump starter away from moisture and humidity. Moisture can lead to corrosion and damage to the device. You should store the jump starter in a dry environment.
- Avoid Direct Sunlight: Direct sunlight can damage the internal components and reduce battery life. Store the jump starter in a location that’s away from sunlight. Consider storing it inside a case.
- Regular Charging During Storage: Even when the jump starter is not in use, you should charge it regularly. The frequency depends on the type of battery and how it is stored. You should plan on charging the jump starter every few months.
Extreme heat can reduce the battery’s life, and extreme cold can reduce its performance. Avoid storing the jump starter in direct sunlight. A garage or a storage closet is generally a suitable space.
If you are storing the jump starter in an area where moisture may be present, use a waterproof container. You may also want to use a desiccant pack to absorb any humidity. This will protect the internal components.
Direct sunlight can damage the jump starter. You should store the jump starter inside a case or cabinet. Keep the jump starter away from windows or other spots where sunlight could hit the device.
Charging your jump starter every few months will ensure it is ready when you need it. Consider the type of jump starter, and refer to the instructions from the manufacturer. You can also set a reminder on your calendar.
Troubleshooting Common Issues
Even with great care, you may run into a few issues. Being prepared to handle these problems can save time. Knowing common problems and how to solve them can help you resolve them quickly. Sometimes you can resolve them yourself. In other cases, you may need a professional’s assistance.
- Jump Starter Won’t Charge: If the jump starter won’t charge, there could be an issue with the power source, the charging cable, or the device itself. First, make sure that the cable is working. Try another wall outlet or USB port.
- Jump Starter Won’t Start a Car: If the jump starter will not start your car, the battery may not have enough charge, or there may be a problem with the connections. Make sure that the clamps are securely connected. Check for any signs of corrosion.
- Clamps Don’t Fit Properly: Make sure the clamps are attached firmly to the car battery terminals. If the clamps are not attached properly, the jump starter won’t be able to deliver power. Some clamps may be damaged.
- The Jump Starter Is Swollen: A swollen jump starter is a sign of internal damage. Stop using the device immediately. You should not charge the jump starter in this condition.
If these tests do not work, then check the charging cable. If the cable is working, there might be a problem with the internal components of the jump starter. Contact the manufacturer for support or professional service.
Make sure the jump starter has a full charge. If the battery is fully charged, and the connections are correct, the jump starter may not have sufficient power for the car. Sometimes a vehicle has a problem that prevents it from starting.
The clamps might not fit correctly, especially if the terminals are corroded or damaged. Clean the terminals with a wire brush or baking soda solution. The clamps might have problems if they are corroded or worn out.
A swollen jump starter may be dangerous. Contact the manufacturer or take the device to a professional for repair or safe disposal. The battery may be damaged.
Frequently Asked Questions
Question: How often should I charge my jump starter if I don’t use it?
Answer: For lithium-ion jump starters, charge them every 3-6 months. Lead-acid jump starters might need charging every 1-2 months, depending on the storage conditions and battery health.
Question: Can I leave my jump starter plugged in all the time?
Answer: No, it is not advisable to leave your jump starter plugged in all the time. Overcharging can damage the battery. Once it’s fully charged, disconnect it.
Question: How long does it take to charge a jump starter?
Answer: Charging times vary. It usually takes a few hours for a lithium-ion jump starter to fully charge. Consult the manufacturer’s directions for your specific model for the exact charging time.
Question: What should I do if my jump starter won’t charge?
Answer: Check the charging cable and the power source first. Try a different outlet or USB port, or try a new cable. If the problem persists, the jump starter may have an internal issue; contact the manufacturer.
Question: Is it safe to use a jump starter in the rain or wet conditions?
Answer: Avoid using the jump starter in wet conditions. Water can cause damage to both the jump starter and the car’s electrical system. Keep the jump starter dry.
Final Thoughts
Understanding how often to charge jump starter is key to keeping your device ready. Knowing the different battery types and how your use affects charging schedules helps. Remember to charge it after each use or every few months, depending on the battery type. Always follow safety steps to keep everything in working order. Doing these things can make sure your car is ready to go whenever you are. Proper care gives you peace of mind.