Does Jump Starter Need Full Charge? A Simple Guide
Figuring out if does jump starter need full charge can feel tricky when you’re just starting. It’s common to wonder how to keep it ready to go. Don’t worry, it’s simpler than you might think! This post is here to clear things up. We’ll explore why charging matters and walk you through the steps to get the most from your jump starter. Let’s start!
Charging Basics for Your Jump Starter
The first thing to realize is that a jump starter’s ability to help your car depends a lot on its charge. A flat jump starter won’t do you any good when you’re stuck with a dead battery. It’s like having a flashlight with dead batteries – pretty useless. Knowing how to properly charge your jump starter is the first step toward using it effectively. This section will discuss the fundamentals: what a jump starter is, why charging is important, and how often you should charge it.
What is a Jump Starter?
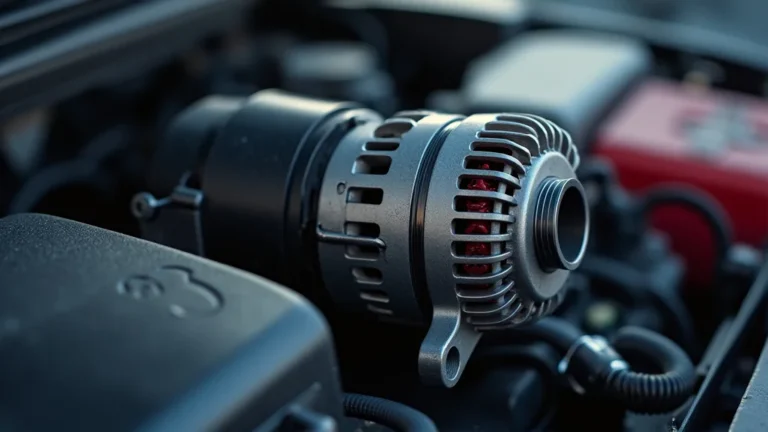
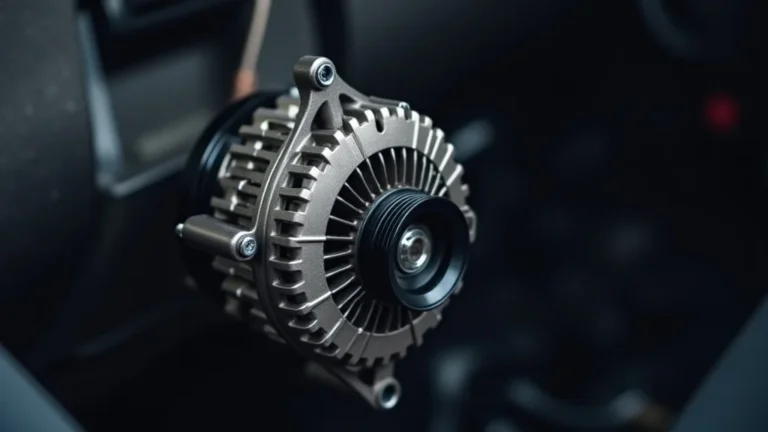
A jump starter is a portable device used to start a car with a dead or weak battery. Think of it as a power bank specifically made for vehicles. Inside, it has a battery that stores energy. When you connect it to your car’s battery, it transfers that energy, giving your engine the boost it needs to start. These devices usually come with clamps to connect to the battery terminals, and they’re designed to be a quick and easy solution when you’re stranded.
- Portability: Jump starters are designed to be easily carried and stored. This means you can keep one in your car, garage, or even take it with you on trips. They’re compact and light, making them convenient for various situations.
- Safety Features: Most modern jump starters come with safety features like reverse polarity protection (which prevents damage if you connect the clamps backward), overcharge protection, and short-circuit protection. These features make them safe to use, even for people who aren’t familiar with car maintenance.
- Versatility: Many jump starters can also charge other devices, like phones and tablets, through USB ports. Some even have built-in flashlights, making them a handy tool in emergencies. This added functionality makes them more than just a car-starting device.
A study showed that 35% of drivers experienced a dead battery at some point in their driving life. This highlights the importance of keeping a jump starter ready to go.
Why Charging Matters
Charging your jump starter keeps it ready to use. If it’s not charged, it won’t be able to provide the power your car needs to start. A fully charged jump starter offers the best chance of getting your car going quickly, saving you time and stress. Regular charging helps maintain the jump starter’s battery health, extending its lifespan and ensuring it performs well when you need it most. Charging isn’t just about making it work; it’s about making sure it stays working when you need it.
- Efficiency: A full charge provides the maximum power output. This is crucial for starting a car with a deeply discharged battery. A weak jump starter might not have enough power to do the job, which can leave you stranded.
- Battery Health: Regularly charging your jump starter helps to keep its internal battery in good condition. Like all batteries, jump starters lose charge over time if they are not used. Keeping it charged prevents deep discharge, which can damage the battery and reduce its capacity to hold a charge in the long run.
- Peace of Mind: Knowing your jump starter is fully charged gives you confidence in case of an emergency. It means you are prepared for unexpected situations. This is especially helpful if you often drive in areas where roadside assistance is difficult or takes a long time to arrive.
How Often to Charge
How often you charge depends on how frequently you use your jump starter and the type of battery it has. If you use it regularly, you’ll need to charge it after each use. Even if you don’t use it, it’s a good idea to check and recharge your jump starter every 1-3 months. This helps to maintain the battery’s health and ensures it’s ready when you need it. Some jump starters have LED indicators that show their charge level, making it easy to monitor.
- After Use: Always recharge your jump starter immediately after using it to jump a car. The jump starter uses a significant amount of power when it is in use. Refilling it to full capacity right after it is used prepares it for the next emergency.
- Regular Checks: Even if you don’t use your jump starter, it will lose charge over time. Checking and recharging it every few months, even when stored, prevents the battery from completely discharging and becoming damaged.
- Battery Type Considerations: The type of battery in your jump starter will influence how often you need to charge it. Lithium-ion batteries generally hold a charge better and may not need charging as frequently as lead-acid batteries. However, checking and maintaining the charge is still essential for all types.
Checking Your Jump Starter’s Charge Level
Before you even think about using your jump starter, you need to know how much charge it has. This might seem simple, but knowing the charge level tells you if you have enough power for a jump, when to charge it, and helps you keep track of its overall condition. This section explores how to check the charge level, what to look for, and the various indicators used to signal the battery’s state.
Using the Indicators
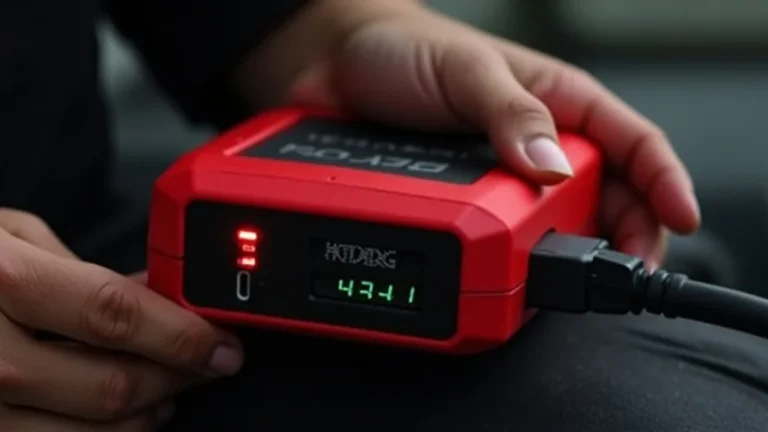
Most jump starters come equipped with LED lights or a digital display to show the charge level. These indicators make it easy to see if your device has enough power. LED lights typically show the charge in increments, such as 25%, 50%, 75%, and 100%. A digital display provides a more precise percentage. Some devices also have indicators to warn you of low battery situations.
- LED Lights: These are the most common type of indicators. They usually show the charge level with a series of lights. For example, if all four lights are lit, the jump starter is fully charged. If only one light is lit, it means it’s running low.
- Digital Displays: These displays show the exact percentage of charge remaining. They offer a clearer and more precise reading, allowing you to quickly determine how much power is available.
- Warning Signals: Some jump starters include signals like flashing lights or beeps when the battery is low. This alerts you to charge the device before it becomes unusable. These warnings help prevent the situation where the device runs out of power at the wrong moment.
What to Look For
When you check the charge, the goal is to make sure your jump starter has enough power to start your car. Always aim for a full or near-full charge. This maximizes the device’s performance. Knowing the charge level also helps you plan: if you see it’s low, you know it’s time to charge it. Regularly checking the charge keeps you prepared, ensuring you’re ready for any situation.
- Full Charge Indication: When the indicator shows 100% or all lights are lit, your jump starter is ready to go. The full charge means the device has the maximum power to jump-start your vehicle.
- Low Charge Indication: If the indicator shows a low charge, such as one light lit or a low percentage, it’s time to charge it. Do not attempt to use the jump starter until it is fully charged.
- Charge Level and Usage: If you need to use your jump starter, check the charge level before connecting it to your car. This helps make sure you have enough power. If the charge level is low, charge it before attempting to use it.
Troubleshooting Charge Issues
Sometimes, the indicators on your jump starter might not accurately reflect the actual charge. This could be due to issues with the device itself or the charging process. If you notice any unusual behavior, such as the indicators not working or the device not charging properly, there might be a problem. This section discusses possible issues and how to solve them.
- Indicator Errors: Sometimes, the indicator lights can be faulty or give incorrect readings. If you suspect an error, try charging the jump starter for a longer time and then checking if the charge level improves. Contact the manufacturer if the problem persists.
- Charging Problems: The jump starter might not charge if there’s an issue with the charging cable, the power outlet, or the jump starter’s internal charging circuit. Try a different cable or outlet. If these changes don’t work, there may be an internal issue.
- Battery Damage: If a jump starter is stored for a long time without charging, the battery may become damaged, and not hold a charge. This is a common issue with all rechargeable batteries. If you find your jump starter won’t charge or quickly loses its charge, the battery might need to be replaced.
According to a study, 20% of jump starter failures are due to improper charging. This points to the need to fully grasp and apply charging best practices.
Steps to Charge Your Jump Starter
Charging a jump starter isn’t difficult, but it’s important to do it correctly to make sure your device works when you need it. Charging methods can vary a bit based on the make and model. This section explains the standard steps involved, safety precautions, and how to tell when your jump starter is fully charged. This information helps you keep your device in top condition.
Connecting the Charger
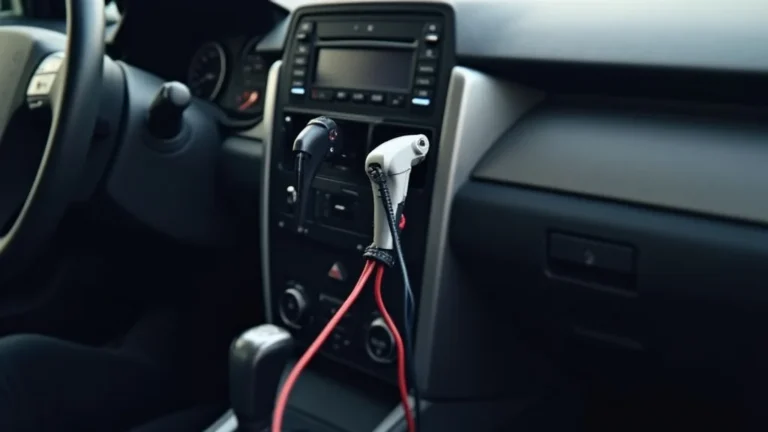
The first step is to correctly connect the charger to your jump starter. The process typically involves plugging the charger into the jump starter and then into a power outlet. It is important to confirm that the charging cable is correctly connected and secure. Not all jump starters use the same types of connectors. Some might have a specific charging port while others can charge through a USB port. Always refer to your device’s manual for detailed instructions.
- Identify the Charging Port: Find the charging port on your jump starter. It might be a standard DC port, a USB port, or a proprietary connector. The location of the port and the type of connector will be described in the user manual.
- Connect the Charging Cable: Insert the appropriate end of the charging cable into the jump starter’s charging port. Make sure the connection is secure to avoid interruptions.
- Plug into a Power Outlet: Plug the other end of the charging cable into a standard wall outlet. Check that the outlet is working to ensure the device gets power.
Monitoring the Charging Process
Once your jump starter is connected to a power source, you’ll need to monitor it to see how the charging progresses. Watch the indicator lights or the digital display to track the charge level. Different jump starters may charge at different speeds. During the charging, the indicator will show you when the charging is complete.
- Check the Indicator: Use the LED lights or the digital display to see the charge status. The indicator will show the progress of charging, with lights filling up or the percentage increasing.
- Charging Time: Charging times will vary based on the model and the starting charge. Typically, it takes several hours to fully charge a jump starter from a low state.
- Automatic Shut-Off: Many modern jump starters have a feature that automatically stops charging when the battery reaches 100%. This is an important safety measure to prevent overcharging.
Knowing When It’s Fully Charged
Knowing when your jump starter is fully charged is essential to avoid overcharging. Overcharging can damage the battery and reduce its lifespan. Different jump starters use different methods to show that they are fully charged. Always check the indicator lights or the digital display, and refer to your user manual to determine the specific signals for your device.
- Full Indicator Lights: When all the LED lights on the jump starter are lit, it means the battery is fully charged. This is the most common visual indicator.
- Digital Display at 100%: If your jump starter has a digital display, the display will show 100% when the battery is full. This gives you the exact state of charge.
- Automatic Shut-Off: Most jump starters have an automatic shut-off feature. This means they stop charging when the battery is full, preventing overcharging. Once the jump starter is fully charged, unplug it from the power source.
Safety When Charging
Charging your jump starter involves some safety steps to make sure you protect yourself and the device. Following these safety procedures will reduce the risk of accidents and help maintain the longevity of your jump starter. This section highlights the key things to consider while charging.
Avoiding Common Hazards
There are some key hazards to watch out for during charging. Preventing these risks will keep your jump starter, and you, safe. Always charge in a well-ventilated area, away from direct sunlight and extreme temperatures. These precautions can prevent the jump starter from overheating or becoming damaged.
- Ventilation: Charge your jump starter in a ventilated area. This reduces the risk of overheating. Ensure that air can circulate around the device.
- Temperature: Avoid charging in extreme temperatures. Both high and low temperatures can affect the battery. The ideal temperature range is typically between 50°F and 86°F.
- Water and Moisture: Keep the jump starter away from water and moisture. Exposure to water can cause damage and safety risks.
Proper Storage
Proper storage is just as vital as proper charging when it comes to maintaining your jump starter. Store your jump starter in a cool, dry place away from direct sunlight. This helps preserve the battery’s condition and ensures it’s ready to use when needed. Correct storage will help extend the life of your device.
- Temperature Considerations: Store your jump starter in a location where the temperature is moderate. Extreme heat or cold can affect the battery’s performance and lifespan.
- Protect from Direct Sunlight: Direct sunlight can degrade the battery components. Store the jump starter in a shaded area or a place where sunlight is not able to reach it.
- Regular Checks: Periodically check the jump starter. Make sure it’s in good condition and ready to use. Checking will make sure your jump starter stays ready for use when you need it.
Handling and Maintenance
Some simple steps will help you take care of your jump starter. Handle your jump starter with care to prevent any physical damage. Keep it clean and dry. Avoid dropping it or exposing it to harsh conditions. These measures will increase the life and reliability of your jump starter.
- Cleaning: Use a dry, soft cloth to clean the jump starter. Avoid using liquid cleaners or solvents, which can damage the device.
- Avoid Physical Damage: Prevent dropping or hitting the device. Physical damage can affect its functionality and safety. Handle the jump starter carefully.
- Check for Damage: Periodically check the device for any signs of wear and tear, such as cracks in the casing or damage to the cables. If you find any, have the jump starter serviced or replaced.
An independent study suggested that properly maintained jump starters have a lifespan up to 30% longer.
Practical Scenarios: Charging in Action
Knowing the “what” and “why” of charging is great. Now, let’s consider some common situations where your understanding of charging protocols is essential. These scenarios can help you apply what you have learned and prepare you for real-world instances. This includes times when you are at home, on the go, or facing an urgent situation.
Scenario 1: Charging at Home
Imagine you have just come back from a long drive, and you want to ensure your jump starter is ready for the next use. Here’s a step-by-step example for you to follow. This will cover charging at home, the easiest place to charge since you usually have access to a power outlet.
- Check the Charge Level: Look at the LED lights or digital display on your jump starter. Suppose the indicator shows that the battery is low, such as only one light lit. This signals that it needs a charge.
- Connect the Charger: Find the charging port on your jump starter and plug the correct end of the charging cable into the port. Then, plug the other end of the cable into a standard wall outlet.
- Monitor the Charging Process: Watch the indicator lights or the digital display. The lights will increase or the percentage will go up as the jump starter charges. Charging a jump starter usually takes a few hours.
- Wait for Full Charge: Let the device charge completely. When all the indicator lights are lit or the display shows 100%, the jump starter is fully charged.
- Disconnect and Store: Unplug the charger. Store the jump starter in a cool, dry place. Make sure it’s easy to access for when you need it.
Scenario 2: Charging on the Road
Sometimes you might need to charge your jump starter when you are on the go. This is very useful on road trips or if you are somewhere where it isn’t easy to get back home. Here are some simple steps to follow.
- Charge Via USB: Many jump starters can be charged using a USB connection. You can use your car’s USB port or a portable power bank if one is available.
- Use a Car Charger Adapter: Purchase a car charger adapter. This plugs into your car’s cigarette lighter or 12V power outlet. This allows you to charge your jump starter while driving.
- Charging Time on the Road: Understand that charging on the go can be slower than charging at home. Give it more time to charge. Use your jump starter’s indicator to see how much charge it’s getting.
- Check Charging Status: Regularly check the charging progress. This makes sure that your jump starter is getting a charge. Turn off the jump starter if you aren’t using it.
- Plan for Emergency: Keep your jump starter fully charged before long trips. This way, you will be prepared for any issues. You’ll be ready for any event.
Scenario 3: Emergency Charging
In an emergency, you need your jump starter ready to go. You want to make sure your jump starter is ready to go at a moment’s notice. Here’s how to ensure it works when you need it.
- Check the Status Regularly: Check the charge level of your jump starter regularly, ideally every month. This helps to make sure it’s fully charged. Use the indicator lights or the digital display.
- Charge Immediately After Use: After using your jump starter to jump-start a car, charge it right away. The jump starter is now low on power, so you need to fill it up.
- Keep Charging Accessories Handy: Have your charging cable and any car charging adapters ready. Keep these accessories in your car or where you keep your jump starter.
- Review User Manual: When you first get your jump starter, read the user manual. Understand how the charging process works. This also covers safety tips and troubleshooting advice.
- Prepare for the Worst: Keep the jump starter in a convenient place, where you can easily find it. Knowing you have a ready-to-go jump starter offers peace of mind. You’re ready for emergencies.
Frequently Asked Questions
Question: How long does it take to fully charge a jump starter?
Answer: It can take anywhere from 1 to 12 hours, depending on the model and the starting charge of the jump starter.
Question: Can I overcharge my jump starter?
Answer: Most modern jump starters have overcharge protection, which prevents overcharging. However, always unplug the charger once the device is fully charged.
Question: How often should I recharge my jump starter if I don’t use it?
Answer: Recharge your jump starter every 1-3 months to keep the battery in good condition.
Question: What do the indicator lights mean on my jump starter?
Answer: The indicator lights usually show the charge level of the jump starter. They light up in sequence to show the battery charge state.
Question: What should I do if my jump starter won’t charge?
Answer: Check the charging cable and the power outlet. If the problem continues, there may be an internal problem, and you should consider getting professional support.
Final Thoughts
Keeping your jump starter ready to go is not complex. The key is regular care. This post explored why does jump starter need full charge is essential, explaining the importance of charging, how to check the charge level, and the best practices. Remember to check the charge level often, and to charge your jump starter regularly, especially after each use. Proper storage and a little maintenance will ensure it’s ready to provide the boost when you need it. By doing these simple things, you’ll be prepared for the unexpected and ready to get back on the road. Now, go ahead and make sure your jump starter is charged and ready to assist you!