Car Battery Charger Showing Zero Amps: Troubleshooting Guide
If your car battery charger showing zero amps, don’t worry! It’s a common problem that can be tricky for anyone who’s new to car maintenance. There are a few different reasons why this might happen, and figuring it out can feel a little confusing. This post is all about making things simple. We’ll explore the main causes and provide easy, step-by-step solutions to get your charger working again. Let’s get started and bring that battery back to life!
Why Is Your Car Battery Charger Showing Zero Amps?
When a car battery charger displays zero amps, it essentially means it’s not delivering any current to the battery. This can be due to various issues, ranging from simple connection problems to more complex internal failures within the charger or battery. The charger’s job is to send electricity into the battery to recharge it. If it’s not registering any amperage, it’s not doing its job. It’s like a water pipe that’s supposed to fill a bucket, but the water isn’t flowing. There are several reasons this could happen, and we’ll explore them next. Understanding these potential issues is key to effective troubleshooting. A zero-amp reading often signals that something is interrupting the charging process, and identifying the root cause allows you to resolve the problem efficiently.
Common Causes for No Amperage
One of the first things to check is the simple stuff. Before you assume it’s a big problem, make sure all the connections are secure. Battery chargers have clamps that need to be firmly attached to the battery terminals. If these aren’t making solid contact, the charger won’t be able to deliver power and the amperage reading will stay at zero. Also, make sure the charger is plugged into a working outlet. A blown fuse in the charger, the car, or the outlet itself will prevent any current from flowing. The problem could be as straightforward as a tripped circuit breaker. Always inspect the charger’s fuse and the car’s fuse box. You should also check the battery’s condition. If a battery is severely damaged, short-circuited internally, or deeply discharged, the charger might refuse to provide any current as a safety precaution. Let’s look at some specific scenarios to better understand the issues.
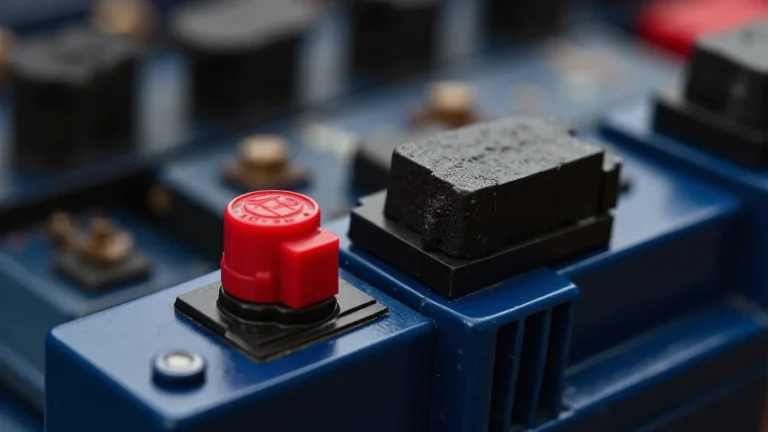
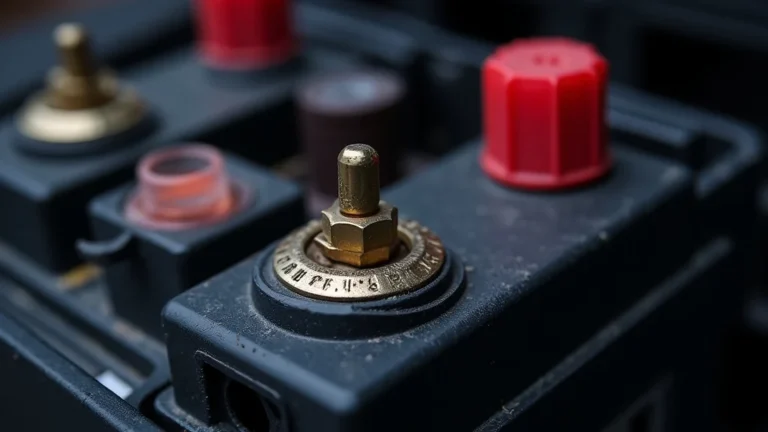
- Loose Connections: This is the most common reason. The charger’s clamps need to be tightly connected to the battery terminals. Corrosion on the terminals can also prevent good contact.
- Blown Fuse: Both the charger and your car have fuses. If the charger’s fuse is blown, it won’t work. The car’s fuse protects the charging circuit.
- Faulty Charger: Chargers can fail. Internal components can break or wear out, especially if the charger is old or overused.
- Battery Condition: A very low or damaged battery might prevent charging. The charger can detect a bad battery.
- Incorrect Settings: Some chargers have different settings (e.g., for different battery types). If the settings are wrong, it can stop the charging.
Corrosion can build up on battery terminals over time. This creates an insulating layer that prevents the charger from transferring electricity. Cleaning the terminals with a wire brush or a specialized battery terminal cleaner is a good starting point. Make sure the clamps are making direct contact with the metal.
When a fuse blows, the circuit is broken, and electricity can’t flow. A fuse can blow because of a power surge or a short circuit. Replacing the fuse is the usual fix, but you should also check why it blew in the first place. You can also test the fuse using a multimeter.
Chargers contain electronic components that can be damaged by voltage spikes or age. The charger might still turn on but not deliver any current. If you’ve ruled out other issues, the charger might need to be repaired or replaced. Use a different charger to eliminate the charger as the root of the problem.
Batteries can become damaged due to age, over-discharging, or physical damage. A battery that’s severely depleted or has internal shorts may not accept a charge. A charger is designed to protect itself and the user, and may not deliver power. Try jump-starting the car or testing the battery voltage before you proceed.
Make sure your charger is set to the correct voltage for your battery (usually 12V for cars). Modern chargers have settings for different battery chemistries (e.g., lead-acid, AGM, gel). Choose the correct setting to ensure your battery is charged safely and efficiently. Refer to the charger’s manual to find the right setting for your battery.
Inspecting Your Car Battery Charger for Zero Amps
When the car battery charger showing zero amps, the first step is to carefully inspect the charger itself. Don’t jump to conclusions, just do some basic checks. Look for any visible signs of damage, such as cracks, burns, or frayed wires. These can indicate internal problems. Verify that the charger is plugged into a functioning power outlet. You might think it is, but it’s always good to check. Check if the power cord is securely connected to both the charger and the outlet. Many chargers have an indicator light that shows if they are receiving power. This is a very easy test. If the light isn’t on, it could be the cord or outlet is bad. Examine the clamps, ensuring they are clean and making solid contact with the battery terminals. Also, many chargers have an LED display. Note what the display tells you, if anything. This information can give you clues about what’s going on. Some chargers provide error messages that can direct you toward specific problems. Be careful. Electricity can be dangerous. Always disconnect the charger from the outlet before you work on it.
Visual Inspection of the Charger
A visual check can reveal a lot about the health of your charger. Start by looking for any physical damage. Carefully examine the body of the charger for any cracks, dents, or signs of overheating. Check the power cord for cuts, fraying, or any damage to the insulation. These can cause electrical shorts or other problems. Also, inspect the clamps (or alligator clips). Look for corrosion or damage. If you see anything suspicious, don’t use the charger until it’s been fixed. Then, look for any unusual odors. A burning smell can indicate internal component failure, and it’s a sign that the charger should not be used. If the charger has a fuse, check it. You can do this by examining the glass to see if the wire is intact. If it’s broken, the fuse is blown and needs to be replaced. Lastly, consult the charger’s manual, for details specific to the model you have.
- Power Cord: Examine the cord for any damage that could prevent power from reaching the charger.
- Clamps: Check the clamps for cleanliness and proper connection to the battery terminals.
- Housing: The housing should be intact and free from cracks or other damage.
- Display: Note any error messages or readings on the charger’s display.
Look closely at the power cord for any cuts, frays, or damage to the insulation. Worn or damaged wires can create a safety hazard or prevent the charger from functioning properly. Do not use the charger if you find any damage to the power cord. Replace it before you try using the charger.
Dirty or corroded clamps can prevent a good electrical connection. Use a wire brush or a specialized battery terminal cleaner to clean the clamps. Make sure the clamps are making good contact with the terminals. Clamps that are loose can also lead to charging problems. Inspect the clamps’ springs and their general condition.
Any damage to the housing can indicate that the charger has been dropped or subjected to stress. This can potentially damage the internal components. Make sure the charger’s housing is intact and that all parts are secured tightly. Examine the charger carefully for any signs of damage before use.
Many modern chargers have an LCD that provides information about the charging process. If the charger is showing an error message, it provides clues about the problem. Pay close attention to what the display says. You might discover an issue with the battery, connections, or the charger itself. If no information appears, it is an indication of a problem with the charger.
Testing the Charger’s Output
If the visual inspection doesn’t reveal any issues, the next step is to test the charger’s output. Before you start, disconnect the charger from the battery and the power outlet for safety. First, use a multimeter to test the charger’s voltage. Set your multimeter to the DC voltage setting that is appropriate for your charger. Most car chargers output 12 volts, so set the multimeter to the 20V DC setting. Put the multimeter probes on the charger’s clamps. If the charger is working, it should show a reading around 12 volts, or slightly higher. Be sure to follow all the safety precautions. If the voltage is normal, but the charger still shows zero amps when connected to the battery, the issue may be in the battery or the charger’s internal amperage sensing circuits. This is why testing the voltage is so important. If the charger is not putting out the correct voltage, then that is likely the problem. It could be a problem with a fuse or the internal components of the charger itself.
- Voltage Test: Use a multimeter to measure the charger’s voltage output.
- Amperage Test: Use a multimeter to check the charger’s amperage output.
- Testing with a Different Battery: Try charging a known good battery to isolate the problem.
- Load Test: Some chargers have a load test feature to assess the battery’s health.
Set your multimeter to measure DC voltage. Place the multimeter probes on the charger’s clamps. If the charger is working, you should see a reading around 12-14 volts DC. If there’s no voltage, the charger isn’t working correctly.
Some multimeters can measure amperage directly. Connect the multimeter in series with the charger and the battery to measure the current. This can help verify if the charger is delivering current to the battery. Set the multimeter to the DC amperage scale and follow the manufacturer’s instructions for connecting it in the circuit.
If you have another car or a spare battery, try connecting the charger to it. This helps determine whether the issue is with the charger or the car battery. If the charger works with the other battery, then the original car battery is likely the problem.
Some advanced chargers include a function to check a battery’s ability to hold a charge under load. This can reveal problems like sulfation or internal shorts. If your charger has this feature, follow the instructions to conduct a load test and see if the battery fails.
Troubleshooting Steps When Your Car Battery Charger Shows Zero Amps
When the car battery charger showing zero amps, a systematic approach is needed to find the source of the issue. Begin by checking the power source. Then, examine the connections for any issues. After that, inspect the charger itself and look for visible damage. Next, test the voltage and amperage output of the charger. Consider testing the charger with a different battery. If none of these steps resolve the issue, it might be necessary to have the charger or battery professionally assessed or repaired. The basic method is to eliminate problems one at a time. This methodical approach will help you pinpoint the issue and fix it.
Step-by-Step Guide to Troubleshoot Zero Amps
Let’s go through the steps needed to find the source of the problem when the car battery charger showing zero amps. Follow these instructions one step at a time, to make certain that nothing is missed. Start by ensuring the charger has power. Next, inspect the charger itself. Check the connections. Test the charger with a multimeter. Test the battery. If problems still persist, seek professional help. The goal is to get the charger working safely and properly, restoring the battery’s power.
- Check the Power Supply: Make certain the charger is receiving power from the outlet.
- Inspect the Connections: Clean and secure the connections between the charger and the battery.
- Check the Charger: Visually inspect the charger for any visible damage.
- Test the Voltage Output: Use a multimeter to verify the charger is providing the correct voltage.
- Test the Battery: Check the battery voltage and condition.
- Test With a Different Battery (If Possible): See if the charger works on another battery.
- Check the Charger’s Fuse: Replace any blown fuses, in the charger or in the car’s charging circuit.
- Seek Professional Help: Get professional help if the problem persists.
Plug the charger into a known working outlet. Use a different appliance to verify the outlet is working. Check the charger’s power cord for damage. A simple way to do this is to check the power indicator on the charger (if it has one). If the indicator light is off, there’s no power reaching the charger.
Loosen the clamps on the battery terminals to check for corrosion. Use a wire brush or battery terminal cleaner to remove any corrosion. Ensure the clamps are firmly attached to the terminals. Make certain the clamps are making good contact. A poor connection is a frequent cause of the issue.
Look for any cracks, burns, or frayed wires on the charger itself. Examine the fuse on the charger and make sure it is not blown. Also, check the charger’s settings to ensure they are correct for the type of battery you have. This will eliminate the possibility of an incorrect setting.
Set your multimeter to the DC voltage setting. Put the probes on the charger’s clamps (unplugged from the battery). A reading of 12-14 volts indicates the charger is working properly. If there is no voltage, the charger is not working.
Use a multimeter to measure the battery voltage. A fully charged 12-volt battery should read around 12.6 volts or higher. A significantly lower voltage can indicate the battery is deeply discharged or damaged. A severely discharged or damaged battery may prevent the charger from operating.
If you have access to another car or a spare battery, test the charger on the different battery. If the charger works on the different battery, the problem lies with your car’s original battery. This step eliminates the charger as the source of the problem. If it doesn’t work, the charger likely has an issue.
Check the charger’s fuse and any related fuses in the car.
If you’ve followed all the steps and still have a car battery charger showing zero amps, the charger or battery might have a more complex issue that requires expert diagnosis. Contact a mechanic or a battery specialist for assistance. They have the tools and experience to diagnose and fix any charging issues.
Dealing with Battery Terminal Corrosion
Corrosion on your battery terminals can stop your car battery charger from functioning. The corrosion acts like an insulator and prevents the electrical current from passing between the charger and the battery. This can be a very simple problem to solve. The corrosion is often a whitish or greenish substance that builds up on the terminals and surrounding areas. It is usually caused by the reaction of battery acid with air and metal components. Regularly checking and cleaning the battery terminals can significantly improve your car’s starting reliability and charging efficiency. Make it part of your car maintenance routine. It’s a good practice, and it’s not hard to do.
- Safety First: Always wear safety glasses and gloves when working with batteries.
- Gather Your Supplies: Collect the items you need to clean the battery terminals.
- Disconnect the Battery: Remove the negative (black) cable first, then the positive (red) cable.
- Clean the Terminals: Mix baking soda and water to create a cleaning paste. Apply it to the terminals.
- Rinse and Dry: Rinse the terminals with clean water and dry them completely.
- Reconnect the Battery: Attach the positive (red) cable first, then the negative (black) cable.
- Prevent Future Corrosion: Apply a battery terminal protectant spray.
Battery acid is corrosive and can damage your skin and eyes. Safety glasses protect your eyes from splashes and gloves protect your hands. Keep in mind that batteries also produce hydrogen gas, which is flammable. Work in a well-ventilated area.
You’ll need a wire brush (or a battery terminal cleaner), baking soda, water, safety glasses, gloves, and a wrench. These materials are widely available and can be found at any auto parts store. Using the right tools makes the process easier and helps ensure you do a thorough job.
Loosen the terminal clamps with a wrench. The order is important: negative first, then positive. This prevents accidental short circuits. Once disconnected, be sure to keep the cables away from the terminals, so they don’t accidentally touch and cause a spark.
The baking soda neutralizes the acid. Use the wire brush or battery terminal cleaner to scrub the terminals. Be thorough to remove all the corrosion. The paste is safe and effective in dissolving corrosion. Use it to scrub away any buildup.
After scrubbing, rinse the terminals with clean water to remove the baking soda solution and any remaining residue. Make sure everything is dry before reassembling the battery connections. Proper rinsing and drying are very important for a complete cleaning.
Use the wrench to tighten the clamps securely. Make sure the connections are snug. A loose connection can cause the charger to show zero amps or lead to starting problems. Tighten the terminals firmly, but avoid overtightening them.
A battery terminal protectant spray creates a protective barrier that helps prevent future corrosion. This will extend the life of your battery and make it easier to keep the terminals clean. This final step helps prevent a repeat of the problem.
Understanding Battery Basics and Charger Compatibility
To fix the issue of a car battery charger showing zero amps, you need to have a basic understanding of your battery and the charger. Car batteries store electrical energy that is used to start the engine, power lights, and run all the electrical systems in the car. It is key to match the charger to the battery’s requirements. Not all chargers are compatible with all batteries. Understanding the basics helps prevent problems and ensures the battery gets the appropriate charging current. This knowledge can also help you identify issues with either the battery or the charger that are not working correctly. The more you know, the better prepared you’ll be to troubleshoot and maintain the battery’s health.
Battery Types and Charger Compatibility
Car batteries aren’t all the same. There are several different types, and each type needs a specific charging strategy. The wrong charging settings can damage a battery or even make it unsafe. You must know what type of battery you have and use a charger that is compatible. A lead-acid battery is the most common type. They are reliable and affordable. AGM (Absorbent Glass Mat) batteries are designed for high-performance vehicles. They can handle deep discharges. Gel batteries are designed for long-lasting use. They’re less common in cars. Knowing these differences helps you charge your battery correctly. Modern chargers are often designed to work with all three types. Always check your charger’s settings before you begin.
- Lead-Acid Batteries: These are the most common type of car battery.
- AGM Batteries: AGM batteries are designed for high-performance applications.
- Gel Batteries: Gel batteries have a gelled electrolyte.
- Charger Settings: Always verify the charger’s settings.
Lead-acid batteries use lead plates immersed in sulfuric acid. These batteries are relatively inexpensive and widely available. Most standard chargers are compatible with lead-acid batteries. Make sure you set the charger to the lead-acid setting if it has one. Choose the correct voltage setting to match your battery (usually 12V).
AGM (Absorbent Glass Mat) batteries have a special design. The electrolyte is absorbed into the glass mats. They are often found in newer vehicles and can handle frequent deep discharges. They may require specific chargers or settings. If your charger has an AGM setting, be sure to select it to charge the battery safely and effectively.
Gel batteries are less common but are sometimes used in specialty applications. They usually require a different charging process. Use a charger designed for gel batteries or a charger with a gel setting to prevent damage. Gel batteries need a slower, more controlled charge. They can be damaged by overcharging.
Many modern chargers have specific settings for different battery types. Choose the appropriate setting for your battery. Incorrect settings can lead to overcharging or undercharging, which can damage the battery. Refer to your charger’s manual. The proper settings will ensure that the charging process is safe and that the battery gets charged properly.
The Role of Voltage and Amperage in Charging
To fully understand why a car battery charger showing zero amps, it’s key to look at voltage and amperage. Voltage is the electrical pressure, like water pressure in a pipe. Amperage is the flow of the electrical current. The charger’s voltage must match the battery’s voltage. Amperage determines how quickly the battery charges. A low amperage setting delivers a slower charge, while a higher setting charges the battery faster, but can also cause damage. Your charger needs to supply the right voltage and amperage. This will ensure your battery is charged safely and efficiently. Improper settings can lead to an inefficient or incomplete charge. Understanding these concepts helps you use your charger correctly. You should be familiar with both concepts.
- Voltage: Voltage is the electrical potential difference, and it must match the battery’s voltage.
- Amperage: Amperage is the electrical current flowing into the battery.
- Charging Stages: Chargers often have different charging stages.
- Battery Health: The battery’s health affects how it charges.
Car batteries are usually 12 volts. The charger must supply the same voltage. Make sure your charger is set to the correct voltage for your battery. The correct voltage will protect your battery from damage. A voltage that’s too low will not charge the battery. A voltage that is too high can overcharge and damage the battery.
The charger’s amperage setting affects the charging speed. Lower amperage charges the battery slowly, which is safer. Higher amperage charges the battery more quickly, but could potentially damage the battery. Most chargers have different amperage settings. Choose an amperage suitable for your battery type and condition. Always follow the manufacturer’s recommendations.
Modern chargers use multiple stages to charge a battery properly. The stages often include a bulk charge, absorption charge, and float charge. Each stage uses a different voltage and amperage setting. These stages help the battery get charged safely and efficiently. Advanced chargers often analyze the battery and adjust the charging process to match its condition. Understand the stages to get the best performance from your charger.
A damaged battery may not accept a charge at the same rate. Internal damage or sulfation (the buildup of sulfate crystals on the battery plates) can reduce the battery’s capacity to store energy. A severely damaged battery can even stop the charger from working at all. You can use a battery tester to determine the battery’s condition. If the battery is damaged, it may need to be replaced. Proper maintenance can extend the battery’s life.
Frequently Asked Questions
Question: Why does my charger show zero amps, even though it’s plugged in?
Answer: There are many possible causes. Check the power source, inspect the connections, and look for any damage. The charger might have an internal fault.
Question: What should I do if my charger’s fuse keeps blowing?
Answer: Replace the fuse and inspect the charger for any damage. Check for shorts. If the fuse blows again, the charger needs repair or replacement.
Question: Can a dead battery cause the charger to show zero amps?
Answer: Yes, a severely discharged or damaged battery may not accept a charge. The charger may be designed not to deliver power in this situation.
Question: How do I know if my battery is bad?
Answer: Test the battery’s voltage with a multimeter. A reading below 12 volts indicates a problem. If the battery won’t hold a charge or the car won’t start, it may be bad.
Question: Can I use any charger for my car battery?
Answer: No. Make sure the charger is compatible with the type of battery you have. Choose the right settings for the battery to prevent damage.
Final Thoughts
So, your car battery charger showing zero amps might seem like a scary issue, but it’s often something you can troubleshoot yourself. We’ve explored the most common causes, from loose connections and blown fuses to problems with the charger or the battery itself. You now know how to inspect your charger, check the power source, clean connections, and perform some basic tests. You should also have a better handle on battery types and proper charger settings. If, after following these steps, you still face problems, don’t hesitate to reach out for professional help. Taking action and staying informed will help you maintain your car’s battery and keep your vehicle running smoothly. With a bit of knowledge and some simple tools, you can resolve the issue of a zero amp reading and ensure your car battery is in top condition. Go out there and start charging!