Car Battery Charger Error Message Explained Simply
Getting a car battery charger says error message can be frustrating, especially if you’re new to car maintenance. It’s a common problem, often due to simple things, which is good news! Don’t worry, many people experience this, and it doesn’t always mean something major is wrong. This guide will help you figure out what the error means and how to fix it, step-by-step. Get ready to explore the reasons behind the error and discover solutions. Let’s get started!
Troubleshooting When a Car Battery Charger Says Error
When your car battery charger says error, it’s a signal that something isn’t right during the charging process. This could be due to issues with the battery itself, the charger, or the connection. This section explores several ways to figure out the problem. We’ll look at common error triggers, like voltage discrepancies or connection issues. Knowing the cause is the first step in solving the issue. Let’s explore how to identify the problem.
Examining Battery Health
One of the first things to check is the health of your car battery. A battery that’s too old, damaged, or deeply discharged can trigger an error message on the charger. The charger has sensors to protect itself from potentially dangerous situations. This ensures that the charging process is safe and doesn’t cause further damage to the battery or the charger. To accurately determine battery condition, you can use a multimeter or a battery tester.
- Checking Battery Voltage: Use a multimeter to measure the battery’s voltage. A fully charged 12-volt battery should read around 12.6 volts or higher. A significantly lower reading indicates a problem. For example, if your battery reads only 11.5 volts, it’s likely deeply discharged and might be triggering the error.
- Inspecting Terminals: Look at the battery terminals for corrosion or buildup. Corrosion prevents proper contact and can lead to charging issues. Clean the terminals using a wire brush and a mixture of baking soda and water to improve contact.
- Performing a Load Test: A load test simulates the battery under real-world conditions. This shows how well the battery can deliver power. Many auto parts stores offer free load tests. If the battery fails the load test, it may need to be replaced.
- Battery Age: Car batteries have a lifespan, typically 3-5 years. A battery close to the end of its life is more likely to cause charger errors. Check the date on your battery to see how old it is.
According to the U.S. Department of Energy, “the average lifespan of a car battery is around 3-5 years.” Maintaining a good battery is essential for car health.
Charger Connection Problems and Error Detection
A loose or poor connection between the charger and the battery is another common cause for a car battery charger says error. This could be due to a faulty charging cable, loose clamps, or a problem with the charger’s internal circuitry. Sometimes, the problem is something as simple as a corroded connection or a dislodged clamp. This section will walk you through how to check and fix these kinds of connection issues. We’ll explore the importance of secure connections. Let’s look at how to ensure your charger is properly connected.
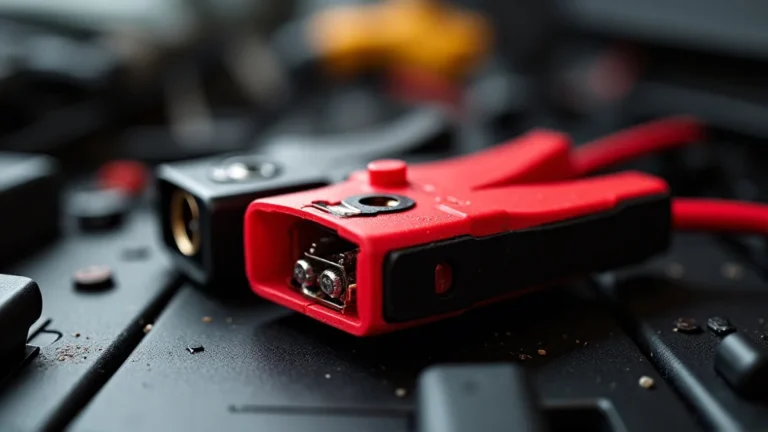
- Checking Clamp Connection: Ensure that the charger clamps are securely attached to the battery terminals. Make sure the red clamp is on the positive (+) terminal and the black clamp is on the negative (-) terminal. A loose clamp can interrupt the charging process.
- Inspecting the Cables: Examine the charging cables for any signs of damage, such as cuts, frays, or exposed wires. Damaged cables can cause shorts or prevent the flow of current. Replace any damaged cables immediately.
- Cleaning the Clamps: Use a wire brush or sandpaper to clean the inside of the charger clamps. This will improve contact with the battery terminals and reduce resistance. Clean clamps guarantee a good electrical connection.
- Testing Charger Output: Use a multimeter to test the charger’s output voltage. This is another way to see if the charger is working. If the output voltage is significantly different from what it should be, the charger could be faulty.
According to a recent study by J.D. Power, “poor battery connection is the number one cause of car battery charging failures.”
Understanding Charger Errors
Battery chargers have built-in systems to detect problems during charging. These systems look for things like incorrect voltage, battery overcharging, and short circuits. This section explores some of the most common error messages that you might see. We’ll explain the meanings of error messages to help you understand what’s happening. Learning about these errors can save you time and money. Here’s what you need to know about charger errors.
Common Error Message Meanings
Understanding the meaning of error messages is the first step toward fixing them. Error messages are designed to give you helpful information about what’s going wrong. Here, we’ll break down a few of the most frequent error messages, helping you translate the signals into actual problems with your battery or charger. From a simple “reverse polarity” alert to more complex warnings about internal problems, each message is a clue. Learning about these messages helps you troubleshoot the situation effectively. Let’s delve into the world of error messages.
-
Reverse Polarity Error: This message means the charger clamps are connected to the battery terminals in the wrong order. The red clamp should be on the positive (+) terminal, and the black clamp should be on the negative (-) terminal. This usually triggers immediately.
Example: You connect the red clamp to the negative terminal and the black clamp to the positive terminal. The charger will display the reverse polarity error, signaling a correction is needed.
-
Overvoltage Error: This error means that the charger has detected a voltage level exceeding a safe threshold. This could indicate a problem with the charger or the battery. It might also mean the battery is already fully charged or is damaged.
Example: The charger is set for a 12-volt battery, but measures a voltage above its safety limit, say 15 volts. This could indicate a charging problem.
-
Battery Fault Error: This usually means that the charger can’t detect a battery or believes it’s unable to charge the battery. This could be due to a dead battery, a damaged battery, or a problem within the charger itself.
Example: A deeply discharged battery may show a “battery fault” error, as the charger might not detect the voltage. This usually means that there is a problem with the battery.
-
Short Circuit Error: This indicates that the charger has detected a short circuit, meaning that the positive and negative terminals are touching each other. Short circuits can cause significant damage. This error protects both the battery and the charger from damage.
Example: A frayed cable inside the charging system might cause a short circuit error, as the wire touches another one. This error stops the charging.
Diagnosing and Addressing Specific Error Codes
Different chargers might display different error codes. It’s always useful to have your charger’s manual handy. The manual tells you what each code means. You can also find help online. Understanding these codes is essential for diagnosing the problem. We’ll explore how to find the root cause of these errors. Let’s learn how to address specific error codes.
- Consult the Charger Manual: The user manual is the best source of information. It provides a list of error codes and their meanings, along with suggested solutions. Always keep the manual handy.
- Check the Battery’s Condition: Once you know the error code, check the battery’s condition. Use a multimeter to measure the voltage and check for corrosion. A damaged battery can trigger several errors.
- Inspect the Connections: Examine the charger clamps and cables for damage or loose connections. Clean the clamps if they are corroded. Secure connections prevent many charging issues.
- Try a Different Charger: If you suspect the charger is faulty, try using a different charger to see if the error persists. This helps to determine if the issue is with the charger or the battery. This helps you get to the bottom of the problem.
Advanced Diagnostics and Solutions
Sometimes, the solutions aren’t as simple as cleaning connections. More advanced issues may call for a deeper look. This section will guide you through more advanced troubleshooting steps. We’ll explore complex issues and what can be done to resolve them. From detailed tests to specialized equipment, we’ll help you find answers. Let’s explore more complex diagnostic steps.
Testing with a Multimeter and Specialized Tools
When basic troubleshooting steps don’t resolve the issue, you might need more advanced tools, like a multimeter. A multimeter is a useful tool. It measures voltage, current, and resistance. These measurements help pinpoint the source of the problem. Understanding how to use these tools can significantly aid in diagnosing the issue. Let’s explore using a multimeter to diagnose problems.
-
Voltage Measurement: Use the multimeter to measure the battery voltage. A significantly low voltage can signal a dead or damaged battery. You can compare the battery voltage to the charger’s reading. If there’s a big difference, it could be a charger problem.
Example: The charger reports an error, and the multimeter shows a voltage of 11.8 volts. This is below the standard 12.6 volts for a fully charged battery. This can tell you about how to proceed.
- Continuity Testing: Use the multimeter’s continuity function to check the charging cables. This shows whether there’s a break or fault. You can use it to determine if your cables have any issues.
- Resistance Testing: Check the resistance across connections and cables. High resistance can indicate corrosion or loose connections. This helps pinpoint issues that might not be visible.
- Using a Battery Analyzer: A battery analyzer provides a more in-depth assessment. It can tell you about the battery’s health and its ability to hold a charge. This is essential for more complex issues.
When to Replace a Battery or Charger
Sometimes, the solution might involve replacing a part. Knowing when to replace your battery or charger can save you money. Let’s explore the circumstances when replacing is the best option. Knowing the signs to look for is important. From performance issues to age, these are the conditions to consider. Here’s when it’s time to replace your car battery or charger.
- Battery Replacement: If a battery is more than five years old, it’s approaching the end of its life. If your battery fails a load test or repeatedly displays charging errors, it’s time to replace it. A battery that doesn’t hold a charge also needs to be replaced.
- Charger Replacement: If you’ve tested the battery, cables, and connections, and the charger still displays an error, the charger itself may be faulty. If the charger is old, it might be more efficient to replace it.
- Considering Safety: If you see any physical damage to the battery or charger, like cracks, bulges, or melted components, replace them immediately. Safety should always be the top priority.
- Cost vs. Benefit: Compare the cost of repairing the charger to the cost of a new one. In many cases, replacing the charger is the more cost-effective option. This is something to consider before proceeding.
Frequently Asked Questions
Question: Why does my car battery charger says error, even though the battery is new?
Answer: Even a new battery can trigger an error. Possible causes include incorrect charger settings (voltage), damaged charger clamps or cables, or an issue with the charger itself. A bad connection or a faulty charger can prevent the charging.
Question: Can I use a regular charger on an AGM battery?
Answer: Not all chargers are compatible with AGM batteries. Using a charger designed for regular lead-acid batteries can damage an AGM battery. Check your charger’s settings to ensure it supports AGM charging.
Question: What does the “desulfate” function on my charger do?
Answer: The desulfate function tries to remove sulfate crystals that build up on battery plates. This build-up prevents the battery from accepting a charge. It’s useful for restoring some batteries. It’s not a fix for all battery problems.
Question: My charger has a “repair” mode. When should I use it?
Answer: The “repair” mode is designed for batteries that have been deeply discharged or show signs of sulfation. This mode uses a special charging cycle. It’s often helpful, but it’s not a guarantee of a fix. Use it if your charger has this feature.
Question: How do I store my car battery for a long time?
Answer: Store the battery in a cool, dry place. Charge it every few months to keep it from discharging completely. The best state to store a battery is in a charged condition. This way, you extend its life and performance.
Final Thoughts
Facing a situation where your car battery charger says error doesn’t have to be a major headache. As you now know, these error messages often stem from things that can be easily addressed. From checking the connections and the battery’s condition, there are several simple troubleshooting steps you can take. Understanding these messages is the initial step towards fixing the problem. Always remember to prioritize safety when working with car batteries and charging systems. If you’re unsure about any step, don’t hesitate to seek advice from a professional mechanic. With some patience and knowledge, you can often solve the problem and get back on the road. Be confident in your troubleshooting skills, and keep your car battery ready to go!