Battery Drain After Alternator Replacement: Troubleshooting Guide
Having a battery drain after alternator replacement can be a real headache, especially after you’ve just spent time and money on a repair. It’s often tricky for folks new to car fixes because it involves electrical systems, which can be a bit mysterious. But don’t worry, we’re going to break it down step-by-step. You’ll learn what might be causing the problem and how to tackle it, making sure your car runs smoothly again. Let’s get started!
Common Causes of Battery Drain After Alternator Replacement
When you’re dealing with a battery drain after alternator replacement, pinpointing the cause is key. The alternator is crucial for charging your car’s battery while you drive, and if it’s not working correctly, or if there’s another electrical issue, your battery can drain overnight or after short periods. Several factors can lead to this issue, ranging from simple wiring problems to more complex electrical system faults. We’ll explore some common culprits to help you explore and resolve the problem.
Wiring Issues and Connections
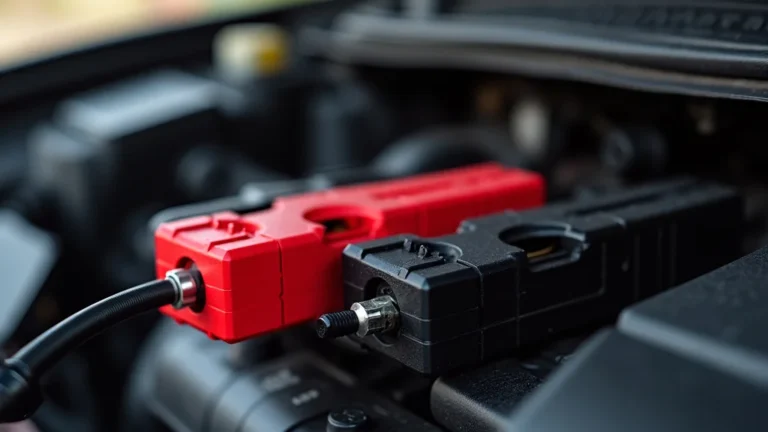
One of the easiest things to check is the wiring. Often, during an alternator replacement, wires can get dislodged, poorly connected, or even damaged. These seemingly small problems can create a “parasitic drain,” where your car’s electrical system pulls power even when the engine is off. This drain slowly depletes the battery’s charge. Inspecting the wiring can sometimes be a quick fix, saving you from more extensive troubleshooting.
-
Loose Connections: Ensure all wires connected to the alternator, including the main power cable (often a heavy gauge wire) and the smaller wires for the regulator, are securely attached. A loose connection can cause intermittent charging or, worse, a constant drain.
Sometimes, a wire might look connected but isn’t making good contact. Wiggle each wire gently to see if it moves. Any movement can show a loose connection that needs tightening or a corroded terminal that needs cleaning.
-
Corroded Terminals: Corrosion on battery terminals or alternator connections can impede the flow of electricity. This corrosion increases resistance, which makes the charging process less effective and can even create a drain.
Clean the terminals with a wire brush and a solution of baking soda and water to remove any buildup. After cleaning, apply a terminal protectant spray to prevent future corrosion. This simple step can sometimes eliminate a parasitic drain.
-
Damaged Wires: Inspect the wires for any signs of damage, such as cuts, fraying, or melted insulation. Damaged wires can short circuit and cause a constant drain.
Carefully examine the wires, especially where they run near sharp edges or hot engine components. Any damaged wire needs to be repaired or replaced to avoid further problems, which could even lead to fire.
-
Incorrect Wiring: Verify that the wiring is connected in the correct order. Check the diagrams or documentation that came with the new alternator to ensure everything is set up properly.
A misconnected wire, especially on a newer vehicle with more complex systems, can trick the car’s computer into thinking that the car needs more or less power. Double-check all wire connections against the wiring diagram.
Faulty Alternator or Regulator
Even though you just replaced the alternator, it’s possible that the new one is faulty. Alternators have internal voltage regulators that control how much power is sent to the battery. If this regulator isn’t working correctly, it can either overcharge the battery (which can damage it) or, more commonly, fail to charge it properly. A malfunctioning alternator can also create a parasitic drain, leading to a dead battery.
-
Voltage Regulator Problems: The voltage regulator controls the output voltage of the alternator. If it malfunctions, it might not provide enough power to charge the battery or could provide too much, potentially damaging the battery.
Test the alternator’s output voltage with a multimeter. A healthy alternator should produce around 13.5 to 14.5 volts when the engine is running. If the voltage is too low or inconsistent, the voltage regulator could be faulty.
-
Diode Failure: Alternators contain diodes that convert the AC current produced by the alternator into DC current to charge the battery. If these diodes fail, they can allow current to flow backward, causing a drain.
Diodes can sometimes fail without obvious signs, and it can be tricky to detect with basic tools. If you suspect a diode problem, testing the alternator at an auto parts store or a mechanic’s shop is often the best course of action.
-
Internal Short Circuits: Sometimes, the internal components of the alternator can short circuit. This can create a constant drain on the battery, even if the alternator itself appears to be functioning normally.
Internal shorts can be difficult to diagnose without specialized equipment. If you suspect an internal short, it’s best to have the alternator tested by a professional. This could involve an alternator bench test to find the root cause.
-
Incorrect Alternator: Sometimes, the new alternator is not the correct one for your vehicle. Using the wrong alternator can lead to charging issues and battery drain.
Confirm the new alternator is the correct one for your make, model, and year. Double-check the part number against your vehicle’s specifications. Incorrectly sized alternators will cause performance problems.
Parasitic Drain Sources
A parasitic drain is a condition where the electrical system of your car draws power when it shouldn’t, such as when the engine is off. This drain slowly discharges the battery over time. It is important to explore all possibilities to identify the source of this problem.
-
Faulty Relays: Relays are electronic switches that control the flow of power to different parts of your car. If a relay sticks in the “on” position, it can keep a circuit active even when it should be off, creating a parasitic drain.
Each relay serves a specific function, and identifying the faulty one might take some time. Start by checking the relays that control systems known to cause a draw, such as the headlights, the cooling fan, or the radio.
-
Lighting Issues: Lights left on, even interior lights, can drain a battery. More obscure problems, such as a faulty trunk light switch, can also cause a drain.
Inspect all lights in the car, including headlights, taillights, interior lights, glove box lights, and trunk lights. Ensure they all switch off when they should. A simple test is to leave your car parked in a dark place and check for any glowing lights.
-
Radio or Entertainment System: Aftermarket radios or other entertainment system components can sometimes cause a parasitic drain. These systems might have faulty wiring or internal issues that keep them drawing power even when the car is off.
Disconnect the aftermarket components to see if the drain stops. If the drain disappears, there may be a problem with the wiring or the component itself. You may need to consult with a car audio specialist.
-
Computer Module Malfunctions: Modern cars have various computer modules that control different functions. If one of these modules malfunctions, it could draw power continuously, causing a drain.
Testing computer modules requires specialized equipment. It’s often best to have a mechanic use a diagnostic tool to check the modules. Some modules can have internal issues that affect their power consumption.
Diagnosing Battery Drain After Alternator Replacement
Finding the source of battery drain after alternator replacement requires a systematic approach. The process involves testing, checking connections, and isolating potential causes. Using the right tools and following a clear procedure will help you find the source of the problem. This will help you resolve the issue efficiently.
Testing the Battery
The first step in diagnosing a battery drain is to check the health of the battery itself. A battery that is old or damaged might not hold a charge, regardless of whether the alternator is working correctly. It is important to determine the battery’s condition before moving on to the alternator and other electrical components.
-
Battery Load Test: A load test assesses the battery’s ability to deliver power. It simulates the load of starting the engine and reveals if the battery can provide the necessary current. A battery that fails a load test needs replacing.
Most auto parts stores offer free battery load tests. This is a quick and easy way to determine if your battery is in good shape or if it needs replacement. This ensures your battery is working as expected.
-
Voltage Check: Use a multimeter to measure the battery’s voltage with the engine off. A fully charged battery should read around 12.6 volts. A voltage below 12.4 volts suggests the battery might be partially discharged or failing.
Check the battery’s voltage first thing in the morning, before you start the car, to see if it has lost charge overnight. Consistently low voltage indicates a charging issue or a parasitic drain.
-
Age and Condition: Batteries have a lifespan, typically three to five years. Check the battery’s age and physical condition (corrosion, swelling). An old or damaged battery might not hold a charge.
If your battery is near the end of its life, it might be the primary cause of your problems. Even if your alternator is working correctly, an old battery might struggle to hold a charge.
Checking the Alternator Output
After confirming the battery is in good condition, the next step is to make sure the alternator is charging the battery correctly. This involves testing the alternator’s output voltage and current. A correctly functioning alternator should generate the required power to keep the battery charged.
-
Voltage Output Test: With the engine running, use a multimeter to measure the voltage across the battery terminals. The voltage should be between 13.5 and 14.5 volts. If the voltage is lower, the alternator might not be charging properly.
Have the car run while checking the voltage. A voltage reading within this range shows the alternator is charging the battery. If the voltage is outside this range, the alternator may have an issue.
-
Current Output Test: Some multimeters can measure current (amps). Connect the multimeter in series with the battery cable to measure the alternator’s output current. This test confirms the alternator delivers enough current to charge the battery.
Make sure your multimeter can handle the high amperage of the alternator. This test is a bit more complex, and you might want to consider consulting a professional. However, it provides a very clear picture of alternator function.
-
Alternator Bench Test: Take the alternator to an auto parts store or mechanic for a bench test. This test verifies the alternator’s output under different loads and ensures it’s performing as expected.
A bench test isolates the alternator from the car’s electrical system, providing a precise assessment of its performance. This test can reveal problems that might not be obvious during on-vehicle testing.
Performing a Parasitic Draw Test
If the battery and alternator appear to be fine, the problem might be a parasitic drain. This test measures the current draw from the battery when the engine is off, identifying any components that are drawing power when they shouldn’t be. This test is very important for finding the root cause of the battery drain.
-
Setting up the Multimeter: Disconnect the negative battery cable. Set your multimeter to measure current (amps) and connect it between the negative battery terminal and the disconnected cable.
Make sure your multimeter is set to measure the correct amperage range. If the range is too low, you could blow a fuse. It’s often best to start with a higher amperage setting and adjust downward if needed.
-
Reading the Current Draw: With the car off and all accessories turned off, observe the current draw on the multimeter. A normal parasitic draw is typically less than 50 milliamps (0.05 amps).
A high current draw means something is consuming too much power while the car is off. This value shows what to expect with your car. Any reading above that suggests a drain.
-
Isolating the Drain: To find the source, start by removing fuses one by one, checking the current draw on the multimeter after removing each fuse. When the current draw drops, the circuit associated with that fuse is the likely culprit.
This is a process of elimination. As you remove fuses, you isolate different circuits. When the current draw drops, you know you’ve found the circuit with the problem. This can lead to a quick diagnosis.
-
Checking Components: Once you’ve identified the circuit with the parasitic drain, investigate the components connected to that circuit. Common sources include interior lights, radio, or aftermarket accessories.
The goal here is to pinpoint the exact component that’s causing the drain. By checking individual components, you can often find the problem source. This can include wiring.
Step-by-Step Troubleshooting Guide
Here’s a step-by-step guide to help you troubleshoot battery drain after alternator replacement, ensuring you explore each potential cause systematically and efficiently. This will walk you through the process, providing a structured approach to finding and fixing the issue.
-
Initial Inspection:
- Check battery terminals for corrosion and clean if necessary.
- Inspect the main power wire and smaller wires from the alternator for secure connections.
- Visually inspect all wires for any damage, such as cuts, fraying, or melted insulation.
Begin with a visual inspection to look for obvious problems that are quick and easy to resolve. This step can often uncover simple issues, such as loose wires or corrosion. This is a very quick step and it saves time.
-
Battery Test:
- Use a multimeter to measure the battery voltage with the engine off. It should be approximately 12.6 volts.
- If the voltage is significantly lower, perform a load test at an auto parts store to check the battery’s capacity.
- Replace the battery if it fails the load test or is old (typically over 3–5 years).
The battery is the cornerstone of your electrical system. This step ensures that the battery itself isn’t the problem. Make sure the battery can hold a charge before exploring other areas.
-
Alternator Output Test:
- Start the engine and measure the voltage across the battery terminals with a multimeter.
- The voltage should be between 13.5 and 14.5 volts.
- If the voltage is outside this range, have the alternator bench-tested at an auto parts store.
These tests confirm if the alternator is charging the battery correctly. A healthy alternator keeps the battery charged. Bench testing provides a precise assessment.
-
Parasitic Drain Test:
- Disconnect the negative battery cable.
- Set the multimeter to measure amps and connect it between the negative battery terminal and the disconnected cable.
- Observe the current draw; it should be less than 50 milliamps (0.05 amps).
This test reveals whether there is a parasitic drain in the system. Any reading above the normal value indicates a power draw when the car is off. This is important to determine if something is drawing power.
-
Isolate the Drain:
- If a parasitic drain is present, start removing fuses one by one, watching the multimeter.
- When the current draw drops, the circuit associated with that fuse is the source of the drain.
- Inspect the components connected to the problematic circuit, such as lights, radio, and aftermarket accessories.
This process helps locate the specific component that is causing the drain. Removing fuses and testing circuits can isolate the faulty part. Identifying the circuit is key.
-
Component Inspection and Repair:
- Examine the problematic component for any obvious issues, such as a sticking relay or damaged wiring.
- Repair or replace the faulty component.
- Recheck the parasitic draw to ensure the issue is resolved.
Once you’ve identified the problematic part, address the issue through repair or replacement. After fixing the component, retest to confirm the issue is gone. This guarantees it’s fixed.
By following these steps, you can effectively diagnose and address the issue of a battery drain after alternator replacement, keeping your vehicle running smoothly. These procedures are useful.
Battery Drain Scenarios and Solutions
Understanding real-world scenarios can help you prepare for and resolve issues with your car’s electrical system. Here are some situations you might experience and how to approach them. These examples provide a good look at some of the things that can happen.
-
Scenario: The battery drains overnight after replacing the alternator.
- Problem: A parasitic drain is present.
- Possible Cause: The trunk light is staying on.
- Solution: Check the trunk light switch and bulb. Replace the switch if it’s faulty.
Many times, the solution is much simpler than you think. A light that stays on can drain your battery quickly. Quickly locate the part, test, and fix it.
-
Scenario: The battery is always low even after driving for a long time.
- Problem: The alternator isn’t charging the battery.
- Possible Cause: A loose or corroded wire at the alternator.
- Solution: Inspect and clean the alternator’s connections and terminals. Tighten any loose wires.
Poor connections stop the alternator from delivering enough power to charge the battery. Cleaning and tightening connections will get things running.
-
Scenario: A new alternator was installed, but the battery keeps going dead.
- Problem: The new alternator is faulty.
- Possible Cause: Internal failure of the voltage regulator.
- Solution: Have the alternator tested or replaced under warranty.
Even new parts can have problems. Testing or replacing the alternator under warranty will help you eliminate this possibility. This is especially true for brand-new products.
Frequently Asked Questions
Question: What should I do if my battery dies after the alternator replacement?
Answer: First, check the battery’s voltage and have it load-tested. If the battery is good, perform a parasitic drain test to look for any current draw when the car is off. Then inspect wiring and connections at the alternator.
Question: Can a faulty alternator cause a battery to drain?
Answer: Yes, a faulty alternator can cause a battery to drain. Problems with the voltage regulator or diodes inside the alternator can prevent proper charging or even create a parasitic drain.
Question: How do I measure the parasitic draw on my car?
Answer: Disconnect the negative battery cable. Set your multimeter to measure amps and connect it in series between the negative battery terminal and the disconnected cable. Ensure the car is off and all accessories are turned off. Check the reading on the multimeter. If it’s above 50 milliamps (0.05 amps), you have a parasitic draw.
Question: Should I replace the battery when replacing the alternator?
Answer: It’s a good idea to test the battery before replacing the alternator. If the battery is old (over 3-5 years) or fails a load test, replacing it along with the alternator can prevent future issues.
Question: How do I know if my alternator is bad?
Answer: Signs of a bad alternator include dimming headlights, a battery warning light on the dashboard, difficulty starting the car, or a dead battery. Additionally, the alternator output voltage should be tested with a multimeter while the engine is running.
Final Thoughts
Dealing with a battery drain after alternator