Alternator Issues Preventing Battery Charging Problems Solved
Having an alternator not charging battery can be a real headache, especially if you’re new to car maintenance. It’s a common issue that often leaves people stranded or worried about their vehicle’s performance. Don’t fret! We’re here to help you get to the bottom of this. We’ll explore the causes and provide you with a simple, step-by-step approach to pinpoint the problem. Get ready to learn about how to troubleshoot this issue and keep your car running smoothly.
Troubleshooting Charging System Failures
The charging system in your car is essential, and when the alternator isn’t working right, the battery will drain. This can lead to a dead battery, leaving you stranded. When your car battery drains, you may need a jump start, which is not a permanent solution. This section explores ways to diagnose these problems so you can get back on the road. We’ll cover simple tests you can do at home, along with a look at what the common culprits are and what you can do about it.
Recognizing the Warning Signs
Before you start digging into the details, knowing the warning signs of a failing alternator can help you catch problems early. Things like dimming headlights, a slow-to-start engine, or the battery warning light on your dashboard are often indicators. Ignoring these signs can lead to more significant issues down the line. We’ll explore what these symptoms mean and what they tell you about the health of your car’s charging system. You will learn to spot the clues that indicate your alternator might be the issue.
-
Dimming Headlights: If your headlights flicker or get dimmer when you accelerate, this could indicate the alternator isn’t providing enough power. The headlights are a good indicator of whether the battery is being charged adequately.
Your vehicle’s headlights typically operate at a set voltage. When the alternator can’t maintain the required electrical power, this can cause the headlights to dim, especially when the car is idling or when extra electrical loads are turned on, like the air conditioning. It’s an indication that the alternator cannot meet the electrical demands of the vehicle.
-
Slow Engine Cranking: A sluggish engine start is another sign. A failing alternator can cause the battery to discharge.
When the alternator is unable to charge the battery properly, the battery will not be able to deliver sufficient power to crank the engine. The starter motor requires a significant amount of electrical energy to turn the engine over, and if the battery is drained, the cranking process will be slow and laborious. In cases of significant alternator failure, the engine may not crank at all.
-
Battery Warning Light: The battery light illuminates when there’s an issue with the charging system. It’s designed to warn you when your car’s charging system has a problem, like an alternator not charging the battery.
This light, often shaped like a battery, is a direct signal from the car’s computer that it detects a problem. The car’s computer monitors the voltage, and if it’s too low, the light will come on. When the light turns on, it’s a good idea to check your charging system. If the light comes on, it’s a definite sign that something isn’t right.
-
Electrical Component Malfunctions: Other electrical components might also start acting up. You might notice unusual behavior from your radio, power windows, or other electrical systems.
A failing alternator might not be able to supply the necessary power to run the car’s electrical systems. This can cause components like the radio, power windows, and air conditioning to stop working, or to behave erratically. The electrical load is shared, and a faulty alternator can leave some systems without the power they need to work correctly.
Testing the Battery’s Voltage
One of the first steps in figuring out what’s causing your alternator not charging battery issue is to check your battery’s voltage. This is a fairly easy task that can be done with a simple voltmeter. You’ll want to check the voltage with the engine off, then start the engine and test it again. It gives you a clear indication of your battery’s state and how well the charging system is working.
-
Gather Your Tools: You’ll need a digital multimeter (voltmeter), safety glasses, and potentially a pair of gloves.
A digital multimeter is a handheld device that measures voltage, current, and resistance. It’s an essential tool for automotive electrical diagnosis. Safety glasses protect your eyes, and gloves can protect your hands. Ensure that your multimeter is set to read DC voltage.
-
Test with Engine Off: Set your multimeter to the DC voltage setting. Connect the red probe to the positive (+) battery terminal and the black probe to the negative (-) terminal. Read the voltage.
With the engine off, the battery voltage should be around 12.6 volts. Anything lower than 12.4 volts suggests the battery is not fully charged. Make sure you connect the probes to the correct terminals to get an accurate reading. Wrong connections can damage the multimeter and give you incorrect readings.
-
Test with Engine Running: Start the engine and let it idle. Repeat the voltage test, making sure the probes stay connected to the correct terminals. Observe the voltage reading.
When the engine is running, the voltage should increase, typically to between 13.5 and 14.5 volts. This indicates the alternator is charging the battery. If the voltage remains the same or decreases, your alternator might not be charging the battery.
-
Interpreting the Results: If the voltage increases when the engine is running, the alternator is likely working. If it doesn’t increase, there’s a good chance the alternator is the problem.
If the voltage doesn’t increase above 13.5 volts when the engine is running, the alternator is probably not working. If the voltage is low and doesn’t change when the engine runs, you should look at the alternator.
Inspecting the Serpentine Belt and Connections
The serpentine belt drives the alternator, and making sure it’s in good shape is critical. Also, the electrical connections at the alternator need to be secure and free of corrosion. The belt drives many things in your car, and it can cause problems if it’s damaged or loose. The wiring harness to the alternator can also develop problems.
-
Belt Inspection: Check the serpentine belt for cracks, wear, or fraying. Any damage to the belt can cause it to slip, preventing the alternator from spinning correctly.
The serpentine belt, also known as the drive belt, transfers power from the engine to various components, including the alternator, power steering pump, and air conditioning compressor. Cracks or fraying indicate the belt is weakening and needs to be replaced. A damaged belt may slip and fail to turn the alternator.
-
Tension Check: The belt should have the right amount of tension. Too loose, and it will slip; too tight, and it can cause damage. The belt’s tension is essential for the alternator to work correctly.
The belt’s tension is usually managed with a tensioner pulley. If the belt is loose, it won’t be able to turn the alternator properly. If the belt is too tight, it can place stress on the alternator bearings and other components. Proper tension ensures efficient power transfer.
-
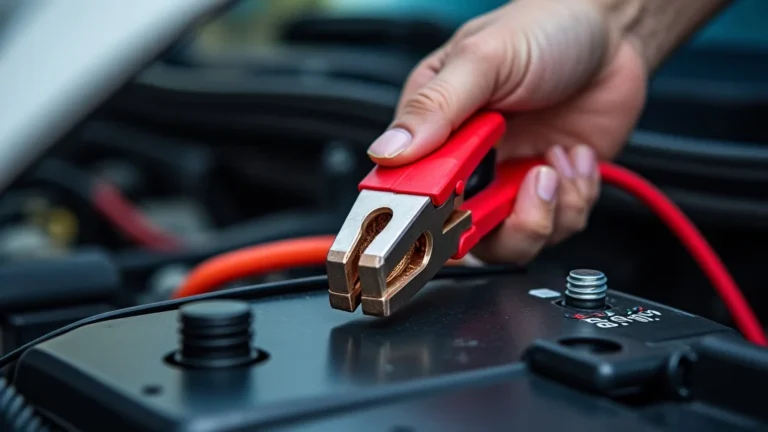
Connection Checks: Examine the electrical connections at the alternator for corrosion or loose wires. Poor connections can prevent the alternator from charging the battery.
The alternator has several electrical connections, including a large wire that carries the charging current to the battery and smaller wires that connect to the car’s electrical system. Corrosion or loose wires can create resistance, reduce the charging current, or cause the alternator to not function.
-
Clean Connections: If you find any corrosion, clean the terminals with a wire brush or electrical contact cleaner. Ensure secure connections.
Corrosion forms on electrical connections when metal surfaces are exposed to moisture and oxygen. Cleaning these connections with a wire brush or electrical contact cleaner removes the corrosion, ensuring a solid electrical connection. Proper electrical connections are key for transferring the current.
Understanding How the Alternator Works
To understand why your alternator not charging battery, you need to know how it works. The alternator converts mechanical energy from the engine into electrical energy to charge the battery and power the car’s electrical systems. Understanding the key parts and their functions can help you diagnose problems more effectively. Let’s delve into the mechanics of your car’s power generator and the role it plays in keeping your vehicle running.
Components of an Alternator
An alternator is a complex component, but each part plays a vital role. Understanding these elements can help you identify possible failure points. From the rotor to the stator and the voltage regulator, each part works to generate and regulate electricity. Let’s examine each of these.
-
Rotor: The rotor is the rotating part of the alternator, creating a magnetic field when current flows through it.
The rotor is a key element of the alternator. It spins within the stator and creates a magnetic field. This magnetic field is essential for generating electricity. The rotor receives current through slip rings, creating a rotating magnetic field.
-
Stator: The stator is the stationary component, where the electricity is produced as the rotor spins inside it. The stator is a coil of wires.
The stator houses the coils of wire where the electrical current is induced. As the rotor’s magnetic field spins around the stator, it generates an alternating current. The stator converts the magnetic energy into electrical energy.
-
Diodes: Diodes convert the alternating current (AC) generated by the stator into direct current (DC) that the car’s battery and electrical components can use.
Diodes serve to convert the AC output of the alternator into DC, which is necessary for the battery and other electrical components. They act as one-way valves for electricity, allowing current to flow in only one direction. This conversion is crucial for charging the battery.
-
Voltage Regulator: The voltage regulator controls the output voltage of the alternator to prevent overcharging or undercharging the battery.
The voltage regulator keeps the output voltage within a safe range, preventing overcharging and damage to the battery and other electrical components. It does this by controlling the current flowing to the rotor, which in turn controls the strength of the magnetic field. The regulator is vital for the health of your battery.
The Charging Process Explained
The charging process is pretty simple. When the engine runs, the alternator begins its work. The engine’s movement turns the serpentine belt, which spins the alternator pulley. This action activates the components inside the alternator, causing it to generate electricity, which charges the battery and powers the car’s electrical systems. This process is key to keeping your car running.
-
Mechanical Input: The engine’s rotation drives the alternator via the serpentine belt.
The first step in the charging process is the mechanical input. The engine’s crankshaft turns the serpentine belt, which in turn spins the alternator pulley. This is what starts the electricity-generating process. The belt acts as the messenger, delivering the power from the engine to the alternator.
-
Magnetic Field Creation: The spinning rotor creates a magnetic field within the alternator.
As the rotor spins, it creates a rotating magnetic field inside the alternator. This magnetic field is produced by current flowing through the rotor’s coils. This is the heart of the alternator’s operation, turning mechanical energy into magnetic energy.
-
Current Generation: The rotating magnetic field induces an electrical current in the stator windings.
As the rotor’s magnetic field spins, it passes through the stator windings, causing an alternating current (AC) to be induced in the stator coils. The current is produced by electromagnetic induction. This AC is the initial form of electricity generated by the alternator.
-
Conversion to DC: Diodes convert the AC to direct current (DC) to charge the battery.
The AC generated by the stator is then converted into DC by the diodes. This DC is what the car’s battery and electrical components use. The diodes allow the current to flow in one direction only, making the conversion possible. Without this conversion, the battery would not charge.
-
Voltage Regulation: The voltage regulator ensures the output voltage is within the safe range for the battery and electrical components.
The voltage regulator controls the alternator’s output voltage to prevent overcharging or undercharging the battery. It adjusts the current flowing to the rotor, which controls the strength of the magnetic field. This ensures the battery receives the appropriate charge and protects electrical components.
Common Alternator Issues
Several things can go wrong with your alternator. Understanding these potential issues can help you diagnose the problem faster. A faulty diode bridge, a worn-out rotor, or a failing voltage regulator can all cause the alternator not charging battery problem.
-
Faulty Diodes: Diodes can fail, preventing the conversion of AC to DC. This can result in a charging issue.
If the diodes within the alternator are damaged or faulty, they can fail to convert the AC output of the stator into DC. This prevents the battery from receiving a charge. Diodes are essential, and their failure can prevent the battery from charging correctly.
-
Worn Rotor: The rotor can wear out over time. When it can’t create a strong enough magnetic field, charging may be affected.
The rotor rotates, creating a magnetic field. Over time, the rotor’s windings or its insulation can wear out. This can lead to a weaker magnetic field, reducing the alternator’s charging ability. The rotor’s condition is vital to the alternator’s functionality.
-
Failing Voltage Regulator: A faulty voltage regulator can cause overcharging or undercharging, affecting the battery’s health.
The voltage regulator keeps the alternator’s output within safe limits. If the regulator fails, it can cause the alternator to overcharge, leading to battery damage, or undercharge, causing the battery to drain. It’s an important part of the alternator.
-
Worn Brushes: The brushes that transfer current to the rotor can wear down. This reduces charging.
The brushes transfer electricity from the stator to the rotor. The brushes wear down over time. When the brushes are worn, they make poor contact with the slip rings, reducing the charging ability. Replacing worn brushes is a common fix.
Step-by-Step Problem Solving
When you’re dealing with an alternator not charging battery situation, a systematic approach is essential. This can make the process more manageable and less daunting. Following a methodical process, you’ll be able to quickly zero in on the source of the problem. It is much easier to manage the issues when you break them down. Here is a clear strategy for diagnosing and fixing your alternator problem.
Diagnostic Checklist
Following a diagnostic checklist can help make sure you don’t miss anything. Start with the basics and move on to more detailed tests. By using a checklist, you can be thorough and effective in finding the cause of the problem. Following the process can save you time and help prevent further problems.
-
Battery Test: Check the battery voltage with the engine off and running. This is your starting point.
Use a voltmeter to measure the battery voltage. Record the voltage with the engine off, and again with the engine running. This gives you a baseline measurement and indicates whether the alternator is charging the battery.
-
Serpentine Belt Inspection: Check the belt for damage, tension, and proper alignment. A slipping belt will prevent charging.
Examine the serpentine belt for cracks, wear, or fraying. Ensure the belt has adequate tension. A worn or loose belt will not drive the alternator, so it must be in good condition.
-
Electrical Connection Checks: Inspect all electrical connections at the alternator for corrosion or looseness.
Check the wires connecting to the alternator. Look for corrosion or loose connections. Clean and tighten connections as needed. Bad connections can prevent the alternator from charging the battery.
-
Alternator Output Test: Perform an alternator output test to measure voltage and current output. This tells you if the alternator is generating power.
Use a multimeter or a specialized alternator tester to measure the voltage and current output. Compare the readings to the manufacturer’s specifications. A low output indicates a problem with the alternator.
-
Load Test: Test the battery under load. This helps you determine if the battery can hold a charge.
A load test involves applying a load to the battery and measuring its voltage drop. This test determines if the battery can deliver the necessary current. If the voltage drops excessively, the battery might be bad.
Tools Required
Gathering the right tools will make the process easier. These are things you’ll likely need. A basic set will allow you to do most of the checks. Having these tools ready can save you time and make the troubleshooting process smoother.
-
Digital Multimeter: This is used to test voltage and current.
A digital multimeter is essential for measuring voltage, current, and resistance. It’s a core tool for checking the battery and alternator’s performance.
-
Wrench Set: To remove and inspect the alternator.
A wrench set is needed to remove and inspect the alternator, as well as to check and adjust belt tension.
-
Wire Brush: To clean corroded connections.
A wire brush helps clean corroded connections at the battery terminals and the alternator’s electrical connections. Clean connections are vital for reliable electrical contact.
-
Safety Glasses: To protect your eyes.
Always wear safety glasses when working on any part of your car to protect your eyes from debris.
-
Battery Terminal Cleaner: To clean the battery terminals.
Battery terminal cleaner helps remove corrosion. Corrosion can interfere with the charging process.
How to Replace an Alternator
If you’ve determined that the alternator is the issue, you might need to
-
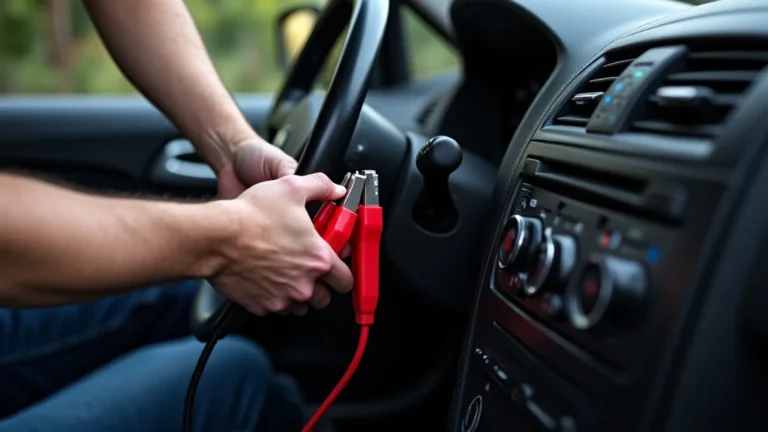
Disconnect the Battery: Always disconnect the negative battery terminal first.
Safety is the first step. Disconnect the negative (black) battery terminal to prevent electrical shocks. This will make it safer to work on the vehicle’s electrical system.
-
Remove the Serpentine Belt: Use a wrench or specialized tool to release tension and remove the belt.
Use a wrench or a tool to relieve the tension on the serpentine belt tensioner. Then, carefully slip the belt off the alternator pulley. You might want to draw a diagram of how the belt is routed before removing it.
-
Disconnect Electrical Connections: Unplug any wiring harnesses and remove any wires connected to the alternator.
Carefully disconnect any wiring harnesses and the main charging wire from the back of the alternator. Note how these wires are connected. Use a marker to identify where they go.
-
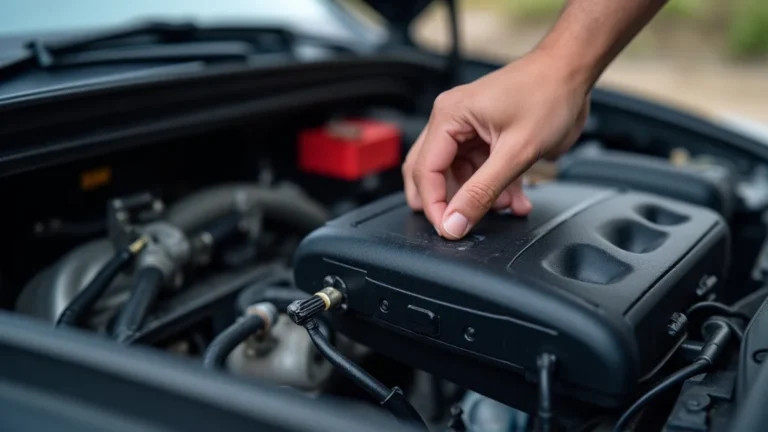
Unbolt the Alternator: Remove the bolts holding the alternator to the engine.
Unbolt the alternator from its mounting bracket. Keep the bolts in a safe place. They will be used to install the new alternator. You may need to jiggle the alternator to remove it.
-
Install the New Alternator: Place the new alternator in position and bolt it in. Reconnect the wiring and the serpentine belt.
Carefully install the new alternator into place. Tighten the mounting bolts. Reconnect the wiring, the charging wire, and the serpentine belt. Make sure everything is connected securely.
-
Reconnect the Battery: Reconnect the negative battery terminal.
Reconnect the negative battery terminal. Double-check all connections. This is the last step and ensures that the electrical system is connected.
-
Start the Engine: Start the engine and check that the battery is charging.
Start the engine and check the battery voltage using a voltmeter. The voltage should be higher than the engine-off reading, indicating that the new alternator is charging the battery correctly.
| Problem | Possible Cause | Solution |
|---|---|---|
| Dim Headlights | Alternator not producing sufficient power | Check alternator output, replace if needed. |
| Slow Cranking | Battery is not charged | Test and charge battery, check alternator. |
| Battery Light On | Charging system malfunction | Inspect alternator, connections, and belt. |
Frequently Asked Questions
Question: Why is my battery dying, even after I jump-start my car?
Answer: Your alternator might not be charging the battery. Jump-starting gets your car running, but if the alternator isn’t working, the battery won’t recharge while you drive.
Question: How can I tell if the alternator is bad without special tools?
Answer: Check your battery voltage with the engine off, then running. If the voltage doesn’t increase when the engine is running, the alternator is likely the problem.
Question: Can a bad battery cause the alternator not to charge?
Answer: A failing battery can sometimes put extra strain on the alternator. It’s a good idea to test both the battery and the alternator when you have charging issues.
Question: What’s the cost of replacing an alternator?
Answer: The cost varies, but it usually ranges from a few hundred to several hundred dollars, depending on the car model and whether you do the work yourself or have a mechanic do it.
Question: How long does an alternator usually last?
Answer: Typically, alternators last between 80,000 and 150,000 miles. However, the lifespan depends on factors like driving conditions and maintenance.
Final Thoughts
When you discover the alternator not charging battery issue, it can be frustrating, but with the correct approach, you can fix it. By understanding the warning signs, inspecting the components, and following the steps outlined, you are well-equipped to diagnose the problem. The main thing is to approach the situation systematically. Always remember to prioritize safety. Don’t be afraid to ask for help from a mechanic if you’re not comfortable with the troubleshooting. If you apply the advice here, you’ll be back on the road in no time.