Why Your Jump Starter Is Beeping And What To Do
Getting your car started is frustrating, especially when your jump starter beeping at you. It can feel like something’s gone wrong, and you might wonder what to do. Don’t worry, many people face this issue. This guide will walk you through the most common reasons why your jump starter might be beeping and how to resolve the problem quickly. We’ll simplify everything so that you can get back on the road. Now, let’s get into the specifics!
Understanding Why Your Jump Starter Beeps
One of the most common issues you’ll encounter is a beeping jump starter. This beeping sound is not just an annoying noise; it’s a signal. The jump starter uses these beeps to communicate a particular error or alert you to a problem. Knowing what each beep sequence means is the first step to solving the issue. Different manufacturers might use varied beep patterns, and sometimes, the volume and frequency of the beeps differ. Knowing the basics helps you diagnose the situation before any hands-on work. This section will explore the common reasons your jump starter beeps.
Low Voltage Detection
One of the primary reasons for a jump starter beeping is that it detects a low voltage in the car battery. This is a safety feature that prevents the jump starter from attempting to charge a battery that’s too weak. A battery with extremely low voltage might not be able to accept a charge, and attempting to jump-start it could damage the jump starter or, in rare cases, the car’s electrical system. This system will often trigger an alert to warn the user about a potential hazard. The jump starter might beep rapidly, flash a warning light, or display an error message on a small screen, if it has one. Understanding this will help you troubleshoot.
- Battery Health: If the car battery is old or damaged, its voltage may be too low to accept a charge. The jump starter will beep, indicating a problem.
- Extreme Cold: Cold temperatures can decrease a battery’s voltage. This can sometimes cause the jump starter to beep, even if the battery is in good condition.
- Excessive Drain: Leaving lights on or other electrical devices running can drain the battery. This can also cause a low-voltage situation, triggering the beep.
- Battery Type: Some jump starters might have trouble with certain types of batteries that have low voltage.
- Jump Starter Function: It is important to know if your jump starter has a display to understand the level of the voltage. A low voltage message should be clear for diagnosis.
For example, you’re trying to jump-start your car on a chilly morning. The jump starter beeps, indicating low voltage. After testing the battery with a multimeter, you confirm it’s below the safe threshold. You then test it again after a few minutes of trying to start the car and see no increase in voltage, which indicates the battery may need replacing. This reveals the true issue and prevents any further charging attempts, avoiding potential damage.
Reverse Polarity Alert
Another critical reason for a jump starter to beep is when reverse polarity is detected. This happens when the positive and negative clamps are attached to the wrong terminals on the car battery. Connecting the jump starter in reverse can lead to serious damage, causing a short circuit, and, in severe cases, the battery could even explode or release harmful fumes. Jump starters have built-in safeguards to protect against this. These include reverse polarity protection, and a beeping sound is one of the most common warnings to alert you of the problem. This sound helps prevent a potentially dangerous situation.
- Clamp Misconnection: Accidentally attaching the red (+) clamp to the negative (-) terminal or the black (-) clamp to the positive (+) terminal triggers the reverse polarity protection.
- Indicator Lights: Many jump starters feature indicator lights that show the connection status. If the light shows an error message, it means there is a problem.
- Beeping Pattern: A specific beep pattern, often a rapid, continuous beeping, signifies reverse polarity, prompting the user to recheck the connections.
- Internal Protection: Modern jump starters use internal circuits that detect and prevent current from flowing if reverse polarity is detected.
- User Error: Make sure you double-check your connections before you attempt a jump start to prevent this from happening.
Here’s a quick real-life scenario: A user tries to jump-start their car in low light conditions and accidentally attaches the clamps incorrectly. The jump starter emits a rapid beeping sound and displays a “Reverse Polarity” warning. Quickly realizing the mistake, the user disconnects the clamps, swaps them to the correct terminals, and the jump-start attempt is successful. This highlights how effective the reverse polarity protection is.
Overload Protection Triggered
When a jump starter beeps, it can be due to an overload. Jump starters are designed to supply a specific amount of current. If the car’s electrical system demands more current than the jump starter can provide, the overload protection kicks in. This overload can occur if the car has a severely discharged battery, a short circuit in the electrical system, or some other issue that draws too much power. This protection prevents damage to the jump starter and the car. When the overload protection is triggered, the jump starter will usually stop providing power and emit a beeping sound to signal the user to check the connections and the car’s electrical system.
- High Current Demand: A car with a completely dead battery might try to draw too much current initially, causing an overload.
- Short Circuits: Any short circuit in the car’s wiring can cause a sudden, high current draw, triggering the overload protection.
- Faulty Components: A faulty starter motor, alternator, or other electrical component can draw excessive current.
- Temperature: Extremely high temperatures can make your jump starter overload faster than in normal conditions.
- Jump Starter Limits: Jump starters have maximum current ratings. Trying to jump-start a car that needs more current than the jump starter can supply will trigger the overload protection.
Consider this example: A driver’s car suddenly won’t start, and they try to jump-start it. Immediately after connecting the jump starter, it starts beeping continuously. The driver checks the connections and they are correct. After a few tries, they realize that there might be an issue with the car. After getting the car checked by a mechanic, the mechanic diagnoses a short circuit in the starter motor. The jump starter saved the driver from any potential damage to its internal components.
Troubleshooting Common Jump Starter Issues
You can quickly fix many beeping jump starter problems by following a structured approach. The first thing to do is determine the beep’s meaning by checking the user manual. Then, check the connections, inspect the battery, and carefully go through the jump starter’s functions. The steps may vary slightly depending on the jump starter model, but these steps cover the common issues. A good understanding of how to use the jump starter, along with basic troubleshooting skills, goes a long way. Let’s get right into the process!
Step-by-Step Troubleshooting Guide
Troubleshooting a beeping jump starter follows a logical flow. Begin with the basic checks, and then move towards more specific problem-solving. Make sure you follow these steps in order. This will allow you to save time and also prevent any potential harm. This step-by-step process is easy to follow and will let you resolve your problems fast. By methodically going through this process, you will likely fix most problems.
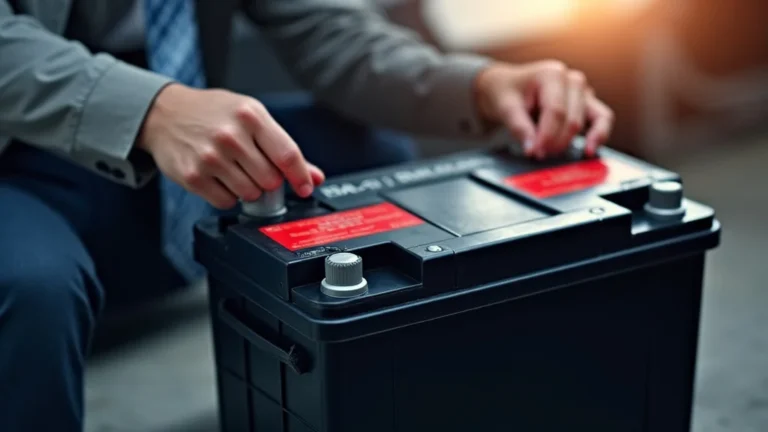
- Check the Connections: Ensure the clamps are properly connected to the car battery terminals. The red clamp should be on the positive (+) terminal, and the black clamp should be on the negative (-) terminal. Make sure the clamps are making good contact.
- Verify Polarity: Double-check that the clamps are connected correctly. If the jump starter is beeping and displaying a reverse polarity warning, immediately disconnect the clamps and reattach them in the correct order.
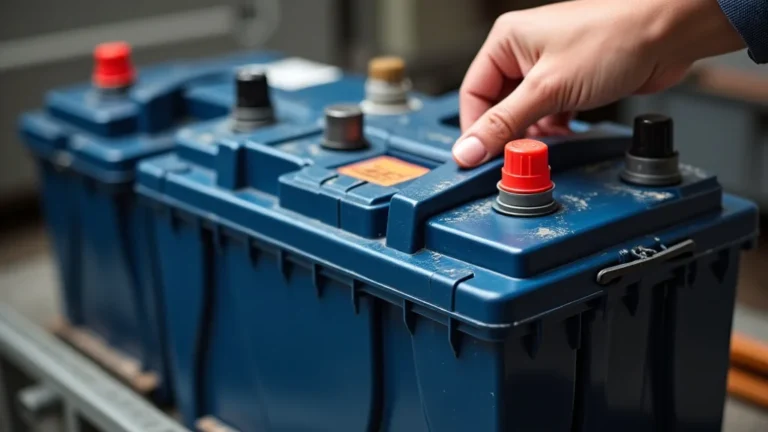
- Inspect the Battery: Check for any corrosion or damage on the battery terminals. If there is corrosion, clean the terminals with a wire brush or a baking soda solution. Make sure the battery itself isn’t visibly damaged.
- Check the Jump Starter’s Charge: Ensure that the jump starter has enough charge to jump-start the car. Many jump starters have an indicator that shows the battery level. If the level is low, charge the jump starter before attempting to jump-start the car.
- Consult the Manual: The jump starter’s manual is a great resource. It includes details about beep codes, troubleshooting tips, and safety instructions.
Consider a practical scenario: You are trying to jump-start your car on a cold morning. The jump starter begins beeping and displays a low-voltage warning. You inspect the battery and find the terminals are clean and connected properly. Using a multimeter, you verify the car battery’s voltage. If the reading is below 12 volts, the battery needs to be charged or
Using a Multimeter for Battery Diagnostics
A multimeter is a handy tool to help understand what’s happening with your car’s battery. It measures voltage, which will tell you how healthy your battery is. A multimeter can measure voltage, amperage, and resistance. You’ll primarily use the voltage setting when diagnosing battery issues. By knowing the actual voltage, you can get a good idea of whether the battery is the cause of your jump starter issues. You’ll know how to read the measurements, to know if your battery is failing. This helps you figure out if the car’s battery is the problem or if something else is going on. Let’s break down how to use a multimeter.
- Set the Multimeter: Turn the dial to the DC voltage setting (usually marked with a “V” and a straight line or “DCV”). Choose a voltage range higher than your battery voltage, typically 20V for a car battery.
- Connect the Probes: Connect the red probe to the positive (+) terminal of the battery and the black probe to the negative (-) terminal. Be careful to avoid touching the probes together or touching any other metal parts of the car.
- Read the Voltage: The multimeter display will show the battery’s voltage. A fully charged 12-volt battery should read around 12.6 volts or higher. A voltage of 12.0 volts or lower indicates a low charge.
- Check Under Load: To get a more accurate idea of battery health, try to start the car while the multimeter is connected. The voltage should not drop significantly. If it drops to 9 volts or lower, the battery might be failing.
- Test for Parasitic Drain: You can also use the multimeter to check if there is an issue. With the car off, disconnect the negative battery cable. Set the multimeter to measure amperage (usually the “A” setting). Connect the probes in series between the negative battery cable and the negative battery terminal. A normal parasitic drain should be less than 50 milliamps (0.05 amps). Anything higher suggests a drain.
Imagine your car won’t start, and your jump starter is beeping. You connect the multimeter to the battery. The reading is 11.8 volts. This shows the battery is likely low. You then try to start the car while watching the multimeter. The voltage drops to 8 volts, which is low and is a sign that the battery might need to be replaced. This information is key to making the best decision for your car.
Handling Corrosion and Terminal Issues
Corrosion on your car’s battery terminals can mess up the connection, and this can prevent the jump starter from working correctly. Corrosion is a white or green powdery substance that forms on the terminals due to the interaction between the battery acid and the air. If the connection is not clean, this will prevent the jump starter from sending power, and can give you a lot of problems. Handling this is a simple process, and the result is a clean and reliable connection. By handling the corrosion and fixing any terminal problems, you guarantee a solid connection for your jump starter.
- Safety First: Before you start, put on safety glasses and gloves to protect your eyes and skin from battery acid. Make sure the car is turned off.
- Disconnect the Cables: Use a wrench or pliers to disconnect the cables from the battery terminals. Always remove the negative (-) cable first and reconnect it last to prevent short circuits.
- Clean the Terminals: Use a wire brush or a terminal cleaner to scrub away the corrosion from the terminals. You can also use a mixture of baking soda and water. Put the solution on the terminals and let it fizz for a few minutes before wiping it off.
- Clean the Cables: Clean the inside of the cable clamps as well. Make sure the clamps have a good, clean surface for proper contact.
- Reassemble and Protect: Once everything is clean, reconnect the cables to the terminals, starting with the positive (+) cable. Tighten the clamps securely. Consider using a terminal protector spray or applying a small amount of petroleum jelly to the terminals to prevent future corrosion.
For example, if you notice white powdery corrosion on your car battery terminals. You put on safety glasses and gloves, and you disconnect the negative cable. Next, you use a wire brush and baking soda solution. After cleaning the terminals and cables, you tighten the clamps. Now, the jump starter works flawlessly. This confirms the importance of keeping the terminals clean.
Advanced Diagnostics and Solutions
After going through the basic troubleshooting steps, the problem may require more advanced techniques. This includes looking at other parts of your car’s electrical system, and knowing the limits of your jump starter. This could mean using advanced tools like an OBD-II scanner, or checking for parasitic drain. This section covers advanced troubleshooting and highlights the best solutions. It provides the steps needed to solve any remaining issues. This includes detailed information about how to solve more complex problems, like diagnosing electrical system failures.
Using an OBD-II Scanner for Further Clues
An OBD-II scanner is a fantastic tool to figure out what’s causing problems in your car’s electrical system, which can help when your jump starter is beeping. OBD-II stands for “On-Board Diagnostics II.” This system gives you data about all parts of your car. These scanners connect to your car’s computer to show error codes and provide information about issues. They can detect problems that aren’t obvious. The scanner lets you see what’s happening and can help you solve complicated problems. They are useful for issues that you can’t figure out by simply looking at your car.
- Plug and Play: Connect the OBD-II scanner to your car’s OBD-II port. This port is usually located under the dashboard near the steering wheel.
- Power Up: Turn on the car’s ignition (but don’t start the engine). The scanner will power up and connect to the car’s computer.
- Scan for Codes: Use the scanner to read any diagnostic trouble codes (DTCs). These codes tell you where the problems are.
- Interpret the Codes: The scanner will provide a code (e.g., P0300), along with a description of the problem. Search online for the code to get more details about what it means.
- Clear the Codes: After fixing the issue, use the scanner to clear the codes. If the problem is still there, the codes will reappear.
If your car won’t start, and the jump starter is beeping, you plug an OBD-II scanner into the diagnostic port. The scanner shows a code related to the starter motor. The code confirms that the starter motor is faulty and needs replacing. After replacing the starter motor, you clear the code, and the car starts right up. This shows the usefulness of OBD-II scanners in complex situations.
Checking for Parasitic Drain
A parasitic drain means that there’s an electrical issue that’s slowly draining your car’s battery when the car is off. This is very hard to detect and can cause your jump starter beeping in certain cases. Parasitic drains can come from a number of sources like faulty interior lights, a radio that does not turn off, or other electrical components that are not shutting down completely when the car is off. The problem is, these are very hard to track down, so you will need to test different parts. This drain slowly depletes your car battery, so the jump starter might beep due to low voltage. Finding and fixing these drains is an important part of making sure that your car can start easily.
- Prepare for Testing: Make sure the car is off. Let the car sit for at least 30 minutes to make sure that the vehicle has completely shut down. Then, open the hood and access the battery.
- Disconnect the Negative Terminal: Using a wrench, carefully disconnect the negative (-) cable from the battery terminal.
- Set Up the Multimeter: Set your multimeter to measure DC amperage (amps). Usually, this setting is marked with “A” or “mA” (milliamps).
- Connect the Multimeter in Series: Put the multimeter leads in between the negative battery terminal and the negative battery cable. Attach the red lead to the negative battery terminal and the black lead to the negative battery cable.
- Read the Amperage: Watch the multimeter display for the amperage reading. A normal parasitic drain should be less than 50 milliamps (0.05 amps). If it’s higher, there’s a drain.
You can use this method to find where the drain is coming from. After performing the above steps and getting a reading over 50 milliamps, you can then start to remove fuses one at a time from your car’s fuse box. Watch the multimeter display after removing each fuse. When the amperage drops back to normal levels, you have found the circuit with the parasitic drain. Then, you can address it.
| Symptom | Possible Cause | Solution |
|---|---|---|
| Jump Starter Beeping Continuously | Reverse Polarity | Check and correct the clamp connections. |
| Jump Starter Beeping and Low Voltage Warning | Low Battery Charge | Charge the jump starter or car battery, replace battery. |
| Jump Starter Beeping and Overload Error | Excessive Current Demand | Check for short circuits or faulty components in the car. |
Frequently Asked Questions
Question: Why is my jump starter beeping even when the clamps are connected correctly?
Answer: Check the battery voltage using a multimeter to make sure it’s not too low. Your jump starter might be protecting itself from trying to charge a battery that can’t accept a charge, which can cause the beeping.
Question: What does it mean when a jump starter beeps rapidly?
Answer: Rapid beeping usually indicates reverse polarity. This means the clamps are connected to the wrong terminals on the car battery.
Question: How do I know if the jump starter is damaged?
Answer: If the jump starter won’t charge, doesn’t work after trying several times, or smells burnt, it may be damaged. Check for physical damage, such as cracks or swelling. The user’s manual can provide instructions about the error signals.
Question: Can I use my jump starter to charge my phone or other devices?
Answer: Most jump starters have USB ports that let you charge phones and other devices. However, this is not their primary function, so use with caution to avoid draining the jump starter’s power.
Question: Can jump starters damage my car?
Answer: When used correctly, a jump starter should not damage your car. Most modern jump starters have safety features like reverse polarity protection and overload protection, which prevent damage. Make sure you follow the manufacturer’s instructions and your car’s manual.
Final Thoughts
When your jump starter beeping, it’s a sign that something needs your attention. It’s often not a major issue but a communication signal that your car’s electrical system needs to be checked. By knowing the meaning behind the different beep patterns and carefully going through the troubleshooting steps, you’ll be well on your way to solving the problem. Remember to start with the easy fixes. Always inspect the connections, verify polarity, and look at the battery’s health. You can also use tools like a multimeter or OBD-II scanner to dive deeper into the problem. If you encounter frequent beeping, this means it’s time to test more of your electrical system or consider getting professional help. With a little bit of knowledge and some basic tools, you can keep your car running smoothly and avoid being stranded.