Jump Starter Problems If the Clamps Don’t Connect
Having trouble getting your car started? One frustrating issue is when your jump starter won’t clamp to the battery terminals. This can be tricky, especially if you’re new to car maintenance. Don’t worry; it’s a common problem. We’ll explore the reasons why this happens, offering easy-to-follow solutions and tips. Let’s start by looking at the possible causes and then discover how to fix this issue step-by-step.
Reasons a Jump Starter Won’t Clamp Properly
When a jump starter won’t clamp, it’s often due to a few common issues. These can range from corrosion on the battery terminals to the design of the clamps themselves. Sometimes, the clamps might be too small for the terminals, or they could have trouble making a solid connection. It could also be that the clamps are damaged or not functioning correctly. Recognizing the primary causes helps in figuring out the appropriate fix, ensuring you can quickly get your car going. We’ll look at the specific problems that prevent a solid connection.
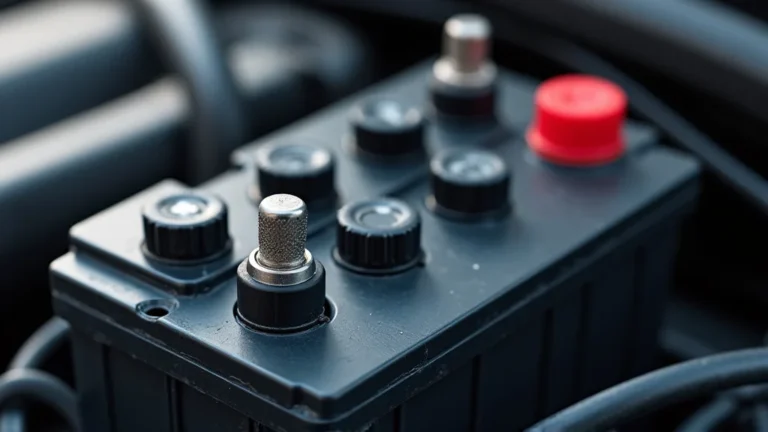
Corrosion on Battery Terminals
One of the most frequent causes is corrosion. Battery terminals are exposed to the elements, and over time, they can develop a white or bluish build-up. This corrosion acts as an insulator, stopping the clamps from making a proper electrical connection. The result? The jump starter may not work. Cleaning off this corrosion is often the first step in resolving the issue. This allows for a good connection and makes sure the jump starter can supply power to your car’s battery. Remember to always disconnect the negative terminal first and reconnect it last when working with batteries.
-
Cleaning the Terminals: Using a wire brush, baking soda, and water, clean the terminals. Mix a paste of baking soda and water to gently scrub away corrosion. Rinse with water and dry.
This process removes the insulating layer caused by corrosion, allowing for a better electrical contact. This approach can be very effective in getting your car started.
-
Using a Terminal Cleaner: Specialized battery terminal cleaners are also available. These sprays or solutions are made to quickly dissolve corrosion without harming the terminals.
Terminal cleaners offer a fast and efficient way to remove build-up. After applying the cleaner, wipe down the terminals. Always follow the instructions on the product label.
-
Preventing Corrosion: Applying a battery terminal protectant after cleaning helps prevent future corrosion. This spray creates a barrier that shields the terminals from moisture and air.
Regular application of a protectant keeps the terminals clean and ensures the battery’s longevity. This will help avoid issues in the future.
Clamp Design and Compatibility
Another factor affecting the ability of a jump starter to work is the design of the clamps. These clamps must properly fit the battery terminals. Some clamps are wide and open well to accommodate larger terminals, while others may not open as much. Clamps that are worn, damaged, or of poor quality can also fail to clamp correctly. Knowing how to tell if your clamps are suitable is very important for a reliable start. Replacing faulty clamps is sometimes necessary.
-
Clamp Size: Make sure the clamps are large enough to fit securely around your battery terminals. Small clamps may struggle to grip, causing connection problems.
Choosing the correct size is very important for a secure connection. A clamp that is too small might not make contact, while a clamp that’s too big may have problems clamping.
-
Clamp Material: Better-quality clamps are usually made of copper or copper-plated steel, since these materials carry electricity effectively. Avoid clamps made from inferior metals, as these might not conduct as efficiently.
Good clamp material ensures a low-resistance connection, allowing the jump starter to supply power easily.
-
Spring Strength: The spring mechanism within the clamps must be strong enough to keep a firm grip on the terminals. Weak springs result in poor contact and may cause the jump starter won’t clamp.
The spring must keep the clamps secure for efficient power transfer.
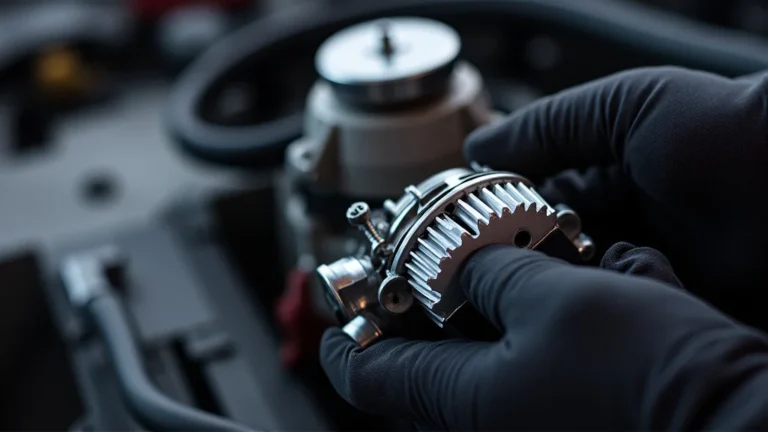
Damaged or Faulty Clamps
Clamps may wear out over time, leading to performance issues. Wear and tear, combined with exposure to the elements and frequent use, can cause these clamps to become damaged. Damage may include cracked plastic casings, corrosion on the metal parts, or weak springs. Inspecting the clamps before each use helps prevent potential problems and increases the safety and effectiveness of the jump starting process. Regular maintenance, including cleaning and proper storage, helps extend the lifespan of your jump starter’s clamps.
-
Visual Inspection: Before using a jump starter, always check the clamps. Look for cracks, breaks, or other physical damage. Also, make sure the metal contacts are clean and free of corrosion.
A simple check can prevent many start-up problems. Replacing damaged clamps is a cheap and easy way to prevent issues.
-
Spring Check: Test the spring mechanism by opening and closing the clamps. They should open easily and close tightly. Weak springs may not make a good connection.
Ensure the clamps grip firmly to the battery terminals to ensure a solid connection.
-
Contact Cleaning: Clean the metal contacts on the clamps using a wire brush or emery cloth. This will remove any corrosion or debris that might be stopping a good connection.
Keeping the contact surfaces clean is a basic task in jump starting.
How to Properly Connect a Jump Starter
Knowing how to correctly hook up a jump starter is just as important as having a working one. The procedure involves a few steps to be followed. Safety is the most important part of this process. It helps to prevent sparks or damage to the electronics. By adhering to the recommended steps, you can significantly increase the chances of a successful jump start and ensure your safety and the safety of your vehicle. Be sure to turn off all electrical devices before starting the process.
Step-by-Step Connection Guide
Properly connecting a jump starter requires following the steps carefully. This prevents potential hazards and boosts the chances of a successful start. You can be confident in your ability to get your car running. Keep in mind that positive and negative terminals need to be identified. It is also important to consider the order of the connections. You will have a better outcome by going slowly.
-
Identify the Battery Terminals: Find the positive (+) and negative (-) terminals on your car’s battery. The positive terminal is usually marked with a “+” symbol and might have a red cover. The negative terminal is marked with a “-” symbol and might have a black cover.
Knowing this is critical to avoid short circuits. The positive terminal is typically larger than the negative one.
-
Connect the Positive Clamp: Attach the red (positive) clamp of your jump starter to the positive terminal on your car’s battery. Make sure the clamp is making a solid, secure connection.
A good connection here is important for transferring power from the jump starter to the car’s battery.
-
Connect the Negative Clamp: Attach the black (negative) clamp of your jump starter to a bare metal surface on your car’s engine block or chassis, away from the battery. This location offers a safe ground.
Connecting to the chassis or engine block reduces the risk of sparks near the battery, which could potentially ignite any released hydrogen gas.
-
Turn on the Jump Starter: Once the clamps are connected, turn on the jump starter. Make sure it’s fully charged. Refer to the manufacturer’s instructions.
This allows the jump starter to deliver power to your car’s battery, preparing it to start the engine.
-
Start the Car: Try to start your car. If it doesn’t start right away, wait a few minutes and try again. Sometimes the battery needs a bit of time to charge before it can start.
If the engine still doesn’t start after a few attempts, there might be other issues with your car. Check the owner’s manual for guidance.
-
Disconnect the Clamps: Once the car has started, disconnect the clamps in reverse order. First, remove the black (negative) clamp from the car’s chassis. Then, remove the black (negative) clamp from the jump starter. Finally, remove the red (positive) clamp from both the jump starter and the car battery.
This order helps minimize the risk of sparks and ensures safety.
Safety Precautions During Jump Starting
Safety is the most important thing when using a jump starter. Certain precautions can help you avoid hazards like electrical shocks, sparks, and battery explosions. Remember to wear safety glasses to protect your eyes. It is also important to maintain good ventilation in the area where you are working, because batteries can release harmful gases. These steps can significantly reduce the risks and help ensure a safer and more successful jump-starting experience. If you are ever uncertain, it is always best to consult a professional.
-
Wear Safety Glasses: Safety glasses protect your eyes from any sparks or flying debris. This will reduce any chance of eye injury.
Eye protection is a basic step in safe auto maintenance.
-
Avoid Sparks: Keep the clamps from touching each other or any other metal parts of the car. Sparks can ignite flammable gases around the battery.
Preventing sparks around the battery is crucial for safety, so connect clamps carefully.
-
Work in a Well-Ventilated Area: Ensure there’s good air circulation. Batteries produce hydrogen gas, which can be explosive in a confined space.
Proper ventilation reduces risks by dispersing any potentially flammable gases.
-
Check for Battery Damage: Look for any cracks or leaks on the battery before connecting the jump starter. A damaged battery can be dangerous.
Avoid jump starting damaged batteries to prevent potential explosions or leaks.
Troubleshooting Common Problems
Even when following the steps carefully, issues can sometimes occur. Troubleshooting helps to diagnose and solve these problems, so you can get your car started. It can be caused by various factors, including problems with the jump starter itself or the car’s battery. Some of these issues are easy to fix. Other problems might need professional attention. These tips will help you figure out what’s wrong and how to fix it.
Jump Starter Won’t Start the Car
When the jump starter won’t clamp it can be very frustrating. However, several factors might stop your car from starting even if the jump starter seems to be working. Some issues might be simple fixes, while others need a closer look. Being able to identify these problems can help you discover and fix the source of the problem. This can save you time and prevent unnecessary trips to a mechanic.
-
Check the Jump Starter’s Charge: Ensure the jump starter has a full charge. A low charge can prevent it from delivering enough power.
Many jump starters have an indicator to show how much charge they have. Fully charging the jump starter will help ensure that it can get the car running.
-
Inspect the Connections: Confirm that the clamps are properly connected to the battery terminals and chassis. Loose connections won’t transfer power efficiently.
Tight connections are critical for power transfer. Make sure that the clamps make contact with clean metal surfaces.
-
Test the Car’s Battery: If the jump starter works but the car still won’t start, the car’s battery could be damaged. A battery load test can confirm this.
This test measures the ability of the battery to hold a charge. A defective battery needs to be replaced.
Jump Starter Fails to Hold a Charge
The jump starter failing to hold a charge is a common concern. This could be due to a problem with the device itself or external factors. When your jump starter doesn’t keep its charge, it becomes useless when you need it most. It is important to know the reason, so you can address it. Routine maintenance and storage can increase the life of the jump starter. This ensures the jump starter is always ready when you need it.
-
Check the Charging Port: Examine the charging port and the charging cable for damage. A damaged port won’t allow the jump starter to charge correctly.
A damaged port might prevent electricity from flowing into the jump starter. This will prevent it from charging.
-
Test the Battery: If the jump starter is old, the battery inside might be losing its ability to hold a charge. Consider replacing it.
Battery life is often measured in charge cycles. The battery might need to be replaced if it loses its ability to hold a charge.
-
Storage Conditions: Always keep the jump starter in a climate-controlled area. Extreme temperatures can affect the battery life and its ability to hold a charge.
Protecting the jump starter from extreme heat or cold helps maintain its performance. This will prevent a jump starter won’t clamp issue in the future.
Comparing Different Jump Starter Types
Understanding the differences between various jump starter types can help you pick the best one for your needs. Different types of jump starters offer various features, advantages, and limitations. Some are designed for basic use, while others are built with more advanced features. This comparison can help you make an educated decision when purchasing a jump starter.
Lead-Acid Jump Starters
Lead-acid jump starters are a popular choice. They have been around for some time, and they are usually a more affordable choice. These jump starters typically have a heavy, lead-acid battery. While they are powerful, they also have some limitations. These are important factors in deciding which jump starter is best for you. These need more care compared to other types, but they are a good option for many.
-
Cost: Lead-acid jump starters are typically cheaper than lithium-ion models. This makes them a great option for people on a budget.
Their affordability can be very appealing, particularly if you do not need all the advanced features.
-
Weight and Size: They are usually bigger and heavier, because of the lead-acid battery. This makes them less portable.
The larger size may be a problem if you have limited space in your car.
-
Maintenance: Lead-acid batteries need more maintenance, such as regular charging. Otherwise, they might lose their charge quickly.
Proper care is necessary for ensuring their reliability. You need to keep up with the maintenance.
Lithium-Ion Jump Starters
Lithium-ion jump starters are becoming very popular. They are known for their compact size, lightweight design, and improved performance. These are a more modern option. They are a great choice if portability and ease of use are important to you. They are usually more costly, but they offer many advantages. They also hold a charge well. They provide many benefits.
-
Size and Weight: Lithium-ion jump starters are smaller and lighter than lead-acid models. They’re very easy to store in a car.
Their lightweight design is very convenient. This allows for easier handling and storage.
-
Charging: Lithium-ion jump starters have a lower rate of self-discharge and hold a charge for much longer. This ensures they’re always ready when you need them.
The battery technology is more efficient, so it keeps the charge for a longer time.
-
Features: These often have extra features, like USB ports for charging devices, LED lights, and digital displays. These features increase their usefulness.
These added features can be really useful in emergency situations.
| Feature | Lead-Acid Jump Starters | Lithium-Ion Jump Starters |
|---|---|---|
| Cost | Lower | Higher |
| Size and Weight | Larger and Heavier | Smaller and Lighter |
| Maintenance | Higher | Lower |
| Portability | Less Portable | More Portable |
| Additional Features | Fewer | More (USB, LED Lights, Digital Display) |
Frequently Asked Questions
Question: Why does my jump starter not grip the battery terminals?
Answer: It could be corrosion on the terminals, the clamps may be too small or damaged, or the clamp springs might be weak, preventing a secure grip.
Question: How do I clean corrosion off the battery terminals?
Answer: Use a mixture of baking soda and water or a specialized terminal cleaner. Apply it to the terminals, scrub gently with a wire brush, rinse, and dry.
Question: What’s the right order to connect jump starter clamps?
Answer: Attach the red (positive) clamp to the positive terminal, then the black (negative) clamp to the car’s chassis (ground). After the car starts, disconnect in reverse order.
Question: What do I do if my jump starter won’t start my car?
Answer: Check the jump starter’s charge, ensure secure clamp connections, and examine the car’s battery for damage. If the issue continues, your battery may need professional service or replacement.
Question: How can I keep my jump starter in good shape?
Answer: Store the jump starter in a moderate temperature area, charge it regularly, and regularly check the clamps for wear and tear, and follow the manufacturer’s directions.
Final Thoughts
Getting your car started when the jump starter won’t clamp can be frustrating, but the solutions are often easy to apply. You have learned about the key things to check, starting with the clamps and battery terminals. You also know the proper way to connect the clamps to get your car running. You have also explored different jump starter types, learning about their features and advantages. When your jump starter fails to work, you now have the tools needed to troubleshoot potential problems. Keep your jump starter in a safe place and charge it. By knowing the basics, you are prepared to handle unexpected car troubles. Remember, safety first, and you will be ready to tackle those dead batteries!