Jump Starter Battery Issues Explained and Solutions
Having a jump starter won’t hold charge can be really annoying, especially if you need to start your car. This is a common problem, even for people just getting started with these tools. Don’t worry, though! It usually isn’t a super complicated issue. This post will break down the reasons why your jump starter might not be working right and show you some easy steps to get it back in good shape. Let’s get started and see what we can do to fix this!
Reasons Why Your Jump Starter Won’t Hold a Charge
One of the most frustrating things is when your jump starter isn’t ready when you need it. This can be due to a number of factors, including the type of battery used, the charging habits, and even how it’s been stored. Problems like these are frequently caused by things you can easily address. These fixes will help you get back on the road in no time.
Battery Type and Performance
Jump starters typically use lithium-ion or lead-acid batteries. Lithium-ion batteries are popular because they are lightweight and hold a charge well. Lead-acid batteries, on the other hand, are heavier and can lose charge faster if they aren’t used regularly. Knowing the type of battery in your jump starter is the first step toward figuring out why it might be failing to hold a charge. Both battery types require different care routines to function at peak performance.
- Lithium-ion batteries have a longer life span. They’re known to charge faster and last longer than lead-acid batteries, but they can be affected by extreme temperatures.
- Lead-acid batteries are more susceptible to self-discharge. If a lead-acid jump starter isn’t used frequently, the charge can drop over time.
- Both battery types can be affected by deep discharge. Constantly draining the battery completely can reduce its lifespan and ability to hold a charge.
Lithium-ion batteries are known for their efficiency and can often handle more charge cycles before failing. However, like all batteries, they degrade over time, which can lead to reduced charge capacity. Extreme temperatures, whether hot or cold, can also affect lithium-ion batteries’ ability to store and hold a charge. Storing the jump starter in a garage or in a temperature-controlled environment can help to protect it and help it last.
Lead-acid batteries slowly lose their charge even when not in use. This self-discharge rate is higher than that of lithium-ion batteries. Regular charging is necessary to keep lead-acid jump starters ready to go, otherwise, they will lose charge and will eventually fail to work. This means that if you have a lead-acid jump starter, you need to remember to charge it more often to keep it ready to use.
Completely draining a battery, regardless of its type, is bad for its long-term health. Deep discharge, where the battery is used until it’s completely empty, puts extra stress on the battery’s internal components. Repeated deep discharges will cause it to lose its ability to store and hold a charge. This is why it’s important to recharge your jump starter before the battery gets too low, to help it last longer and function better.
Charging Habits and Maintenance
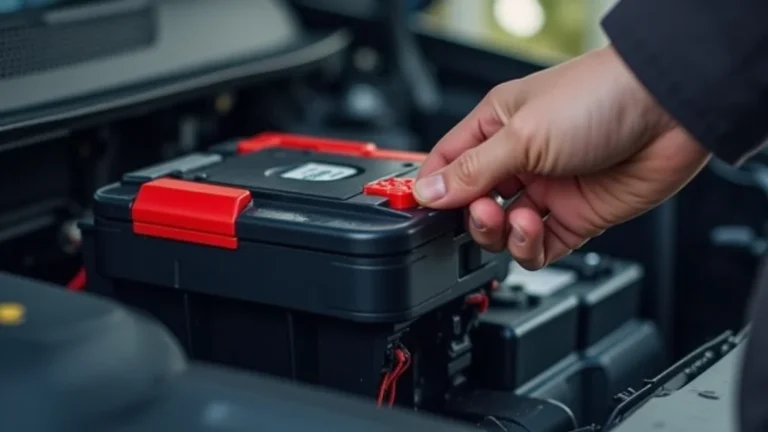
How you charge and take care of your jump starter has a big impact on how well it works. Using the right charger, following the manufacturer’s directions, and storing the jump starter properly are all important. Skipping these steps can cause charging problems. Regularly checking and maintaining your jump starter is key to keeping it ready for when you need it.
- Using the correct charger is important. Always use the charger that came with the jump starter or one recommended by the manufacturer.
- Following the recommended charging times is also important. Overcharging or undercharging can damage the battery.
- Checking the battery’s condition frequently will help. Look for any signs of damage, such as swelling or leaks.
Using the wrong charger can damage the battery. It might not provide enough power to charge the battery fully, or it could overcharge it, causing damage. A compatible charger makes sure that the battery gets charged safely and properly. If your charger is lost or broken, always get a replacement charger from the manufacturer or a trusted brand, to avoid any issues.
Charging your jump starter for too long or not long enough can cause problems. Overcharging can cause the battery to overheat and shorten its life. Undercharging might not allow the battery to reach its full capacity. Following the charging times suggested by the manufacturer helps to get the best performance and to keep your jump starter in good shape.
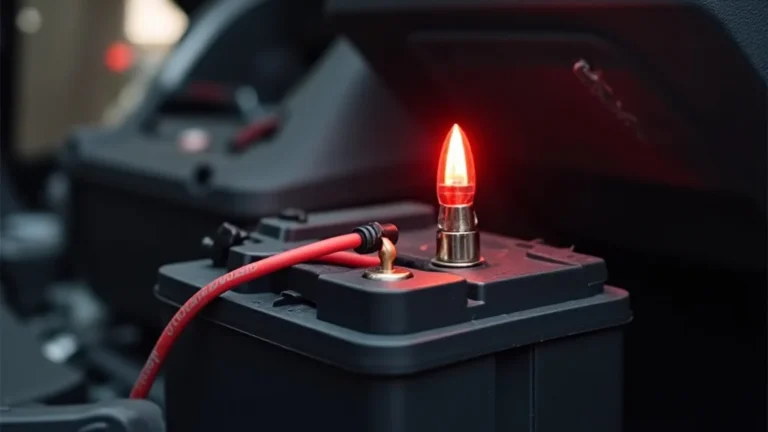
Regularly check your jump starter for any physical damage. Swelling of the battery casing might be a sign of internal damage caused by overcharging or extreme heat. Leaks can indicate that the battery is failing and is potentially dangerous. If you see any of these issues, it’s best to stop using the jump starter immediately and get it checked by a professional or replace it.
Common Problems Causing a Jump Starter Won’t Hold Charge
Several factors might be at play if your jump starter won’t hold charge. Knowing what to look for can help you identify the root cause of the problem. Some of the most common issues involve the battery itself, charging habits, and how you store the device.
Battery Issues
The battery is at the heart of the jump starter, and it’s often the first place to look when problems pop up. Over time, all batteries get old and don’t work as well. There might be some specific problems you will be able to notice, and knowing what to watch for can help you take care of the problem before it’s too late.
- Sulfation in lead-acid batteries. This happens when lead sulfate crystals build up on the battery plates.
- Battery degradation. All batteries wear out over time.
- Internal damage. Physical damage from dropping the unit can also cause battery problems.
Sulfation often occurs in lead-acid batteries when they’re not fully charged or when they sit for long periods without being used. It stops the battery from getting a full charge and can decrease its performance. Regularly charging the battery and ensuring it remains topped up when stored can help prevent sulfation. There are desulfation chargers available that will help, although sometimes the damage is permanent.
Batteries have a certain number of charge cycles. This means the number of times you can charge and use the battery before it starts to lose its ability to hold a charge. Heat, cold, and how you use the battery also impact how quickly it degrades. When a battery reaches the end of its life, its capacity decreases, and it won’t hold a charge for as long. Proper care and use can help slow down the process, but eventually, you will need to replace the battery.
Impacts from drops can damage the battery cells inside a jump starter. Internal shorts, cracked components, and other forms of damage can reduce the battery’s ability to hold a charge or even make it unsafe. If your jump starter has been dropped or otherwise suffered physical damage, it’s important to carefully inspect the unit and look for signs of damage. If there is damage, you should not use it.
Charging System Problems
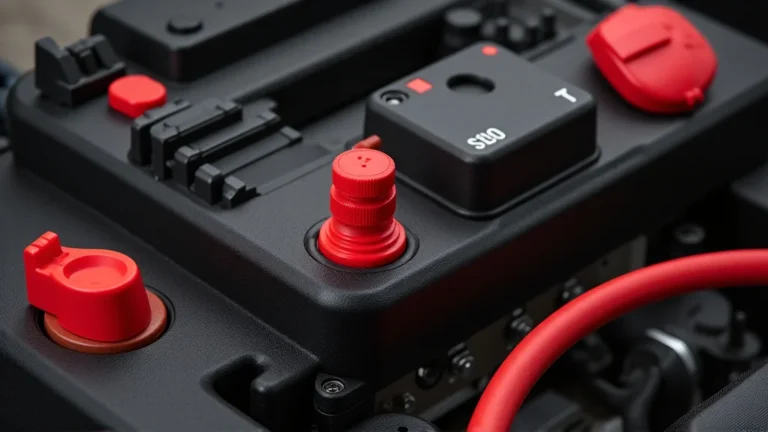
Your jump starter’s ability to charge depends on its charging system. Any issues with the charger, the charging port, or the internal circuitry can stop it from charging correctly. Checking these components can help you find out if there’s a problem.
- Faulty charger. The charger might be broken or not working correctly.
- Issues with the charging port. This is the place where you plug the charger into the jump starter.
- Internal circuit failure. There might be a problem with the internal circuits of the jump starter.
If the charger isn’t working right, it will not deliver the correct voltage or current to charge the battery. This can lead to the jump starter not charging or not charging fully. Check the charger for damage, like a broken cord or visible wear and tear. Use a multimeter to measure the charger’s output to make sure it’s delivering the correct voltage. If the charger is the problem, replace it.
Damage to the charging port can interrupt the charging process. The charging port could be loose, have corroded contacts, or have internal damage. Inspect the port for any visible problems. Try wiggling the charger plug to see if the charging stops or starts. If there is damage, the port might need to be repaired or replaced. If you see corrosion, you can carefully clean it using a suitable cleaning solution.
Jump starters have internal circuits that regulate the charging process. These circuits can fail because of overcharging, voltage surges, or old age. Signs of circuit failure can include the unit not charging at all, charging very slowly, or the unit overheating. If you suspect circuit failure, it’s best to have the jump starter checked by a qualified repair technician.
Storage and Environmental Factors
Where and how you store your jump starter can affect its performance and how long it lasts. Extreme temperatures and how long the jump starter has been stored will have an impact on its ability to hold a charge.
- High or low temperatures. Extreme temperatures can harm the battery.
- Long-term storage without charging. This can cause the battery to discharge completely.
- Exposure to moisture. Moisture can cause corrosion and damage electrical components.
Extreme heat can cause batteries to lose their charge faster and can damage internal components. Cold temperatures also affect the ability of a battery to hold a charge and can cause it to discharge faster. The best place to store your jump starter is in a cool, dry place away from direct sunlight and extreme temperatures. Storing it in a garage or shed can be fine if you live in an area with a moderate climate.
If your jump starter is stored without being charged for a long time, the battery can discharge to a level that damages it. It’s a good idea to charge your jump starter every few months, even if you are not using it. Some jump starters have a self-discharge rate that causes them to lose charge gradually, so it’s important to check the charge level and recharge when needed.
Storing your jump starter in a damp place can lead to corrosion on the terminals and internal components. This corrosion can stop the jump starter from charging and working correctly. Make sure you store your jump starter in a dry location and avoid exposing it to any moisture. If it does get wet, let it dry completely before attempting to use or charge it.
Troubleshooting Steps When Your Jump Starter Won’t Charge
If you find that your jump starter won’t hold charge, there are some steps you can take to figure out the problem. A bit of troubleshooting can often solve the problem and get your jump starter working again. Here are some of the actions you can take to make sure your jump starter is in good shape and ready to go.
Initial Checks
Start with some simple checks to identify the root cause before looking for more complex solutions. These steps can help you quickly find the problem. This can save time and effort later on.
- Check the power source. Make sure the outlet you are using works.
- Inspect the charger and charging cable. Look for any visible damage.
- Examine the charging port. Make sure it’s clean and free of debris.
Ensure the power outlet you’re using is working correctly. Plug another device into the outlet to make sure there’s power. If the outlet doesn’t work, you’ll know that you may have a problem with the outlet, and this might be the reason why your jump starter isn’t charging. Also, check to make sure the charging cord is properly plugged into the jump starter.
Examine the charging cable and the charger for signs of damage, such as frayed wires, breaks, or cracks. If you spot any damage, the charger might not be able to charge the jump starter correctly. It’s a good idea to check the charger’s indicator lights to see if they’re showing that the jump starter is charging. If the cable or charger is damaged, the charger will need to be replaced.
Check the jump starter’s charging port for any dirt or debris that could be preventing a good connection. Sometimes, a clogged charging port is the problem. Gently clean the port using a small brush or compressed air. Make sure there isn’t any corrosion. A clean charging port helps to ensure a solid connection between the charger and the jump starter, allowing the jump starter to charge correctly.
Testing the Battery
Test the battery to see if it is still working. These tests will help you understand the health of the battery and if it can hold a charge. Testing the battery is crucial in figuring out if the battery is the cause of the problem.
- Use a multimeter. This device can measure the voltage of the battery.
- Check for signs of swelling or leaks. These are signs of battery damage.
- Test with a load. This will show how well the battery performs under use.
A multimeter can accurately measure the voltage of your jump starter’s battery. Set the multimeter to the DC voltage setting and carefully touch the probes to the positive and negative terminals of the battery (or the appropriate points on the jump starter). Check the voltage reading against the jump starter’s specifications. If the voltage is too low, the battery may not be holding a charge, or it might be damaged and not functioning at all. This reading will let you know whether the battery is the problem.
If you see any swelling or leaks on the battery casing, it’s a clear sign that the battery is damaged. Swelling often happens when the battery is overcharged or exposed to high temperatures, and it can be dangerous. Leaks indicate that the battery’s internal components are breaking down. In either case, the battery needs to be replaced immediately, since these can be potentially hazardous.
If your jump starter has a built-in function to test its performance, use it. Some jump starters have a load test feature, which simulates the draw of power that the battery experiences when used. If the battery is healthy, it should maintain its voltage under this simulated load. If the voltage drops dramatically, it shows that the battery isn’t holding a charge as it should and might need to be replaced. Testing under load gives you a clearer view of its performance.
Advanced Troubleshooting Techniques
If initial checks don’t reveal the issue, some advanced troubleshooting techniques might be required. These techniques will help you look deeper into the problem. If you are not comfortable with these techniques, it is best to take your jump starter to a professional repair technician.
- Disassemble the jump starter (if comfortable). Carefully examine the internal components.
- Check the charging circuit. See if the circuit is working.
- Contact a professional. Get help from a qualified repair technician.
If you are skilled with electronics and feel comfortable taking things apart, you might try opening the jump starter to check the internal components. Look for any loose connections, burnt circuits, or signs of corrosion. Be very careful, and only attempt this if you’re familiar with electronics and safety precautions. Taking apart the unit and inspecting the internal parts might give you a better idea of what is causing the problem.
If you can check the charging circuit, use a multimeter to measure the voltage at different points in the circuit while the jump starter is charging. This will help you identify any components that aren’t getting the right power. If you find any problems, you may need to
If you’ve tried the above steps and your jump starter still doesn’t hold a charge, it’s probably best to have it repaired by a professional. A qualified technician will have the skills and tools necessary to diagnose the problem accurately and make the necessary repairs safely. This can save you time and prevent any potential risks associated with electrical repairs. A professional will be able to help fix the problem and extend the life of your jump starter.
Practical Examples and Scenarios
Let’s explore some real-life examples and situations where jump starter problems happen. These scenarios will show how to apply what you have learned about troubleshooting. This knowledge is important, so you will be better prepared to handle issues if they come up.
- Scenario 1: The Weekend Project. A person is working on their car in the garage. They use a jump starter to get their car running after accidentally draining the battery. The jump starter works fine at first, but after a few hours, they try to start their car again and the jump starter won’t work.
- Scenario 2: The Emergency. A person is driving home from work when their car battery dies. They pull out their jump starter, but the jump starter won’t start their car. They are stuck in an isolated area with no cell service.
- Scenario 3: The Cold Start. During winter, a person tries to start their car, but the battery is too weak due to the cold. They use their jump starter. The jump starter seems to work, but then dies a few minutes after it starts the car.
Troubleshooting: The first step is to check the jump starter’s charge level. The person will need to recharge the jump starter before the next use. If the problem persists, they should look at the battery and charging system for issues, following the steps discussed earlier. This will give them a good idea of what could be causing the problem.
Troubleshooting: Because the jump starter isn’t working, the person will need to focus on what they can do with what they have. First, check that the jump starter is charged. If it is, then look at the connection. Make sure the connections are secure. If all these steps fail, they may need to seek help from a passing motorist or contact roadside assistance.
Troubleshooting: First, make sure the jump starter has a full charge. Cold temperatures can drain batteries, but if the jump starter is not working as expected, there may be a problem with the battery in the jump starter. If the jump starter is older, it may not be in good condition. The user may have to replace it.
Frequently Asked Questions
Question: Why does my jump starter not charge fully?
Answer: Common causes include a damaged charger, a battery issue, or problems with the charging port. Make sure you use the correct charger and check for any physical damage to the charger or the charging port. The battery might be old and not able to hold a full charge.
Question: How often should I charge my jump starter?
Answer: It’s important to charge your jump starter every 1-3 months, even if you are not using it. This will prevent the battery from discharging and keep it ready for use. Also, charge it after each use to keep it in good shape.
Question: Can I leave my jump starter plugged in all the time?
Answer: Most modern jump starters have a charging cutoff feature, but it’s not a good idea to leave it plugged in constantly. Over time, this could potentially harm the battery. Charge it until it’s full and then unplug it.
Question: What’s the lifespan of a jump starter battery?
Answer: The lifespan of a jump starter battery varies depending on the type and how you use it. Lithium-ion batteries often last longer than lead-acid batteries. On average, you can expect a battery to last around 3-5 years. Regular maintenance, proper charging, and storage will increase this lifespan.
Question: What safety precautions should I follow when using a jump starter?
Answer: Always read the manufacturer’s instructions carefully. Make sure the jump starter is in a well-ventilated area. Avoid sparks or open flames near the battery. Wear safety glasses, and do not connect the clamps to the wrong terminals. If you notice any smoke or unusual smells, stop using the jump starter immediately.
Final Thoughts
Discovering your jump starter won’t hold charge can be irritating, especially when you need it most. We’ve explored the main causes, like battery problems, charging issues, and storage conditions. We discussed how to examine your jump starter and explained some of the key checks to diagnose the problem, from testing the charger and the battery to looking at the charging port. You also learned the value of consistent upkeep and how to keep your jump starter in good condition for the long term.
So, the next time your jump starter acts up, don’t stress. Use the steps provided to troubleshoot, and you should be able to restore it to proper working order. If you aren’t comfortable with any of the troubleshooting steps, remember it’s okay to ask for help from a professional. Keeping your jump starter in top shape means you’ll have a dependable power source whenever you need it. Now, go ahead and ensure your jump starter is ready and charged so you won’t get caught off guard. You’re now equipped to take charge and keep your vehicle’s battery ready!