How Long Should You Charge a Jump Starter? Get the Answers Now.
Figuring out how long to charge a jump starter can be a little confusing. Many people get a new jump starter, plug it in, and hope for the best. Don’t worry, it’s not as hard as it seems! This guide will break down everything you need to know in a simple, step-by-step way. We’ll explore the basics, common charging mistakes, and ways to make sure your jump starter is always ready. Let’s get started and keep you prepared for unexpected car troubles.
Understanding Jump Starters and Their Charging Needs
Jump starters, also known as portable power banks for cars, are lifesavers when your car battery dies. They provide a quick boost to get your engine running again. However, just like any battery-powered device, jump starters need to be charged to work correctly. Ignoring this vital step could leave you stranded. There are various types, each with its own charging requirements. You will learn the main aspects about jump starters and what to consider when you need to recharge them to ensure you are ready for any situation. We will look at things like battery chemistry, charging indicators, and how different models vary. This is critical knowledge for properly utilizing and maintaining your jump starter.
Types of Jump Starters and Their Batteries
Jump starters come in different flavors, and their internal batteries are the heart of their performance. The type of battery significantly affects how long a jump starter takes to charge and how well it performs. The most common types include lithium-ion (Li-ion), lithium polymer (LiPo), and lead-acid. Each has its strengths and weaknesses, influencing charging times, lifespan, and overall usability. Knowing these differences helps you make smart choices regarding which jump starter suits your needs and how to care for it. For example, some devices have a shorter charging time. Others have more power to kickstart your car, especially in tough situations.
- Lithium-ion (Li-ion) Jump Starters: These are very popular due to their compact size and high power-to-weight ratio. They often have shorter charging times and hold a charge for long periods. Li-ion jump starters are generally more expensive but offer excellent performance.
- Lithium Polymer (LiPo) Jump Starters: LiPo batteries are similar to Li-ion but offer even greater flexibility in design. They are often found in very slim or oddly shaped jump starters. Their performance characteristics are very similar to Li-ion, including shorter charging times and good power output.
- Lead-Acid Jump Starters: These are the traditional option, often more affordable and simpler in design. They are generally larger and heavier than Li-ion or LiPo jump starters. Charging times are typically longer.
Lithium-ion batteries excel at delivering high currents. However, overcharging and extreme temperatures can reduce their life and performance. For example, a quality Li-ion jump starter may fully charge in 2-4 hours. You’ll often find them with built-in safety features like overcharge protection. Proper storage is essential to prolong their lifespan, and it involves keeping them in a cool, dry place.
These batteries are known for their high energy density, allowing for smaller, lighter jump starters. Also, they perform well in cold weather. Charging times are usually similar to Li-ion devices. LiPo batteries benefit from regular charging to ensure they are ready for action. Be careful not to leave them in extremely hot environments, such as a car in direct sunlight. This could damage the battery and reduce its life.
Lead-acid batteries are very durable and reliable in extreme temperatures. However, they may require more frequent charging and can be affected by the ‘memory effect,’ where partially charged batteries can reduce their capacity over time. For these batteries, charging times can stretch to 8-12 hours, or even more. Storing these jump starters in a well-ventilated space is key, as they can produce gasses. It is also important to consider that they may experience self-discharge over time if not charged regularly.
Charging Indicators: What to Look For
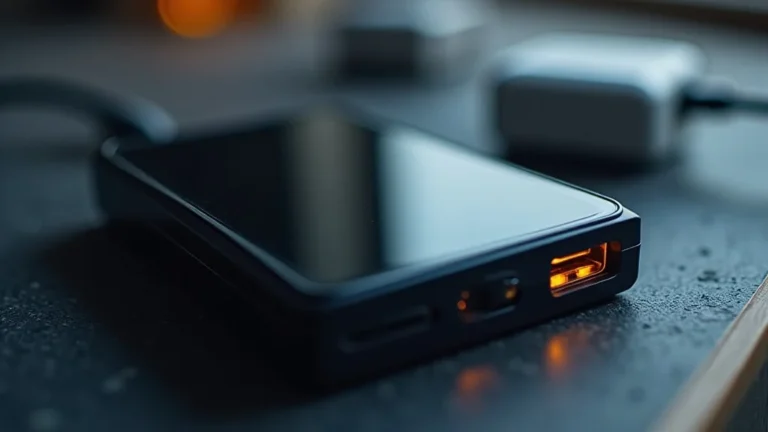
The charging indicators on your jump starter are your best friend. They tell you exactly what’s happening during the charging process. Ignoring these indicators can lead to a dead jump starter when you need it most. They vary based on the model and brand. Common indicators include LED lights, digital displays, and even audible alerts. It’s important to understand what each indicator means. This is so you know when your device is charging correctly, when it’s fully charged, and when there’s an issue.
- LED Lights: These are the most common indicators. They usually show the charging status with different colors or blinking patterns. A blinking light might mean it is charging. A solid light often indicates a full charge. The number of lights lit up could show the percentage charged.
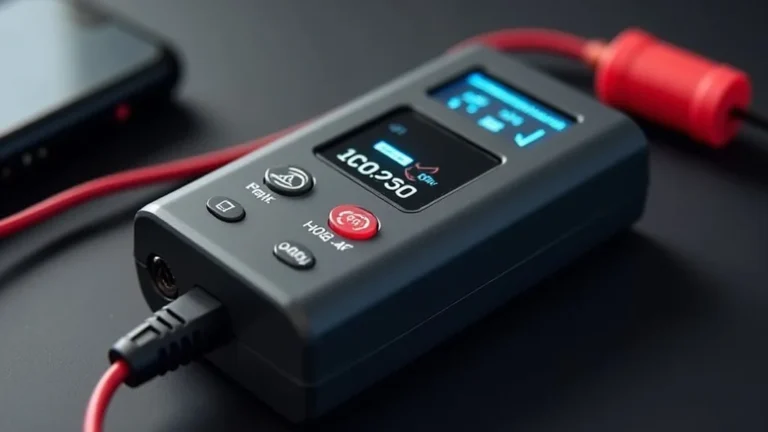
- Digital Displays: Some advanced jump starters have digital displays. They show the exact percentage of charge, charging time, and any error messages. This can be very helpful for the precision of charging.
- Audible Alerts: Some jump starters make a sound when they are charging or when the charging process is complete. This can be especially helpful if you aren’t actively watching the device.
Keep a close eye on the color and pattern of these lights. A red light might signal a problem. You should always consult your jump starter’s manual for specific instructions regarding what each light signifies. Regularly checking these indicators helps ensure you never get caught without a charged jump starter when you need it.
Digital displays give precise feedback. These displays allow you to see the battery’s health status in real time. They often display the remaining capacity. A display can help you diagnose and fix any problems before they become serious. They are particularly useful for users who need a jump starter that can be charged quickly and accurately.
Audible alerts offer a quick way to know the device’s status. They alert you to potential issues like overheating. Hearing an alert means that you can quickly tend to the situation. This feature is particularly useful for those who want to set up the charger and then move on to other activities. It also prevents overcharging, which can reduce battery life.
Factors Affecting Charging Time
Several factors affect how long it takes to charge a jump starter. Understanding these can help you better manage your jump starter. It will also help you make sure it’s always ready to go. Things such as the battery type, the charger used, and the ambient temperature all impact the process. A thorough knowledge of these things is useful. It ensures you know what to expect and how to handle any issues that may arise during charging. By keeping an eye on these factors, you can maximize your jump starter’s efficiency and lifespan.
- Battery Type: As mentioned, the type of battery significantly affects charging time. Li-ion and LiPo batteries usually charge faster than lead-acid batteries.
- Charger Specifications: Using the right charger is key to safe and fast charging. The charger’s output current and voltage must match the jump starter’s specifications. Using a weak charger or one that does not deliver enough current will prolong charging times.
- Temperature: Extreme temperatures can impact charging times and battery health. Charging in very cold or very hot conditions can slow down the process and reduce the battery’s lifespan.
Lithium-based jump starters can fully charge in a few hours. Lead-acid models, though, might take much longer. Choosing the right charger is also important, as using an incorrect one can harm the battery. It is important to look at the battery type when estimating charging times. Consider what you need for your use case and environment.
Check your device’s manual to see the specifications. A charger with a higher amperage than needed could damage the battery. Use a charger designed for your jump starter to guarantee its safety and efficiency. It may be a good idea to buy a fast charger, which might reduce the charging time considerably.
Ideal charging temperatures are usually around room temperature. Avoid charging your jump starter in direct sunlight or freezing conditions. If the jump starter is too cold or too hot, let it adjust to a moderate temperature before you start charging. Keeping the device in a climate-controlled area is ideal to protect the battery.
Step-by-Step Guide to Charging Your Jump Starter
Charging your jump starter should be a straightforward process. But there are important steps to follow for safe and effective charging. Knowing the right way to do it can prevent battery damage and ensure you are prepared for unexpected situations. This guide breaks down the charging process into simple steps. It covers everything from connecting the charger to monitoring the battery. It also covers the safe storage of the device. This information makes sure your jump starter is always ready when you need it.
Connecting the Charger
Properly connecting the charger is the most important part of the charging process. Incorrect connections can damage the jump starter. Always use the charger supplied with the jump starter or one recommended by the manufacturer. Before plugging in anything, check the voltage and amperage requirements of your jump starter. This will make sure that the charger is compatible. Take these steps to make sure charging is safe and efficient. Always read the instructions that came with your jump starter to avoid any damage.
- Locate the Charging Port: Find the charging port on your jump starter. It is often a USB, micro-USB, or a DC input. Consult the manual if you are unsure.
- Connect the Charger: Insert the charger’s plug into the jump starter’s charging port. Make sure the connection is snug.
- Plug into a Power Source: Plug the charger into a standard wall outlet. Check that the outlet is working correctly.
The port might be covered by a rubber flap to protect it from dust and moisture. Make sure it is clean before connecting the charger. Knowing the location of the port makes it easy to quickly begin charging when necessary.
Avoid forcing the plug if it doesn’t fit easily. A poor connection might stop the charging process or damage the port. Double-check to make sure everything is properly connected to ensure effective charging.
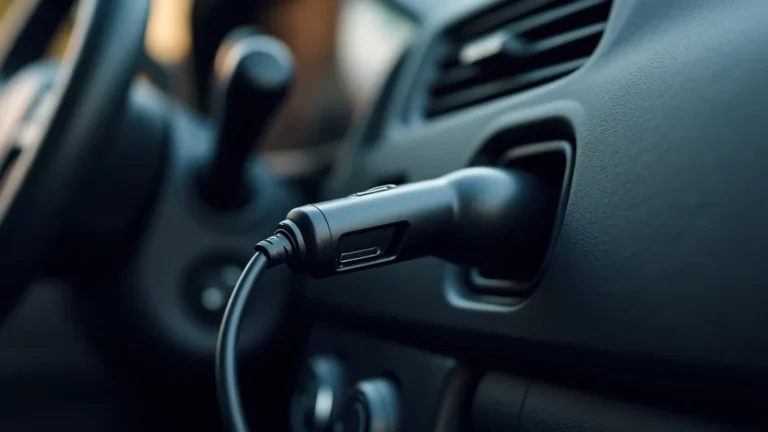
Use a grounded outlet for extra safety. If you are using a car charger, make sure your car’s power outlet is functional. The light on the charger will often indicate that the device is charging. If it does not, make sure there is a working power source.
Monitoring the Charging Process
Watching your jump starter as it charges guarantees a smooth and safe process. The charging process usually has distinct stages. These include the initial charging, the constant current phase, and the final topping-off. Paying attention to these stages can help you manage the battery health of the device. Also, it ensures it does not overcharge. The charging indicators, like LED lights or digital displays, should be checked frequently. This makes certain the jump starter is charging effectively and without issues.
- Check the Indicators: Watch the LED lights or digital display on the jump starter. They give you the charging status.
- Charging Time: Find the charging time for your specific model. This varies based on the battery type and charger specifications.
- Avoid Overcharging: Once the jump starter is fully charged, disconnect it from the charger. Overcharging damages the battery.
A blinking light might show that it is charging. A solid light often means it is fully charged. Refer to the user manual to know the exact meaning of the light patterns. Keep an eye on the indicators during the entire charging period. This way, you can keep track of the process and see if there are any issues.
Li-ion batteries might charge in a few hours. Lead-acid batteries might take much longer, up to 12 hours. It is important to plan ahead. Make sure you charge the jump starter in advance if you plan to use it soon. This ensures the device is fully charged when you need it.
Most jump starters have overcharge protection. But it is always better to be cautious. Unplug the charger as soon as the indicators show it is fully charged. This is especially important for lead-acid jump starters, which are more susceptible to damage from overcharging. Always disconnect the charger once it is fully charged.
Safe Storage and Maintenance
Taking care of your jump starter when you’re not using it will extend its life and make it more dependable. Proper storage involves protecting the jump starter from temperature extremes and other issues. Maintenance means charging it regularly and cleaning it as needed. These practices are very important for keeping the device in good shape. It will always be ready when you need it. A well-maintained jump starter gives you the peace of mind of being prepared for emergencies. It also saves you money on replacements.
- Storage Conditions: Store the jump starter in a cool, dry place. Avoid extreme temperatures and direct sunlight.
- Regular Charging: Charge the jump starter every few months, even if you haven’t used it. This prevents the battery from discharging too much.
- Cleaning and Inspection: Regularly inspect the jump starter for any damage. Check the cables, clamps, and housing. Clean the device as needed.
Ideal storage temperatures are usually between 50°F and 77°F (10°C and 25°C). It is important to protect the device from moisture. Avoid storing it in a car trunk, where temperatures can vary widely. Storing it in a garage or indoor storage space is ideal.
Lithium-ion batteries have a slower discharge rate. Lead-acid batteries need more frequent charging. Follow the manufacturer’s recommendations for how often to charge the device. Consistent charging will help the battery work well for a long time.
Remove dirt or debris from the clamps and cables. Use a soft, dry cloth to clean the housing. Make sure there are no cracks or signs of damage that might affect its performance. Cleaning and inspecting the device will help in detecting issues and stopping them early.
Troubleshooting Common Charging Issues
Even with good care, you may run into charging problems with your jump starter. Common issues include the device not charging, charging too slowly, or displaying error messages. Recognizing these problems and understanding the solutions helps you resolve them quickly. Addressing these issues will make sure that your jump starter is working well when you need it. By working through the troubleshooting steps, you can resolve problems that appear during the charging process. You will keep your jump starter in great condition and ready for use.
The Jump Starter Isn’t Charging
If your jump starter is not charging, there are some steps you can take to figure out the problem. Checking the power source, charger, and connections will help you find the problem. This will help you find a solution. Common causes include a dead outlet, a faulty charger, or a problem with the device itself. A good diagnostic process, starting with the simple parts and moving to more complex ones, often gives the most effective answers. You might be able to find the issue without special tools or the need for a professional.
- Check the Power Source: Make sure the wall outlet or car outlet is working correctly. Try plugging another device into the same outlet to make sure it is working.
- Inspect the Charger: Check the charger for damage. Inspect the cable for frays or breaks.
- Examine the Jump Starter: Make sure the jump starter’s charging port is clean and free of debris. Consult the user manual for any specific troubleshooting steps.
Use a different outlet to rule out issues with the original one. A tripped circuit breaker could also be preventing the jump starter from charging. Reset the breaker if it has been tripped. Make sure that the power source is working properly.
Make sure the charger is properly connected. Try a different charger if possible, especially if you have an extra charger or a spare. Also, you should examine the charger’s port to ensure the plug makes a secure connection. If you see visible damage, you’ll need to replace the charger. Before replacing the charger, make sure the original charger’s specifications match your jump starter’s requirements. This may prevent damage to the device.
Look for any damage to the charging port on the device. Try charging the jump starter again after you have checked the obvious issues. If nothing seems to work, the jump starter might need servicing or replacing. Before you give up, look at the user manual for any extra troubleshooting tips.
The Jump Starter Charges Slowly
Slow charging can be very frustrating. It may leave you waiting for longer than you expect. Several factors may affect the charging speed. The charger used, the battery type, and the temperature where it is being charged are some of the most common causes. By finding the cause of the slow charging, you can often fix the issue. A fully charged jump starter means that you are prepared for whatever comes your way.
- Check the Charger: Make sure you are using the correct charger for your jump starter. A charger with a lower amperage than needed will charge the jump starter slowly.
- Battery Type and Age: Older batteries might take longer to charge than new ones. The type of battery also affects the charging speed.
- Temperature: Extremely high or low temperatures can slow down the charging process. Try charging the jump starter in a moderate temperature.
The charger needs to meet the voltage and amperage needs of the device. Check the jump starter’s specifications. You may need to use a charger with a higher output. Make sure the charger cable and connectors are in good condition. The charger will work more efficiently with a well-functioning charger. This helps speed up the charging process. This is good for those who have a busy lifestyle.
Lithium-ion and LiPo batteries usually charge more quickly than lead-acid batteries. If the battery is old, it might not hold a charge very well. Consider the type and age of your battery. It may affect charging times. If the battery is old, you may have to replace the device.
Ideal charging temperatures are usually around room temperature. Avoid charging in very hot or cold places. Let the device adjust to a moderate temperature before you start charging. If the temperature is too high, the charger may slow down to protect the battery. The jump starter will charge quicker if you are in a moderate environment.
Error Messages or Unusual Behavior
If your jump starter shows error messages or behaves unusually, it could signify a problem with the device. This includes an overcharge or a safety issue. Being able to solve these problems helps keep your jump starter in good shape. It also prevents more serious issues. The most important thing is to address these problems as quickly as possible. This stops any damage and ensures that the device can provide you with reliable power when you need it.
- Consult the User Manual: The user manual is your best resource for understanding any error messages and their solutions.
- Check for Physical Damage: Examine the jump starter for any physical damage. Look for cracks, swelling, or leaks.
- Seek Professional Help: If you are unsure about the issue, consider taking your jump starter to a professional for evaluation.
The manual will have specific instructions for any error messages that the jump starter shows. It also shows you what they mean and how to fix them. If you don’t have the manual, look for a digital copy online or call the manufacturer’s customer support. Always refer to your user manual first to see if you can resolve the issue.
Any visible damage means the jump starter needs attention. Do not use the jump starter if there is any visible damage. It can be dangerous. If you see damage, stop using the device and contact the manufacturer for assistance. Replacing a damaged device is usually the best approach.
A professional can diagnose the problem and determine the best course of action. Do not try to repair any internal parts if you do not have the knowledge and tools. They can safely handle problems such as electrical failures. This will ensure that you do not face further damage.
Frequently Asked Questions
Question: How long does it take to charge a lithium-ion jump starter?
Answer: A lithium-ion jump starter typically takes between 1 to 4 hours to charge fully. This can vary based on the specific model, the charger’s output, and the battery capacity.
Question: Can I overcharge my jump starter?
Answer: Modern jump starters often have overcharge protection, which prevents damage from overcharging. However, it is still a good idea to disconnect the charger once it is fully charged to prolong battery life.
Question: How often should I charge my jump starter?
Answer: It’s best to charge your jump starter every 2-3 months. This will keep the battery healthy and ready for use. This frequency applies even if you haven’t used the jump starter.
Question: What should I do if my jump starter won’t charge?
Answer: Start by checking the power source, the charger, and the charging port for any issues. Consult your user manual for any troubleshooting steps specific to your model. If problems remain, the device may require professional servicing.
Question: Is it safe to leave a jump starter in a hot car?
Answer: It’s generally not recommended to leave a jump starter in a hot car. Extreme temperatures can damage the battery and reduce its lifespan. Try to store your jump starter in a cool, dry place whenever possible.
Final Thoughts
Knowing how long to charge a jump starter properly ensures it’s ready when you need it most. Charging times depend on the battery type, the charger you are using, and the environmental temperature. Following the right steps, you can keep the device in good working order. Always use the right charger for your model and watch the charging indicators to make sure everything is working as it should. Regular maintenance, including periodic charging and safe storage, will increase the life and reliability of your jump starter. By keeping your device in good condition, you are well-prepared for sudden car trouble. When it’s time to charge, check your manual and follow the instructions. This easy care keeps you moving, giving you peace of mind on the road!