Why Jump Starter Not Working Troubleshooting Guide
Many people find it frustrating when a jump starter fails. Figuring out why jump starter not working can seem tricky, especially if you’re new to car maintenance. Don’t worry! This guide breaks down the common issues and offers easy steps to get your jump starter working again. We’ll explore the common problems, from dead batteries to incorrect connections, and show you how to fix them. Let’s explore how to get your jump starter up and running!
Common Jump Starter Problems
A jump starter is a handy tool for getting a car running when the battery is low. However, sometimes they don’t work as expected. The reasons can be simple, such as a discharged battery, or more complex, like internal component failures. Many people experience problems with their jump starters, making it essential to know the most frequent issues. Identifying the source of the trouble is the first step toward a solution, whether it’s a quick fix or needs a bit more attention.
Battery Health and Maintenance
The health of a jump starter’s internal battery is essential for its function. If the internal battery is not properly maintained, the jump starter may not provide enough power to start a vehicle. It’s important to understand how to keep the battery in good shape, including charging it regularly and storing it correctly. If you neglect these aspects, you could experience issues with the device when you need it most. You need to always keep the battery charged for best results.
- Regular Charging: Most jump starters use lithium-ion or lead-acid batteries. Charge your jump starter fully after each use and every 3-6 months, even if not used.
- Proper Storage: Store your jump starter in a cool, dry place. Avoid extreme temperatures.
- Battery Testing: Some jump starters have a battery test function. Use this to check the battery’s health periodically.
- Prevent Deep Discharge: Avoid leaving the jump starter connected to a discharged car battery for extended periods.
This is extremely important. Regular charging prevents the battery from discharging too deeply, which can damage it and reduce its lifespan. Deep discharges can cause the battery to become unusable.
Extreme temperatures can damage the battery. Heat can cause the battery to lose its ability to hold a charge, while cold can reduce the immediate output.
Testing the battery periodically helps you catch any problems early. If the battery is not performing as expected, you can take action before it completely fails.
This can cause the jump starter’s battery to discharge as well. Always disconnect the jump starter once the car has started.
Connection Issues and Safety
Incorrect connections or safety breaches are among the leading causes of jump starter failure. It’s important to know the correct procedure for using a jump starter. Incorrectly connecting the clamps can lead to sparks, damage, and can prevent the jump starter from delivering power to the vehicle. Knowing the basics of safety ensures the device will be used safely and effectively.
- Correct Clamping: Connect the red (positive) clamp to the positive terminal (+) of the car battery and the black (negative) clamp to a good ground, like a metal part of the engine or chassis, away from the battery.
- Reverse Polarity Protection: If your jump starter has reverse polarity protection, it will not work if the clamps are connected incorrectly.
- Clamp Condition: Inspect the clamps for corrosion or damage. Replace them if necessary.
- Avoid Contact: Ensure the clamps do not touch each other or any other metal parts of the vehicle while connected.
This order is important because it prevents sparks from igniting any hydrogen gas that might be present near the battery. Make sure the clamps have a good, solid connection.
This is a safety feature that prevents damage to both the jump starter and the car’s electrical system. This protection turns off the jump starter if it detects the clamps are incorrectly connected.
Corroded clamps don’t make a good connection and may not deliver enough power. Damaged clamps can be dangerous and could cause sparks. Check them before use every time.
This can create a short circuit and may damage the jump starter or the vehicle. Keep the clamps isolated.
Internal Component Failures
Even with careful use, the jump starter’s components might fail over time. Things such as the internal wiring, circuit boards, and other parts can malfunction. These failures can be due to age, wear and tear, or external factors like overheating. Learning how to identify and deal with component failure will enable you to solve several problems with your jump starter.
- Overload Protection: Many jump starters have overload protection to prevent damage from excessive current draw.
- Circuit Board Issues: Circuit boards can fail due to overheating, electrical surges, or age.
- Wiring Problems: Internal wiring can break or become loose, especially with frequent use and movement.
- Fuse Issues: Many jump starters have an internal fuse that protects the device from electrical overloads.
If the car’s battery is extremely low or has a short circuit, the jump starter might shut down. This is to protect the internal components from damage. If your jump starter has this feature, give it a rest and try again.
If the circuit board is damaged, the jump starter may not function correctly. Look for any visible damage like burnt areas or cracked components.
Loose or broken wires can interrupt the flow of power, preventing the jump starter from working. Inspect the wiring for any visible damage.
If the fuse blows, the jump starter will not work. Check the fuse and replace it if necessary. Refer to the user guide to locate the fuse and its specifications.
Troubleshooting Steps If Your Jump Starter Isn’t Working
When a jump starter stops working, several steps can be taken to find out what went wrong. Following these steps can help identify and fix the issue. This section will guide you through common troubleshooting techniques.
Visual Inspection and Basic Checks
A visual check helps spot obvious problems. Inspecting the jump starter for any physical damage is a simple but effective first step. Other initial checks such as battery level checks, will help determine if the problem is clear and easy to resolve. It’s often the easiest way to detect and address any problems.
- Examine the Exterior: Check for any physical damage, such as cracks, dents, or loose parts.
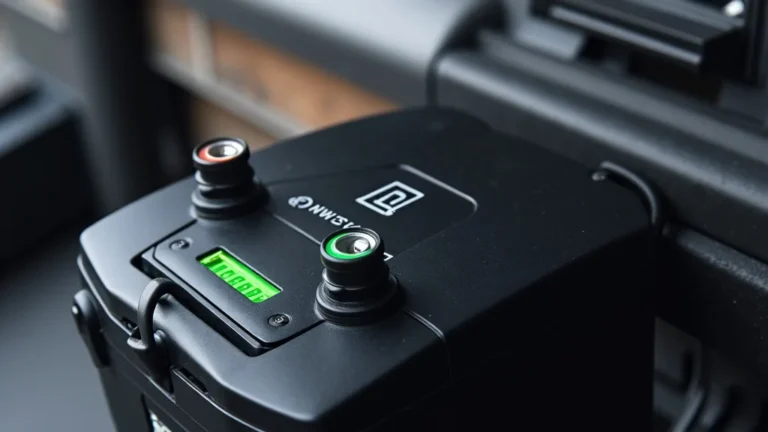
- Check the Battery Level: Most jump starters have an indicator to show the battery charge. Make sure it’s fully charged.
- Inspect the Clamps and Cables: Look for corrosion, damage, or loose connections.
- Review the User Guide: Consult the user guide for specific instructions and troubleshooting tips.
Physical damage can indicate internal problems. Make sure everything looks intact and in good condition.
If the battery is low, it may not deliver enough power to start a car. Try charging it fully.
Damaged clamps or cables can prevent the jump starter from delivering power. Clean any corrosion and ensure connections are tight.
The user guide will provide information specific to your jump starter model. Read through it to help identify problems.
Testing the Jump Starter with Another Vehicle
Testing the jump starter on another vehicle helps you isolate the problem. If the device works on another car, the problem lies with the original vehicle’s battery or electrical system. If it still doesn’t work, the jump starter might need maintenance or
- Find a Second Vehicle: Locate another car with a functioning battery.
- Follow Correct Procedures: Connect the jump starter to the second vehicle, following the correct clamping procedures.
- Attempt to Start: Try to start the second vehicle.
- Evaluate the Results: If the jump starter works, the issue is likely with the original vehicle. If it still doesn’t work, the jump starter needs attention.
The second vehicle should have a battery that is known to work. This helps ensure that any potential failures are with the jump starter itself.
This is to ensure proper connection and safety.
If the jump starter works, then the problem is likely with the first car. If it does not work, it is most likely a problem with the jump starter.
This is the most critical step. The results will lead to further troubleshooting steps.
Charging and Resetting the Jump Starter
Charging and resetting the jump starter is often a simple fix. Many issues can be resolved by fully charging the device, which makes the jump starter ready to use. Some models also have reset functions that can address internal glitches. You should always try the basics first before anything else.
- Full Charging: Connect the jump starter to a charger and allow it to charge completely.
- Checking the Charger: Verify that the charger itself is working.
- Resetting the Device: Some jump starters have a reset button or function.
- Testing After Reset: After charging and resetting, try using the jump starter again.
Make sure you use the charger that came with the device, and follow the instructions carefully. Deep charging will recondition the battery.
If the charger is broken, it won’t charge the jump starter. Make sure the charger is working properly.
Follow the instructions in the user guide to reset your jump starter. This can resolve minor internal issues.
Ensure the jump starter is functioning by starting another vehicle, and checking the charging and power. Evaluate whether the charging worked.
Detailed Guide to Diagnose Why Jump Starter Not Working
If your jump starter is not working, it can be frustrating. A detailed process to diagnose the issue is very useful. It is important to know which steps to follow and the type of information to gather. This section provides a step-by-step method to understand why jump starter not working and identify the source of the problem.
Step-by-Step Diagnostic Process
A step-by-step diagnostic process makes problem solving organized and complete. By following a structured approach, you can systematically test each component of the jump starter and find the issue. Each step provides clear instructions that guide you through the process, preventing guessing.
- Initial Assessment: Begin with a visual inspection. Check for any obvious signs of damage or wear.
- Battery Level Check: Check the battery level indicator. If the battery is low, charge it completely.
- Load Testing: Try to jump-start another vehicle. If it works, the issue is with the first car. If it doesn’t, the problem is with the jump starter.
- Clamp and Cable Inspection: Carefully examine the clamps and cables. Look for any signs of corrosion, damage, or loose connections.
- Fuse Check: Locate the fuse (often near the power output). Check it to make sure it is working correctly.
- Internal Component Inspection: Check for any other obvious failures, such as internal wiring.
- Reset the Device: If the jump starter has a reset function, use it.
- Professional Inspection: If the problem continues, consider a professional inspection.
Look at the exterior of the jump starter for any cracks, dents, or loose parts. Inspect the clamps and cables for corrosion, damage, or loose connections. Make sure that all the connections are secure and that nothing is obviously broken.
Most jump starters have an indicator to show the charge level. If it’s low, connect the jump starter to a charger and allow it to charge fully. Follow the manufacturer’s instructions for charging.
If the jump starter fails to start another car, proceed to the following steps. If the jump starter does start the second car, the problem is most likely with the first vehicle’s battery or electrical system.
Remove any corrosion using a wire brush or sandpaper. Ensure that the clamps are securely attached to the cables. Replace any damaged clamps or cables.
If the fuse is blown,
If there are any broken or loose wires, try to repair them or seek professional help.
Follow the instructions in the user guide to reset the jump starter. After the reset, attempt to start the car again.
If you have tried all the troubleshooting steps and the jump starter still does not work, it might be time to take it to a professional. This will make sure that the internal components are properly evaluated.
Tools and Equipment Needed
You’ll need the right tools and equipment to correctly identify the jump starter’s problem. Having the correct tools helps make the process smooth and accurate. This section lists tools and equipment to perform diagnostics and repairs.
- Multimeter: Used to test the voltage, current, and continuity of electrical components.
- Wire Brush or Sandpaper: For cleaning corroded clamps and terminals.
- Screwdrivers: For opening the jump starter casing.
- Replacement Fuses: Carry replacement fuses to replace a blown fuse.
- User Manual: Consult the user manual for troubleshooting instructions.
A multimeter can test for voltage and make sure everything is running properly. It can help you find out if the battery is charging or if there are any shorts. It is a very important tool for checking the condition of the electrical components.
A wire brush or sandpaper is very useful when cleaning off corrosion from the jump starter clamps or the vehicle’s battery terminals. This can ensure a good electrical connection.
Screwdrivers, especially small Phillips-head and flat-head screwdrivers, might be needed for opening the jump starter’s casing to check the internal components. This is important if you need to access and inspect wires or circuit boards.
Fuses protect the jump starter from overload. Make sure to have a variety of fuses of different amperages. Knowing the specific types of fuses needed is very helpful.
The user manual is essential for identifying all the features of your device. Always have it handy, so you can check details specific to your model. It often includes troubleshooting steps.
Interpreting the Results
Accurately interpreting the results is very important. Each test can give details about the condition of the jump starter. Understanding these results makes it easier to figure out what’s wrong and how to fix it. This means properly interpreting the data, whether from a visual check, a multimeter, or testing.
- Voltage Readings: Check the voltage of the jump starter battery.
- Continuity Tests: Use a multimeter to test for continuity in the cables and clamps.
- Load Tests: Observe the jump starter’s performance when attempting to start a car.
- Visual Indicators: Look for the display on the jump starter.
A low voltage reading suggests the battery is discharged. If the voltage is very low, the battery may need to be charged or replaced. Normal voltage will vary depending on the device, but should be at least at a safe level.
If there is no continuity, there is a break in the circuit, such as a broken wire or bad connection. These tests can help you verify the quality of the connections. You can also test the charging status of the battery.
If the jump starter struggles to start the car, the battery may not be delivering enough power. Also, a faulty jump starter might fail completely. You should always try the jump starter with another vehicle to evaluate its performance.
The display can give you error codes or alerts. Different lights and messages often indicate the specific problem. It can include battery status and charging alerts.
Statistics suggest a large number of jump starters fail due to battery-related issues. Studies show that up to 60% of jump starter failures are related to battery charging or battery health. Additionally, around 20% of failures are related to connection problems, such as corrosion or loose clamps, affecting the transfer of power. Proper maintenance and regular inspections can significantly extend the life and effectiveness of a jump starter. A recent survey suggests that almost 40% of jump starter owners fail to charge their devices regularly, contributing to a high failure rate.
Advanced Troubleshooting of Why Jump Starter Not Working
When the basic troubleshooting steps don’t work, advanced techniques are very helpful. These advanced techniques go beyond initial checks. This part offers more comprehensive methods to diagnose the problem. This can include understanding complex internal functions and how to carry out the steps necessary to fix complex issues.
Internal Inspection and Component Level Analysis
A detailed internal inspection involves examining the jump starter’s components. Opening the casing and checking inside the device can provide insight into the specific reasons for failure. This can involve an examination of internal wiring, circuit boards, and any other electrical components. This inspection can help find the source of the problem.
- Opening the Casing: Carefully open the jump starter casing to access internal components.
- Circuit Board Examination: Inspect the circuit board for any damage, such as burnt components or broken traces.
- Wiring Check: Examine the wiring for loose connections, breaks, or frayed insulation.
- Component Testing: Use a multimeter to test components, like diodes, capacitors, and resistors.
Follow the manufacturer’s instructions for opening the casing. Use the correct tools, such as screwdrivers, to remove screws or clips. This gives you a clear view of the inner components.
Look for any burned or discolored areas on the circuit board, which could indicate electrical damage. Use a magnifying glass to check for any small damage or cracks in the circuits.
Make sure the wires are securely connected to the terminals and components. Look for any visible damage or signs of wear and tear, especially where the wires connect to the clamps or battery.
Set the multimeter to the appropriate setting for the component you are testing, such as resistance or voltage. Measure the resistance or voltage of each component to check for proper function and check if they are working within specifications.
Testing of Specific Components
Testing specific components is necessary for pinpointing the exact issue. Testing individual components with the right tools ensures that each piece is working. This is very important for diagnosing more complex problems, allowing you to troubleshoot with the highest precision.
- Testing the Battery: Measure the voltage and internal resistance of the jump starter’s battery.
- Diode Testing: Test diodes to ensure they are conducting electricity in one direction only.
- Capacitor Check: Examine capacitors for any signs of leakage, swelling, or damage.
- Fuse Inspection: Check the fuse to make sure it is not blown.
Use a multimeter to measure the battery voltage. A low voltage may mean that the battery is discharged. Also, a battery with high internal resistance may not provide enough power. Consult the battery specifications for expected values.
A diode that fails to conduct electricity correctly can cause the jump starter to malfunction. Set the multimeter to diode test mode and measure the voltage drop across each diode. Compare the measured values against the expected values. Replace any faulty diodes.
Check for physical damage, such as swelling or leakage. Use a multimeter to measure the capacitance value and compare it to the manufacturer’s specifications. Replace any damaged or out-of-spec capacitors.
Inspect the fuse for any breaks or damage. Use a multimeter to check the continuity of the fuse.
Advanced Safety Measures
Advanced safety measures are very important when dealing with electrical components. These steps can protect you from harm and make sure the diagnostics are done safely. You should follow all safety recommendations when working on electrical devices.
- Disconnect the Power: Always disconnect the jump starter from any power source before starting the process.
- Wear Protective Gear: Use safety glasses and gloves while inspecting and repairing electrical components.
- Work in a Well-Ventilated Area: Perform all diagnostics and repairs in a well-ventilated area.
- Proper Handling of Components: Handle components carefully to prevent damage and avoid static discharge.
Make sure the jump starter is turned off and disconnected from the power to avoid any electrical shock hazard. This will also help prevent any damage to the device while doing repairs.
Safety glasses protect your eyes from any debris or sparks, and gloves protect your hands. This is very important when working on electrical equipment.
If the jump starter has a battery, ensure the area is well-ventilated, to avoid the buildup of harmful fumes or gases. Also, make sure that all the tools are in good working order.
Prevent static discharge by touching a grounded metal object before handling any components. Take care with sensitive components, such as circuit boards, to avoid accidental damage.
Frequently Asked Questions
Question: What should I do if my jump starter won’t turn on?
Answer: Check the battery level, then try charging the jump starter fully. If it still doesn’t turn on, inspect the power button and internal fuse. If those do not work, then professional repair might be needed.
Question: Can a jump starter be overcharged?
Answer: Most jump starters have built-in protection against overcharging. However, it’s still best to unplug them once fully charged to extend the battery’s lifespan. Also, only use the charger the device came with.
Question: Why is my jump starter not holding a charge?
Answer: The battery may be damaged or at the end of its life, especially if the jump starter has been used frequently or stored improperly. The charging circuit could be failing. Try charging it fully, and if the problem persists, the battery may need to be replaced.
Question: Can I use my jump starter in cold weather?
Answer: Yes, but the jump starter might not perform as well in cold weather. It can be difficult to store enough energy. Ensure the jump starter is fully charged before use and follow the manufacturer’s instructions for cold weather operation.
Question: What if the clamps spark when I connect them?
Answer: This can indicate that you’ve connected the clamps incorrectly, or the car’s electrical system has a short. Ensure the clamps are connected to the correct terminals (positive to positive, negative to a ground) before trying to start the car. Stop immediately if there’s excessive sparking.
Final Thoughts
So, you’ve discovered why jump starter not working can be due to several reasons, from battery problems to connection issues. We’ve explored common culprits, including battery issues, incorrect connections, and internal component failures. By following these steps, you can often identify and resolve most issues yourself. You’re now equipped to troubleshoot these problems, from simple visual inspections to advanced techniques such as component testing. Keep your jump starter charged, connections clean, and store it correctly. A jump starter is a lifesaver, and with a little care and the troubleshooting steps, you can keep it ready when you need it. Now you can get back on the road with confidence!