Learn How to Test a Car Battery with a Multimeter Easily
Featured image for how to test a car battery with multimeter
Image source: cdn.pixabay.com
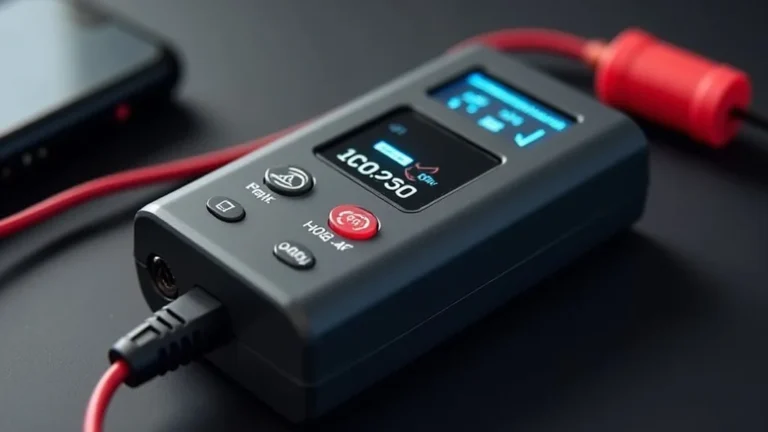
Easily test your car battery with a multimeter, an essential skill for proactive vehicle maintenance. By learning to set your multimeter to DC volts and connecting probes correctly, you can quickly assess your battery’s charge level and health, preventing unexpected breakdowns. This guide makes checking your battery’s voltage and diagnosing potential issues straightforward.
We’ve all been there, right? That moment of dread when you turn the key in the ignition, and instead of a confident roar, you’re greeted by a sluggish crank, or worse, just a mournful click. It’s a feeling that instantly puts a knot in your stomach, especially when you’re already running late. Often, the culprit for these morning surprises is a dying car battery. But how can you be sure before calling for a tow or investing in a new one?
The good news is, you don’t need to be a seasoned mechanic to diagnose your battery’s health. With a simple, affordable tool called a multimeter, you can easily check its vital signs from the comfort of your driveway. It’s a super empowering skill that not only saves you time and money but also helps you understand a little more about your car. Learning how to test a car battery with multimeter is much simpler than it sounds, and I’m here to walk you through it, just like I would for a friend.
Think of your car battery as the heart of your vehicle’s electrical system. Just like you’d want to keep an eye on your own heart health, understanding your car battery’s condition can prevent unexpected breakdowns. This guide will show you exactly how to test a car battery with multimeter, breaking down each step so clearly that you’ll feel like a pro in no time. Let’s get that peace of mind!
Key Takeaways
- Prioritize safety: Always wear eye protection and gloves during testing.
- Set multimeter correctly: Use DC Volts (V=) on the 20V range.
- Connect leads accurately: Red lead to positive (+), black to negative (-).
- Interpret results: 12.6V+ means healthy; 12.4V or less needs charging.
- Consider replacement: If below 12.0V, your battery is likely failing.
- Test engine off: Ensure vehicle is off for an accurate static reading.
📑 Table of Contents
Why Your Car Battery Matters (More Than You Think)
Your car battery is a hardworking hero, often taken for granted until it decides to take a day off. It’s not just about starting your engine; it powers everything from your radio and lights to your onboard computer systems. Understanding its importance helps appreciate why a quick check can save a lot of headaches.
The Heart of Your Vehicle’s Electrical System
From the moment you unlock your car with a remote, your battery is at work. It provides the initial surge of electricity needed to crank the starter motor, which in turn gets your engine running. Once the engine is on, the alternator takes over, powering the electrical systems and recharging the battery. But if your battery is weak, it can’t deliver that initial punch, leaving you stranded. A simple multimeter battery test can tell you if it’s struggling.
Signs of a Weakening Battery
Your car often tries to tell you its battery is failing before it gives up entirely. Look out for these common clues:
- Slow engine crank: The engine takes longer than usual to start.
- Dim headlights: Especially when the car isn’t running.
- Warning lights: A battery or check engine light on your dashboard.
- Electrical issues: Power windows or radio acting strange.
- Clicking sound: Often heard when you turn the key, indicating insufficient power to engage the starter.
These signs are your car’s way of saying, “Hey, maybe you should check car battery voltage soon!”
Getting Started: What You’ll Need
Before you dive into learning how to test a car battery with multimeter, let’s gather our tools. Don’t worry, it’s a very short list!
Your Trusty Multimeter
This is the star of our show. A digital multimeter is ideal because it gives you clear, precise readings. You can find one at any auto parts store or electronics shop for a very reasonable price. Make sure it can read DC voltage, which almost all multimeters do.
Safety First!
Working with car batteries involves electricity and chemicals, so safety is paramount. Always wear:
- Safety glasses: To protect your eyes from accidental sparks or acid.
- Gloves: To protect your hands from battery acid and dirt.
Also, remove any metal jewelry like rings or watches to avoid accidental short circuits.
Other Helpful Gear
- Wire brush or battery terminal cleaner: If your battery terminals are corroded.
- Old rags or paper towels: For wiping terminals or hands.
- Baking soda and water: To neutralize battery acid if you spot corrosion.
Pre-Test Preparations: Setting Up for Success
Before you even touch your multimeter, a few simple steps will ensure accurate readings and safe operation. These preparations are key to correctly performing a car battery test.
Car Off and Cool
First things first: Make sure your car is completely off. The engine should not be running, and the car should have been off for at least a few hours if possible. This allows the battery to settle and gives you an accurate static voltage reading. If you just drove the car, the battery might show a falsely high reading due to surface charge.
Locating Your Battery
For most cars, the battery is under the hood. However, some vehicles might have it in the trunk, under the back seat, or even in the wheel well. Once you find it, identify the positive (+) terminal (usually red and marked with a plus sign) and the negative (-) terminal (usually black and marked with a minus sign).
Cleaning the Terminals (Optional but Recommended)
If you see any white, blue, or green powdery substance around the terminals, that’s corrosion. Corrosion can interfere with electrical connections and lead to inaccurate multimeter readings. Use a wire brush or a dedicated terminal cleaner to remove it. You can also mix baking soda with a little water to form a paste, apply it, let it fizz, and then rinse it off carefully with water.
Setting Up Your Multimeter
This is where you configure your tool for the multimeter battery test:
- Turn the dial to the DC voltage setting. This is often labeled with a “V” followed by a straight line and a dashed line (V— or VDC).
- Select a range appropriate for a car battery. Since car batteries are typically 12 volts, a 20V DC range is usually perfect.
- Plug the red lead into the “VΩmA” or “V” jack.
- Plug the black lead into the “COM” (common) jack.
The Main Event: Testing Your Battery Voltage
Now that everything is set up, it’s time to actually learn how to test a car battery with multimeter. We’ll perform a few different tests for a complete picture of your battery’s health.
The Static Voltage Test (Engine Off)
This test tells you the battery’s resting charge. It’s the simplest and first test you should perform.
- Ensure the car has been off for at least 2-3 hours (ideally overnight) to get rid of any surface charge.
- Touch the red (positive) multimeter lead to the positive (+) battery terminal.
- Touch the black (negative) multimeter lead to the negative (-) battery terminal.
- Read the voltage displayed on your multimeter.
A healthy, fully charged car battery should read around 12.6 volts or higher.
The Cranking Voltage Test (Engine On/Starting)
This test checks how well your battery holds up under load – specifically, when it’s working hard to start the engine. This is a critical part of knowing how to test a car battery with multimeter effectively.
- Connect your multimeter leads to the battery terminals as described above.
- Have a helper start the car while you watch the multimeter display.
- Note the lowest voltage reading your multimeter shows while the engine is cranking.
A healthy battery should not drop below 9.6 to 10 volts during cranking. A significant drop below this indicates a weak battery that might struggle to start the car, especially in cold weather.
The Charging System Test (Engine Running)
While not a battery-only test, checking the charging system helps confirm if your alternator is doing its job and recharging the battery properly. This complements your car battery test perfectly.
- With the engine running, keep the multimeter leads connected to the battery terminals.
- Your multimeter should now read between 13.7 and 14.7 volts.
- Turn on your headlights, radio, and other accessories. The voltage should remain within this range. A drop below 13 volts could indicate an alternator problem.
Deciphering the Readings: What Do Your Numbers Mean?
You’ve got your numbers, but what do they actually tell you about your battery’s condition? Let’s break down the results from your how to test a car battery with multimeter efforts.
Understanding the Static Voltage Chart
Here’s a simple guide to interpreting your static (engine off) voltage readings:
| Voltage Reading (Engine Off) | Battery Charge Level | Condition |
|---|---|---|
| 12.66V or higher | 100% | Excellent, fully charged |
| 12.45V | 75% | Good, minor discharge |
| 12.24V | 50% | Fair, needs charging soon |
| 12.06V | 25% | Weak, requires immediate charging |
| Below 12.0V | 0-25% | Discharged, likely needs charging or replacement |
This table is your quick reference for a basic car battery test.
Interpreting Cranking Test Results
- Above 10V: Your battery is likely in good health and has enough power to crank the engine efficiently.
- 9.6V to 10V: The battery is getting weak. It might start the car for now, but you should consider a full charge or prepare for a replacement, especially before winter.
- Below 9.6V: Your battery is likely failing and will struggle to start the car. It’s time for a replacement.
Interpreting Charging System Results
- 13.7V – 14.7V (engine running): Your alternator is working correctly and charging the battery.
- Below 13.7V: The alternator might not be charging the battery sufficiently. This can lead to a continually drained battery.
- Above 14.7V: The alternator might be overcharging, which can damage the battery.
Both scenarios (under- or over-charging) indicate a problem with your charging system, not necessarily the battery itself, but it certainly impacts battery life.
When to Act: Next Steps Based on Your Test
So, you’ve learned how to test a car battery with multimeter and you have your readings. What’s next? Here’s what your results typically mean for your car.
Battery is Good!
If your static voltage is above 12.6V, your cranking voltage stays above 10V, and your charging system is in the 13.7-14.7V range, congratulations! Your battery and charging system are in good shape. Keep up with routine maintenance and maybe re-test every few months, especially before extreme weather hits.
Time for a Recharge
If your static voltage is between 12.0V and 12.4V, your battery is partially discharged. It might just need a good boost. Use a smart battery charger to bring it back to full charge. After charging, perform the static voltage test again to confirm it holds a charge. Sometimes, a deeply discharged battery can still recover.
Time for a New Battery
If your static voltage is consistently below 12.0V even after charging, or if your cranking voltage consistently drops below 9.6V, your battery is likely at the end of its life. Modern car batteries often fail suddenly, so it’s best to replace it before it leaves you stranded. This is the ultimate outcome of a definitive car battery test indicating failure.
Charging System Issues
If your battery tests fine but the charging system test (engine running) shows readings outside the 13.7V-14.7V range, your alternator or voltage regulator might be faulty. A weak alternator won’t properly recharge your battery, leading to repeated discharge. In this case, consult a professional mechanic to diagnose and fix the charging system.
See? Learning how to test a car battery with multimeter isn’t scary at all! It’s a fantastic little trick to have up your sleeve, empowering you to quickly diagnose one of the most common car problems. So next time your car hesitates, grab that multimeter with confidence. You’ve got this!
Frequently Asked Questions
Why should I test my car battery with a multimeter?
Testing your car battery with a multimeter helps you quickly diagnose potential issues before they leave you stranded. It allows you to monitor its charge level and overall health, indicating whether it needs charging, maintenance, or a full replacement.
How do I correctly set up my multimeter to test a car battery?
To test a car battery, set your multimeter to the DC voltage setting, typically marked as “V—” or “VDC”, and select a range of 20V. Ensure the red lead is plugged into the VΩmA jack and the black lead into the COM jack.
What are the normal voltage readings I should see when I test a car battery with a multimeter?
A healthy, fully charged car battery should typically read between 12.6 to 12.8 volts when the engine is off. With the engine running, your multimeter should show readings between 13.7 to 14.7 volts, indicating that the alternator is charging the battery correctly.
My multimeter shows a low voltage when I test my car battery. What does that mean?
A low voltage reading, typically below 12.4 volts with the engine off, indicates that your car battery is discharged or potentially weak. This could mean it needs a charge, or it might be nearing the end of its lifespan and require replacement soon.
Are there any important safety tips when testing a car battery with a multimeter?
Yes, always wear safety glasses and gloves to protect against battery acid and electrical sparks. Ensure your workspace is well-ventilated and avoid touching the positive and negative terminals simultaneously with the multimeter leads, which could cause a short circuit.
Can I test a car battery’s cold cranking amps (CCA) or overall capacity using just a multimeter?
While a multimeter is excellent for measuring voltage, it cannot directly test a car battery’s Cold Cranking Amps (CCA) or its overall capacity and ability to hold a load. For those specific tests, you would need a specialized battery load tester or a professional battery diagnostic tool.