Which Charger Terminal to Connect First: A Simple Guide
Figuring out which charger terminal to connect first can seem tricky, especially when you’re just starting. It’s a common question for anyone using a charger, and it’s easy to feel unsure about it. This guide will walk you through the process, making it super simple to understand. We’ll break down the steps clearly, ensuring you feel confident in every charge. Let’s get started!
Choosing the Right Charger and Preparations
Before plugging anything in, selecting the appropriate charger is important. Different devices need different types of chargers, and using the wrong one could potentially damage your device or, in some cases, pose a safety risk. This section will help you identify the right charger for your device and prepare everything for a safe and efficient charging session. Knowing this helps to prevent problems from the start. We will also look at safety measures, ensuring your safety throughout the charging process.
Identifying Your Device’s Charging Requirements
Every device has specific power needs, and it’s important to match those needs with the right charger. Look for information on your device itself, usually near the charging port or in the manual. This information will tell you the voltage and amperage your device requires. Voltage is the electrical pressure, measured in volts (V), and amperage is the current, measured in amps (A). A mismatch can lead to slow charging, damage to your device, or even safety hazards. For instance, a phone might need 5V and 1A, while a laptop could require 20V and 3A or more. Always use a charger that matches your device’s specifications or is specifically designed for it. This simple step ensures your device receives the correct amount of power, charging it safely and efficiently. If you are unsure, consult your device’s documentation or contact the manufacturer.
- Check the Device Specifications: Find the voltage and amperage requirements usually printed on the device or in its manual.
- Examine the Charger: Make sure the charger’s output matches or is compatible with your device’s specs.
- Compatibility with Charging Ports: Ensure both the charger and device have compatible ports.
- Consider the Power Source: Ensure the outlet you are using provides stable power.
- Read the Charger Instructions: Chargers often come with their own safety instructions.
Knowing your device’s power requirements is the first step. Look for the voltage (V) and amperage (A) printed on the device itself or in its manual. These numbers indicate the necessary power for your device to charge correctly.
Next, check the charger itself. It should clearly state its output voltage and amperage. The charger’s output should match your device’s requirements or have a slightly higher amperage rating. A higher amperage will charge your device faster, but never exceed the recommended voltage.
Check that the charger’s plug fits your device’s charging port. Different devices use different connectors like USB-C, Lightning, or Micro-USB. Verify the charger’s port matches your device’s port. Otherwise, you’ll need an adapter.
The power source plays a role, too. Ensure the outlet provides stable power. Avoid using damaged or old outlets, as they may cause issues. If you are using a power strip or extension cord, make sure it is in good condition and rated to handle the power draw of your charger.
Always review the charger’s included instructions. These instructions contain any specific safety advice or operating information. If you’re unsure about anything, consult the manual or contact the manufacturer for clarification.
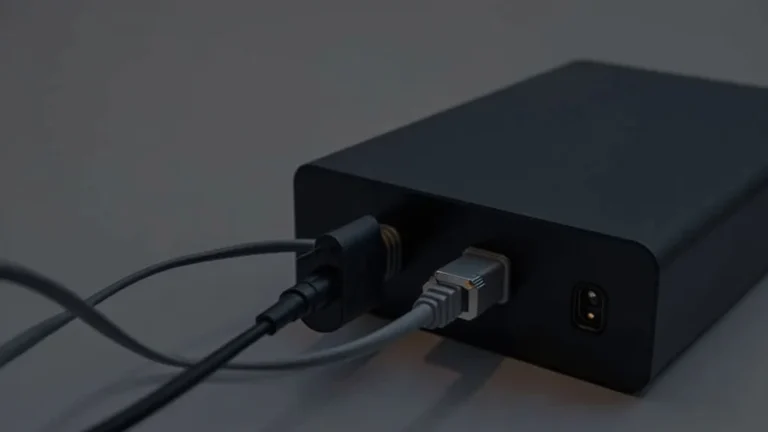
Safety First: Inspecting the Charger and Cables
Before plugging in the charger, make sure both the charger and the cable are in good condition. Look for any visible damage like frayed wires, cracks, or exposed conductors. Using a damaged charger or cable can be a fire hazard and might cause electrical shocks. Ignoring these safety measures could result in personal injury or damage to your device. Regular inspections help to ensure your safety and protect your devices from any potential harm. This step is about minimizing the possibility of accidents by spotting and fixing problems before they become dangerous.
- Examine the Charger Body: Check for any cracks, breaks, or signs of overheating.
- Inspect the Cable: Run your fingers along the cable, checking for fraying, cuts, or kinks.
- Check the Connectors: Make sure the connectors on both ends of the cable are clean and intact.
- Listen for Unusual Sounds: During use, listen for any buzzing or other odd noises from the charger.
- Avoid Extreme Conditions: Do not use chargers in excessively hot or cold environments.
Examine the charger’s exterior for any visible damage. Look for cracks, breaks, or discoloration that might indicate overheating. If the charger is damaged, do not use it. Replace the charger immediately. These visual checks are the first line of defense in spotting potential problems.
Check the cable for any signs of wear. Feel for fraying, cuts, or kinks that could expose the wires inside. Frayed or damaged cables should be replaced immediately. These damages can lead to short circuits and other electrical hazards. A cable in good condition is vital for safe charging.
Inspect the connectors at both ends of the cable. The connectors should be clean, not bent, and free of any debris. Dirt or corrosion can reduce the effectiveness of the charge and may lead to overheating. If necessary, clean the connectors with a dry cloth.
Pay attention to any unusual sounds while the charger is plugged in. Buzzing or crackling noises can indicate a problem. If you hear anything out of the ordinary, disconnect the charger and replace it.
Extreme temperatures can affect charger performance and safety. Avoid using chargers in very hot or cold locations. Also, do not place them near sources of heat, like heaters or direct sunlight.
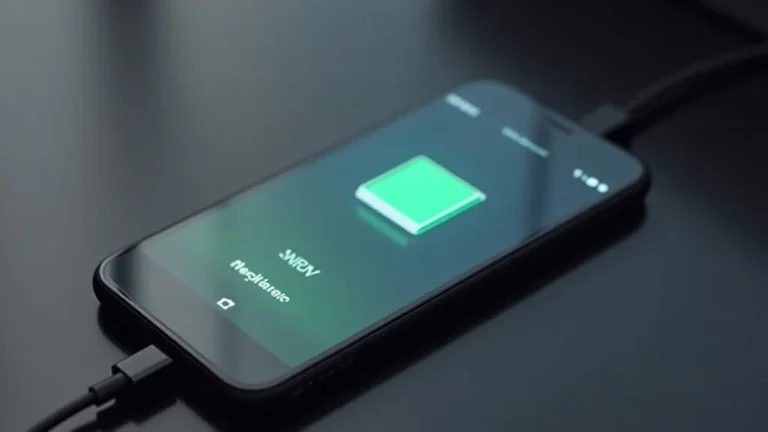
The Correct Order: Which Charger Terminal to Connect First
Knowing the proper steps to connect the charger terminals is key to charging your device safely. Many people ask, which charger terminal to connect first, and the answer depends on the type of charger. This section will break down the process step by step, ensuring you understand the correct procedures for both AC (alternating current) and DC (direct current) chargers. This knowledge ensures safe and efficient charging, protecting your device from potential damage.
AC Charger Connection Procedure
AC chargers are the most common type and used for most devices. This section will guide you through the correct order for connecting an AC charger, focusing on simple steps that prioritize safety and device protection. Following the correct sequence is important to avoid electrical shocks and damage to the device. Mastering this ensures your device receives power safely and efficiently.
- Plug the Charger into the Wall Outlet: Connect the charger to the electrical outlet first.
- Connect the Charging Cable to Your Device: Once the charger is plugged in, connect the cable to your device.
- Check the Indicator Lights: Observe the device or charger for any charging indicator lights.
- Monitor the Charging Process: Keep an eye on the charging process for any irregularities.
- Disconnect in Reverse Order: Always remove the charger cable from the device before unplugging it from the wall.
The first step is to plug the charger into the wall outlet. This ensures the charger has a stable power supply before connecting to your device. Make sure the outlet is functioning correctly and is not overloaded.
Next, plug the charging cable into your device. Be sure that the connector fits snugly and correctly into the charging port. Do not force the cable. If it doesn’t fit easily, it may be the wrong type.
After plugging in both ends, check for any visual indications that charging has begun. Many devices show a charging icon on the screen or have an LED light on the charger. If nothing lights up, make sure everything is plugged in securely.
Watch your device as it charges, especially at first. Make sure nothing gets too hot and there is no unusual behavior. If you notice anything strange, disconnect the charger immediately.
When you’re finished charging, always disconnect the cable from your device first. Then, unplug the charger from the wall. This helps prevent any potential electrical surges or shocks.
DC Charger Connection Procedure
DC chargers are common in electric vehicles and other high-power applications. Correctly connecting a DC charger is important for safety and for the health of your equipment. This section outlines the essential steps to ensure a smooth, safe, and efficient charging process. This understanding is key for preventing damage to your device and potential safety risks.
- Connect the Charger to the Device First: This is opposite to AC chargers. Connect the charging cable to the device before plugging it into the power source.
- Activate the Charging Station (If Applicable): Follow the station’s instructions to activate the charger.
- Check the Charging Indicator: Monitor the device’s display or the charger for charging progress.
- Be Alert for Any Issues: Keep an eye out for any unusual behavior or error messages during charging.
- Disconnect in Reverse Order: Unplug the charger from the power source only after disconnecting it from the device.
For DC chargers, the first step is to connect the charging cable to your device. This ensures a stable connection before applying power. If using a public charging station, attach the charging connector to your vehicle first.
If you’re using a public DC charging station, you may need to authorize the session using a card or an app. Follow the station’s prompts to start the charging process. This is the stage when you pay or verify your account.
Once charging has started, check for an indicator that shows the charging status. Most electric vehicles have a dashboard display that shows the charging rate, time remaining, and battery level.
Watch for any warning signs that might indicate a problem. Look for overheating, unusual noises, or error messages on the charging station or your device’s display. Disconnect immediately if you notice anything unusual.
When charging is complete, the process is reversed. First, disconnect the cable from your device. Then, deactivate the charging session (if needed) and unplug the charger from the power source.
Troubleshooting Common Charging Problems
Sometimes, your device might not charge as expected. It is good to know how to diagnose the common issues. This section will walk you through the most frequent charging problems, offering clear, actionable solutions. These fixes will help you quickly resolve issues and ensure your devices are always charged. This understanding can save time, frustration, and possibly prevent more serious damage.
Common Issues and Solutions
Charging problems can arise for many reasons. Here’s a look at some of the most common issues and how to resolve them. Understanding these issues will help you troubleshoot charging problems with confidence, saving time and money. Quick fixes are often possible.
- Device Not Charging: Check the connections, cable, and charger.
- Slow Charging: Check the charger’s output and consider the device’s demands.
- Overheating: Disconnect the charger and let the device cool down.
- Incompatible Charger: Ensure that the charger matches the device’s power requirements.
- Software Glitches: Restart or update your device’s software.
If your device does not charge, the first step is to check all connections. Ensure the charger is securely plugged into the wall and your device. Test different cables and chargers to rule out a faulty component. Sometimes, the problem is a loose connection or a damaged cable.
Slow charging can be caused by a low-power charger or a problem with the cable. Try using a charger with a higher output (amps) or a different cable. Devices also charge slower when they are in use, so try turning your device off during charging.
Overheating can be a sign of a problem, like a short circuit or a faulty battery. If your device or charger is overheating, disconnect immediately. Allow it to cool down before trying again. If the issue continues, replace the charger or have your device checked by a professional.
Using the wrong charger can cause various issues, from slow charging to device damage. Always use a charger that matches your device’s voltage and amperage requirements. Consult your device’s manual for recommended chargers.
Sometimes, software glitches can interfere with charging. Restarting your device can often fix the issue. Also, ensure your device’s software is up to date, as updates often include fixes for charging problems.
When to Seek Professional Help
Knowing when to seek professional help is as important as knowing how to troubleshoot. This guide will provide clear indications of when the problem is beyond a simple fix and requires expert attention. Taking your device to an expert can prevent further damage and ensure safe usage. This proactive approach can save you from bigger problems down the line.
- Persistent Charging Failures: When troubleshooting steps don’t resolve the charging problem.
- Physical Damage to Device: Any signs of physical damage can require professional intervention.
- Overheating Issues: If your device overheats repeatedly.
- Battery Problems: If you suspect battery issues, have the device checked by a specialist.
- Unusual Noises or Smells: Electrical faults that generate sounds or smells should be checked by a specialist.
If you’ve tried all the standard troubleshooting steps (checking connections, cables, and chargers) and your device still won’t charge, it’s time for help. This indicates an internal problem that requires professional diagnostic.
If your device has been dropped, has water damage, or shows other signs of physical damage, do not attempt to repair it yourself. This could cause more damage or create a safety hazard. Take your device to a professional for assessment.
If your device or charger frequently overheats and you can’t identify a cause, take it to a professional. Overheating can be a sign of a serious internal fault that needs to be resolved by a qualified technician.
If you suspect the battery is faulty, it is best to take your device to a professional. These signs can include rapid battery drain, swelling of the battery, or the device shutting down unexpectedly. A professional can diagnose the battery issue and provide a safe solution.
If you notice unusual noises like buzzing or crackling from your charger or device, or if you smell burning plastic, immediately disconnect the device and have it checked by a professional. These are signs of a dangerous electrical fault that must be repaired immediately.
Frequently Asked Questions
Question: Is it safe to leave my phone charging overnight?
Answer: Yes, it is generally safe to leave your phone charging overnight. Modern smartphones have built-in circuits that stop charging once the battery is full.
Question: What happens if I use a charger with a higher voltage than my device needs?
Answer: Using a charger with a higher voltage than your device needs can damage it. Always use a charger that matches your device’s voltage.
Question: Can I use any USB cable with any charger?
Answer: No, not all USB cables are the same. While the connector might fit, the cable’s specifications, like its ability to carry power, can vary. Always use the cable recommended for your device or a high-quality replacement.
Question: How can I tell if my charger is working properly?
Answer: You can tell if your charger is working properly by checking for a charging indicator on your device (e.g., a charging icon on the screen or an LED light) and ensuring the device is charging at a normal rate.
Question: What should I do if my charger sparks when I plug it in?
Answer: If your charger sparks when you plug it in, immediately unplug it and stop using it. Contact a qualified electrician to inspect the outlet and the charger.
Final Thoughts
Knowing which charger terminal to connect first is a straightforward process when you have the information. Always start by verifying your device’s power requirements. Use the correct charger and ensure both the charger and cable are in good shape. For AC chargers, plug the charger into the wall first, then connect to your device. DC chargers have you connect to the device first. If you face any issues, troubleshoot step-by-step. Remember that safety is key, and if problems persist, it is important to seek professional help. With these simple tips, you can confidently charge your devices safely and effectively. Now you’re well-equipped to handle any charging situation with ease!