Battery Charger Stops Working Right Away Troubleshooting Guide
It’s frustrating when your battery charger shuts off immediately, leaving your devices powerless. This issue is common, especially for beginners who may not know the basics of charging systems. Don’t worry, though; finding the solution is easier than you think. This guide will walk you through the most likely causes and give you step-by-step instructions. Get ready to explore the troubleshooting process.
Common Causes for a Battery Charger Shutting Down
The first step in fixing a malfunctioning charger is figuring out why it’s failing. Several issues can cause a battery charger shuts off immediately. These range from simple problems like a loose connection to more complex electrical issues. Most of the time, the fix is easy. Identifying the correct problem is the key to a speedy repair. We’ll explore these common causes and give you the knowledge you need to determine the underlying problem.
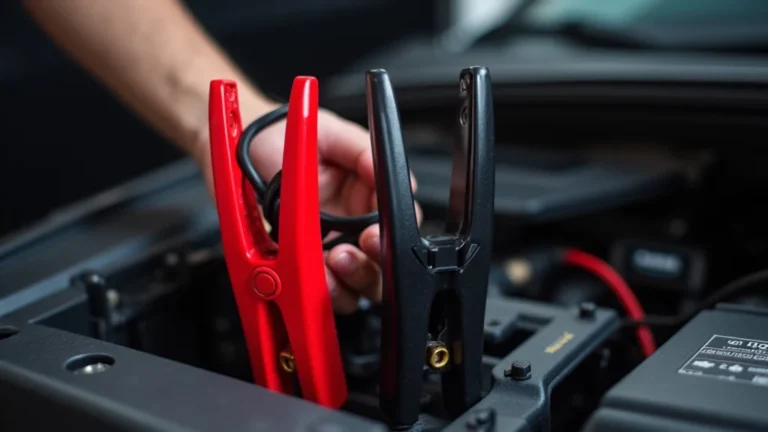
Faulty Connections
Sometimes, the problem is something simple: a bad connection. This can involve the charger’s plug, the cord, or the connection to the battery itself. A loose connection interrupts the flow of electricity, causing the charger to shut down as a safety measure. Dust or corrosion on the contacts can also interfere with power transfer. Checking for these problems is the first step in troubleshooting any charging issue. Fortunately, it’s an easy fix once you identify the source.
- Check the Power Cord: Examine the power cord for any damage, such as cuts, frays, or exposed wires. These can create electrical hazards and cause the charger to fail. Any damage means replacing the power cord.
- Inspect the Plug: Make sure the plug fits securely into the wall outlet. A loose plug can cause intermittent power, leading to shutdown. If the prongs are bent, try carefully straightening them or using a different outlet.
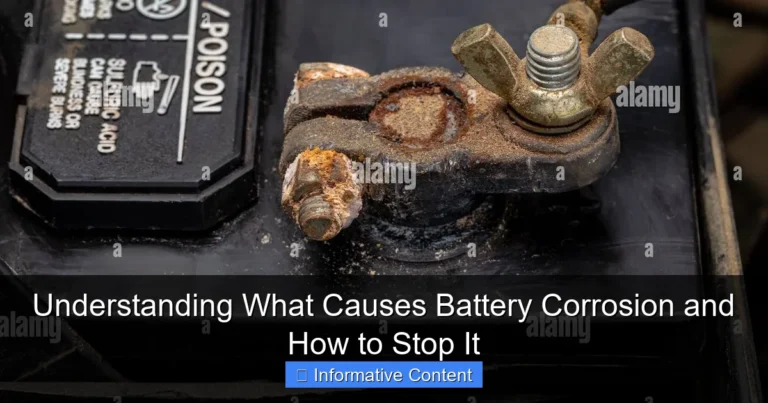
- Battery Terminal Connection: Confirm that the charger’s terminals (the clamps or connectors) are firmly attached to the battery terminals. Corrosion can prevent a good connection, so clean terminals are important. Use a wire brush or battery terminal cleaner to remove any buildup.
- Internal Connection Check: For chargers with removable cords, check the connection where the cord plugs into the charger unit. Make sure it’s secure. Sometimes, a loose internal connection can cause an immediate shutdown.
Battery Issues
Your battery itself may be the problem. If a battery has problems, the charger can protect itself by shutting down. Issues such as extreme age or internal damage are common culprits. Over time, batteries degrade and may no longer accept a charge. A damaged battery can also create resistance or short circuits that cause the charger to malfunction. It is important to know that these issues exist to help isolate the problem and prevent safety hazards.
- Battery Age and Condition: Older batteries have a reduced capacity to hold a charge. If your battery is old, it might be unable to receive a charge. Check the battery’s date code or age to see how old it is.
- Internal Short Circuits: An internal short circuit happens when the battery’s positive and negative terminals touch inside. This creates a surge of current, leading the charger to shut down for protection. You can test a battery using a multimeter to see if there’s a short circuit.
- Sulfation Buildup: Sulfation occurs when lead sulfate crystals build up on the battery plates. This reduces the battery’s ability to take a charge. This is commonly found in batteries that are left uncharged for long periods. You may have to get a new battery.
- Over-Discharged Battery: If a battery has been discharged too deeply, the charger might fail to recognize it. Some chargers have safety features that won’t start charging if the battery’s voltage is below a certain level. Try a charger designed for deeply discharged batteries.
Charger Problems and Safety Features
Sometimes, the issue isn’t the battery or the connections but rather the charger itself. Chargers have various safety features that can trigger a shutdown. These features are in place to prevent damage to both the charger and the battery. Knowing about these protective measures can help you narrow down the root cause of your charger problem. By understanding these features, you can better diagnose if your charger is faulty or if it is doing its job as intended.
- Overload Protection: Most chargers have built-in overload protection. If the charger detects excessive current draw, it shuts down to prevent overheating and damage. This can happen if the battery is severely depleted or if there’s a short circuit.
- Overcharge Protection: Chargers often turn off when the battery is fully charged. However, a faulty overcharge protection system can trigger a premature shutdown. A failing circuit board can be the problem.
- Temperature Sensors: High temperatures can harm batteries. Chargers use temperature sensors to monitor the battery’s temperature. If the temperature gets too high, the charger shuts down to avoid damaging the battery or the charger itself.
- Reverse Polarity Protection: Modern chargers have reverse polarity protection. This prevents the charger from operating if the connections are reversed (positive to negative and vice versa). This is a helpful feature, but it can also prevent charging if the connections are incorrect.
Step-by-Step Troubleshooting Guide When the Battery Charger Shuts Off Immediately
Now, let’s explore how to identify the specific issue. This step-by-step guide will walk you through the process, from checking the basics to using more advanced troubleshooting methods. By following these steps, you can pinpoint the reason your battery charger shuts off immediately and work towards a fix. Remember, safety first. Always disconnect the charger from the power source before performing any inspections.
Step 1: Visual Inspection and Basic Checks
Start with the simplest checks. Often, you can find the problem without using special tools. These initial visual inspections can help you identify any obvious issues before moving on. Thoroughness at this stage can save time and effort. It might only be a loose cable or a damaged plug that is causing the problem.
- Check the Power Source: Make sure the outlet is working. Plug another device into the same outlet to confirm it’s providing power. If the outlet is the problem, you may need to use a different one.
- Inspect the Charger: Look over the charger for any visible damage, such as cracks, burns, or loose parts. Also, check the power cord for any cuts or damage. Any damage to the charger itself may require replacement.
- Check the Connections: Examine the charger’s connections to the battery. Make sure the clamps are securely attached to the terminals. The terminals need to be clean.
- Review the Battery: Check the battery for any signs of damage or leakage. Any visual indicators can tell you if there are major battery problems. Look for swelling, cracks, or corrosion.
Step 2: Inspecting and Cleaning Connections
Dirty or loose connections are a common cause of charger failure. Cleaning and tightening these connections can often resolve the problem. This can be as simple as wiping off some dust or tightening the clamps on the battery terminals. Proper connections are essential for the flow of electricity. Take your time to guarantee a solid connection.
- Clean the Battery Terminals: Use a wire brush or battery terminal cleaner to remove any corrosion or buildup on the battery terminals. Corrosion can create resistance and prevent the charger from working correctly.
- Tighten Connections: Make sure the charger’s clamps are tightly secured to the battery terminals. Loose connections can lead to intermittent power. Tighten the clamps, and ensure they are making good contact.
- Check the Charger’s Cord Connection: If your charger uses a removable cord, check the connection where the cord plugs into the charger unit. Ensure it is firmly in place and not loose.
- Examine the Plug: Make sure the charger’s plug fits snugly into the wall outlet. A loose connection here can also cause problems.
Step 3: Checking the Battery’s Voltage and Condition
The battery’s state is critical. Checking its voltage and overall condition can tell you if it is the root cause. This requires a multimeter, but the information it can give is helpful. If the voltage is too low or the battery is damaged, the charger may shut down to protect itself. This step is important for diagnosing deeper battery issues.
- Use a Multimeter: Set your multimeter to DC voltage. Connect the probes to the battery terminals, observing the correct polarity (red probe to positive, black probe to negative). A low voltage reading might show a deeply discharged or damaged battery.
- Battery Voltage Readings: A fully charged 12-volt battery should read around 12.6 volts or higher. A voltage of 10.5 volts or less means the battery is severely discharged. If the reading is significantly lower, the charger might be unable to initiate charging.
- Check for Short Circuits: To check for an internal short circuit, set your multimeter to the resistance (ohms) setting. Disconnect the battery from the charger. Touch the multimeter probes to the battery terminals. A very low resistance reading (close to zero) means an internal short circuit.
- Load Test the Battery: If possible, perform a load test using a battery tester. This will tell you if the battery can supply the necessary power under load. A failing load test indicates a damaged battery, and it needs replacing.
Step 4: Isolating the Charger and Testing
Isolating the charger means making sure it’s the issue, not the battery or external connections. You can do this by using a known-good battery or testing the charger’s output with a multimeter. This step will help determine if the problem lies with the charger itself or another part of your equipment. It is important to know if the charger is functioning correctly. Otherwise, you’ll be spinning your wheels and possibly making the problem worse.
- Try a Different Battery: If possible, test the charger with a battery you know is working properly. If the charger works with a different battery, the problem lies with your original battery.
- Check the Charger Output Voltage: With the charger unplugged and disconnected from any battery, use a multimeter to check the charger’s output voltage. This will confirm if the charger is producing the correct voltage.
- Test with a Known-Good Charger: If possible, use a known-good charger on your battery to see if the battery charges. If it does, the problem is with your original charger. If the known-good charger also shuts off, the battery is the source of the issue.
- Observe the Charger’s Behavior: Plug in the charger and note its behavior. Does the charging light come on? Does it show any error messages? Does it shut off immediately after plugging it in? This behavior can provide clues.
How to Prevent Immediate Shutdowns in the Future
Preventing future problems involves regular care and maintenance. By following these steps, you can greatly reduce the likelihood of your battery charger shuts off immediately. This includes regular maintenance and proper charging practices. This will help you protect both your battery and your charger, saving you time and money. Here are some actions you can take to prevent the problem from happening again.
- Use the Right Charger: Always use the correct charger for your battery type and voltage. Using the wrong charger can damage the battery and the charger.
- Regular Maintenance: Clean the battery terminals regularly to prevent corrosion buildup. This ensures good connections and helps your charger work efficiently.
- Avoid Deep Discharges: Try not to completely drain your battery. Deep discharges can cause damage and reduce the battery’s life. Charge your battery before it reaches a critically low level.
- Storage Tips: If you are storing your battery for a long time, charge it fully before storing it. Store it in a cool, dry place. Charge the battery every few months to maintain its charge.
- Check for Damage: Examine your charger and battery for any signs of damage regularly. Replace damaged parts immediately. This is vital to prevent electrical hazards and potential safety issues.
Frequently Asked Questions
Question: Why does my charger shut off as soon as I plug it in?
Answer: There are many reasons, including a bad connection, a damaged battery, or a faulty charger. A short circuit, low voltage, or the charger’s safety features might also trigger the shutdown. Check connections and battery condition.
Question: Can a bad battery cause a charger to shut down?
Answer: Yes, a damaged or old battery is a common culprit. Internal short circuits, sulfation, or being deeply discharged can all cause the charger to shut down for protection. Check the battery’s voltage and condition.
Question: What if my charger is hot when it shuts off?
Answer: Overheating is a sign of a problem, such as excessive current draw, an overloaded charger, or poor ventilation. Let the charger cool down, and check for any obstructions to airflow. If it keeps overheating, the charger may be faulty.
Question: How do I know if the charger is the problem?
Answer: Try using a different charger with your battery. If the other charger works, your original charger is likely the problem. You can also test the charger’s output voltage with a multimeter. Also, check to see if the charger is in working order.
Question: Can I fix a charger that shuts off immediately?
Answer: The fix depends on the cause. Loose connections are usually an easy fix. More complex problems, such as internal charger issues, may require professional repair or replacement. It’s always important to consider your safety first.
Final Thoughts
When a battery charger shuts off immediately, it can be frustrating, but the solution often comes down to basic troubleshooting. By methodically checking connections, evaluating the battery’s condition, and understanding the charger’s safety features, you can solve the problem. Often, a simple adjustment can get your charger working. Now, you should be able to approach this issue with confidence. If you’ve ruled out the common causes, it may be time to consult a professional. With the right approach, you can restore power to your devices quickly and safely.