What Amp to Charge Car Battery? A Simple Guide for You
Figuring out what amp to charge car battery can seem tricky at first, especially if you’re new to car maintenance. It’s a common question because using the wrong charger settings can damage your battery or take ages to charge it. Don’t worry, though! It’s actually pretty easy once you know a few key things. This guide will break down the process step-by-step so you can easily and safely charge your car battery. Let’s get started!
Choosing the Right Charger and Amp Setting
Selecting the correct charger and setting the appropriate amperage is the first step when you’re charging your car battery. This involves understanding your battery’s needs and the capabilities of your charger. A good charger will have different settings for different battery types and charging speeds. You need to identify your battery type and size to ensure you are charging it correctly. Doing this helps protect the battery from damage and ensures it charges effectively. A poorly chosen charger can lead to an undercharged or overcharged battery, reducing its lifespan. Knowing the right charger and settings is like choosing the right fuel for your car—it’s important for optimal performance.
Understanding Your Car Battery
Car batteries aren’t all the same, and knowing yours is the first thing you must do. Look for the battery’s specs. These can usually be found on the battery itself or in your car’s manual. The specs will tell you about the battery’s voltage (usually 12 volts for cars) and its capacity, which is measured in Amp-hours (Ah). The Ah rating shows how much current the battery can deliver over a certain period. Knowing this helps you pick the right charger and amperage. For example, a bigger battery might need a higher amp charger. Checking this information makes the charging process safer and more effective. It also prevents the battery from damage.
- Battery Type: There are different kinds of car batteries, like flooded lead-acid, AGM (Absorbent Glass Mat), and gel batteries. Your charger must be compatible with your battery type, or it might not charge correctly. Using the wrong charger type could be dangerous.
- Amp-hour Rating: This is a number, like 60Ah or 80Ah, that shows how much power the battery can store. A higher Ah rating means the battery can deliver more power and needs a slightly different charging approach. Knowing this helps you determine charging time.
- Voltage: Car batteries typically operate at 12 volts. Make sure your charger is set to the correct voltage. Using the wrong voltage can severely damage the battery.
- Battery Age and Condition: An old or damaged battery might not charge as efficiently as a new one. Examine the battery terminals for corrosion or damage. If the battery is very old, it may be time for a replacement instead of charging.
Selecting the Proper Charger
Picking the correct charger is as important as knowing your battery. You can find many chargers at auto parts stores or online. Look for a charger that is compatible with your battery type. Modern chargers often have smart features. They can sense the battery’s condition and adjust the charging rate. This feature prevents overcharging. Chargers are available in different amperage ranges. Choose a charger with settings that match your battery’s needs. A charger with a slow charging option is great for letting your battery recharge gently. This is very good for preserving the battery’s health. A fast charger is useful if you are in a hurry, but it’s best to use it only when needed.
- Charger Types: Choose from smart chargers, trickle chargers, and fast chargers. Smart chargers are generally best, as they automatically adjust the charging rate. Trickle chargers deliver a small current over a longer time. Fast chargers provide a quick charge but might be harmful to the battery if used too frequently.
- Amperage Settings: Chargers have an amp setting, often adjustable. For most car batteries, a slow charge is safer. The general rule is to charge at a rate of 10% of the battery’s Ah rating. For instance, a 60Ah battery can be charged at 6 amps.
- Safety Features: Good chargers have safety features like reverse polarity protection and overcharge protection. Reverse polarity protection prevents the charger from operating if the clamps are connected incorrectly. Overcharge protection stops the charger once the battery is full, which prevents damage to the battery.
- Charging Modes: Some chargers have different modes for different battery types and conditions. Use the appropriate mode for your battery to optimize charging. Always read the charger’s manual to understand its features and settings.
Determining the Correct Amperage
Picking the right amperage to charge your car battery ensures your battery charges efficiently. It also protects it from damage. Amperage is the rate at which the charger delivers electricity to the battery. The right amperage depends on the battery’s capacity (Ah rating) and the charger’s capabilities. A low amperage setting is best for preserving battery health, but it takes longer. A higher amperage setting charges the battery faster, but there are risks. Overcharging can damage the battery. The goal is to strike a balance between speed and battery safety.
Calculating the Charging Rate
To determine the proper amperage, use the 10% rule. This means you should charge your battery at a rate that is 10% of its Amp-hour (Ah) rating. For example, if your car battery has a 60Ah rating, you should charge it at 6 amps. This rate allows for a safe and effective charge, reducing the risk of overheating or damaging the battery. This method is a general guideline. Some chargers have settings that let you adjust the amperage based on your specific battery’s condition. Using the correct amperage extends the life of your battery and ensures it performs optimally.
- 10% Rule: This is a simple guideline. Divide the battery’s Ah rating by 10 to find the recommended charging amps. Following this guideline helps protect the battery from damage.
- Battery Size: Larger batteries (with higher Ah ratings) can handle higher charging rates. Always check the charger’s instructions and your battery’s specifications to ensure compatibility. This information is usually found on the battery itself or in your car’s owner’s manual.
- Charger Settings: Most chargers have different amp settings. Choose the setting that matches the 10% rule. Some smart chargers adjust the charging rate automatically, which removes the guesswork.
- Charging Time: Charging time depends on the battery’s condition and the amperage used. A lower amperage means a longer charging time, but it’s gentler on the battery. A higher amperage means a shorter charging time.
Adjusting Amperage for Different Battery Types
The type of battery you have can also affect the amperage you should use. AGM (Absorbent Glass Mat) and gel batteries are common. These batteries often have specific charging requirements. They may need a different voltage or amperage than standard flooded lead-acid batteries. Always consult the battery’s manufacturer’s instructions. This is important when setting the amperage. Using the wrong settings can harm the battery. Many modern chargers have settings for different battery types. This makes it easier to match the charger to your battery’s needs. Always check the battery’s label or your car’s manual to get the most accurate charging information.
- AGM Batteries: AGM batteries often require a slightly higher charging voltage than standard batteries. They also typically charge at the 10% rate of their Ah rating. Consult the manufacturer’s instructions for the best results.
- Gel Batteries: Gel batteries are sensitive to overcharging. Use a charger designed for gel batteries, and follow the manufacturer’s instructions. They may require lower charging rates and specific voltage settings.
- Flooded Lead-Acid Batteries: These are the most common type. They generally charge well with the 10% rule. It’s always good to check for any special instructions.
- Smart Charger Settings: Use the charger’s settings for the correct battery type. This ensures that the charging process is safe and efficient. Always follow the manufacturer’s directions.
The Charging Process: Step-by-Step Guide
Charging your car battery safely and effectively requires following a specific procedure. This helps avoid accidents and ensures your battery charges correctly. The process starts with preparing your battery and charger. You then connect them properly and monitor the charging process. Always make sure you’re in a well-ventilated area to avoid the buildup of dangerous gases. Check and double-check your connections before you start charging. Regularly check on the battery as it charges.
Preparing for Charging
Before connecting the charger, take several important precautions. First, find a well-ventilated area. Charging batteries can release gases, so fresh air is essential. Examine the battery and charger. Look for any signs of damage. Make sure the battery terminals are clean. If there is corrosion, clean them using a brush and a baking soda and water solution. This will ensure good electrical contact. Then, set the charger to the correct voltage and the amperage according to the guidelines discussed earlier. By doing this, you’re setting the stage for a safe and effective charging experience. Neglecting these steps can lead to problems.
- Location: Charge the battery in a well-ventilated area, away from sparks and flames.
- Safety Gear: Wear safety glasses and gloves to protect yourself.
- Terminal Cleaning: Clean battery terminals using a wire brush and a solution of baking soda and water. Make sure the terminals are clean so that they can establish good electrical contact.
- Charger Inspection: Inspect the charger for any damage to the cables or clamps.
Connecting the Charger
Connecting the charger to your car battery requires care to avoid sparks or incorrect connections. First, turn off the charger. Then, connect the positive (red) clamp to the positive (+) terminal of the battery. The positive terminal is usually marked with a plus sign (+). Next, connect the negative (black) clamp to a good ground on the car chassis, such as a metal part away from the battery. Never connect the negative clamp directly to the negative (-) terminal of the battery, as this can create sparks. Once connected, plug in the charger and turn it on. Following this procedure protects you and your car’s electrical system and ensures a good connection. Double-check all connections before starting the charger.
- Clamp Placement: Connect the red clamp to the positive (+) terminal. Connect the black clamp to a metal part of the car’s frame, away from the battery.
- Charger On/Off: Always turn the charger off before connecting or disconnecting the clamps. This reduces the risk of sparks.
- Check Connections: Make sure the clamps have a secure connection to the battery terminals or chassis ground.
- Charger Settings: Verify that the charger is set to the correct voltage and amperage.
Monitoring and Disconnecting
Once the charger is running, keep an eye on the process. Many smart chargers have indicator lights that show the charging status. Check the battery’s temperature from time to time; it should not get too hot. If you notice any unusual noises or smells, immediately turn off the charger. Once the battery is fully charged (the charger will usually indicate this), turn off the charger and unplug it from the outlet. Then, remove the clamps in reverse order. Remove the black clamp from the car chassis first, then the red clamp from the positive (+) terminal of the battery. Taking these steps allows you to safely disconnect the charger and use your fully charged battery.
- Charging Time: Charging time varies depending on the battery’s condition and the amperage used.
- Temperature Check: Check the battery temperature during charging. It should not be excessively hot.
- Status Indicators: Use the charger’s status indicators to monitor the charging progress.
- Disconnecting: Turn off and unplug the charger before removing the clamps. Remove the negative (black) clamp first, then the positive (red) clamp.
Understanding Battery Health and Maintenance
Understanding battery health and routine maintenance is key to keeping your car starting reliably. Batteries don’t last forever. They gradually lose their ability to hold a charge over time. Regular care extends the battery’s life and prevents unexpected failures. This involves routine checks, proper charging practices, and an understanding of the factors that affect battery performance. Regular attention to your battery can prevent trouble and help keep your vehicle running smoothly. A little bit of maintenance can go a long way.
Recognizing Signs of Battery Trouble
Recognizing the signs of a failing car battery can prevent you from getting stranded. The most obvious sign is a slow engine crank when starting your car. This suggests the battery doesn’t have enough power. Other signs include dim headlights, especially when the engine is idling. Also, electrical accessories like the radio or power windows might function slowly. Another indicator is the “check engine” light coming on, which can sometimes indicate a battery problem. If your battery is more than three to five years old, it’s more likely to fail soon. Knowing these indicators can help you diagnose issues and take timely action, like charging or replacing the battery, to avoid disruptions.
- Slow Cranking: The engine takes longer than usual to start.
- Dim Headlights: Headlights dim, especially when the engine is idling.
- Electrical Issues: Power windows, radio, and other accessories function slowly or erratically.
- Warning Lights: The “check engine” light may come on.
- Battery Age: Batteries over three to five years old are more prone to failure.
Battery Maintenance Tips
Regular battery maintenance is essential for good performance. Keep your battery terminals clean. Corrosion can affect the connection. Use a wire brush and a baking soda and water solution to remove any buildup. Ensure the battery is securely mounted in the car. Vibration can damage the battery. Check the battery’s water level (if it’s a flooded lead-acid battery) and top it up with distilled water if needed. Avoid letting your battery completely discharge. Deep discharges can shorten the battery’s life. Regular maintenance ensures your car starts reliably. Following these maintenance tips saves you money and trouble.
- Terminal Cleaning: Clean corrosion from battery terminals regularly.
- Secure Mounting: Make sure the battery is securely mounted in its tray.
- Water Level: If your battery is a flooded lead-acid type, check and top up the water level.
- Avoid Deep Discharges: Try to avoid letting the battery completely discharge.
- Regular Charging: Charge the battery regularly, especially if you don’t drive your car often.
Alternative Charging Methods and Considerations
There are different ways to charge your car battery beyond using a standard charger. Jump-starting is a quick solution for a dead battery. Solar chargers are an eco-friendly option for maintaining the battery charge. Each method has pros and cons. Understanding these alternatives will give you more flexibility. Knowing what option works best for your situation can be very helpful.
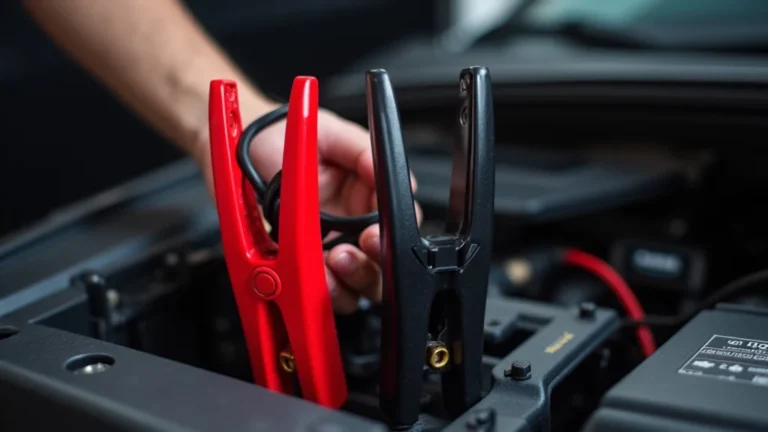
Jump-Starting Your Car
Jump-starting your car is a way to get your car running when the battery is dead. This requires another car with a good battery and a set of jumper cables. Connect the red clamp to the positive (+) terminal of the dead battery and the other red clamp to the positive (+) terminal of the good battery. Then, connect the black clamp to the negative (-) terminal of the good battery and the other black clamp to a metal ground on the disabled car (away from the battery). Start the good car and let it run for a few minutes. Then, try starting the car with the dead battery. Once the car starts, disconnect the cables in reverse order. After jump-starting, the car should be driven for a while to allow the alternator to recharge the battery. This method is convenient. But, it is not a long-term solution. It’s important to figure out why the battery went dead.
- Safety First: Wear safety glasses and gloves.
- Cable Connection Order: Connect the cables in the correct order (positive to positive, negative to ground).
- Start the Good Car: Run the good car’s engine for a few minutes before trying to start the dead car.
- Reverse Disconnection: Disconnect the cables in reverse order.
- Drive After Jump: Drive the car for at least 30 minutes to help recharge the battery.
Solar Chargers and Trickle Chargers
Solar chargers and trickle chargers offer alternative methods for keeping your car battery charged. Solar chargers use sunlight to generate electricity. This is a green and sustainable way to maintain a battery’s charge. Trickle chargers deliver a small current over a long period. These are useful for cars that are not driven very often. Both are good for maintaining battery health. Solar chargers are best used in sunny locations. Trickle chargers are ideal for long-term storage or periods of infrequent use. They both prevent your battery from draining. This makes them good choices for vehicle owners. They extend the life of your battery and provide a steady source of power.
- Solar Chargers: Use sunlight to generate a small current.
- Trickle Chargers: Deliver a small, constant current over time.
- Maintenance: Solar chargers require minimal maintenance. Trickle chargers may need periodic checks.
- Use Cases: Useful for cars stored for long periods.
- Environmental Impact: Solar charging is environmentally friendly.
| Feature | Standard Charger | Jump Start | Solar Charger | Trickle Charger |
|---|---|---|---|---|
| Purpose | Full Battery Charge | Immediate Start | Maintain Charge | Maintain Charge |
| Charging Time | Several Hours | Instant Start, Requires Driving | Slow, Dependent on Sunlight | Slow, Constant |
| Convenience | Needs Power Outlet | Needs Another Car | Needs Sunlight | Needs Power Outlet |
| Sustainability | Dependent on Electricity Source | N/A | Eco-Friendly | Dependent on Electricity Source |
Frequently Asked Questions
Question: What happens if I charge my car battery at a higher amp than recommended?
Answer: Charging your car battery at a higher amp than recommended can cause the battery to overheat, potentially damaging it and shortening its lifespan. In severe cases, it could even lead to battery explosions or acid leaks.
Question: Can I leave my car battery charging overnight?
Answer: It’s generally not recommended to leave a car battery charging overnight with a standard charger, especially if it doesn’t have automatic shut-off features. Overcharging can damage the battery. Smart chargers are safe and designed for extended charging.
Question: How long does it take to charge a car battery?
Answer: The time it takes to charge a car battery varies. It depends on the battery’s size, its current charge level, and the amperage of the charger. A slow charge can take several hours, while a fast charge might take an hour or two.
Question: What is a smart charger?
Answer: A smart charger is a charger that monitors the battery’s condition and adjusts the charging rate automatically. It prevents overcharging, making it safer and more efficient. It also often has different charging modes for different battery types.
Question: What do I do if my car battery won’t charge?
Answer: If your car battery won’t charge, first check the charger and connections. Ensure the clamps are properly connected and that the charger is working. If the connections are fine, the battery may be too damaged. It might be time to replace it. A professional inspection can help diagnose the issue.
Final Thoughts
Now you have a solid understanding of what amp to charge car battery, and you can confidently maintain your vehicle’s power source. You now know how to pick the right charger and how to determine the correct amperage for your battery. Remember to always prioritize safety. Ensure proper connections and ventilation. You’ve also explored the significance of regular battery maintenance and alternative charging methods, which gives you valuable skills. This information will help extend the life of your battery and keep your car reliable. Continue to learn about your car and practice these tips. You’ll keep your car running well for years to come!