How Long to Charge Car Battery With Charger: Simple Guide
Figuring out how long to charge a car battery with charger can feel tricky, especially if you’re new to car maintenance. Don’t worry, it’s easier than it seems! This blog post will help you break it down step-by-step. We’ll explore the basics, so you’ll know exactly what to do. Let’s get started and learn how to keep your car running smoothly.
Understanding Car Battery Charging Fundamentals
Knowing the basics of how car batteries work is key to keeping them in good shape. A car battery stores electrical energy, which it uses to start your car and power its electrical systems. When you start your car, the battery provides a burst of power to the starter motor, which turns the engine. Afterward, the alternator takes over, recharging the battery as you drive. Charging a battery involves sending electrical current back into it to restore its power. Different types of chargers and batteries have different charging needs. Ignoring these needs can result in problems like undercharging or overcharging, both of which can reduce battery life.
Battery Types and Charging Needs
Different car batteries need different types of chargers and charging times. The most common type of car battery is the lead-acid battery, which is generally found in older vehicles. Another type of battery is the AGM (Absorbent Glass Mat) battery, popular in newer cars. AGM batteries need specific chargers designed for them. It’s important to know your battery type to choose the right charger and to properly time the charging process. Using the wrong charger can damage the battery. Make sure you read your battery’s manual to find out what type it is. Incorrect charging methods often lead to a battery not holding a charge or even getting damaged.
- Lead-Acid Batteries: These are the most common type and are often found in older cars. They usually require a simple charger.
- AGM Batteries: Found in many newer cars, these batteries need special chargers to prevent damage.
- Lithium-Ion Batteries: Found in some electric vehicles (EVs) and hybrid cars, these require very specific chargers.
Lead-acid batteries are typically charged at a slower rate than AGM batteries. It is important to know the appropriate charging current for your lead-acid battery to avoid damage. The charging time can vary depending on the battery’s state of charge and the charger’s output.
AGM batteries require a charger specifically designed for AGM batteries. They also can charge faster than standard lead-acid batteries. The charger must have a specific charging profile to ensure the battery is not damaged. This profile includes a different voltage and charging algorithm, all designed for AGM batteries.
Lithium-ion batteries have a complex charging profile and need specialized chargers. They require precise voltage and current control for safety. Overcharging can be very dangerous. It’s important to use the correct charger to prevent any damage to the battery.
Charger Types and Their Impact
The type of charger you use also influences the how long to charge a car battery with charger process. There are several types, including trickle chargers, smart chargers, and fast chargers. Trickle chargers deliver a small current over a long time, suitable for maintaining a charge. Smart chargers analyze the battery’s condition and adjust the charging rate accordingly, making them safe and efficient. Fast chargers provide a higher current and charge the battery quickly, but they can damage the battery if used improperly. Choosing the right charger depends on the battery type and your needs.
- Trickle Chargers: These deliver a small current over a long period.
- Smart Chargers: These assess the battery’s condition and adjust the charging rate.
- Fast Chargers: These provide a higher current for quick charging, but require care.
Trickle chargers are best for maintaining a battery’s charge. They are designed for slower charging and prevent overcharging, which can damage the battery. They are good for batteries used in vehicles that aren’t driven frequently, such as seasonal cars.
Smart chargers use built-in technology to monitor the battery’s condition and adjust the charging process. This helps prevent overcharging and extends battery life. They are a safe and effective option, suitable for all battery types.
Fast chargers can quickly charge a car battery. However, they can potentially damage the battery if used incorrectly. It is important to monitor the charging process to ensure the battery does not overheat. Generally, they should only be used in specific situations and with caution.
Factors Affecting Battery Charging Duration
Several factors will impact the how long to charge a car battery with charger time. The size of the battery, its current charge level, the charger’s output, and the battery’s age all play a role. A larger battery takes longer to charge than a smaller one, simply because it holds more energy. A battery that’s deeply discharged will need more time to fully recharge. The charger’s amperage (the rate at which it delivers current) influences how quickly the battery charges. Lastly, an older battery may charge slower than a new one due to internal wear and tear. Therefore, knowing these elements helps you estimate the charging time more accurately.
Battery Size and Capacity
The size and capacity of your car battery have a big influence on the charging time. Battery capacity is usually measured in Amp-hours (Ah). This number tells you how much current the battery can deliver over time. A larger battery, with a higher Ah rating, will take longer to charge than a smaller one. For example, a battery with a 60 Ah rating will take longer to charge than a battery with a 40 Ah rating, given the same charger. The charger must supply enough current to recharge the battery fully.
- Amp-hour (Ah) Rating: Determines how much energy the battery can store.
- Battery Dimensions: Affect the physical size and charge requirements.
The Ah rating indicates the battery’s energy storage capacity. A higher Ah rating means the battery can supply more power for a longer time. A car battery with a higher Ah rating will naturally take longer to fully charge.
The physical size of the battery usually corresponds to its capacity. Larger batteries generally have a higher Ah rating, leading to a longer charging duration. The charging process also depends on the charger’s amperage, matched to the battery’s Ah rating.
State of Charge and Discharge Level
The current state of charge (SoC) of your battery and how deeply it is discharged directly impact the charging time. A battery that is nearly full will charge much faster than one that is completely drained. When a battery is deeply discharged, it needs a longer charging period to restore its full capacity. The discharge level refers to the percentage of the battery’s capacity that has been used. The charger’s ability to supply the correct current is essential to efficiently charge a deeply discharged battery.
- Percentage of Charge Remaining: How much energy the battery currently holds.
- Depth of Discharge (DoD): The extent to which the battery is drained.
A battery with a low percentage of charge needs more time to recharge. A fully discharged battery can take many hours to charge, even with a fast charger. This is because the charger needs to replace all the lost energy.
The DoD is the percentage of the battery’s capacity that has been used. Batteries that have been deeply discharged need longer charging times. Avoid deep discharges regularly. They can reduce the lifespan of the battery.
Charger Output and Charging Rate
The charger’s output, specifically its amperage, has a direct effect on the charging time. Amperage is the rate at which the charger delivers electrical current to the battery. A charger with a higher amperage will charge the battery faster than one with a lower amperage. However, it’s vital to match the charger’s output to the battery’s specifications. A charger that delivers too much current might damage the battery. Always check your battery’s specifications and the charger’s capabilities to make sure they are compatible. Keep the charger type in mind as well. Smart chargers can adjust the charging rate depending on the battery’s requirements.
- Amperage (Amps): The rate at which the charger delivers current.
- Voltage: The electrical potential difference the charger provides.
Higher amperage means faster charging. A charger with a higher amp rating will charge the battery quicker than a charger with a lower rating. However, it is essential to follow the battery manufacturer’s guidelines for safe charging.
The voltage of the charger must match the battery’s voltage for it to charge properly. Most car batteries are 12V. Make sure the charger is set to the correct voltage. Incorrect voltage can damage the battery or prevent it from charging.
Steps for Safe and Effective Battery Charging
To safely and effectively charge your car battery, you need to follow a few simple steps. Start by preparing your car and charger. Make sure the car is turned off, and in a well-ventilated area. Connect the charger correctly, typically positive to positive and negative to negative, ensuring the connections are secure. Once the charger is connected, set the correct voltage and amperage settings as per the battery’s recommendations. Then, monitor the charging process to prevent overcharging. Always disconnect the charger safely when the process is complete. Following these steps ensures your safety and protects your battery.
Preparing Your Car and Charger
Proper preparation is key to safe and effective battery charging. Park your car in a well-ventilated area, away from any potential sources of sparks or flames. Ensure the car is turned off and the key is removed from the ignition. Open the hood to access the battery terminals. Inspect the battery for any signs of damage or leakage. Check the charger for any damage as well. Before connecting the charger, read the charger and battery manuals. This way you’ll ensure you know the safe charging settings.
- Location and Ventilation: Choose a well-ventilated area.
- Safety Gear: Wear protective gloves and eyewear.
Charging a battery produces hydrogen gas, which can be explosive. Charging in a well-ventilated space helps disperse the gas. Avoid charging indoors without proper ventilation or near any sources of ignition.
Always use protective gear when handling car batteries. Gloves protect your hands from battery acid. Safety glasses shield your eyes from potential splashes or spills.
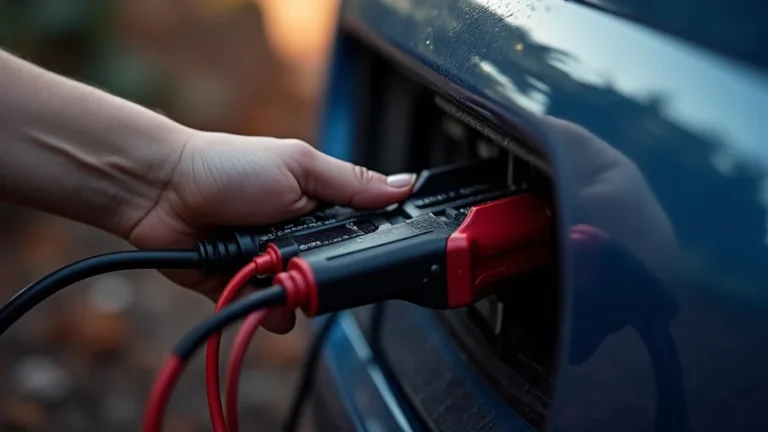
Connecting the Charger Correctly
Connecting the charger correctly is vital for both safety and effective charging. First, identify the positive (+) and negative (-) terminals on your car battery. The positive terminal is usually marked with a “+” symbol and is often red. The negative terminal is marked with a “-” and often black. Connect the positive (red) charger clamp to the positive terminal of the battery. Next, connect the negative (black) charger clamp to the negative terminal. Ensure the connections are tight and secure. Double-check all connections before plugging in the charger to the electrical outlet. Reverse connections can cause sparks and damage.
- Terminal Identification: Locate the positive and negative terminals.
- Clamp Placement: Ensure secure connections.
Incorrectly connecting the charger can lead to sparks and damage. Double-check the terminals before connecting the charger cables. Use the correct terminals on your charger to prevent any risks.
Loose connections can reduce charging efficiency and create heat, increasing safety risks. Make sure the clamps are firmly attached to the battery terminals to ensure a solid electrical connection. Clean any corrosion on the terminals before connecting the clamps.
Setting the Charger and Monitoring the Process
After connecting the charger, you need to set it up correctly and keep an eye on it. Check your car battery’s specifications to determine the correct voltage setting. Most car batteries use a 12-volt system. Set the charger’s amperage according to the battery’s capacity and the charger’s capabilities. For a lead-acid battery, a slower charging rate is generally better. Once the charger is set up, monitor the charging process regularly. Watch for any signs of overheating, swelling, or unusual noises. If something appears wrong, immediately disconnect the charger. Keep an eye on the charging time to avoid overcharging your battery.
- Voltage and Amperage Settings: Match settings to the battery’s needs.
- Charging Time and Monitoring: Regularly check the battery during charging.
Incorrect settings can damage the battery or prevent charging. Consult your battery and charger manuals for the right settings. Typically, lead-acid batteries will need a lower amperage setting than AGM batteries.
Monitor the battery for any unusual activity. Most chargers have lights or displays that indicate the charging status. Checking frequently helps identify any issues early, which can prevent battery damage.
Troubleshooting Common Charging Problems
You might experience some problems while charging your car battery. Not charging at all, slow charging, or the battery overcharging can occur. If the battery is not charging, check the connections and the charger itself. Make sure the charger is plugged in and the terminals are connected correctly. Slow charging might indicate a problem with the battery or the charger. Overcharging is another issue, which may result in battery damage. By recognizing and resolving these problems, you can ensure that your car battery remains healthy and reliable.
Battery Not Charging: Causes and Solutions
If your battery isn’t charging, there are several things you can explore. The first thing is to check the connections. Ensure the charger clamps are securely attached to the battery terminals. Make sure the charger is plugged into a working power outlet. If the charger has a fuse, check to see if it is blown. If the charger works on other batteries, the issue might be with the battery. The battery might be too deeply discharged, or it could have internal damage. If these steps do not work, it might be the charger that has gone bad.
- Connection Issues: Check charger connections.
- Charger Problems: Test the charger itself.
Loose or corroded connections prevent the charger from delivering power to the battery. Clean the terminals and ensure the clamps are attached tightly. Reconnecting the charger may fix the issue.
If the charger isn’t working, it cannot charge the battery. Make sure the charger is plugged in and powered. If there is a fuse, check it. Use a different charger to test your battery. This will help you know if the issue is with the charger or the battery.
Slow or Inefficient Charging: Potential Issues
Slow or inefficient charging might be caused by several factors. One common reason is a sulfated battery. This happens when the battery sits for a long time, and the lead sulfate crystals build up. Another issue could be a faulty charger. The charger might not be delivering the right amount of current. The battery itself might have internal damage, making it unable to take a charge efficiently. Check the battery’s age and health. An older battery will charge more slowly than a new one. Replace the battery if it is no longer working properly.
- Battery Condition: Assess the battery’s health.
- Charger Performance: Examine the charger’s output.
An older or damaged battery might charge slowly. A battery test can measure its capacity and health. If the battery is damaged, it may need to be replaced. Proper battery maintenance can extend the battery life.
A charger not delivering the correct voltage or amperage can cause slow charging. Check the charger’s settings and its performance with a multimeter. A faulty charger might need to be replaced.
Overcharging and Its Dangers
Overcharging a car battery is a serious issue that can damage the battery and create safety risks. Overcharging happens when the charger supplies too much current to the battery for too long. This causes the battery to overheat, potentially leading to explosions or leaks. Overcharging can also reduce the lifespan of the battery. The battery might become swollen or start to leak acid. Always follow the charging guidelines provided by the battery and charger manufacturers. Keep an eye on the charging process and disconnect the charger when the battery is fully charged.
- Heat and Swelling: Recognize the signs of overcharging.
- Reduced Battery Life: Understand the impact on battery longevity.
Overcharging causes excessive heat, which can lead to swelling. If you see the battery bulging or feel it is hot to the touch, disconnect the charger immediately. Continued overcharging can result in the battery exploding.
Overcharging degrades the battery’s internal components, which reduces its lifespan. Avoid overcharging by using the right charger and settings. Monitor the charging process. Always remove the charger once the battery is fully charged.
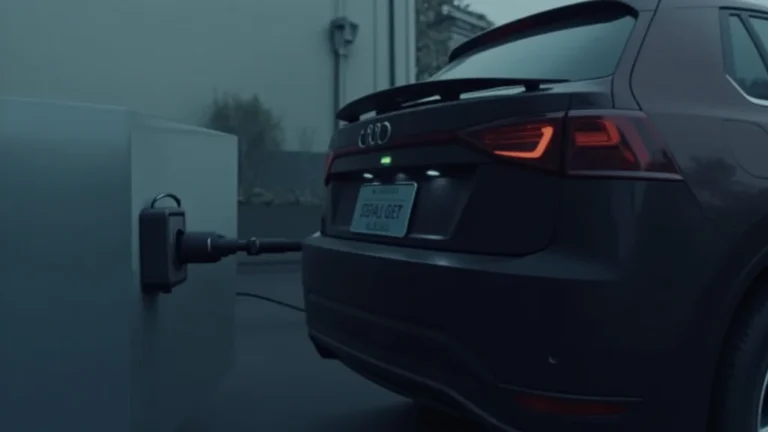
Alternative Charging Methods and Their Uses
In addition to standard chargers, there are alternative methods for charging a car battery that can be used. Jumper cables are a common temporary solution to get a car started, but they don’t fully charge the battery. Solar chargers offer a clean, eco-friendly way to maintain a battery’s charge, especially for vehicles parked outside. These methods can be helpful in different situations. Jumper cables are useful for a quick boost. Solar chargers work well for keeping a battery topped up. Using these methods may require knowing how they work.
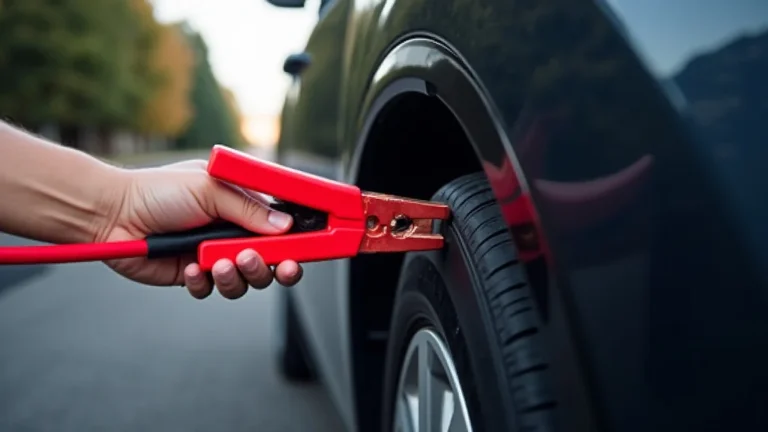
Using Jumper Cables for a Quick Boost
Jumper cables offer a quick way to start a car with a dead battery by using another car’s battery. Connect the red (positive) cable to the positive terminals of both batteries. Then, connect the black (negative) cable to the negative terminal of the working battery and the engine block or a metal part of the stalled car. Start the working car’s engine. Let it run for a few minutes. Then, try starting the car with the dead battery. After starting, run your car for at least 20-30 minutes so the alternator can recharge the battery. Remember, jumper cables don’t fully recharge the battery; they provide a starting boost.
- Prepare the Cars: Park both cars close together.
- Cable Connections: Connect the cables in the correct order.
- Starting the Car: Start the car with the dead battery.
Ensure the cars are close enough for the jumper cables to reach both batteries. Turn off the ignition of both cars before you start. Make sure the parking brakes are engaged.
Connect the red (positive) cable to the positive terminals of both batteries. Then, connect the black (negative) cable to the negative terminal of the working battery. Attach the remaining black clamp to a metal part of the car with the dead battery. Always keep a safe distance from both car batteries.
After connecting the cables, start the car with the working battery. Let it run for a few minutes to give the battery a small boost. Then, try to start the car with the dead battery. If it starts, let it run for a while to allow the alternator to charge the battery.
Solar Chargers for Battery Maintenance
Solar chargers use the sun’s energy to charge or maintain a car battery’s charge. They’re useful for vehicles that aren’t driven often, like seasonal cars. Place the solar panel where it can get direct sunlight. Connect the panel to the car battery. Most solar chargers connect directly to the battery terminals. Solar chargers provide a trickle charge, which helps prevent the battery from discharging. They’re eco-friendly and prevent battery problems by keeping the battery topped up. Always make sure the solar charger is compatible with your battery type.
- Panel Placement: Place the panel in direct sunlight.
- Connection to Battery: Connect the solar charger to the battery terminals.
- Battery Maintenance: Keep the battery charged and in good condition.
For the solar charger to work, it has to be in direct sunlight. Make sure there are no obstructions, such as trees. The more sunlight the panel receives, the better it works. Ensure the panel is securely placed to prevent it from moving.
Follow the manufacturer’s instructions for connecting the charger to your car’s battery. Most solar chargers connect directly to the battery terminals. Correctly connecting the charger will ensure safe and efficient charging.
Solar chargers offer a trickle charge. This helps maintain the battery’s charge. By maintaining the battery’s charge, solar chargers can extend its life. This is great for cars stored for extended periods.
How Long to Charge Car Battery With Charger: Examples
The charging time varies based on many things, such as the battery capacity, the charger’s output, and the battery’s condition. For example, a deeply discharged 60 Ah battery might take 12 to 24 hours to charge with a 2-amp charger. A 100 Ah battery could take even longer. A smart charger can adjust the charging rate. It may also take a little longer. It’s important to monitor the charging process and disconnect the charger when the battery is full.
| Scenario | Battery Capacity | Charger Amperage | Estimated Charging Time |
|---|---|---|---|
| Partially Discharged | 60 Ah | 6 Amps | 5-8 hours |
| Deeply Discharged | 80 Ah | 2 Amps | 24-48 hours |
| Standard Charge | 40 Ah | 4 Amps | 8-12 hours |
Frequently Asked Questions
Question: How can I tell if my car battery needs charging?
Answer: Common signs include slow engine cranking, dim headlights, and difficulty starting the car. You might also notice electrical problems.
Question: Can I charge a car battery in a garage?
Answer: Yes, but make sure the garage has good ventilation to prevent a buildup of hydrogen gas.
Question: What happens if I charge my battery too long?
Answer: Overcharging can damage your battery, causing it to overheat and potentially leak acid.
Question: Is it okay to leave a car battery charger connected overnight?
Answer: If you’re using a smart charger, it’s generally safe. However, always monitor the battery and charger.
Question: How often should I charge my car battery?
Answer: Charge your battery if you notice starting problems or if the car sits unused for long periods. You can also charge it regularly to maintain its health.
Final Thoughts
Knowing how long to charge a car battery with charger involves considering several factors, including the battery type, its size, its discharge level, and the charger’s output. Lead-acid batteries generally take longer to charge than AGM types, and a larger battery will take more time. A charger’s amperage directly impacts the charging speed. Following the proper steps, from preparing the car and charger to monitoring the charging process, will ensure that your battery is charged safely and efficiently. Always be alert for any potential problems like slow charging or overcharging, and take the necessary steps to fix these issues. By applying this information, you can keep your car battery in top shape, and extend its life, ensuring your car is ready to go whenever you need it.