Best Method for Starting a Vehicle When It’s Cold
The best way to jump start in winter can seem tricky, especially if you haven’t done it before. Cold weather can make your car’s battery less effective, meaning it might struggle to start. It’s a common problem, so don’t worry! This article will explain, step-by-step, how to get your car running again. We’ll cover everything you need to know, from getting the right equipment to staying safe. Let’s get started!
Understanding Why Jump Starting Is Needed in Winter
Winter brings challenges for your car’s battery. Cold temperatures can slow down the chemical reactions inside the battery that create electricity. This reduced performance makes it harder for the engine to start. Additionally, the engine oil thickens in the cold, making it more difficult for the engine to turn over. This means the battery needs to work harder than usual to get your car going. That’s why knowing the best way to jump start in winter is a valuable skill. Knowing how your car functions in cold weather can protect you and your car.
Battery Basics and Cold Weather Effects
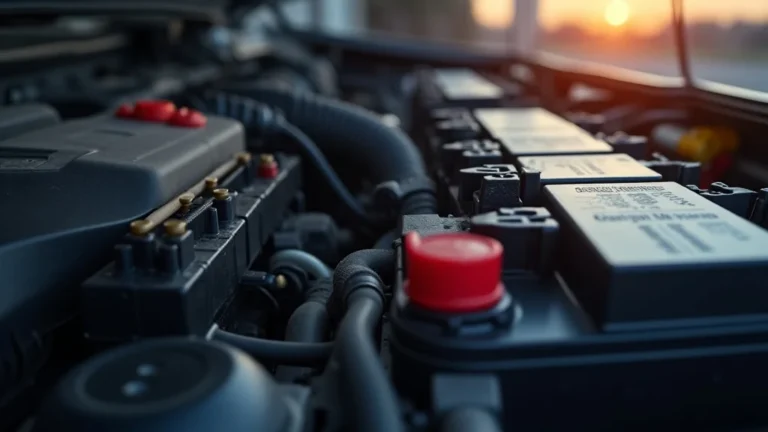
A car battery is a rechargeable storage device that provides electrical power to start the engine, run the lights, and power the various electronic components of your car. It works by converting chemical energy into electrical energy. The battery contains lead plates submerged in a sulfuric acid solution. When you turn the key, the battery releases energy to the starter motor, which then cranks the engine. However, when winter sets in, that changes. The chemical reactions within the battery slow down as temperatures drop. This means the battery produces less power. Also, the engine oil becomes thicker, which increases the load on the battery as the engine tries to start. Because of this, it is common to need the best way to jump start in winter to get your car back on the road.
- The Chemistry of Cold: Cold weather slows down the chemical reactions inside the battery. This means it produces less electricity. Think of it like a slow-motion version of what happens in warmer weather.
- Oil’s Thickening: Cold weather also thickens your engine oil. This makes it harder for the engine to turn over when you try to start it. This further stresses the battery.
- Battery Age Matters: An older battery is even more vulnerable in the winter. Its ability to hold a charge declines over time.
In cold temperatures, the chemical reaction rate in a car battery decreases. This is due to a reduction in the kinetic energy of the reacting molecules. The electrolyte, a mixture of sulfuric acid and water, becomes more viscous, impeding the movement of ions necessary for the chemical reactions. For example, at -18°C (0°F), a battery’s cranking power can be reduced by as much as 30-60% compared to its performance at 25°C (77°F). This decrease in power makes it harder for the engine to start because the starter motor requires more power to overcome the increased viscosity of the engine oil and the tighter tolerances of the engine components.
Engine oil’s viscosity increases as temperature decreases. The oil’s molecules move slower and clump together, creating more resistance. This thicker oil makes it harder for the engine to crank, requiring more power from the battery. When the temperature drops below freezing (0°C/32°F), the viscosity of engine oil can increase significantly. This is especially true for oils with a high viscosity index. The increased resistance can place a significant load on the battery and the starter motor, making it difficult to start the engine. This increased load is especially noticeable in engines that have not been adequately warmed up.
As batteries age, they lose their ability to store and deliver power efficiently. This is due to several factors. Lead sulfate crystals build up on the lead plates within the battery, reducing the surface area available for chemical reactions. The battery’s internal resistance increases, which causes it to lose power during discharge. Older batteries also experience corrosion and deterioration of the internal components. An older battery is also more likely to fail in cold weather compared to a new one. This is because the chemical reactions are already less efficient. The battery is struggling to maintain its performance in cold temperatures. An older battery might have a capacity that is significantly reduced compared to its original rating.
The Role of a Jumper Cable
Jumper cables, or jump leads, are essential tools for jump-starting a vehicle. They act as a temporary electrical bridge between the drained battery in your car and a working battery in another vehicle. This allows the working battery to supply the power needed to start the car with the dead battery. Think of the jumper cables as a lifeline, providing an external source of energy to your car. Understanding how to use the jumper cables is the core of jump starting.
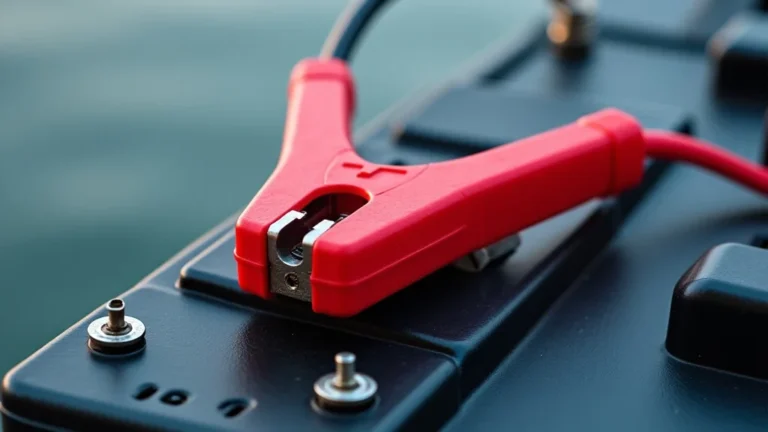
- Conductors of Energy: Jumper cables are made of thick copper wires. Copper is an excellent conductor of electricity, and the thickness ensures that it can handle the large amount of current needed to start a car.
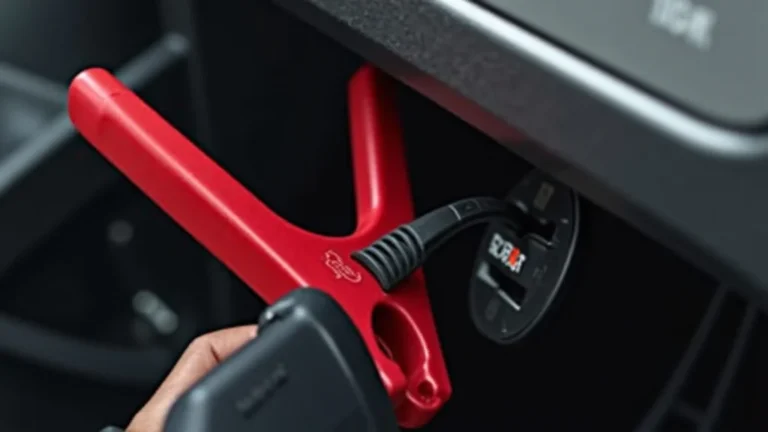
- Clamps and Connections: The clamps at each end of the jumper cables are designed to securely connect to the battery terminals. They are usually made of metal, providing a good electrical contact.
- Safety Features: Good jumper cables often have insulated handles and protective coverings on the clamps to reduce the risk of electric shock and short circuits.
The thick copper wires in jumper cables ensure a low resistance path for the high current flow required to start a vehicle. When the engine is cranking, the starter motor draws a substantial current, often exceeding 100 amps. A thinner wire would have a higher resistance. This would lead to excessive heat generation and a voltage drop, reducing the effectiveness of the jump start. High-quality jumper cables usually have a copper core that is stranded. This offers a balance between flexibility and current-carrying capacity. Properly sized cables are able to withstand the electrical load without overheating. This makes the jump start more efficient and safe.
The clamps on jumper cables are designed to provide a secure and reliable connection to the battery terminals. They’re typically made of sturdy metal, often coated with plastic or rubber for insulation and to prevent accidental shorts. The clamps should grip the terminals firmly. This is crucial for efficient power transfer. Poor connections can cause sparks, heat buildup, and a failed jump start. When connecting the clamps, it is important to ensure a clean contact surface on the battery terminals. Any corrosion or dirt can hinder the electrical flow. Make sure the clamps are making direct contact with the metal of the terminals. It may be needed to wiggle the clamps gently to get a good connection.
Safety features on jumper cables are important to protect users from electrical hazards and prevent damage to the vehicles. Insulated handles and clamp coverings prevent accidental contact with energized parts of the car. This reduces the risk of electric shock. The insulation can be made from various materials, such as PVC or rubber. These materials are chosen for their electrical resistance and durability. Some jumper cables include built-in fuses or circuit breakers to protect against overcurrent situations. Some cables use a color-coding system for the clamps, typically red for positive (+) and black for negative (-). This reduces the chance of incorrect connections, which could damage the vehicle’s electrical system.
Step-by-Step Guide for Jump Starting Your Car Safely
The best way to jump start in winter relies on following some clear, straightforward steps. Jump-starting your car doesn’t have to be hard. By following these steps, you can get your car started safely and effectively.
Gathering Your Supplies
Before you begin, gather the following: jumper cables, a vehicle with a working battery (the “donor” vehicle), and safety equipment. The more prepared you are, the faster and safer the process will be. Remember to bring gloves and a flashlight, especially if it is dark. Knowing these steps can help avoid issues during the jump start process.
- Jumper Cables: Make sure your jumper cables are in good condition. Check for any fraying or damage to the wires or clamps. Ensure that the clamps are clean and free of corrosion.
- Donor Vehicle: The donor vehicle should have a fully charged battery. The donor vehicle must be the correct voltage for your car (usually 12 volts). Make sure the donor vehicle’s battery is in good condition and is compatible with your car’s electrical system.
- Safety First: Put on safety glasses and gloves to protect your eyes and hands. If working in low light, use a flashlight. Consider wearing warm clothes in cold weather.
Good quality jumper cables are crucial for a successful jump start. Inspect the cable wires and clamps before use. Look for any signs of wear, such as exposed wires, cracks, or cuts in the insulation. These can cause shorts and create a safety hazard. Clean clamps are essential for ensuring a solid electrical connection. Use a wire brush or sandpaper to remove any corrosion or buildup. The cable should also be thick enough to handle the current required to start your car. Thin cables may overheat, reducing the effectiveness of the jump start. Also consider the length of the cables. Cables need to be long enough to reach from one car’s battery to the other, with enough slack to be easily connected and positioned safely.
Using a donor vehicle with a good battery is essential for a successful jump start. Check the donor vehicle’s battery to ensure it is in good condition and can supply sufficient power. A weak donor battery might not be able to provide enough current. This will make it difficult to start your car. It is important to match the voltage of the donor vehicle’s battery to your car’s. Most vehicles use a 12-volt system, but confirming this is wise. Using a donor vehicle with a higher voltage can damage your car’s electrical components. Position the donor vehicle close enough to your car so the jumper cables can reach the batteries. Ensure the donor vehicle is turned off during the connection process to avoid any potential damage.
Prioritizing safety during a jump start protects you from potential hazards. Wear safety glasses to shield your eyes from sparks or battery acid, and put on gloves to protect your hands from burns or electrical shock. When working in low-light conditions, use a flashlight. This enables you to see the battery terminals and make accurate connections. In cold weather, dress warmly. Wear layers to stay comfortable and maintain dexterity. Before starting, remove any jewelry and ensure loose clothing is tucked away. This reduces the risk of entanglement with the moving parts of the vehicles or electrical connections.
Connecting the Jumper Cables
Once you have gathered your equipment, it’s time to connect the jumper cables. Follow these steps carefully to ensure a safe and effective jump start. Connecting the cables in the right order and paying attention to safety is the key.
- Park and Position: Park the donor vehicle close to your car, ensuring they are not touching. Turn off both vehicles and engage the parking brakes.
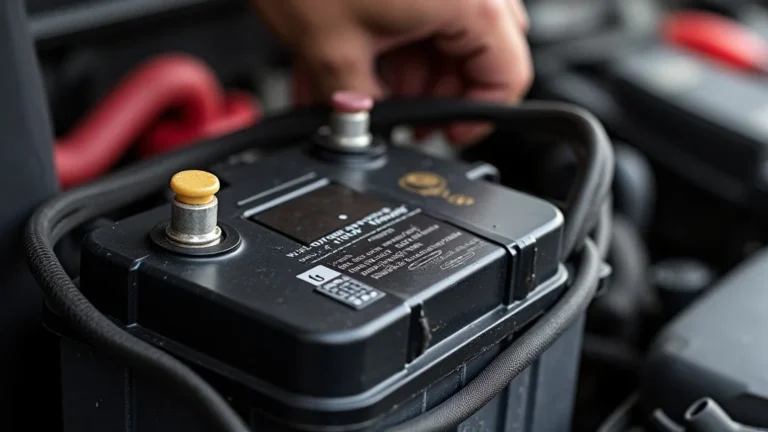
- Identify Terminals: Locate the positive (+) and negative (-) terminals on both batteries. The positive terminal is usually marked with a “+” symbol and is often red. The negative terminal is marked with a “-” symbol and is usually black.
- Connect the Cables:
- Connect the red (+) clamp to the positive terminal of the dead battery.
- Connect the other red (+) clamp to the positive terminal of the donor battery.
- Connect the black (-) clamp to the negative terminal of the donor battery.
- Connect the remaining black (-) clamp to a grounded metal surface on your car, away from the battery.
Start by connecting the red clamp to the positive terminal of the dead battery. Make sure the clamp is securely attached to the positive terminal. It is very important to avoid touching the metal parts of the car or any other wires while making this connection. A good connection at this point ensures that the jumper cables can transfer the required power from the donor vehicle’s battery to the dead battery. Always double-check that the clamp is securely in place to prevent accidental disconnection during the jump start.
After attaching the first red clamp to the positive terminal of the dead battery, attach the second red clamp to the positive terminal of the donor vehicle’s battery. Ensure that the red clamps are firmly attached to the positive terminals of both batteries. This step completes the connection of the positive side of the electrical circuit. If the connections are loose or poorly made, it can result in an incomplete circuit, preventing the flow of current. Taking the time to secure these connections properly can increase the chance of a successful jump start.
Once both red clamps are connected, connect one black clamp to the negative terminal of the donor battery. Ensure that the black clamp is securely attached to the negative terminal. This completes the electrical circuit for the jump start. This step often connects to the donor car’s negative terminal. But it is always best to double-check this step because this is how the circuit is completed.
The final step involves connecting the remaining black clamp to a grounded metal surface on your car. Avoid connecting it directly to the negative terminal of the dead battery. Connecting it to a grounded metal surface on your car reduces the risk of sparks near the battery, which can be a safety hazard. Look for an unpainted metal surface, such as a chassis bolt or a metal part of the engine. Connecting the cable to this surface provides a safe and effective grounding point. Before connecting, make sure the surface is clean to ensure a good connection. This step ensures that the circuit is completed safely.
The positioning of the vehicles is an important part of the jump start process. Park the donor vehicle close enough to your car that the jumper cables can easily reach both batteries. Ensure that the vehicles are not in contact to avoid any electrical issues. After parking, turn off both vehicles and engage their parking brakes. This prevents accidental movement. It is also good to open the hoods of both vehicles to access the batteries. Be certain the vehicles are in a well-ventilated area, especially if you are working indoors or in an enclosed space, to prevent the buildup of harmful fumes from the exhaust.
Identifying the positive and negative terminals is very important for a jump start. The positive terminal is typically marked with a “+” symbol and is often red. The negative terminal is typically marked with a “-” symbol and is often black. If the markings are unclear, consult the owner’s manual for your vehicle. Use this knowledge to properly connect the jumper cables. Incorrect connections can damage the vehicle’s electrical system. Be sure to check that the terminals are free of corrosion or buildup. A good, clean connection is very important for an effective jump start.
Starting the Vehicles
After connecting the jumper cables, you’re ready to start the cars. This requires a systematic approach. Carefully start each vehicle, allowing enough time for the jump start to work. Be prepared to deal with any potential issues that may arise during the starting process. Safety and patience are key here. Following these steps can help avoid issues during the jump start process.
- Start the Donor Vehicle: Start the donor vehicle and let it run for a few minutes. This allows the donor battery to provide some charge to the dead battery.
- Attempt to Start Your Car: Try to start your car. If it doesn’t start, wait a few minutes and try again.
- Successful Start: If your car starts, let it run for a few minutes to stabilize. Then, disconnect the jumper cables.
- Disconnecting Cables:
- Disconnect the black (-) clamp from the grounded metal surface on your car.
- Disconnect the black (-) clamp from the negative terminal of the donor battery.
- Disconnect the red (+) clamp from the positive terminal of the donor battery.
- Disconnect the red (+) clamp from the positive terminal of the dead battery.
After your car has started and is running smoothly, begin the process of disconnecting the jumper cables. The first step involves removing the black clamp from the grounded metal surface on your car. This is often an unpainted metal surface, like a chassis bolt or a metal part of the engine. Disconnecting this clamp first ensures that any residual current is safely discharged. This step is crucial for maintaining safety. When removing the clamp, be careful not to touch the metal parts of the vehicle or any other wires. Double-check to ensure there are no sparks when removing the clamp.
After removing the black clamp from the grounded metal surface on your car, disconnect the black clamp from the negative terminal of the donor battery. This step removes the final connection from the donor vehicle, disconnecting the circuit. Ensure the clamp is completely clear of the terminal to avoid accidental contact. Take care not to touch any other metal parts of the car. Make sure the clamp is fully disconnected before moving on to the next step.
Once you’ve removed the black clamps, it’s time to disconnect the red clamp from the positive terminal of the donor battery. Gently remove the red clamp. Make sure it is completely disconnected from the terminal. Again, be careful to avoid touching any metal parts or wires during the removal process. Remove this clamp once you have already disconnected the black clamp from the negative terminal. Make sure all clamps are clear of any metal parts and wires to prevent any short circuits.
The final step in the jump start process involves disconnecting the red clamp from the positive terminal of the dead battery. Make sure the engine is running and that the donor vehicle is no longer connected. This step completes the disconnection process, separating the vehicles. Check that the clamp is entirely clear of the terminal. Be very careful to avoid touching any metal parts of the vehicles or any wires. After removing the clamps, it is important to inspect the battery terminals and connections for any signs of damage or corrosion. If there is any damage, it is time to have your car checked by a mechanic. Remove the cables from the area. Make sure all the clamps are properly stored for future use.
Once the jumper cables are correctly connected, start the donor vehicle’s engine and let it run for a few minutes. This allows the donor vehicle’s battery to provide an initial charge to the dead battery. Running the engine at a slightly elevated idle speed (around 1,500-2,000 RPM) can help maximize the current transfer. Let the donor vehicle run for about 5-10 minutes. This gives the dead battery time to absorb some charge. Be aware of any unusual noises or smells from either vehicle. This might indicate a problem. Turn off all unnecessary electrical loads, such as the air conditioning or headlights, in both vehicles. This minimizes the drain on the batteries during the jump start process.
After the donor vehicle has been running for a few minutes, try to start your car. Turn the ignition key to the start position. If the engine turns over slowly or doesn’t start, let go of the key and pause for a few minutes before trying again. The engine may struggle to start right away, especially in cold weather. Be patient and give the dead battery a chance to absorb more charge. If the car still does not start after a few attempts, there might be another problem. These could include a severely discharged battery, a faulty starter, or a problem with the vehicle’s fuel system. Do not crank the engine for extended periods, as this can damage the starter motor.
If your car starts, let the engine run for a few minutes to stabilize and allow the alternator to begin recharging the battery. The alternator is responsible for charging the battery while the engine is running. Once the car is running smoothly, it is time to disconnect the jumper cables. Turn off all unnecessary electrical loads in your car, such as the headlights and the heater. This reduces the load on the alternator and helps it recharge the battery more efficiently. Once the car is running well, you can start the process of disconnecting the jumper cables.
After the Jump Start: What’s Next?
After successfully jump-starting your car, it is important to take several steps to maintain your vehicle and make sure the problem does not repeat. Ensuring you understand what to do after the jump start can save you trouble down the road. Addressing these issues can protect your car and prevent future issues.
Driving and Battery Recharging
After a successful jump start, the best way to jump start in winter is to keep the engine running for a while. This lets the alternator recharge the battery. Proper driving and charging practices can help prevent future battery problems. Keep your battery healthy by driving for longer distances. This lets the alternator replenish the charge to the battery.
- Driving Duration: Drive your car for at least 30 minutes after the jump start. This allows the alternator to fully recharge the battery.
- Avoiding Short Trips: Avoid frequent short trips. These don’t give the battery enough time to recharge.
- Monitoring Battery Performance: If your car struggles to start again soon, have your battery and charging system checked by a mechanic.
After the jump start, it’s very important to drive your car for an extended period, generally at least 30 minutes. This gives the alternator enough time to fully recharge the battery. Short trips may not give the battery enough time to regain the charge lost during the jump start. The alternator converts the engine’s mechanical energy into electrical energy. The alternator then provides power to the car’s electrical system and recharges the battery. Keeping the engine running for an extended time helps ensure that the battery reaches its full capacity. This avoids the risk of the car not starting again. During this time, it’s wise to limit the use of electrical accessories, such as the air conditioning, headlights, and the radio. This reduces the load on the alternator. This also allows the battery to recharge more efficiently.
Avoid taking frequent short trips after a jump start. Short trips do not allow the alternator enough time to fully recharge the battery. The battery may drain again, particularly in cold weather. The engine start requires a lot of power from the battery. Short trips deplete the battery’s charge. With short trips, the alternator may not have enough time to replace the energy that was used. This can cause the battery to become increasingly discharged over time. This can cause starting problems or even a complete battery failure. If your driving patterns mostly involve short trips, consider using a battery charger periodically to keep the battery in good condition.
It is important to pay attention to your car’s starting performance after a jump start. If the car struggles to start again soon after jump-starting, there might be an underlying problem with the battery. This could indicate a need for
Battery Maintenance and Prevention
Keeping your battery in good shape can help you avoid needing to jump start your car again. Battery maintenance is a key part of car care. Regular maintenance and preventative measures can help keep your battery healthy. You can avoid those frustrating cold-weather start-up issues.
- Battery Testing: Have your battery tested regularly, especially before winter. This can reveal any weaknesses.
- Terminal Cleaning: Clean the battery terminals regularly to prevent corrosion. This improves electrical conductivity.
- Battery Replacement: Replace your battery every 3-5 years, or as needed, to prevent unexpected failures.
Regular battery testing, especially before the winter season, helps you identify any weaknesses in your battery. Many auto parts stores offer free battery testing. This involves checking the battery’s voltage, cold-cranking amps (CCA), and overall health. These tests reveal any potential problems before they lead to starting issues. A weakened battery may struggle to start your car in cold weather. When the battery is tested, any problems with the charging system can be identified. These include a failing alternator or damaged wiring. A properly functioning charging system is essential for maintaining the battery’s health. Regular testing also allows you to plan for a possible battery replacement. This prevents a sudden failure. Addressing any identified issues can prevent unexpected starting problems and keep you on the road.
Cleaning the battery terminals on a regular basis is important to prevent corrosion. This corrosion can prevent your car from starting and lower the life of your battery. Battery terminals are prone to corrosion from acid fumes and environmental factors. Corrosion on the terminals can cause increased resistance. This prevents the flow of electricity. Cleaning the terminals ensures a solid connection. It prevents starting problems and ensures the battery is charged efficiently. Use a battery terminal cleaner or a mixture of baking soda and water to clean the terminals. Make sure to disconnect the battery cables before cleaning the terminals. Make sure the terminals are thoroughly dry before reconnecting the cables. Cleaning the terminals regularly will help your battery perform better and prevent unexpected starting issues. Proper terminal care can extend the battery’s lifespan.
Replacing the battery every 3-5 years, or as needed, prevents unexpected failures and ensures reliable starting performance. Car batteries have a limited lifespan. Over time, the internal components of the battery degrade, reducing its capacity to hold a charge. The performance declines. Replacing the battery regularly reduces the risk of being stranded due to a dead battery. Consider factors like climate, driving habits, and vehicle usage. These factors can affect the battery’s lifespan. If you frequently experience starting problems or notice the battery is slow to crank, it is time to replace the battery. Replacing the battery regularly also helps maintain your vehicle’s electrical system. This helps prevent damage to the starter motor and other components. Taking preventative action is important. This is one of the best ways to keep your car running smoothly.
Additional Considerations
The best way to jump start in winter also includes considering these important points. Addressing any underlying issues can avoid future problems. You can make sure your car is ready for the cold weather. Addressing these issues can protect your car and prevent future issues.
- Check the Alternator: If your car frequently needs a jump start, the alternator might not be charging the battery correctly. Have it checked.
- Inspect for Parasitic Drain: A parasitic drain is when something is drawing power from the battery even when the car is off. This can drain the battery over time.
- Consider a Battery Charger: A battery charger can help maintain your battery’s charge. It is especially useful if you don’t drive your car often.
If your car frequently requires jump-starting, it may indicate a problem with the alternator. The alternator is crucial for charging the battery while the engine is running. The alternator converts mechanical energy from the engine into electrical energy. The alternator then supplies power to the car’s electrical system and recharges the battery. If the alternator is not functioning correctly, it might not be charging the battery fully. This causes the battery to become depleted. If your car frequently needs jump-starting, take the car to a mechanic. They can inspect the alternator and charging system. They can identify and fix any issues that prevent the battery from charging. Ignoring issues with the alternator can lead to premature battery failure and more starting problems. Having the charging system in good condition ensures your car starts reliably.
A parasitic drain is when a vehicle’s electrical components continue to draw power from the battery, even when the car is turned off. This can discharge the battery overnight or over a few days. The drain can be caused by various issues, such as faulty wiring, malfunctioning electrical components, or aftermarket accessories. Identify the cause of the drain is important. To test for parasitic drain, use a multimeter to measure the current draw from the battery with the car off. The normal drain should be very low. If the draw is higher than expected, a mechanic can identify the source of the drain by disconnecting fuses. Identifying the parasitic drain and fixing the issue prevents the battery from discharging prematurely. This helps keep your car starting reliably.
Using a battery charger can help you maintain your battery’s charge and extend its lifespan. It is also especially helpful if you do not drive your car very often. Battery chargers provide a controlled electrical current to recharge the battery. This can prevent the battery from becoming discharged. This helps maintain the battery’s capacity and overall health. They are great for maintaining batteries. Smart chargers can monitor the battery’s condition and adjust the charging process to prevent overcharging. Consider using a battery charger, especially during periods of inactivity. This is especially true during winter. This ensures your car is ready to start when you need it. Regular charging helps maintain the battery’s performance and prevents starting issues. This can increase the lifespan of your battery.
Frequently Asked Questions
Question: What do I do if my car won’t start after a jump start?
Answer: If your car still won’t start, there might be a problem with your starter, the battery itself, or another electrical issue. You should have it checked by a mechanic.
Question: Can I jump start a car with a different voltage battery?
Answer: No, you should only jump start a car with a battery of the same voltage (usually 12 volts). Using a different voltage can damage your car’s electrical system.
Question: How long should I let the donor car run after connecting the cables?
Answer: Let the donor car run for about 5-10 minutes after connecting the cables. This allows the dead battery to get some charge.
Question: What if the jumper cables spark when I connect them?
Answer: Some sparking is normal, but if it’s excessive, disconnect the cables and check the connections. Make sure the clamps are making good contact and that the cables are connected in the correct order.
Question: How can I prevent my car battery from dying in the winter?
Answer: Keep your battery terminals clean, have your battery tested regularly, drive your car frequently for longer distances, and consider using a battery charger if you don’t drive often.
Final Thoughts
The best way to jump start in winter is about knowing the process. Remember, a cold battery and thick oil make starting harder, but with the right steps, you can get going. You’ve now seen how to connect the cables, start the cars, and what to do afterwards. Keep your battery healthy by driving it regularly and getting it checked. Keeping these points in mind helps ensure your car starts reliably, no matter the weather. Knowing how to deal with a dead battery can save you time and hassle. With a little care and preparation, your car will be ready for anything.