Trickle Charger Troubleshooting: Simple Fixes for Common Issues
Having a trickle charger not working can be frustrating, especially if you’re new to car maintenance. It’s a common problem because these chargers have several components, and sometimes things just don’t go as planned. Don’t worry, though; we’ll break down the most common issues step-by-step. This guide will walk you through easy solutions so you can get your battery charged again. We’ll look at the most typical issues to find out why your charger might not be doing its job. After exploring these points, we will look at how you can solve them!
Initial Checks When a Trickle Charger Is Inactive
When you discover your trickle charger isn’t working, the first steps are about the basics. Don’t immediately assume the worst; start with simple checks. Often, the solution is something easily fixed. Examining the power source, connections, and the charger’s indicators can often solve the problem. These initial checks will save you time and prevent unnecessary repairs. They help identify whether the issue is internal or external to the charger itself.
Power Supply Examination
The power supply is the lifeline of your trickle charger. A lack of power is the primary reason why a trickle charger won’t work. Start by ensuring the electrical outlet is functional. Plug another device into the outlet to verify it’s providing power. If the outlet is fine, check the charger’s power cord for any damage. Look for cuts, fraying, or any signs of wear and tear, which could interrupt the electrical flow. A damaged cord is a safety hazard and needs immediate attention.
- Outlet Functionality: Use a known working device, like a lamp or phone charger, to test the outlet.
- Power Cord Inspection: Carefully examine the charger’s power cord for any visible damage.
- Fuse Examination: Many trickle chargers have an internal fuse to protect against overloads.
- Extension Cords: If using an extension cord, ensure it’s rated for the charger’s power requirements.
If the lamp also doesn’t work, it confirms the outlet is the problem. If another device does work, move to the next step.
If you see damage, stop using the charger immediately. Replace the cord or the entire charger for safety.
Check your charger’s manual to see if it has a
A low-rated extension cord can’t provide enough power. Use a cord that’s the correct gauge.
A simple test with a multimeter can confirm if power is reaching the charger. This tool helps detect voltage problems. If you’re comfortable with electrical devices, you can use the multimeter to check the charger’s input voltage. This confirms the power supply is operating as intended. It also points to the next set of checks if there are still issues.
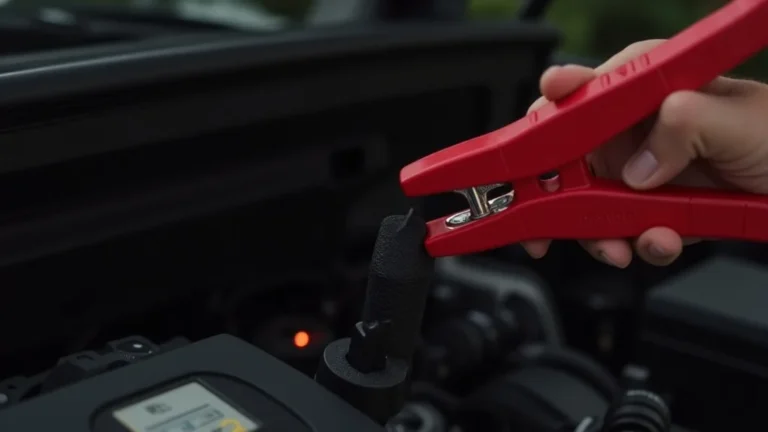
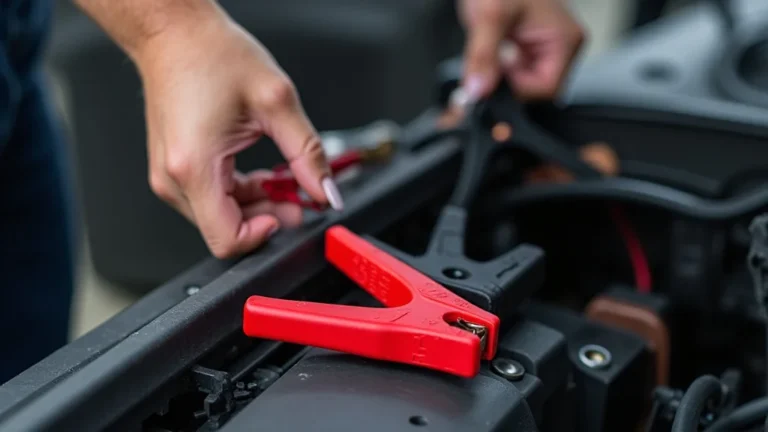
Connection Inspection
Poor connections are another frequent reason for a non-functional trickle charger. Make sure the charger’s clamps are properly connected to the battery terminals. Ensure a firm grip on the terminals. Check for corrosion on both the clamps and the battery terminals. Corrosion acts as an insulator, preventing the charger from sending power to the battery. Loose or corroded connections can prevent the flow of electricity.
- Clamp Security: Ensure each clamp is firmly attached to its respective battery terminal.
- Terminal Corrosion: Examine the battery terminals and charger clamps for corrosion.
- Clamp Condition: Check the clamps for any physical damage, such as cracks or broken parts.
- Polarity: Double-check that the positive (+) clamp is connected to the positive terminal and the negative (-) clamp to the negative terminal.
Loose clamps may disconnect the circuit. Make sure each clamp is making solid contact with the terminals.
Corrosion forms a barrier to electrical flow. Clean the terminals and clamps thoroughly to ensure good contact.
Damaged clamps may not create a strong connection. Replace any damaged clamps immediately.
Incorrect polarity will prevent the battery from charging and may damage the charger.
Corrosion can build up over time due to battery acid fumes. This can severely affect electrical connections. The build-up is often visible as a white or bluish residue. Use a wire brush or baking soda solution to clean the terminals and clamps before connecting. Clean, reliable connections are vital for the trickle charger’s functionality. This ensures the full flow of electricity necessary for charging.
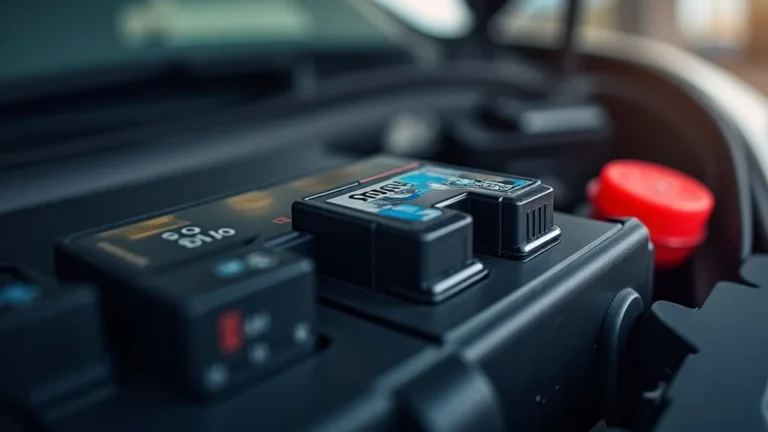
Investigating the Trickle Charger Itself
Once you have checked the power and connections, the issue might be with the charger. Sometimes internal components or settings can be the problem. The charger might have built-in safety features that have been triggered. Some chargers have indicator lights to show their status. Learning how these indicators work is helpful.
Visual Inspection of the Charger
Take a closer look at the trickle charger’s physical condition. Inspect for any signs of damage or wear. This means looking at the casing, the cord, and the clamps. Small damages could be a reason for the malfunction. These checks can help you figure out if the charger is safe to use. Visual inspection can reveal obvious problems that need attention.
- Casing Check: Look for cracks or damage to the charger’s casing.
- Cord Condition: Inspect the power cord and output cables for cuts, abrasions, or kinks.
- Clamp Integrity: Examine the clamps for corrosion, breakage, or loose connections.
- Ventilation: Make sure the charger’s vents are clear and free from obstructions.
Cracks can expose the internal components. Stop using the charger if damage is present to prevent injury or more damage.
Damaged cords can cause shorts or prevent power delivery. If there’s damage, replace the cord or the whole unit.
Faulty clamps won’t create a good electrical connection. Clean or replace any clamps that are damaged.
Restricting airflow can cause overheating. Ensure there’s enough space around the charger.
Overheating is a common problem in electronic devices. A blocked vent can cause overheating. This can lead to internal damage. Keeping the charger in a well-ventilated area ensures it operates efficiently. Inspecting the charger also means looking for any unusual smells. Burning smells suggest internal damage and require stopping use immediately. These inspections can prevent bigger problems.
Indicator Lights and What They Mean
Most trickle chargers have indicator lights that show their status. These lights are important for troubleshooting. Different light patterns mean different things about the charger’s operation. Learning what each light color and pattern represents helps to understand what the charger is doing. It can show whether the charger is charging, if there is a problem, or when the battery is fully charged.
- Power Indicator: Usually, a light to show the charger is getting power.
- Charging Indicator: Shows that the charger is actively charging the battery.
- Full/Charged Indicator: Indicates the battery has reached full charge.
- Error/Fault Indicator: Alerts if there’s a problem, like incorrect polarity or a faulty battery.
If this light is off, check the power source.
A solid light usually means charging. Flashing could indicate a problem.
This light means charging is complete.
If the error light is on, check the connections or the battery.
Check the charger’s manual to decode these lights. Manuals have detailed explanations of indicator light patterns and what they mean. Knowing the exact meaning of each light can make it easier to fix problems with your trickle charger. A blinking charging light can indicate that the battery has a problem. The lights can help you to know if the problem is with the charger or the battery.
Troubleshooting Common Trickle Charger Issues
Beyond the simple checks, more complex issues could be causing your trickle charger not working. This part explores these problems and offers solutions. These might involve the battery itself, the internal settings of the charger, or external factors. Taking these steps can help solve common issues and get your charger back to functioning properly. Troubleshooting should go beyond visual inspection.
Battery-Related Problems
The battery is a key part of the charging process. A faulty battery can prevent the charger from working correctly. Sometimes, the battery itself has issues. Batteries can have internal damage or be too old to hold a charge. Troubleshooting these problems can solve why the charger might not function. If the battery is the problem, the charger will not work right.
- Battery Condition: A very old or damaged battery might not accept a charge.
- Sulfation: Sulfation can build up on the battery plates, preventing charging.
- Internal Shorts: Shorts within the battery can stop the charging process.
- Voltage Level: Some chargers won’t start if the battery voltage is too low.
If the battery is old or appears swollen, it may need to be replaced. Check the battery’s age and overall condition.
Desulfation might solve this. But heavily sulfated batteries often need replacement.
Shorts cannot be fixed with trickle chargers. The battery will need to be replaced.
Try using a different charger to give the battery an initial boost. This may get the trickle charger going.
Use a multimeter to check the battery voltage. Low voltage could mean the battery is not receiving charge. If the battery is deeply discharged, the trickle charger may not activate. Sometimes, using a higher-powered charger to start the process is necessary. This will prepare the battery for the slower trickle charge. Regular battery maintenance can help avoid these problems.
Charger Settings and Modes
Trickle chargers often have different settings. Using the wrong settings can lead to problems. Understanding the different modes and adjusting the settings can resolve issues. Modern chargers have automatic features that manage the charging process. Manual settings may be necessary in some cases.
- Voltage Selection: Check if the charger setting matches the battery voltage.
- Charge Mode: Some chargers have modes for different battery types (e.g., lead-acid, AGM).
- Automatic vs. Manual: Some chargers switch off automatically when the battery is full.
- Current Settings: Trickle chargers have adjustable current settings.
Common battery voltages are 6V and 12V. Using the wrong voltage can damage the charger or the battery.
Choose the correct mode for the battery type to ensure proper charging.
If the charger doesn’t turn off, it might be set to manual mode. This means it may keep charging, which could damage the battery.
Select the appropriate current setting for the battery’s size. Higher currents can charge faster but can also cause damage to the battery.
Read the charger’s manual to understand the settings and modes. Most chargers are designed to automatically detect the battery type. But setting the correct voltage and current is important. Knowing how to change these settings and their effects will make troubleshooting easier. It also will prevent damage.
External Factors and Environmental Conditions
The environment where the charger is used can affect its function. Extreme temperatures or moisture can cause problems. Keep the charger in a dry, protected place to prevent damage. External factors can interfere with the charging process. This section explores how to deal with the environmental conditions.
- Temperature: Extreme temperatures can affect the charger’s performance.
- Humidity: High humidity can cause corrosion and damage.
- Dust and Debris: Dust can clog vents and cause overheating.
- Power Surges: Power surges can damage the charger.
Use the charger in a moderate environment. Avoid very hot or cold locations.
Keep the charger away from excessive moisture. Store it in a dry location.
Clean the charger regularly to prevent dust buildup.
Use a surge protector to shield the charger from sudden voltage spikes.
The best setting for a trickle charger is a cool, dry place. Direct sunlight or extreme cold can affect the charger. Protect the charger from the elements. Regularly clean the charger and its surroundings. Power surges may cause permanent damage. Using a surge protector is a simple step to prevent this damage. Considering these external conditions will keep your trickle charger working longer.
Advanced Troubleshooting Steps
After you have tried the basic checks, more investigation may be required. This section goes into more advanced steps. These steps might need a multimeter or other tools. It also covers what to do if the initial tests don’t reveal the problem. These steps are more technical and may require some electrical knowledge.
Using a Multimeter for Diagnostics
A multimeter is an important tool for diagnosing electrical problems. It can test voltage, current, and resistance. It’s useful for finding where the power isn’t flowing. Use a multimeter to see if there is power coming into the charger. You can also use it to test the output of the charger.
- Input Voltage Test: Check if the charger is receiving the correct voltage from the outlet.
- Output Voltage Test: Verify the charger is sending the correct voltage to the battery.
- Continuity Check: Ensure that the charger’s internal circuits are intact.
- Component Testing: Test individual components like diodes or capacitors, if you are comfortable.
Set the multimeter to AC voltage and test the prongs of the power cord.
Set the multimeter to DC voltage and test the charger’s output leads (clamps).
Use the multimeter’s continuity setting to check the power cord and output cables for breaks.
Follow the charger’s service manual, if available.
If you don’t have experience using a multimeter, seek assistance from someone who does. Using a multimeter improperly can cause damage or injury. Knowing how to use it safely is essential for effective troubleshooting. A multimeter can identify problems not easily seen by eye. It can determine if there’s a short circuit or a broken component. This will help you to focus on the problem.
Testing the Charger Under Load
Sometimes, a charger will seem to work, but not when the battery is connected. This is where testing the charger under load comes in. Testing under load will simulate the real-world conditions. This means testing the charger while it’s connected to the battery. This test reveals the charger’s performance under actual use.
- Connect to Battery: Attach the charger to the battery terminals.
- Voltage Measurement: Watch the multimeter while the charger is working.
- Current Measurement: Use an ammeter to see the charging current.
- Temperature Check: Feel the charger for any signs of overheating.
Make sure the connections are secure and the polarity is correct.
The voltage should increase slightly as the charger works. If it does not, the charger may not be giving power.
The current may vary, but it should increase when it is charging. No increase may show a problem.
Overheating could mean the charger is not working correctly. If it’s too hot to touch, turn it off immediately.
Testing under load can identify if the charger is underperforming. A well-functioning charger will increase the battery voltage and charging current. Use a clamp meter to measure the current without disconnecting the leads. This measurement shows whether the charger is delivering the specified current. These checks will help identify problems under the actual conditions of use. This can prevent overcharging or undercharging.
When to Seek Professional Help
Some problems need a professional touch. There are times when it’s best to call an expert. If you have done all the checks and the trickle charger is not working, it’s time to consider professional repair. Electrical work can be dangerous, and some problems might need specialized skills and tools.
- Internal Component Failure: If you suspect a problem with the internal components.
- Safety Concerns: If the charger shows signs of damage.
- Complex Issues: If you’ve tried all troubleshooting steps without success.
- No Experience: If you’re not comfortable working with electrical devices.
Repairing the internal components requires some electrical knowledge and tools.
Do not risk using a damaged charger.
A professional will have the expertise to diagnose and fix the problem.
Safety is the most important thing. Get help if you are unsure.
A trained technician has the knowledge and equipment to diagnose the problem. They can safely open the charger and test components. Attempting DIY repairs on a complex issue can lead to more damage. This can also pose a risk of injury. Don’t hesitate to get help if you are uncertain. A professional can quickly diagnose and fix the issue. This saves time and ensures the charger is safe to use.
Real-Life Examples and Case Studies
Sometimes, real-life examples can help you understand how to solve problems. These stories show common issues. They also show how you can find and fix those problems. These are examples of what can go wrong and what was done to fix it.
- Case Study 1: The Dead Battery Blues
A driver left their car lights on overnight. The next morning, the car wouldn’t start. They connected their trickle charger but found it wasn’t working. The first check revealed that the outlet was fine. Then, they checked the clamps and battery connections. They cleaned the battery terminals and the clamps. This improved the connection. They also ensured the charger was set to the correct voltage. This simple cleaning and settings check fixed the issue, and the car started again after a few hours of charging.
- Case Study 2: The Charger That Wouldn’t Charge
A car owner noticed their trickle charger wasn’t showing any activity. After checking the power source and connections, the issue was still there. Using a multimeter, they checked the output voltage of the charger. They found that it wasn’t producing the right voltage. Further inspection revealed a blown fuse inside the charger. After replacing the fuse, the charger began to function normally. They found that a power surge had caused the fuse to blow.
These examples show that problems are often simple to solve. They emphasize the value of going step-by-step. They highlight the importance of careful checks and diagnostics. These stories show that sometimes it is a simple fix. In other cases, they can be a bit more complicated.
| Issue | Troubleshooting Steps | Outcome |
|---|---|---|
| Dead Battery | Check power, connections, battery terminals, correct voltage | Battery charged and car started |
| Faulty Charger | Inspect fuse, test output voltage, correct setting | Charger fixed and ready for use |
Frequently Asked Questions
Question: Why is my trickle charger not turning on?
Answer: Check the power supply (outlet and cord) and connections to the battery. The charger might also have a blown fuse or an internal fault. Review the indicators.
Question: Can a trickle charger damage my battery?
Answer: If used correctly, trickle chargers are safe. However, leaving a charger on a battery for too long can overcharge it. Make sure the charger has an auto shut-off function or remove it after the battery is charged.
Question: My charger has an error light. What does this mean?
Answer: The error light often means there is a problem with the connection or the battery itself. Check the connections and the battery voltage. You may need to replace a damaged battery.
Question: How do I know if my battery is fully charged?
Answer: Most trickle chargers have an indicator light that shows when the battery is fully charged. Refer to your charger’s manual for specific instructions on these indicators.
Question: Can I use a trickle charger on any type of battery?
Answer: Most trickle chargers can work with different battery types. But always check the charger settings. Confirm the charger is set for the correct battery type and voltage. This will prevent damage.
Final Thoughts
When your trickle charger isn’t working, you now have a step-by-step method to fix it. Start with easy checks. Look at the power and connections. Then, examine the charger itself for any visible problems. If the problem continues, explore the battery and consider its settings. If needed, move to advanced tests. Remember to follow safety steps. Also, don’t hesitate to ask for professional help if you are unsure. Knowing how to solve these problems will save you time and money. It also helps keep your battery in excellent shape. Now that you have these steps, you can troubleshoot issues. You can also solve the problems to make sure your battery is charged.