Battery Not Charging After Jump? Quick Fixes and Troubleshooting
It’s frustrating when your car won’t start, and you need a jump, only to find the battery not charging after jump. This happens more often than you think, especially for beginners. Don’t worry, it doesn’t always mean a huge problem! This post will walk you through the most likely causes and how to fix them. We’ll explore the basics of car batteries, explain the jump-starting process, and give you a simple, step-by-step plan to get your car running again. Let’s get started and solve this issue together!
Why Your Battery Might Not Charge After a Jump
When you give or receive a jump start, you expect your car to get going, and that the battery will start charging. However, several things can go wrong. Issues might range from simple, like loose connections, to more complex electrical problems. Many people don’t know the exact steps for jump-starting or the mechanics of a car battery. This section will explore the common reasons why a jump start might fail to fully charge your battery, equipping you with the knowledge to troubleshoot effectively. The goal is to identify why your battery not charging after jump and get you back on the road.
Faulty Connections and Their Impact
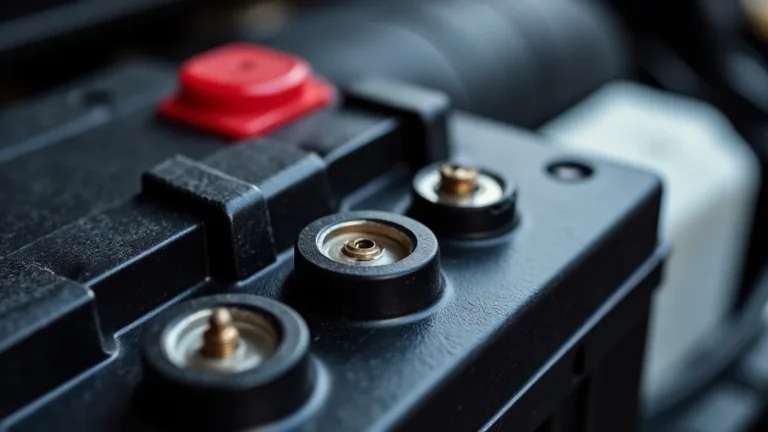
One of the most frequent reasons for a battery not charging after jump is poor connections. This includes loose or corroded battery terminals. These terminals are the points where the jumper cables attach to your car’s battery. If they’re not making a solid connection, electricity can’t flow correctly, and your battery won’t charge. Corroded terminals are often covered in a white or greenish substance, a sign of a chemical reaction. Loose connections can also be caused by wear and tear or incorrect tightening of the battery clamps.
- Corroded Terminals: Corrosion acts as an insulator, preventing the flow of electricity. Cleaning the terminals is key, as is a good connection.
- Loose Cables: If the cables aren’t properly secured, they can disconnect easily. This stops the charging process. Always make sure the clamps are tight.
- Incorrect Cable Placement: Putting the jumper cables on the wrong terminals (positive to negative or vice versa) can cause severe electrical damage. It can also prevent charging.
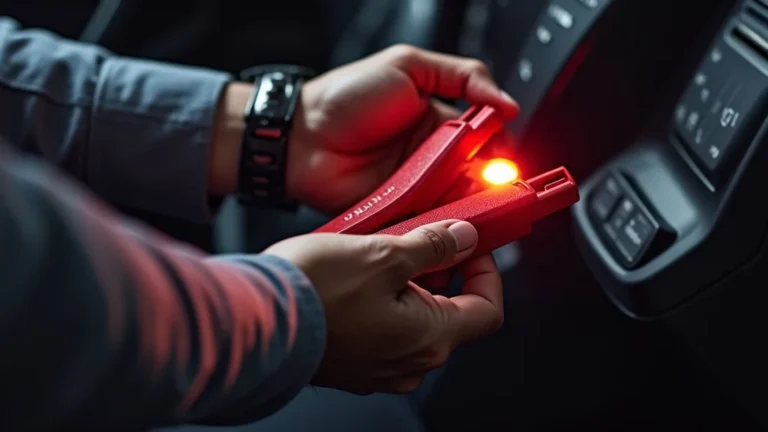
- Damaged Jumper Cables: Check your jumper cables for damage. Worn or broken cables will not be able to transmit power effectively.
The Role of the Alternator
The alternator is the car’s electrical generator, responsible for keeping the battery charged while the engine is running. After a jump start, the alternator should kick in and recharge the battery. If the alternator is faulty, the battery won’t charge, even if the car starts. A failing alternator can be caused by worn-out components, such as diodes or the voltage regulator. The voltage regulator controls the amount of power the alternator sends to the battery. If it fails, the battery might not receive enough power to charge properly. This is key if your battery not charging after jump is still an issue.
- Alternator Output: The alternator creates electricity to power the car’s electrical system. It is also needed for charging the battery. A defective alternator can’t perform these tasks.
- Voltage Regulator: The regulator is important in controlling the voltage output. If it malfunctions, the battery can be overcharged or undercharged.
- Diodes and Rectifiers: These components change alternating current (AC) to direct current (DC). They’re needed for charging the battery. Damage to these can cause charging issues.
- Belt Issues: The alternator needs a belt to spin and produce power. A loose or broken belt will prevent the alternator from working.
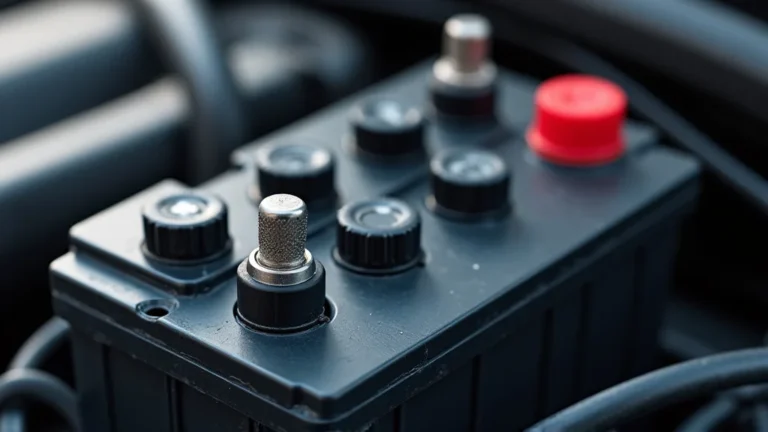
Battery Health and Internal Issues
Even if the connections and alternator are working, the battery itself could be the issue. Car batteries have a limited lifespan, typically a few years. Over time, the internal components can degrade, reducing their ability to hold a charge. Extreme temperatures, frequent deep discharges (like leaving your headlights on), and simple age impact a battery. If the battery is old or damaged, it might not be able to accept a charge, even after a jump start. A shorted cell inside the battery is another possible issue, preventing proper charging. The battery not charging after jump problem often boils down to the battery itself.
- Sulfation: This happens when sulfate crystals form on the battery plates. It prevents the battery from accepting a charge.
- Plate Damage: Over time, the internal plates of a battery can warp or break, reducing its capacity and ability to charge.
- Short Circuit: If the internal components touch, a short circuit can occur, preventing the battery from charging properly.
- Battery Age: As batteries age, they lose their ability to hold a charge. The older the battery, the more likely it is to have issues.
How to Troubleshoot If Your Battery Still Isn’t Charging
After a jump start, if your battery is still not charging, there are specific steps to follow. This includes checking connections, testing components, and identifying the root problem. The goal is to methodically identify the cause. Knowing how to troubleshoot helps to save time and money. Here are some key points to address the battery not charging after jump issue.
Checking the Basics
First, inspect the connections. Carefully examine both the positive and negative terminals on your battery for any signs of corrosion or loose connections. Make sure the jumper cables are correctly attached, and the connections are tight. Next, check the jumper cables themselves for damage. Ensure that the cables are the right size for your car. Finally, ensure the engine is running after the jump start to allow the alternator to recharge the battery.
- Inspect Terminals: Check for corrosion. Use a wire brush and baking soda/water mix to clean the terminals if needed.
- Tighten Connections: Make sure the clamps are tight and secure on both the battery terminals and the jumper cables.
- Check Jumper Cables: Look for any signs of damage. If the cables are damaged, replace them.
- Engine Running: After starting the car, let it run for at least 15-20 minutes. This allows the alternator to start recharging the battery.
Testing the Alternator
If the basics check out, test the alternator. You’ll need a multimeter for this, which is a device that measures voltage. Start the car and set the multimeter to the DC voltage setting. Place the black probe on the negative battery terminal and the red probe on the positive terminal. You should see a reading around 13.5 to 14.5 volts. This indicates the alternator is working correctly. A lower reading suggests the alternator is not charging the battery, pointing to a potential alternator problem. This test is key if your battery not charging after jump persists.
- Voltage Test: With the engine running, measure the voltage across the battery terminals. A healthy alternator should produce 13.5 to 14.5 volts.
- Load Test: Turn on electrical devices. This includes headlights and the air conditioner. The voltage should remain relatively steady. If it drops significantly, there might be an alternator problem.
- Alternator Belt: Check the alternator belt for cracks or wear. A slipping or broken belt can prevent the alternator from charging the battery.
- Professional Inspection: If you’re unsure, have a mechanic inspect the alternator. They have the equipment to perform a more thorough test.
Battery Testing Methods
To determine if the battery itself is at fault, you can conduct a few tests. One common method is to use a multimeter to measure the battery’s voltage. If the battery voltage is below 12.6 volts with the engine off, the battery may need replacing. You can also take the battery to an auto parts store. Most stores offer free battery testing. This will check its capacity and ability to hold a charge. If the battery fails these tests, it’s likely the cause of the battery not charging after jump issue.
- Voltage Check: Measure the voltage with a multimeter. A fully charged battery should read approximately 12.6 volts.
- Load Test: This is best done at an auto parts store. It simulates the load on the battery.
- Hydrometer: This device measures the specific gravity of the battery acid. This gives an idea of the battery’s charge.
- Battery Replacement: If the battery is old or fails the tests, it will need to be replaced.
Preventing Battery Charging Problems After a Jump
Prevention is key when it comes to battery issues. Regular car maintenance and knowing the right jump-starting practices can prevent the problem. This includes the correct use of jumper cables, keeping your battery clean, and regular testing. These practices reduce the likelihood of a battery not charging after jump situation.
Proper Jump-Starting Techniques
Always follow the correct jump-starting procedure to avoid damage and ensure the battery charges properly. First, park the cars close to each other, but ensure they don’t touch. Turn off both engines. Connect the red (positive) cable to the positive terminals on both batteries. Then, connect the black (negative) cable to the negative terminal of the good battery. Connect the other end of the black cable to a bare metal surface on the car with the dead battery, away from the battery itself. Start the working car and let it run for a few minutes before trying to start the car with the dead battery. Always be sure to disconnect the cables in the reverse order. Avoid touching the cables together.
- Park and Prepare: Position the cars safely and turn off both engines.
- Cable Connection: Connect the cables in the correct order, positive to positive, then negative to a metal ground.
- Start the Booster Car: Let the booster car run for a few minutes before attempting to start the dead car.
- Remove Cables: Remove the cables in the reverse order, ensuring they don’t touch each other.
Battery Maintenance and Care
Regular battery maintenance extends the battery’s lifespan. Keep the battery terminals clean, as previously discussed. Clean off any corrosion with a wire brush and a mix of baking soda and water. Check the battery’s water level in flooded batteries and add distilled water if needed. Avoid leaving electrical devices on when the engine is off. This can drain the battery. Check the battery’s voltage regularly with a multimeter. This is good preventative maintenance against a battery not charging after jump issue.
- Terminal Cleaning: Regularly clean the battery terminals to prevent corrosion.
- Water Level (Flooded Batteries): Check the water level and add distilled water if needed.
- Avoid Deep Discharges: Don’t leave lights or accessories on when the engine is off.
- Regular Testing: Use a multimeter to check the battery’s voltage periodically.
Regular Inspection and Testing
Make sure to regularly inspect your car’s battery and electrical system. Have a mechanic check the alternator and the battery during scheduled maintenance. Regular inspections can detect potential problems early. This allows you to address them before they lead to a situation where the battery not charging after jump. This includes checking the battery cables and the voltage regulator. Consider a battery test every six months. This will help maintain your car’s electrical health.
| Component | Frequency of Inspection | What to Check |
|---|---|---|
| Battery Terminals | Monthly | Corrosion, tightness of connections |
| Battery Voltage | Quarterly | Use a multimeter to measure voltage |
| Alternator Belt | During Oil Changes | Check for cracks or wear |
Frequently Asked Questions
Question: What if the car starts, but dies right after removing the jumper cables?
Answer: This often indicates the alternator isn’t working. The alternator is responsible for keeping the battery charged once the engine is running. If it’s not working, the car will run only as long as the battery has power.
Question: Can jump-starting damage my car’s electrical system?
Answer: Yes, improper jump-starting can cause damage. Incorrect connections or using the wrong type of cables can lead to electrical shorts. Always follow the correct procedures and use appropriate cables.
Question: How long should I leave the jumper cables connected before trying to start the car?
Answer: Let the working car run for a few minutes (around 5-10 minutes) with the cables connected before attempting to start the car with the dead battery. This allows the good battery to provide some charge.
Question: What’s the difference between a flooded and an AGM battery?
Answer: A flooded battery is a traditional battery with liquid electrolyte, while an AGM (Absorbent Glass Mat) battery has the electrolyte absorbed in a fiberglass mat. AGM batteries are generally more durable and can handle more deep discharges.
Question: How do I know if my battery is completely dead and needs replacing?
Answer: If the battery consistently fails to hold a charge, or it’s several years old, it’s likely nearing the end of its life. Battery testing at an auto parts store can confirm this, or you can perform a voltage test with a multimeter.
Final Thoughts
When you’re dealing with a battery not charging after jump, it can be a source of frustration, but with the right approach, you can fix it. Remember, it’s often a connection or alternator problem, or the battery itself. Take the time to troubleshoot, checking connections, testing the alternator, and assessing the battery’s health. By following these steps, you’ll be well on your way to getting your car back on the road. Don’t let a dead battery ruin your day – armed with this knowledge, you can approach the problem with confidence and get your vehicle running smoothly again!