How to Check Alternator Vs Battery: A Simple Guide
Figuring out how to check alternator vs battery can seem tricky at first. It’s a common problem for anyone who drives a car, from new drivers to seasoned veterans. The symptoms of a bad alternator and a dead battery can be similar, so knowing how to tell the difference is important. Don’t worry, we’re going to break it down step-by-step. This guide will walk you through easy checks you can do at home, saving you time and money. Let’s get started!
Understanding Your Car’s Electrical System
Your car’s electrical system is a network of components working together to power everything from your headlights to your radio. At the heart of this system are the battery and the alternator. The battery provides the initial power to start your car. The alternator then takes over, generating electricity to run the car’s systems and recharge the battery while you drive. Think of the battery as a reservoir and the alternator as a pump refilling that reservoir. Problems can arise if either part isn’t functioning properly, leading to issues with starting the car or keeping it running.
The Role of the Battery
The battery’s primary function is to store electrical energy. This energy is used to start the engine, providing the initial spark needed to get things moving. It also provides power to various components, such as the lights, radio, and other accessories when the engine is off. A healthy battery can hold a charge and deliver a consistent voltage. Over time, batteries lose their ability to hold a charge due to age, use, and temperature. This decline is a natural process, and the battery will eventually need to be replaced.
- Starting the Engine: The battery provides the large burst of power needed to crank the engine and get it running. Without a functional battery, the car will not start.
- Powering Accessories: When the engine is off, the battery powers your car’s electrical components like the lights, radio, and power windows.
- Voltage Regulation: A battery helps to regulate the voltage in the electrical system, ensuring that sensitive components aren’t damaged by surges or drops in power.
- Energy Storage: The battery stores the electrical energy generated by the alternator, ready to be used as needed.
For example, if you leave your headlights on overnight, the battery drains, preventing the car from starting in the morning. A properly functioning battery should hold a charge for several days without significant loss, depending on its age and condition.
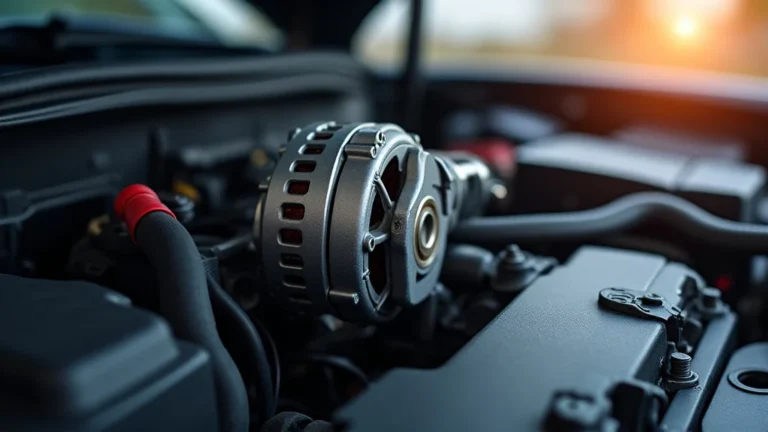
The Alternator’s Job
The alternator is the car’s power generator. It converts mechanical energy from the engine into electrical energy. The electricity generated by the alternator powers the car’s electrical systems while the engine is running and also recharges the battery. A failing alternator can cause the battery to drain because it won’t be getting the charge it needs. This means your car can die even after jumping it, as the alternator isn’t refilling the power used by the starter motor. It’s a vital component for consistent performance.
- Generating Power: The alternator produces the electrical power needed to run all of the car’s electrical components while the engine is running.
- Recharging the Battery: It replenishes the battery’s charge, ensuring that it has enough power to start the engine and run accessories.
- Voltage Regulation: The alternator regulates the voltage output to the car’s electrical systems to prevent damage from overcharging.
- Continuous Power Supply: The alternator supplies power to the car’s electrical system consistently while the engine is running, freeing the battery from having to work.
For instance, if your headlights dim when you rev the engine, this could indicate a problem with the alternator struggling to keep up with the electrical demands. This is especially noticeable during cold weather when the battery has a more difficult time producing the current to crank the engine.
Simple Checks: How to Check Alternator Vs Battery
Determining whether your problem lies with the battery or the alternator doesn’t require complex equipment. You can perform several tests using basic tools like a multimeter. These tests will give you a good idea of which component needs attention. Performing these checks can save you from unnecessary and costly repairs. By learning how to check alternator vs battery yourself, you gain valuable insights into your car’s function.
Battery Voltage Test
A battery voltage test helps determine if the battery is holding a charge. It’s the first step in diagnosing electrical issues. A healthy battery should read a certain voltage when the engine is off. A low voltage suggests a problem with the battery itself or that it’s not being charged properly. This test provides a quick, easy way to assess the battery’s health.
- Gather Your Tools: You will need a multimeter, a device that measures voltage, current, and resistance.
- Set the Multimeter: Turn the multimeter to the DC voltage setting, usually marked with a “V” with a straight line or “DCV”.
- Locate the Battery Terminals: Open the hood of your car and identify the positive (+) and negative (-) terminals on the battery.
- Connect the Leads: Touch the red probe of the multimeter to the positive (+) terminal and the black probe to the negative (-) terminal.
- Read the Voltage: Note the reading on the multimeter. A fully charged battery typically reads around 12.6 volts or slightly higher. Anything below 12 volts indicates a weak battery.
A battery reading below 12 volts suggests a problem. The battery could be old, damaged, or not being charged by the alternator. If the reading is close to or below 12 volts, try recharging the battery using a battery charger and retesting the voltage. If the voltage doesn’t increase, the battery may need replacing.
Alternator Output Test
This test determines whether the alternator is producing enough voltage to charge the battery. The alternator output test is conducted with the engine running. It measures the voltage the alternator is putting out to charge the battery. A low voltage output signals a fault. This test is key to establishing if the alternator is doing its job.
- Start the Engine: Ensure the engine is running and idling.
- Set the Multimeter: Keep the multimeter set to the DC voltage setting.
- Connect the Leads: Place the red probe of the multimeter on the positive (+) terminal and the black probe on the negative (-) terminal of the battery.
- Check the Voltage: Observe the reading on the multimeter. A healthy alternator should produce between 13.5 and 14.5 volts.
- Test Under Load: Turn on accessories like headlights and the air conditioning. The voltage should remain relatively stable.
If the voltage is below 13.5 volts, the alternator may not be charging the battery effectively. If the voltage drops when accessories are turned on, the alternator might be struggling to keep up with the electrical demand. If the voltage is too high, above 14.5 volts, this can also indicate a problem, as the alternator might be overcharging the battery.
Advanced Diagnostics and Troubleshooting
Sometimes, the issues are not straightforward, and you may need to use advanced methods to pinpoint the cause. This could be parasitic drain tests, or more specific electrical inspections. Using these tools and techniques can help to find out the root cause of electrical faults. In more complicated situations, it’s beneficial to seek expert advice, and the advanced diagnostics add a deeper level of analysis.
Parasitic Drain Test
A parasitic drain test checks for electrical current leaks when the car is off. A parasitic drain means some electrical component is using power even when the car is not in use. It can lead to a drained battery. This test involves measuring the current flowing from the battery while the car is off. By eliminating these power leaks, you can stop the battery from losing charge when it is not in use.
- Prepare the Vehicle: Turn off all lights and accessories. Make sure the doors are closed.
- Set Up the Multimeter: Set your multimeter to the DC current (amps) setting.
- Disconnect the Negative Terminal: Carefully disconnect the negative (-) cable from the battery.
- Connect the Multimeter: Place one multimeter probe on the negative battery terminal and the other probe on the disconnected negative cable. This completes the circuit.
- Read the Current: Note the current reading on the multimeter. A normal parasitic drain is typically less than 50 milliamps (0.05 amps).
- Isolate the Drain: If the current is higher than normal, start removing fuses one by one until the current reading drops. This indicates which circuit is causing the drain.
If the reading is higher than 50 milliamps, it suggests a parasitic drain. To find the source, start pulling fuses one by one until the multimeter reading drops. When the reading drops, the fuse you removed is in the faulty circuit. This can help you identify and fix the issue draining the battery.
Alternator Diode Test
Alternator diodes convert AC (alternating current) to DC (direct current). These diodes are crucial for the alternator’s ability to charge the battery. Damage to these diodes can cause the alternator to fail or create problems. The diode test verifies if the diodes are working properly. Problems with diodes are a common cause of alternator failure.
- Set the Multimeter: Set the multimeter to the diode test setting (often indicated by a diode symbol).
- Disconnect the Alternator: Remove the alternator from the car or disconnect its wiring.
- Test the Diodes: Place the red probe on the alternator’s output terminal and the black probe on the alternator’s case. Note the reading. Then, reverse the probes. A reading in one direction and no reading in the other indicates a good diode.
- Inspect for Short Circuits: Check for short circuits by checking the resistance between the alternator’s output terminal and ground.
If there is a reading in both directions, the diode is faulty. If there’s no reading at all, the diode is also bad. The diode test provides essential data, telling you whether the diodes are functioning well.
Real-Life Examples and Scenarios
Applying the diagnostic tests to real-world situations provides a clearer picture of electrical system problems. These case studies highlight the process and outcome of using the tests. Using examples can help connect the theoretical information to practical experiences, making it easier to solve problems.
- Case Study 1: The Dead Battery Mystery: A car wouldn’t start one morning. A battery voltage test revealed 11.8 volts. After a jump start, the car ran but died later. The alternator output test showed 12.0 volts while running, confirming a faulty alternator. Replacement solved the issue.
- Case Study 2: The Dimming Headlights: The headlights of a car flickered at idle. The alternator output test revealed 13.0 volts when idle, but it dropped to 11.5 volts with the headlights on. This indicated the alternator was failing to supply enough power under load. Replacing the alternator solved the problem.
- Case Study 3: The Parasitic Drain Problem: A car kept losing battery power overnight. A parasitic drain test showed a 0.25 amp drain. After removing fuses, the drain stopped when removing the radio fuse. A faulty radio was replaced, and the drain ceased.
These real-world examples show how crucial the tests are for problem-solving. Each case offers a practical perspective on the value of these tests.
Scenario 1: The Car That Won’t Start
A car won’t start, and the headlights are dim. After checking, the battery voltage is below 12 volts, indicating a discharged battery. You jump-start the car, and it runs for a short time but then dies. This likely points to an alternator problem. Performing a voltage test while the engine is running will confirm this.
Scenario 2: The Battery That Keeps Dying
A car’s battery keeps dying after sitting overnight. Performing a parasitic drain test will help determine if an electrical component is draining the battery when the car is off. This points towards an issue where the electrical system is failing to regulate energy usage correctly.
Advanced Component Breakdown
Beyond the battery and alternator, several other components play a key role in the electrical system. These components are essential in the system’s function. Having an idea of how these parts work will give you a more in-depth knowledge.
The Voltage Regulator
The voltage regulator is a critical component of the alternator. It is designed to control the output voltage produced by the alternator. It ensures the battery does not get overcharged, which can damage it. The regulator does its job by adjusting the current flowing to the alternator’s rotor (a rotating electromagnet). Understanding the regulator is key to understanding how the electrical system balances power.
- Voltage Control: The primary function is to maintain a consistent voltage, usually between 13.5 and 14.5 volts.
- Protection: It protects the battery and other electrical components from overcharging.
- Efficiency: It manages the alternator’s output according to the car’s electrical needs.
- Integrated: In many modern cars, the voltage regulator is integrated into the alternator or the engine control unit (ECU).
A faulty voltage regulator can cause overcharging or undercharging, which both lead to battery problems. Overcharging can damage the battery by causing it to boil over, while undercharging can prevent the battery from reaching its full potential.
The Starter Motor
The starter motor, or starter, is an electric motor that cranks the engine. It’s powered by the battery. When you turn the key, the starter engages the engine’s flywheel, rotating the engine and starting combustion. The starter’s design needs to supply large current demands. The starter, though only used briefly, is a vital part of the system.
- Engine Cranking: Its main function is to turn the engine over, allowing it to start.
- High Current Draw: The starter draws a substantial amount of current from the battery to function.
- Solenoid: A solenoid (an electromagnetic switch) is often part of the starter motor, which engages the starter gear with the engine flywheel.
- Short-Term Use: The starter motor is used only for a few seconds to start the engine.
A failing starter can make a clicking sound, fail to engage, or crank the engine slowly. Problems with the starter are often confused with battery or alternator problems, so it’s important to understand the different components.
Wiring and Connections
The wiring and connections throughout your car’s electrical system are essential for proper operation. All wires, from the battery to the alternator and all the components in between, are key for transmitting electrical power. Corrosion, loose connections, or damaged wires can disrupt the flow of electricity, and cause a variety of issues.
- Conductors: Wires are typically made of copper or aluminum, which conduct electricity from one component to another.
- Insulation: Insulation covers the wires, preventing short circuits and protecting against external damage.
- Connections: Secure and clean connections are necessary to prevent voltage drops and ensure efficient power transfer.
- Fuses: Fuses are safety devices that protect circuits from overcurrent, preventing damage to electrical components.
For example, a corroded battery terminal can restrict current flow, making it difficult for the starter to crank the engine. Regularly inspecting and cleaning the battery terminals and checking the condition of the wiring can prevent electrical problems.
Frequently Asked Questions
Question: How can I tell if my battery is bad?
Answer: If your car struggles to start, the headlights are dim, or the battery is old, it might be bad. Check the voltage with a multimeter. A reading below 12 volts usually means your battery is weak.
Question: What does a failing alternator sound like?
Answer: A failing alternator might make a whining or growling sound. It could also make a clicking sound, similar to a worn-out starter motor.
Question: What are the main signs of a bad alternator?
Answer: Dimming headlights, a dead battery after driving, and warning lights are all signs. You might also notice a burning smell from the engine compartment.
Question: Can I drive with a bad alternator?
Answer: You can drive for a short time, but the car will eventually die because the battery won’t be recharged. It’s best to get it fixed quickly.
Question: How often should I replace my car battery?
Answer: Most batteries last three to five years. Factors like climate and driving habits can affect how long your battery lasts. Check your battery’s age and condition regularly.
Final Thoughts
Knowing how to check alternator vs battery is a handy skill for any car owner. You now know the difference between the alternator and the battery, and how to identify problems. You’ve also learned about simple tests you can do at home with a multimeter. This knowledge can save you money and prevent being stranded. You can confidently diagnose common electrical problems. By taking the time to learn these tests, you are equipped to deal with your car’s electrical issues. If you notice any unusual symptoms, don’t hesitate to start with these simple tests. Keep your car running smoothly by staying informed!