How to Test Car Battery: A Simple Step-by-Step Guide
Figuring out how to test car battery can seem tricky at first. It’s a common issue for many drivers, and you might feel a little lost when your car won’t start. But don’t worry! This guide is made for anyone, even if you’re not a car expert. We’ll show you exactly what to do, step by step, so you can quickly find out if your battery is the problem. Let’s get started and learn how to check your battery!
Gathering Your Tools to Test a Car Battery
Before exploring how to test car battery, you’ll need a few essential tools to get started. Don’t worry, you probably already have some of these things at home or can easily find them. Having the right equipment ensures you can safely and accurately test your car’s battery and get a true picture of its condition. Think of these as your basic car battery detective kit!
What You’ll Need
-
A Digital Multimeter: This is the star of the show! A digital multimeter (DMM) is a device that measures voltage, current, and resistance. For this task, we will primarily use it to measure voltage. Many auto parts stores sell them, and they are not expensive. Think of it as a voltmeter that helps measure how much power is in your battery.
A digital multimeter is a handheld device that combines several measurement functions into one tool. Its main purpose in this context is to measure the voltage of your car battery. Voltage is the electrical “pressure” that pushes electrons through a circuit, and by measuring it, you can tell if your battery has enough power to start your car. The multimeter has a display that shows the measurement, making it easy to read. It’s safe to use on car batteries since it works with low voltages. Remember to set the multimeter to the DC voltage setting before taking a measurement.
-
Safety Glasses: Working around car batteries can be a bit risky. Safety glasses protect your eyes from any splashes or sparks.
Safety glasses are a simple but important piece of equipment. Car batteries contain sulfuric acid, which can cause eye damage if it splashes. Safety glasses create a physical barrier, shielding your eyes from potential hazards. They also protect against any small debris that might be present while you’re working. Make wearing them a standard practice whenever dealing with car batteries or performing any car maintenance tasks.
-
Gloves: A pair of gloves can help protect your hands from battery acid and any grime.
Gloves are a practical safety measure when working with car batteries. They protect your hands from potential contact with battery acid, which can cause skin irritation or burns. Battery acid is corrosive, and gloves provide a physical shield. They also keep your hands clean and offer some grip while handling tools or working around the battery. Any type of gloves can be worn, but those made of rubber or latex are very helpful.
-
A Clean Rag or Cloth: You might need this to wipe down the battery terminals or the top of the battery.
A clean rag is helpful for several reasons. You may need to clean the battery terminals, which can accumulate corrosion (a white, powdery substance). Wiping down the top of the battery will also ensure there is no dirt or debris on top of it. Using a clean rag prevents spreading dirt and ensures the tests are accurate.
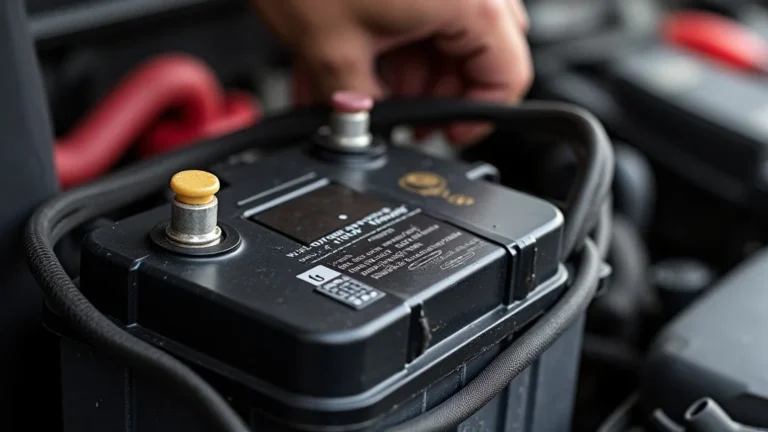
Checking Your Car Battery’s Voltage
The voltage test is a good place to start when learning how to test car battery. It tells you the general condition of your battery. If the voltage is too low, the battery might not be able to start your car. This is like checking the fuel gauge of your car to see how much gas you have. This quick check helps you understand if your battery is in good shape. Let’s explore the easy steps.
Setting Up Your Multimeter
-
Turn on the Multimeter: Start by switching on your digital multimeter. You’ll find a power button on the front of the device. Make sure the device is working and ready to measure.
Turning on the multimeter is your first step. It is the command to get the device ready. Once it is on, you will know the device is active. Many multimeters will show the screen or display on the device when it is turned on.
-
Select the DC Voltage Setting: Look for the DC voltage setting on your multimeter. It will be marked with a “V” symbol with a straight line and a dotted line above it (DC). This setting is for measuring direct current, which is what your car battery provides.
DC, or direct current, is the type of electrical power that a car battery uses. Choosing the DC voltage setting tells the multimeter to measure the voltage coming from the car battery. This is an important step because using the wrong setting could lead to an inaccurate reading.
-
Set the Range: Depending on your multimeter, you may need to set the voltage range. Choose a setting that is slightly higher than 12 volts, such as 20V. This prevents the meter from being overwhelmed when measuring the battery.
The voltage range selection tells the multimeter the maximum voltage to measure. By setting the range to a value a little higher than the battery’s expected voltage, you ensure that the meter can accurately measure the battery’s voltage. If the range is set too low, the meter may not be able to read the voltage.
Connecting the Multimeter to the Battery
-
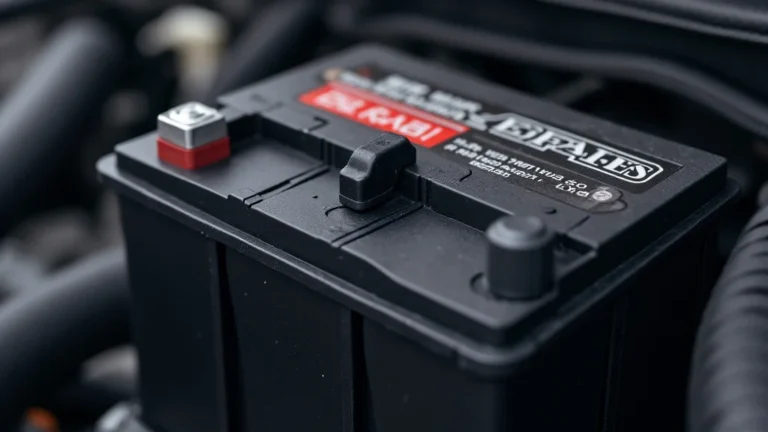
Locate the Battery Terminals: Find the positive (+) and negative (-) terminals on your car battery. These terminals are usually marked with the plus and minus symbols. The positive terminal is often covered by a red cap.
Finding the correct terminals is important for the test. The positive terminal connects to the positive side of your car’s electrical system, while the negative terminal connects to the negative side. Knowing which is which is necessary to avoid mistakes and ensure accurate measurements.
-
Connect the Red Lead: Attach the red (positive) lead of the multimeter to the positive (+) terminal of the battery.
The red lead of the multimeter is used to measure the positive voltage. The positive terminal of the car battery delivers the electrical current to the car’s components. By connecting the red lead to this terminal, you’re creating a circuit that allows the multimeter to measure the voltage.
-
Connect the Black Lead: Attach the black (negative) lead of the multimeter to the negative (-) terminal of the battery.
The black lead of the multimeter is connected to the negative terminal of the car battery. This completes the circuit and allows the multimeter to measure the voltage difference between the positive and negative terminals. Connecting the leads properly is important for getting an accurate voltage reading.
Interpreting the Voltage Reading
Once you’ve connected the multimeter correctly, you’ll see a voltage reading on the display. This number will tell you about the condition of your battery. Different voltage readings suggest different battery conditions. This is the moment of truth. Let’s look at what the voltage reading means.
-
A Healthy Battery: A healthy, fully charged car battery should read around 12.6 volts or slightly higher (12.6V to 12.8V) when the car is off and has been sitting for a few hours. This means your battery is in good shape.
When your car battery reads between 12.6V to 12.8V, it shows that the battery is strong and capable of delivering the power your car needs. A reading within this range shows the battery has a good charge and is ready to start your car. If the car starts without problems, your battery is likely operating fine.
-
A Low Battery: A voltage reading below 12.4 volts indicates that your battery needs charging. If the voltage is 12.0 volts or less, the battery is very low and might not be able to start your car.
A reading below 12.4 volts suggests that the battery has lost some of its charge. The lower the voltage, the more depleted the battery is. A reading of 12.0 volts or less means the battery is significantly discharged and might not provide enough power to start the engine. In this situation, you might need to recharge or replace the battery.
-
When the Car Is Running: With the car engine running, the voltage reading should be between 13.7 and 14.7 volts. This tells you the alternator is working and charging the battery.
When the engine is running, the alternator charges the battery, so the voltage should increase. A reading within this range means that the alternator is functioning correctly and providing a charge to the battery. If the voltage is too low or too high, there might be a problem with the alternator or the charging system.
Conducting a Load Test
If you’re still exploring how to test car battery, the load test is a more advanced method. It simulates the stress the battery experiences when starting the car. It tells you if the battery can provide the necessary power under load. This test can reveal problems that the simple voltage test might miss. It’s like a stress test for your car battery.
How the Load Test Works
The load test measures the battery’s ability to maintain its voltage when a large electrical load is applied. This mimics the strain on the battery when starting the engine. If the battery voltage drops too much under load, it indicates the battery is weak and cannot deliver the power needed to start your car. Performing a load test accurately requires special equipment or using your car’s electrical system. This test is most important if you are experiencing repeated difficulty starting your car.
Testing with a Load Tester
-
Connecting the Load Tester: Attach the load tester’s clamps to the battery terminals, matching the positive and negative leads. Make sure the connections are secure.
To start the load test, you must connect the load tester to the battery terminals correctly. The positive and negative leads of the load tester must match the positive and negative terminals of the battery. Secure connections are important to provide accurate readings.
-
Applying the Load: Activate the load tester. The tester applies a load to the battery, simulating the load of starting the car. Follow the instructions on the tester for how long to apply the load, usually about 15 seconds.
Once connected, you will turn on the load tester. The load tester simulates the power needed to start the car, which puts a strain on the battery. Applying the load for the prescribed time allows the load tester to test the battery’s performance under stress. The tester might display the results directly.
-
Reading the Results: The load tester will display the battery’s voltage under load. Observe the voltage reading during the test. If the voltage drops below 9.6 volts during the load, the battery has likely failed the test and is no longer able to produce enough current.
The main part of the load test is reading the voltage output. If the voltage drops too low when the load is applied, it indicates the battery is failing. A reading below 9.6 volts typically means the battery is not producing enough power to start your car. The load test gives an accurate assessment of the battery’s capacity to deliver power under the demands of a starting engine.
Testing with Your Car
You can also do a basic load test using your car’s electrical system, though this method is not as exact as using a load tester. Turn on your headlights for a few minutes to put a small load on the battery. Then, try to start the car.
-
Starting the Car: If the engine starts easily, your battery is likely in good condition.
A quick and effective indicator of the battery’s health is how easily the engine starts. If the engine starts without a struggle, the battery is probably working correctly. The engine should turn over promptly without any slow cranking.
-
Listen for Weakness: If the engine cranks slowly or struggles to start, the battery might be weak and could fail a load test.
If the engine cranks slowly or has difficulty starting, it suggests that the battery may not be performing well under load. This can mean the battery doesn’t deliver enough power to run the starter motor. Slow cranking could signal that a load test is needed.
-
Warning Signs: If the car starts but the lights dim noticeably while cranking, or if the car clicks but doesn’t start, the battery might have a problem.
There are several warning signs when the battery may be failing. If the headlights dim while starting, the battery is having trouble delivering the necessary power. If the car clicks but doesn’t start, that also suggests battery issues. These symptoms are strong indicators that a battery check is needed.
Checking the Car Battery Terminals and Cables
When trying to figure out how to test car battery, don’t overlook your car’s battery terminals and cables. These are important for your car to start. Even with a good battery, a bad connection can stop your car. These can cause a lot of problems, even if your battery is still good. Let’s explore how to check these connections to make sure everything is working as it should.
Inspecting the Battery Terminals
-
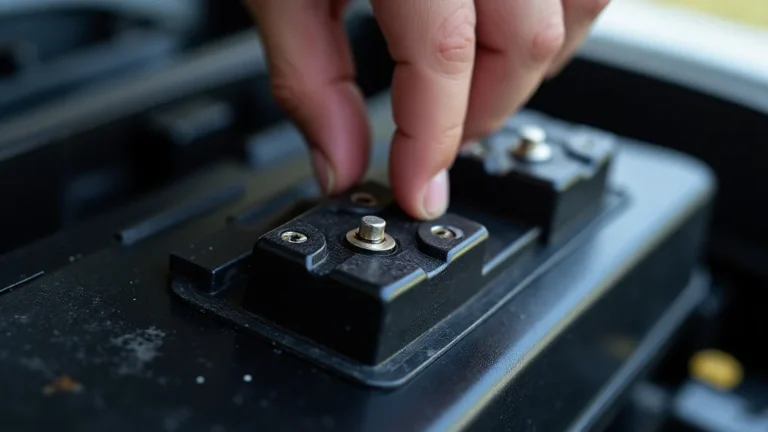
Look for Corrosion: Check the battery terminals for corrosion. This is a white or greenish buildup. Corrosion can prevent a good electrical connection.
Look carefully at the battery terminals for corrosion. Corrosion can build up on terminals over time. It can block the flow of electricity, causing your car to have difficulty starting or even preventing it from starting. This is why this should be part of a regular maintenance routine.
-
Cleaning Corrosion: If you see corrosion, you should remove it. You can use a terminal cleaner (available at auto parts stores), a mixture of baking soda and water, or a wire brush to clean the terminals.
If corrosion is present, cleaning the terminals is necessary to restore good electrical contact. You can use a specialized terminal cleaner or make your own solution with baking soda and water. Applying the cleaning solution and scrubbing gently will remove the corrosion. When the terminals are clean, your car’s electrical system will run better.
-
Tighten the Terminals: Make sure the terminal clamps are securely fastened to the battery terminals. Loose terminals can interrupt the flow of electricity.
Tightening the terminal clamps is crucial to ensure that the connections are safe. Use a wrench to tighten the clamps on the battery terminals. If the clamps are not tight, the car might not start. Make sure the terminals are snug enough to provide solid contact but not so tight that you could damage them.
Inspecting the Battery Cables
-
Check for Damage: Look for any damage to the battery cables, like fraying, cracks, or swelling. Damaged cables can affect the flow of electricity.
Inspect the battery cables for visible damage. Fraying, cracks, or swelling in the cables can disrupt the flow of electrical power. Damaged cables can reduce the efficiency of the car’s electrical system, causing problems.
-
Check the Connections: Ensure the connections at both ends of the cables (at the battery and the starter) are clean and secure.
Make sure all connections at the battery terminals and the starter are clean and securely fastened. Loose or dirty connections can stop the electrical current from flowing correctly. Using a wrench to tighten the cable connections provides good contact. Clean connections help the electrical system function correctly.
-
Replace Damaged Cables: If the cables are damaged, they should be replaced. Replacing damaged cables is essential to ensure a reliable electrical connection.
If the battery cables have any damage, replacement is necessary. Damaged cables can decrease the performance of the electrical system, causing starting problems or other electrical issues. Replacing the cables will prevent future problems.
Understanding Car Battery Problems
Part of understanding how to test car battery includes the common problems. Knowing what goes wrong helps you diagnose issues more quickly. Batteries don’t last forever, and many things can cause them to fail. By understanding the common problems, you’ll be better equipped to troubleshoot your car’s starting problems. This knowledge can also help you prevent issues in the first place.
Common Causes of Battery Failure
-
Age: Car batteries have a lifespan of about three to five years. The older the battery, the more likely it is to fail.
One of the most common reasons for battery failure is its age. Batteries undergo wear and tear. Over time, their ability to hold a charge diminishes. Regularly checking your battery’s condition can help you prepare for replacement. Knowing how old your battery is can give you an idea of how long it will continue to work.
-
Corrosion: Corrosion on the terminals can prevent good electrical contact, causing the battery to not work.
Corrosion on the battery terminals is another common cause of failure. Corrosion can stop the flow of electricity, and the car might not start. Regular cleaning of the terminals helps prevent corrosion and ensure a good connection. Periodic cleaning and maintenance can prevent this problem.
-
Extreme Temperatures: Both very hot and very cold temperatures can affect the battery’s performance. Cold temperatures can reduce the battery’s capacity, making it harder to start the car.
Extreme temperatures can take a toll on a car battery. Cold temperatures can reduce the battery’s power, making it harder to start the engine. Hot temperatures can speed up the process of the battery losing its charge, also reducing its lifespan. Consider the climate you live in when it comes to battery maintenance.
Signs Your Battery Is Going Bad
-
Slow Cranking: If the engine cranks slowly when you try to start the car, it can indicate a weak battery.
If the engine turns over slowly when you try to start the car, a failing battery is often the issue. The starter motor may struggle to turn the engine. If this happens consistently, it’s time to check your battery.
-
Clicking Sounds: If you hear clicking sounds when you turn the key, it means the battery does not have enough power to start the car.
Hearing a clicking sound when you try to start the car is a common warning sign. This usually indicates that the battery has not enough power. In this case, the battery might not be able to operate the starter motor.
-
Difficulty Starting: Repeated difficulty starting the car is a major sign that there could be a battery problem.
Regular difficulties in starting the car is a significant warning sign that the battery could be bad. If you’re struggling to start the car, it is important to test your battery.
Maintaining Your Car Battery
When you are learning how to test car battery, you should also explore battery maintenance. Good maintenance can help extend your battery’s life and prevent problems. A few simple steps will keep your battery healthy for longer and help you avoid unnecessary headaches. Here’s a look at some easy ways to take care of your battery.
Simple Maintenance Tips
-
Clean the Terminals: Regularly clean the battery terminals to prevent corrosion buildup.
Cleaning your battery terminals helps maintain a good connection. Corrosion can build up over time. Clean the terminals at least twice a year to keep your car operating properly.
-
Check the Water Level (If Applicable): If you have a battery that requires it, check the water level.
For batteries that require it, checking the water level regularly is important. Make sure that the battery has enough water to function correctly. This is usually necessary for older types of batteries.
-
Avoid Leaving Lights On: Make sure to turn off your car’s lights when the car is off, as they can drain the battery.
Avoid leaving your car’s lights on overnight. This is one of the easiest ways to drain the battery. Make it a habit to double-check that your lights are off every time you leave your car.
When to Replace Your Battery
-
Battery Age: If your battery is older than three to five years, it is probably time to consider a replacement, regardless of performance.
The age of the battery is the best indicator of when to replace it. Batteries only last for so long. Even if your car appears to be working fine, an older battery may fail suddenly. Keep the age in mind when you are considering battery replacement.
-
Repeated Problems: If you regularly experience starting problems, or if your car cranks slowly, it is time for a new battery.
Consistent starting issues indicate a possible battery problem. If the car cranks slowly or has difficulty starting, it’s a good idea to consider replacing the battery. Recurring issues should not be ignored.
-
Failure of Tests: If your car battery fails a voltage test or a load test, it should be replaced.
A failed test is a direct indication of a defective battery. If the voltage test results or load test results show the battery is not performing, replacement is needed to ensure the car starts reliably.
Frequently Asked Questions
Question: What do I do if my car won’t start?
Answer: First, check if your headlights are dim. If they are, it might be the battery. Then, try jump-starting your car or getting a new battery.
Question: How can I tell if my battery is bad?
Answer: If your car cranks slowly, clicks, or won’t start, your battery could be bad. Also, if your lights dim, the battery may have problems.
Question: Can I charge my car battery at home?
Answer: Yes, you can use a battery charger to recharge your car battery. These are available at most auto parts stores.
Question: What’s the difference between a load test and a voltage test?
Answer: A voltage test measures the battery’s voltage when the car is off. A load test measures the voltage under load, like when starting your car.
Question: How often should I test my car battery?
Answer: It’s good to check your battery at least twice a year, especially before the winter. This will give you a chance to prepare for the conditions.
Final Thoughts
You now have the basic knowledge of how to test car battery, and you’re ready to tackle the situation when your car won’t start. Remember to gather your tools, start by checking the voltage, and look at the terminals. Load tests will give you a better understanding of the battery’s ability to supply power when under stress. You now know the signs of a failing battery and how to help keep it in good condition. You can do this! With a few easy steps, you can keep your car running smoothly. Be confident, and remember that with a little maintenance, your car will always start when you need it.