How to Find What’s Draining Car Battery: A Simple Guide
Figuring out how to find what’s draining car battery can feel tricky, especially if you’re not a car expert. Many people struggle with this because car electrical systems can seem complicated. But don’t worry! This guide breaks it down step by step, making it easy to see what’s going on. We’ll help you pinpoint the issue without any complicated jargon. Let’s get started and learn how to keep your car running smoothly!
What Causes Car Battery Drain? Common Culprits
Car batteries don’t last forever, and sometimes, they lose power faster than they should. Several things can cause this, and identifying the problem is the first step toward a fix. Many issues stem from electrical components that continue to draw power even when the car is off. This is often called a “parasitic drain.” Other times, the battery itself might be the issue, or something simple like leaving lights on could cause the problem. Knowing the usual suspects helps you narrow down your search and save time and money. We’ll explore the common reasons your car battery might be losing its charge.
Parasitic Drain: The Hidden Energy Thief
A parasitic drain happens when something in your car continues to use electricity when the engine is off. This can slowly deplete your battery’s charge over time. Think of it like a tiny, constant leak of power. This drain can be caused by various electrical components. They might be malfunctioning or designed to stay active even when the car is parked. Finding the source can sometimes be a bit like detective work. However, the process is straightforward with the right tools and approach. Pinpointing and fixing a parasitic drain can save you from a dead battery and frustration.
- Faulty Interior Lights: These lights may stay on due to a switch malfunction or a door sensor that doesn’t recognize the door is closed. This causes a constant drain on the battery.
- Glove Box and Trunk Lights: Similar to interior lights, the lights in the glove box or trunk can also drain the battery if they fail to turn off. These lights have their switches, and if these switches fail, the light will remain on.
- Aftermarket Accessories: Items like aftermarket stereos, alarms, or dash cameras can draw power even when the car is off. These accessories often have a direct connection to the car’s electrical system, and if installed incorrectly or have issues, they might keep drawing power.
- Faulty Relay or Solenoid: Relays and solenoids control the flow of electricity to different components. When these components fail, they might get stuck in the “on” position, continuously drawing power. This is common in the car’s starting system.
- Defective Alternator Diode: The alternator is responsible for charging the battery while the engine is running. A faulty diode inside the alternator can allow current to flow backward, draining the battery.
Interior lights, especially those in the dome or glove compartment, are designed to turn off when the car is off. Sometimes, a problem with the switch, the door sensor, or the wiring can prevent the lights from fully switching off. This can drain the battery overnight. Regularly check these lights to see if they’re the issue. A simple visual inspection can often identify the problem before it fully drains the battery. Ensure all switches are in the “off” position.
The glove box and trunk lights are connected to switches that activate when the compartments open. If these switches stick or malfunction, the lights stay on constantly. To check, open the glove box and trunk, and then observe if the lights are on. If they are, it suggests a problem with the switch or wiring. Many times, the switch might be stuck due to some objects, and simple cleaning can solve the problem.
Many people add accessories like aftermarket stereos, alarms, or dash cameras to their vehicles. While these can be great additions, they may sometimes contribute to battery drain. The wiring or the accessory itself may cause a parasitic draw. It is important to carefully inspect the installation and ensure that the accessories are wired correctly. Always use proper fuses to protect the electrical system. If you suspect an accessory, you might disconnect it to see if the drain stops. If the drain stops, the accessory is likely the culprit.
Relays and solenoids are like electrical switches. They regulate the flow of electricity to various car components, such as the starter motor or the fuel pump. If they malfunction, they can get stuck in the ‘on’ position, continuously drawing power from the battery. Diagnosing a faulty relay or solenoid can sometimes be tricky. This requires using a multimeter to check for current draw when the car is off. If there’s a current draw from these components, they might need replacing. This is a job that is usually best left to a professional mechanic.
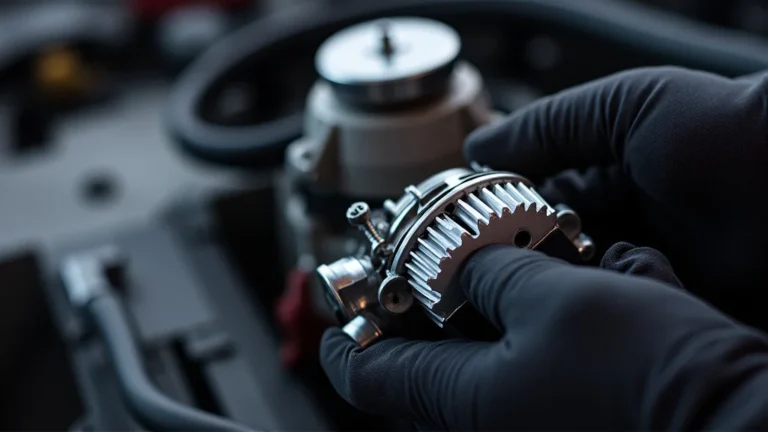
The alternator plays a significant role in keeping the battery charged. The alternator has diodes that convert the AC current produced by the alternator into DC current to charge the battery. A defective diode can let current flow in the wrong direction, draining the battery. This can happen slowly over time, making it hard to diagnose. If you suspect an alternator diode problem, a professional check is often needed. A mechanic can test the alternator and diagnose this issue using specialized equipment. Replacing the alternator may be necessary to correct the problem.
Battery Problems: Age, Damage, and Beyond
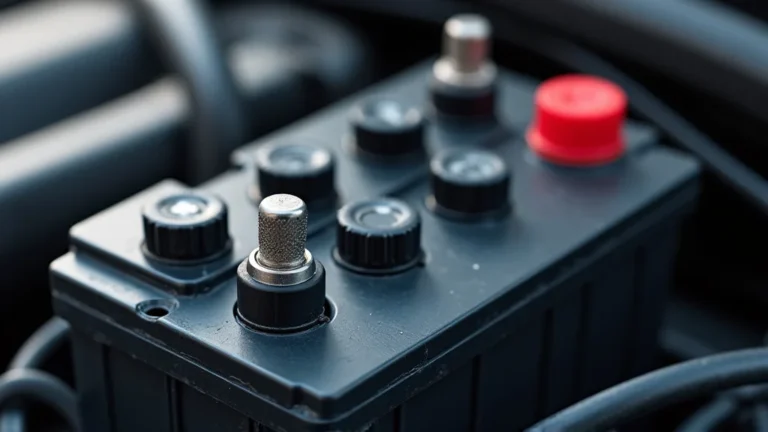
Sometimes, the battery itself is the source of the trouble. Batteries don’t last forever, and factors like age, damage, and even how you use your car can affect their lifespan. A battery that’s nearing the end of its life will struggle to hold a charge. Internal damage or external factors like temperature changes can further shorten its life. Understanding battery-related issues is key to keeping your car starting reliably. Let’s delve into why batteries fail and what to watch out for to keep your car starting strong.
- Battery Age: Batteries degrade over time. Their ability to hold a charge diminishes, especially after a few years. An old battery is much more likely to fail.
- Internal Damage: Physical damage or internal issues, like short circuits, can prevent the battery from holding a charge. Corrosion inside the battery can also degrade its performance.
- Extreme Temperatures: Hot and cold temperatures can affect the battery’s ability to hold a charge. Heat speeds up the corrosion process, while cold can slow down the chemical reactions needed to produce electricity.
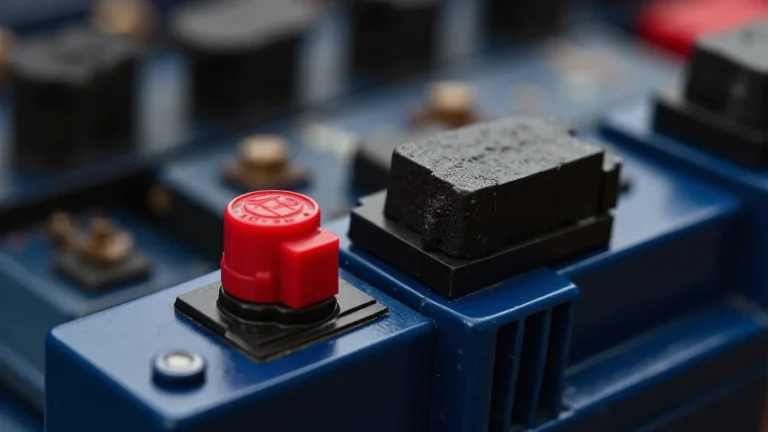
- Battery Terminal Corrosion: Corrosion on the battery terminals can prevent the battery from delivering its full power to the car. This can create a poor connection and result in starting problems.
- Frequent Short Trips: Short trips don’t give the alternator enough time to fully charge the battery. This leads to a gradual discharge over time.
Like any component, batteries have a limited lifespan. Typically, a car battery lasts from three to five years. The battery’s age is a significant factor in its performance. As the battery ages, the chemical reactions inside become less efficient. This results in reduced capacity and increased susceptibility to discharge. The date of manufacture is usually printed on the battery. Using this information helps you gauge its age. If your battery is approaching or past its expected lifespan, consider replacing it as a preventative measure. This can avoid the inconvenience of a dead battery.
Car batteries, despite their durability, can suffer internal damage. Physical impacts or vibrations can cause internal components to break, leading to short circuits or reduced capacity. Internal corrosion is another common problem. This corrosion often affects the plates inside the battery, which reduces their ability to store and release energy. Inspecting the battery terminals for corrosion is the first step. If the battery is damaged, you will need to replace it.
Extreme temperatures can have a significant effect on car batteries. Heat can speed up the corrosion process inside the battery, which reduces its lifespan. On the other hand, cold temperatures can slow down the chemical reactions necessary to generate electricity. This results in the battery struggling to provide enough power to start the car. When you are in areas with extreme temperature swings, keep your car battery protected, for example, by parking in a garage or using a battery blanket during the winter. This will help to prolong the life of the battery.
Battery terminal corrosion is a common problem that directly affects your car’s ability to start. Corrosion occurs because of the reaction between the battery acid and the metal terminals. This often results in a white or green residue. This corrosion prevents good electrical contact, reducing the flow of current. Clean terminals with a wire brush or a specialized terminal cleaner. You can also use a battery terminal protectant to help prevent future corrosion.
Short trips can contribute to battery drain. When you drive short distances, the alternator may not have enough time to recharge the battery fully. This is especially true if you are using your car’s electrical systems. Each time you start your car, it uses a considerable amount of energy from the battery. If the alternator cannot replace that energy, the battery slowly discharges. Frequent short trips can lead to a dead battery. It is a good practice to take a longer drive every so often to allow the alternator to recharge the battery fully. You can also use a battery charger to keep your battery topped off.
Methods for Discovering Battery Drain
Finding the source of the battery drain might require some investigation, but it doesn’t need to be overwhelming. You’ll need a few tools and a systematic approach. With these techniques, you’ll be able to identify the culprit and take steps to solve the issue. This section will walk you through the essential steps and tools. Let’s explore how you can find what is draining your car battery and get your car running smoothly again.
Using a Multimeter: The Essential Tool
The multimeter is your primary tool in this process. It’s a device that measures electrical values. To check for parasitic drain, you’ll use it to measure current. A digital multimeter (DMM) is a great choice. You can find them at most auto parts stores. Familiarizing yourself with how to use a multimeter is essential for automotive troubleshooting. A multimeter allows you to measure voltage, current (amperes), and resistance. Let’s delve into using this device to diagnose your battery drain.
- Setting up the Multimeter: Set your multimeter to measure DC current (amps). Connect the red probe to the amp port on the multimeter. The black probe goes into the COM port.
- Disconnecting the Negative Terminal: Before you start, disconnect the negative (black) battery terminal to prevent any shorts.
- Connecting the Multimeter in Series: Place the multimeter in series between the negative battery post and the disconnected cable. Ensure there is only one connection point between the multimeter and the battery terminal.
- Interpreting the Readings: A normal parasitic draw is typically under 50 milliamps (0.05 amps). Anything higher suggests a drain. Start by checking the reading after about 15 minutes of the car being off.
- Troubleshooting with the Multimeter: If there’s a drain, start by pulling fuses one at a time. Watch the multimeter to see if the reading drops when a fuse is removed. This helps to isolate the circuit causing the drain.
Correctly setting up the multimeter is a key step. First, ensure the multimeter is set to measure DC current. You’ll find a dial or button on the device to select the appropriate setting. Then, connect the red probe to the port marked for measuring amps. This port is usually different from the one used for voltage measurements. The black probe goes into the COM port. This port is usually black and provides a common ground connection.
Before you begin any electrical testing, it’s vital to disconnect the negative (black) battery terminal. This disconnect prevents any short circuits and ensures your safety. Use a wrench to loosen the nut that secures the terminal clamp to the battery post. Then, carefully remove the terminal from the post. Make sure the terminal does not come into contact with any metal parts of the car while it’s disconnected. This helps to eliminate any risk of accidental electrical shock or damage to your car’s electrical system.
Once you’ve disconnected the negative battery terminal, you can connect the multimeter in series. This means the current has to flow through the multimeter. Connect one probe of the multimeter to the negative battery post. Connect the other probe to the disconnected negative cable. This completes the circuit. Make sure the car is off and all doors are closed to minimize the parasitic draw. The multimeter will now measure any current flowing from the battery when the car is off. Pay attention to the reading on the multimeter. This reading shows you if there’s a parasitic drain.
Interpreting the multimeter’s readings is critical. A healthy electrical system will have a very low parasitic draw. Typically, this draw should be less than 50 milliamps (0.05 amps). If the multimeter displays a reading higher than this, it suggests a drain. When you first connect the multimeter, the reading may start high. Some modules might take a few minutes to fully shut down. Wait about 15 minutes after connecting the multimeter to get an accurate reading. This allows all the car’s computers to enter their sleep mode. A higher reading means you should investigate further to find the source of the drain.
When you have confirmed a parasitic drain using the multimeter, the next step is to locate the source. Start by removing the fuses one at a time. The goal is to see which circuit’s fuse causes the current draw to drop. When you remove a fuse, observe the multimeter. If the reading drops significantly after removing a particular fuse, the circuit connected to that fuse is causing the drain. To do this efficiently, have a fuse puller and a fuse box diagram ready. This will make the process much easier. With each fuse you remove, make a note of the circuit it protects. This will help you identify the faulty component.
Fuse Pulling and Circuit Identification
Once you have a suspicion of a drain based on your multimeter readings, the fuse-pulling method helps you pinpoint the specific circuit causing the problem. This method is systematic, allowing you to isolate different components. This approach can be time-consuming. However, it is effective in tracking down the issue. Understanding the car’s fuse box layout and what each fuse controls is crucial for this process. This section provides a clear roadmap to help you use the fuse-pulling method effectively.
- Locating the Fuse Boxes: Most cars have multiple fuse boxes, often in the engine bay and under the dashboard. Check your owner’s manual to find the locations.
- Using the Fuse Box Diagram: Use the fuse box diagram to identify which components each fuse controls. This helps you understand which circuits you are testing.
- Pulling Fuses One by One: With the multimeter connected, carefully pull each fuse one at a time. Observe the multimeter reading after each fuse removal.
- Identifying the Faulty Circuit: When the multimeter reading drops, you’ve found the circuit causing the drain. This narrows your focus to the components connected to that circuit.
- Further Testing: Once the faulty circuit is identified, perform further tests on the components within that circuit to find the exact issue.
Your car has several fuse boxes. They are located in the engine compartment, under the dashboard, and sometimes in the trunk. The owner’s manual is your best friend here. It provides diagrams and identifies the exact location of all fuse boxes in your car. Some cars may have more than two fuse boxes, so it’s essential to locate them all. Locating the fuse boxes upfront saves you time during the fuse-pulling process. Make sure the car is off and all doors are closed before you start inspecting or removing fuses. This ensures accurate readings with the multimeter.
The fuse box diagram is a detailed map of your car’s electrical circuits. It helps you understand what each fuse protects. This information helps you narrow down potential problem areas. The diagram usually comes in the owner’s manual or on the fuse box cover itself. With the diagram in hand, you can identify which circuits are connected to each fuse. Knowing which components are protected by each fuse will make the process more efficient. Make notes as you go, and always double-check the diagram before pulling a fuse. Incorrectly pulling a fuse can disrupt other systems and lead to additional issues. This diagram will be your guide throughout the testing process.
With the multimeter set up and the fuse box diagram ready, you can start the fuse-pulling process. Begin by carefully removing one fuse at a time. Observe the reading on the multimeter after you remove each fuse. Remember, if the reading drops significantly when you remove a fuse, the circuit that fuse controls is the source of the drain. Work methodically, and make notes as you go. Use the fuse puller to safely remove the fuses. The fuse puller prevents you from damaging the fuses or the fuse box. If the multimeter reading does not change after removing a fuse, replace the fuse before moving on to the next one. This process may take a while, but it is one of the most effective ways to find the drain.
Once the multimeter reading drops, you’ve identified the faulty circuit. This means you have narrowed down where the problem is originating. At this point, you can look closer at the components connected to that circuit. Check all the components powered by that circuit for any obvious issues. Check for frayed wires, loose connections, or any sign of damage. If the circuit is powering something like a radio, it might be the culprit. Knowing which circuit is causing the drain helps you know where to focus your troubleshooting. It allows you to move closer to finding the solution.
Now that you’ve identified the faulty circuit, it’s time for deeper diagnostics. You can test individual components within that circuit. To do this, you might need to use the multimeter. For example, test for voltage or resistance. Inspect the wiring and connections for any signs of damage. If the circuit controls the car’s interior lights, check the switches and wiring. This step involves using diagnostic tools and knowing how to test specific components. This can include checking for shorts or opens in the wiring. You could also test the current draw of individual components. The purpose of this step is to find the exact problem causing the drain.
Visual Inspection and Other Tests
Sometimes, the solution to battery drain is simple. A visual check can often reveal obvious problems like lights left on. Other times, you may need to use more advanced tests to get to the root of the problem. This combination of visual checks and component testing will lead you to a solution. In this section, you’ll learn how to identify issues that may not always be evident with simple tests. Combining these approaches increases your chances of finding the cause of battery drain. Let’s delve into these techniques to diagnose the issue.
- Checking for Obvious Issues: Start by looking for the easy things, such as lights left on, open doors, or accessories that might be running.
- Inspecting Wiring and Connections: Look for damaged or corroded wiring. Inspect the connections at the battery terminals and around other electrical components.
- Testing Components: If the fuse-pulling test points to a particular circuit, test the components within that circuit. This might involve using a multimeter to check for current draw.
- Using a Scan Tool: A scan tool can help identify issues with the car’s computer-controlled systems. This can help with identifying problems like faulty modules.
- Checking the Alternator: A faulty alternator diode can cause battery drain. Have the alternator tested by a professional. They have the equipment to check for diode leakage.
Always start with the most basic checks. Look for obvious problems like headlights or interior lights left on. Walk around the car and ensure that all doors and the trunk are closed properly. Also, make sure that any aftermarket accessories, like dash cameras, are turned off. Check the car’s interior and make sure that nothing is inadvertently left on. Simple solutions are often overlooked. Checking these basics can save time and effort. Also, these checks can eliminate the easy fixes before moving on to more complex tests.
Inspect the wiring and connections around your car’s electrical components. Look for fraying, breaks, or any signs of physical damage. Look at the battery terminals for corrosion. Check the connectors on starters, alternators, and other essential systems. Ensure all connections are secure. A loose or corroded connection can cause a significant current drain. If any wiring is damaged, it might be touching other components or ground. This can cause a parasitic drain. If you notice any issues with the wiring or connections, address them promptly. Cleaning or repairing the wiring will resolve the problem and keep the car running correctly.
Once you identify the faulty circuit, it’s time to test the specific components within that circuit. Use a multimeter to measure the current draw from each component. You can also check for resistance. If you suspect an accessory, like a radio, you might disconnect it to see if the drain stops. If the drain goes away after disconnecting a specific component, that component is likely causing the problem. Make sure to consult your car’s service manual or use online resources for testing procedures. You may need specialized tools for some tests.
A scan tool is a valuable tool for diagnosing electrical issues in modern cars. It connects to the car’s onboard computer system. Scan tools can show you any diagnostic trouble codes (DTCs). They can help identify problems with sensors, modules, and other computer-controlled systems. You can also use it to monitor the operation of various components. For example, you can check if a module goes into sleep mode after the car is turned off. A scan tool may also show issues with the car’s CAN (Controller Area Network) bus. This bus manages communication between various modules in the car. Scan tools are beneficial when dealing with complex electrical problems.
A defective diode in the alternator can cause the battery to drain. This diode helps convert AC power into DC power. If the diode fails, it allows current to flow backward. This leads to a gradual battery drain. Diagnosing this problem requires specialized equipment. Take your car to a trusted mechanic or auto repair shop. They can perform an alternator test to check for diode leakage. If the test shows that the alternator is defective, it will likely need to be replaced. Proper alternator function is essential for a healthy charging system.
Real-Life Examples and Scenarios
Seeing real-world examples helps put the steps into practice. The following cases demonstrate how to find what’s draining car battery. These scenarios highlight the common issues you might encounter. They also show how the methods we discussed earlier can lead to a solution. These examples will help you better understand and solve your car battery problems. Let’s explore these real-world examples to help you find the source of your battery drain.
- Scenario 1: The Case of the Interior Lights: A driver noticed their car battery was dying overnight. After a visual check, they found that the interior lights were remaining on even when the doors were closed. The problem was fixed by replacing a faulty door switch.
- Scenario 2: The Mystery of the Aftermarket Stereo: A car owner was experiencing battery drain issues. They suspected the aftermarket stereo they had installed. Using a multimeter, they found a constant parasitic draw. Disconnecting the stereo confirmed that it was the problem, and a wiring issue was found and fixed.
- Scenario 3: The Alternator Issue: A vehicle had a slow battery drain. The owner replaced the battery. The problem persisted. A professional test revealed a faulty diode in the alternator. Replacing the alternator solved the issue.
This situation involves a driver who experienced frequent dead batteries. They noticed that the interior lights were staying on, even after closing all the doors. They checked the door switches and found that one was faulty. The switch was not working, which failed to tell the car’s computer that the door was closed. This caused the lights to stay on. After replacing the faulty door switch, the problem was resolved. The car battery started to hold a charge overnight. This demonstrates the impact of a simple issue like a malfunctioning door switch. These types of problems can be solved with a straightforward diagnosis.
In this example, the car owner was experiencing a battery drain problem and suspected the aftermarket stereo. Using a multimeter, they determined a parasitic draw was present when the car was off. They disconnected the stereo from the car’s wiring harness. This action confirmed the drain disappeared. Further investigation revealed a wiring issue during the installation. The stereo’s power wire was directly connected to a constant power source. This caused it to stay on even when the car was off. The owner repaired the wiring issue. The problem was resolved. The car battery stopped draining. This highlights the importance of correct installation for accessories.
In this situation, the car owner noticed their battery was slowly draining. They
Frequently Asked Questions
Question: What is a parasitic drain?
Answer: A parasitic drain is when something in your car continues to use electricity even when the engine is turned off.
Question: What tool do I need to find the source of a drain?
Answer: The most important tool is a multimeter, which measures electrical current and voltage.
Question: How do I use a multimeter to check for a parasitic drain?
Answer: Disconnect the negative battery terminal and connect the multimeter in series between the battery post and the cable to measure current.
Question: What is the normal amount of parasitic draw in a car?
Answer: A normal parasitic draw is typically under 50 milliamps (0.05 amps).
Question: What should I do if I find a drain?
Answer: Start by pulling fuses one at a time and watching the multimeter to see which circuit stops the drain.
Final Thoughts
Knowing how to find what’s draining car battery might seem complicated, but with the right approach, it’s manageable. You’ve now seen how to identify potential problems, from faulty lights to battery issues. By using a multimeter to check for parasitic draw and going through a methodical process, you can find the source of the issue. You learned the importance of visual inspections, fuse-pulling tests, and, if needed, more detailed diagnostics. Following these steps and knowing when to seek professional help will equip you to tackle your car battery problems. Armed with this knowledge, you can troubleshoot efficiently and make sure your car starts reliably. This will prevent you from being stranded with a dead battery.