Easy Guide How to Install Battery Terminal Clamps Safely

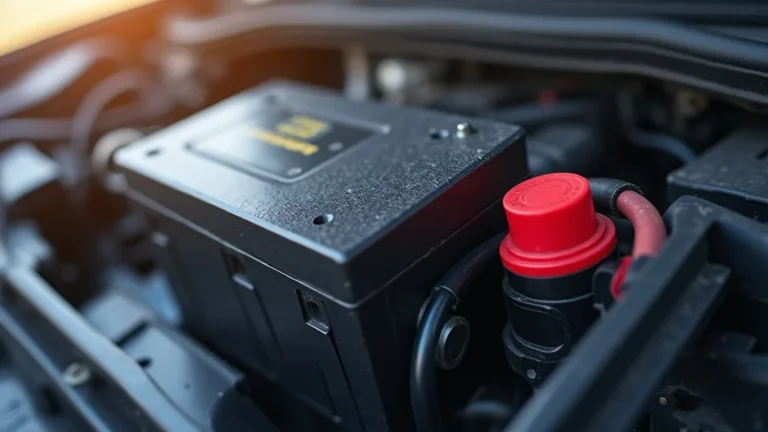
Featured image for how to install battery terminal clamps
Image source: dc-wiring.eu
Safety is paramount when installing battery terminal clamps; always begin by disconnecting the negative terminal first and connecting the positive terminal first to prevent hazards. Ensure terminals are clean and corrosion-free, then securely fasten the new clamps to guarantee a robust electrical connection. Finally, double-check all connections to confirm proper power flow and vehicle reliability.
Ever found yourself in that all-too-familiar, frustrating situation where your car just won’t start? You turn the key, hear that dreaded click, or maybe nothing at all. It’s often more than just a dead battery; sometimes, the real culprit is right there on top of it: your battery terminal clamps. These unsung heroes are vital for a consistent electrical connection, and when they fail, your car grinds to a halt.
I totally get it; tackling car maintenance can feel a bit intimidating, especially when it involves the battery. But trust me, learning how to install battery terminal clamps yourself isn’t nearly as scary as it sounds. In fact, it’s a super empowering skill that can save you money, time, and the hassle of waiting for roadside assistance. Think of this as a chat with a friend who’s walked through it before, giving you the lowdown on getting your ride back in action safely and effectively.
In this guide, we’re going to walk through everything you need to know about replacing those crucial connections. We’ll cover what tools you’ll need, the essential safety steps, and a clear, easy-to-follow process for how to install battery terminal clamps properly. By the end, you’ll feel confident tackling this common issue, ensuring your battery delivers power reliably every time you start your engine.
Key Takeaways
- Prioritize Safety: Always disconnect the negative cable first and wear PPE.
- Clean Contacts: Thoroughly clean battery posts and new terminal clamps.
- Ensure Correct Fit: Match clamp size to terminal; avoid forcing or gaps.
- Connect Properly: Attach positive (+) first, then negative (-) last.
- Secure Tightly: Fasten clamps firmly, but prevent over-tightening damage.
- Prevent Corrosion: Apply a protective anti-corrosion grease or spray.
- Inspect Connections: Double-check all connections are stable and secure.
📑 Table of Contents
Understanding Battery Terminals and Why They Fail
Before we jump into the “how-to,” let’s quickly chat about what battery terminals are and why they sometimes decide to give up on us. Knowing this background helps you understand why it’s so important to install battery terminal clamps correctly.
What Are Battery Terminals?
Imagine your car battery as the heart of your car’s electrical system. The battery terminals are like the main arteries, connecting the battery to the rest of the car’s electrical network. You’ll typically see two posts sticking up from your battery: a positive (+) post, usually thicker and marked, and a negative (-) post. Each post has a metal clamp attached to it, which then connects to the main battery cables leading to your car’s starter, alternator, and other electrical components.
These clamps are absolutely critical because they’re responsible for transferring all that electrical juice from your battery to power everything in your vehicle. A good, clean connection means reliable power. A bad one? Well, that’s where the problems begin.
Common Issues Leading to Replacement
Battery terminal clamps are tough, but they’re not invincible. Here are the usual suspects that lead to their demise and necessitate learning how to install battery terminal clamps:
- Corrosion: This is probably the most common culprit. That fuzzy, powdery blue, green, or white stuff you sometimes see on your terminals is corrosion. It’s usually a build-up of sulfuric acid residue reacting with the metal. Corrosion acts like a resistance, preventing electricity from flowing freely, which can lead to starting problems or even prevent your car from starting at all.
- Loose Connections: Vibrations from driving, or simply not being tightened enough in the first place, can cause the clamps to loosen. A loose connection means intermittent power, leading to flickering lights, slow cranking, or a complete failure to start.
- Physical Damage: Accidents, over-tightening (which can strip threads or crack the battery post), or even just wear and tear over many years can damage the clamps themselves, making them unable to provide a secure grip on the battery post.
- Wear and Tear: Over time, the metal in the clamps can simply degrade, especially in harsh environments.
Any of these issues can severely impact your car’s performance, making it essential to address them promptly and understand how to properly install battery terminal clamps.
Gathering Your Tools and Safety Gear
Before you even think about touching your battery, let’s talk about preparation. Just like cooking, having all your ingredients and tools ready makes the whole process smoother and, most importantly, safer. When you’re ready to install battery terminal clamps, having the right gear is half the battle.
Essential Tools Checklist
Here’s a handy list of what you’ll likely need. Most of these are standard garage tools, so you might already have them kicking around!
- Wrenches: You’ll typically need an open-end wrench or a socket wrench set. Common sizes for battery terminals are 10mm, 13mm, or 1/2 inch. Having a small adjustable wrench can also be helpful.
- Wire Brush or Battery Terminal Cleaning Tool: Absolutely essential for cleaning corrosion off the battery posts and cable ends. There are specific battery post cleaners that work wonders.
- New Battery Terminal Clamps: Make sure you get the right type for your battery and cable gauge. They come in various materials (lead, brass) and styles (standard, quick-disconnect). Buying a good quality pair is a smart move.
- Battery Post Puller (Optional but Recommended): Sometimes old clamps can be really stuck. A battery post puller makes removal much easier without damaging the battery.
- Crimping Tool (If needed): If your new clamps require you to strip and crimp the battery cables, you’ll need a crimping tool and possibly wire cutters/strippers. Many DIY clamps just bolt on, though.
- Anti-Corrosion Grease or Spray: This is a preventative measure for once you install battery terminal clamps, helping to keep new corrosion at bay.
Safety First!
Working with car batteries involves electricity and sometimes corrosive acid, so safety isn’t just a suggestion; it’s a must. Please don’t skip these steps!
- Safety Glasses: Protect your eyes from any acid splash or debris.
- Gloves: Chemical-resistant gloves are best to protect your hands from battery acid.
- Old Rags or Shop Towels: Handy for wiping up messes.
- Baking Soda and Water Mixture: Keep a small container of this nearby. If battery acid gets on you or your car, this mixture neutralizes it immediately.
- Ventilation: Work in a well-ventilated area to avoid inhaling any fumes.
- No Smoking or Open Flames: Batteries produce hydrogen gas, which is highly flammable. Keep all sources of ignition away.
Seriously, friends, take these safety precautions to heart. A little caution goes a long way when you’re about to install battery terminal clamps.
Step-by-Step Guide to Removing Old Terminal Clamps
Okay, gear’s ready, safety’s covered. Now let’s get down to the actual work of removing those old, tired battery terminal clamps. This is a crucial first step before you can install battery terminal clamps.
Safety Precautions Revisited
Before you even lay a hand on the battery, make sure your car is off, the keys are out of the ignition, and the parking brake is engaged. Pop the hood and locate your battery, identifying the positive (+) and negative (-) terminals. The positive terminal usually has a red cover or a “+” sign, and the negative often has a black cover or a “-” sign.
Disconnecting the Negative Terminal First
This is probably the most important safety rule when working with batteries: ALWAYS disconnect the negative terminal first. Why? Because if your wrench accidentally touches the car’s metal frame (ground) while you’re working on the negative terminal, nothing will happen. However, if you start with the positive terminal and your wrench touches the car’s frame, you could create a short circuit, causing sparks, damage to the battery or electronics, and even personal injury. It’s a big deal!
- Grab your wrench and loosen the nut on the negative (-) battery terminal clamp. You usually only need to loosen it a turn or two.
- Once loose, gently wiggle the clamp until it comes off the battery post. If it’s really stuck, this is where a battery terminal puller comes in handy.
- Once it’s off, move the negative cable completely away from the battery so there’s no chance it can accidentally touch the post again. You can tuck it away or even wrap it in a rag for extra security.
Disconnecting the Positive Terminal
Now that the negative side is safely out of the way, you can proceed with the positive terminal.
- Use your wrench to loosen the nut on the positive (+) battery terminal clamp.
- Wiggle it free from the post. Again, a puller can be useful here.
- Carefully remove the positive cable and move it away from the battery posts.
Congratulations! You’ve successfully disconnected your battery. You’re one step closer to knowing how to install battery terminal clamps like a pro.
How to Install Battery Terminal Clamps Properly
With the old clamps off and the battery disconnected, we’re ready for the main event: learning how to install battery terminal clamps. This is where attention to detail really pays off for a long-lasting, reliable connection.
Cleanliness is Key
Before attaching anything new, we need to ensure the best possible electrical connection. This means cleaning!
- Clean the Battery Posts: Use your wire brush or specialized battery post cleaner to thoroughly scrub both battery posts. Get rid of any corrosion, dirt, or grime. You want the metal shiny and bright.
- Clean the Cable Ends: If you’re reusing your existing battery cables with new clamps, inspect the ends of the cables that connect to the clamps. If they look corroded or dirty, clean them with your wire brush too. A clean connection here is just as important.
- Inspect New Clamps: Give your new clamps a quick look-over. Ensure they are clean and free of any manufacturing debris.
A pristine surface ensures maximum conductivity, allowing your battery to perform at its best once you install battery terminal clamps.
Connecting the Positive Terminal First
Just as we disconnected the negative first, we will connect the positive first. This maintains the safety hierarchy and prevents accidental shorts.
- Carefully slide the new positive battery terminal clamp onto the positive (+) battery post. Ensure it sits flush and completely over the post.
- Using your wrench, tighten the nut on the clamp. You want it to be snug and secure – tight enough that you can’t easily twist it by hand, but don’t overtighten it. Over-tightening can strip threads or damage the battery post. A good rule of thumb is “snug, then a quarter turn.”
- Give the clamp a gentle wiggle to ensure it’s firmly seated.
Connecting the Negative Terminal
Now, repeat the process for the negative side.
- Slide the new negative battery terminal clamp onto the negative (-) battery post.
- Tighten the nut securely, using the same “snug, then a quarter turn” principle.
- Perform the wiggle test to confirm it’s secure.
Applying Anti-Corrosion Protection
You’ve almost finished learning how to install battery terminal clamps! This final step is a preventative measure that really pays off.
- Once both clamps are installed and tight, apply a generous layer of anti-corrosion grease or spray over the clamps and battery posts. This creates a barrier against moisture and air, significantly slowing down the formation of new corrosion. It’s a small step that can greatly extend the life of your battery and connections.
Double-Checking Your Work and Final Tips
You’ve done the hard work! Now it’s time for the final checks and some long-term tips to ensure your new battery terminal clamps give you years of trouble-free service. This step is crucial to confirm you correctly knew how to install battery terminal clamps.
The Wiggle Test
This might sound simple, but it’s incredibly effective. Gently try to wiggle each battery terminal clamp. They should be absolutely rock solid on the battery posts. Any movement, however slight, indicates that the clamp isn’t tight enough, which can lead to intermittent power issues and even damage over time. If they move, re-tighten them until they are secure.
Visual Inspection
Take a moment to visually inspect everything:
- Are both positive and negative clamps securely fastened?
- Are there any stray strands of wire that could touch other components? (There shouldn’t be, thanks to your careful installation!)
- Is the anti-corrosion protection evenly applied?
- Are there any tools or rags left near the battery that could cause an issue?
Everything should look neat, clean, and professional.
Test Start Your Vehicle
The moment of truth! Get in your car, put it in neutral or park, and try to start it. If you’ve correctly learned how to install battery terminal clamps, your car should crank over with enthusiasm and start right up. If it doesn’t, don’t panic:
- Recheck Connections: Go back and re-inspect both positive and negative terminals. Are they tight? Are they clean?
- Check Battery Charge: It’s possible the battery was dead or very low before you started. If it still doesn’t start, you might need to jump-start the car or charge the battery.
- Fuses: Very rarely, a short during the process could blow a fuse, but if you followed the safety steps, this is unlikely.
Maintenance for Longevity
Now that you know how to install battery terminal clamps, a little ongoing care will keep them in top shape:
- Regular Checks: Every few months, or when you check your oil, pop the hood and visually inspect your battery terminals. Look for any signs of new corrosion or loosening.
- Cleanliness: If you see any corrosion starting, clean it off immediately with your wire brush and apply more anti-corrosion grease.
- Avoid Overtightening: When doing future checks, if you need to tighten them, remember the “snug, then a quarter turn” rule.
There you have it! You’ve successfully learned how to install battery terminal clamps safely and effectively. This isn’t just a simple fix; it’s a valuable skill that empowers you to keep your vehicle running smoothly, avoiding inconvenient breakdowns and costly mechanic visits. Remember, proper installation ensures reliable power and extends the life of your battery.
By following these steps, you’ve not only solved a common car problem but also gained confidence in tackling future DIY projects. So, next time your car shows signs of a flaky connection, you’ll know exactly what to do. Stay safe, drive smart, and enjoy the satisfaction of a job well done!
Frequently Asked Questions
How do I properly install new battery terminal clamps?
Begin by ensuring your car is off and the old battery is disconnected. Identify the positive (+) and negative (-) posts on your battery, then attach the corresponding new battery terminal clamps securely. Make sure they are snug and provide a good electrical connection.
What safety precautions are important when installing battery terminal clamps?
Always wear safety glasses and gloves to protect against acid or sparks. Disconnect the negative terminal first when removing old clamps, and reconnect it last to prevent accidental shorts and ensure your safety during the process.
How do I know which battery terminal clamp goes on which post?
Car batteries are typically color-coded: the positive (+) post is usually larger and marked with a plus sign, often connected to a red cable. The negative (-) post is smaller, marked with a minus sign, and connected to a black cable; ensure your battery terminal clamps match these.
What tools will I need to install battery terminal clamps?
You’ll typically need a wrench or pliers to loosen and tighten the clamp nuts. A wire brush or battery terminal cleaner is also highly recommended to clean the battery posts thoroughly before installing new battery terminal clamps.
How tight should I secure the battery terminal clamps?
The battery terminal clamps should be snug enough so they cannot be twisted or moved by hand, but avoid overtightening. Overtightening can damage the battery posts or the clamps themselves, while a loose connection can cause starting issues or power loss.
Is it necessary to clean the battery posts before installing new battery terminal clamps?
Yes, absolutely. Cleaning the battery posts thoroughly with a wire brush or specialized terminal cleaner removes corrosion and dirt. This ensures an excellent electrical contact for your new battery terminal clamps and prevents future power issues or poor performance.