Revive Your Car How To Use a Jump Starter Correctly
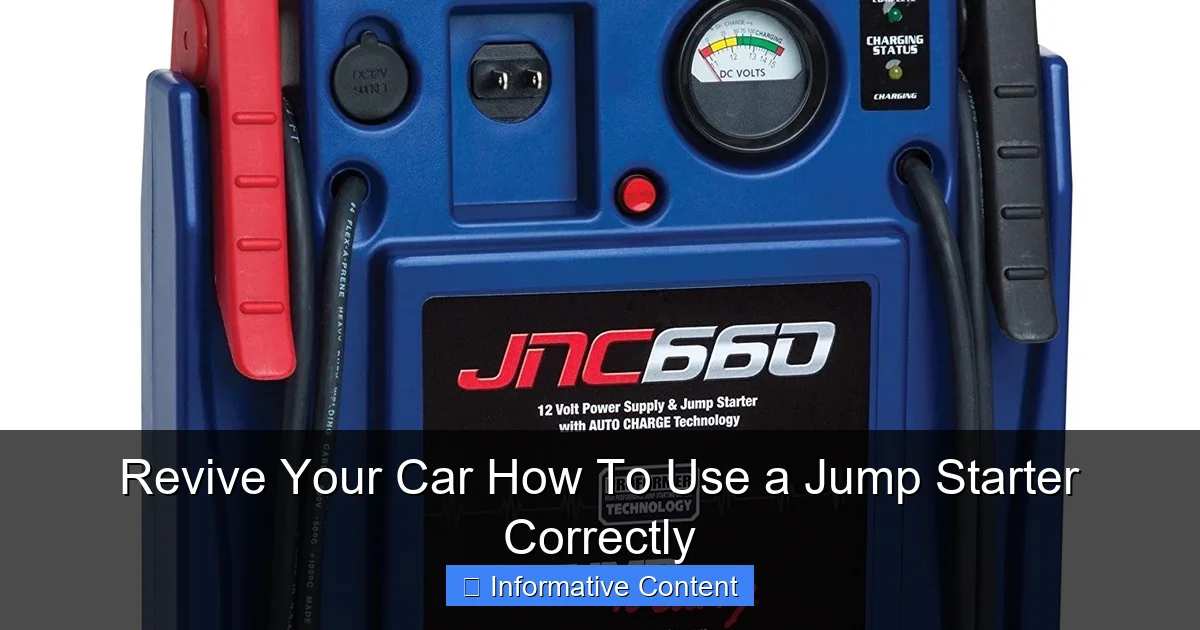
Featured image for how to use a jump starter
Image source: images-na.ssl-images-amazon.com
To safely jump-start your car, always prioritize the correct connection order to prevent damage or injury. First, attach the red clamp to the positive terminal of the dead battery, then the black clamp to a metal ground on the engine block, away from the battery. Only then connect the other end to your jump starter, following its specific instructions for power-up and disconnection, to effectively revive your vehicle.
<h1>Revive Your Car How To Use a Jump Starter Correctly</h1>
<p>Imagine this: you’re running late, keys in hand, coffee cooling on the counter. You hop into your car, turn the key, and… nothing. Just that dreaded, heartbreaking click-click-click, or worse, complete silence. We’ve all been there, haven’t we? That sinking feeling in your stomach, the sudden panic, and the inevitable question: “Now what?” A dead car battery can derail your entire day, leaving you stranded and frustrated. It’s a universal experience of modern life.</p>
<p>For years, the go-to solution for a dead battery involved finding a kind stranger with jumper cables and another running car. While effective, it’s not always convenient, safe, or even possible. Enter the portable jump starter – a true game-changer that puts the power to revive your car right in your hands. But like any powerful tool, knowing <strong>how to use a jump starter</strong> correctly is absolutely crucial, not just for success, but for your safety and the longevity of your vehicle.</p>
<p>Don’t let the thought of connecting wires intimidate you. Learning <strong>how to use a jump starter</strong> is a straightforward process once you understand the steps. Think of it as gaining a superpower against dead batteries. In this comprehensive guide, we’ll walk through everything you need to know, transforming you from a stranded motorist into a confident car rescuer. Let’s make sure that next time your battery gives up, you’re ready to get back on the road in minutes.</p>
<h2>Understanding Your Jump Starter: More Than Just a Box</h2>
<p>Before we dive into the practical steps of <strong>how to use a jump starter</strong>, let’s get acquainted with the tool itself. Modern jump starters are incredibly advanced and user-friendly, but a little background knowledge goes a long way.</p>
<h3>Types of Jump Starters</h3>
<ul>
<li><strong>Portable Jump Starters (Battery Packs):</strong> These are the stars of our show. Compact, often lithium-ion powered, and completely self-contained. They don’t need another vehicle and can even charge your phone! This guide primarily focuses on <strong>how to use a jump starter</strong> of this type.</li>
<li><strong>Traditional Jumper Cables:</strong> While still common, these require a second vehicle with a healthy battery. The method for connecting them is similar, but the power source is external.</li>
</ul>
<p>When choosing a portable jump starter, consider its peak amperage (more is better for larger engines or colder weather), battery capacity, and built-in safety features like reverse polarity protection.</p>
<h3>Essential Safety Precautions</h3>
<p>Safety first, always! This isn’t just a suggestion; it’s a non-negotiable part of learning <strong>how to use a jump starter</strong>.</p>
<ul>
<li><strong>Read Your Manual:</strong> Every jump starter is a little different. Your specific unit’s manual is your best friend.</li>
<li><strong>Wear Protection:</strong> Safety glasses and gloves are highly recommended. Battery acid and electrical sparks are no joke.</li&
<li><strong>Ensure Ventilation:</strong> Car batteries can release hydrogen gas, which is flammable. Work in an open area.</li>
<li><strong>Check for Damage:</strong> Inspect your car battery for cracks, leaks, or swelling. If you see any, do NOT attempt to jump start it. Call for professional help.</li>
<li><strong>Car in Park/Neutral:</strong> Always make sure your car is in Park (automatic) or Neutral (manual) and the parking brake is firmly engaged.</li>
<li><strong>Turn Off Accessories:</strong> Ensure headlights, radio, air conditioning, and anything else drawing power is off.</li>
</ul>
<h2>Getting Ready: Pre-Jump Checklist</h2>
<p>Preparation is key when learning <strong>how to use a jump starter</strong>. A quick check before connecting anything can save you time and potential headaches.</p>
<h3>Locate Your Car Battery</h3>
<p>For most cars, the battery is right under the hood, often on one side. However, some vehicles, particularly European models or those with space-saving designs, might have their battery in the trunk, under the back seat, or even in the wheel well. Consult your car’s owner’s manual if you can’t find it.</p>
<p>Once located, identify the positive (+) terminal (usually larger and covered by a red cap or marked with a plus sign) and the negative (-) terminal (usually black and marked with a minus sign).</p>
<h3>Prepare the Jump Starter</h3>
<ul>
<li><strong>Charge It Up:</strong> If using a portable jump starter, make sure it’s fully charged. Nothing’s more frustrating than trying to jump start a car with a dead jump starter!</li>
<li><strong>Power Off:</ok> Ensure the jump starter itself is OFF before connecting the clamps. This prevents accidental sparks.</li>
<li><strong>Clear the Area:</strong> Remove any tools, rags, or anything that could interfere with the connections around the battery.</li>
</ul>
<h2>The Step-by-Step Guide: Connecting the Cables Correctly</h2>
<p>This is the moment of truth – the actual process of <strong>how to use a jump starter</strong>. Follow these steps carefully to ensure a safe and successful jump.</p>
<h3>Connecting to the Dead Battery</h3>
<ol>
<li><strong>Red to Positive (+):</strong> Take the <em>red</em> positive clamp from your jump starter and securely attach it to the <em>positive</em> (+) terminal of your car’s dead battery. Make sure it has a good, solid grip.</li>
<li><strong>Black to Ground (or Negative):</strong> Now, take the <em>black</em> negative clamp. <strong>IMPORTANT:</strong> Many jump starter manufacturers recommend connecting this clamp to a bare, unpainted metal part of your car’s engine block or chassis, <em>away from the battery</em>. This minimizes the risk of sparks near potentially explosive battery gases. However, some modern jump starters with advanced safety features might instruct you to connect the black clamp directly to the negative (-) terminal. Always follow your specific jump starter’s instructions. If connecting to a ground point, choose a sturdy, clean metal surface.</li>
</ol>
<h3>Activating and Starting</h3>
<ol start=”3″>
<li><strong>Turn On the Jump Starter:</strong> Once both clamps are securely attached, switch your portable jump starter ON. Many units have indicator lights that will confirm a good connection and readiness.</li>
<li><strong>Start Your Car:</strong> Get into your car and attempt to start it. Turn the key or push the start button as you normally would. Do not crank for more than 5-10 seconds.</li>
<li><strong>If It Doesn’t Start:</strong> If the car doesn’t start on the first try, turn everything off, wait about 60 seconds, and try again. Sometimes the battery needs a moment to absorb the charge. Do not continuously crank the engine, as this can damage the starter motor.</li>
</ol>
<h3>Troubleshooting During Startup</h3>
<p>What if your car still won’t start after a few tries?</p>
<ul>
<li><strong>Check Connections:</strong> Ensure the clamps are making solid contact. Wiggle them slightly.</li>
<li><strong>Jump Starter Lights:</strong> Does your jump starter show an error code or flashing light? Consult its manual for what it means.</li>
<li><strong>Deeply Discharged Battery:</strong> Sometimes, a battery is so dead it can’t even accept a jump. Or, the issue might not be the battery at all, but a faulty starter motor or alternator.</li>
</ul>
<h2>After the Jump: What To Do Next</h2>
<p>Congratulations, your car is running! But the job isn’t quite finished yet. There are crucial steps to take after successfully learning <strong>how to use a jump starter</strong>.</p>
<h3>Disconnecting Safely</h3>
<p>Once your car is running smoothly, it’s time to disconnect. <strong>Always disconnect in the reverse order of connection:</strong></p>
<ol>
<li><strong>Black Clamp First:</strong> Disconnect the <em>black</em> negative clamp from the ground point or the negative (-) terminal.</li>
<li><strong>Red Clamp Second:</strong> Disconnect the <em>red</em> positive clamp from the positive (+) terminal of the battery.</li>
<li><strong>Turn Off Jump Starter:</strong> Switch off your portable jump starter and store it safely.</li>
</ol>
<h3>Next Steps for Your Car</h3>
<ul>
<li><strong>Let It Run:</strong> Allow your car to run for at least 15-30 minutes, or drive it around for a bit. This gives the alternator time to recharge the battery.</li>
<li><strong>Get It Tested:</strong> A dead battery usually signals a problem. Head to an auto parts store or mechanic to have your battery and charging system (alternator) tested. This is often a free service.</li>
<li><strong>Find the Cause:</strong> Was it just old age? Did you leave your lights on? Or is there a deeper issue like a parasitic draw or a failing alternator? Identifying the cause prevents future surprises.</li>
</ul>
<h2>Choosing the Right Jump Starter: A Quick Guide</h2>
<p>Now that you understand <strong>how to use a jump starter</strong>, let’s consider what makes a good one. Having the right tool makes all the difference.</p>
<h3>Key Features to Consider</h3>
<ul>
<li><strong>Peak Amps / Cranking Amps (CCA):</strong> This indicates how much power it can deliver. Higher numbers are better for larger engines (V6, V8, diesel) and cold climates. For a small 4-cylinder car, 400-600 peak amps might suffice, but for a large SUV or truck, you’ll want 1000+ peak amps.</li>
<li><strong>Battery Capacity (mAh/Wh):</strong> Determines how many times it can jump start a car or charge devices before needing a recharge itself.</li>
<li><strong>Safety Features:</strong> Look for spark-proof clamps, reverse polarity protection, over-current protection, and short-circuit protection. These make the device much safer and easier to use.</li>
<li><strong>Portability & Size:</strong> A compact unit is easier to store in your trunk or glove compartment.</li>
<li><strong>Extra Features:</strong> Many come with USB ports for charging phones, LED flashlights, or even built-in air compressors for tires.</li>
</ul>
<h3>When to Seek Professional Help</h3>
<p>While knowing <strong>how to use a jump starter</strong> is empowering, sometimes it’s best to call a professional. If your car shows any of these signs, refrain from attempting a jump and call roadside assistance or a mechanic:</p>
<ul>
<li>The battery looks swollen, cracked, or is leaking fluid.</li>
<li>The car won’t start after several jump attempts, or the starter sounds sluggish.</li>
<li>There’s a strong smell of rotten eggs, which indicates a damaged battery.</li>
<li>You’re uncomfortable or unsure about any part of the process.</li>
</ul>
<h2>Jump Starter Recommendation Guide</h2>
<p>To help you choose, here’s a general guide for recommended jump starter specifications based on vehicle type. Remember, these are general guidelines, and manufacturer recommendations may vary.</p>
<table>
<thead>
<tr>
<th><strong>Vehicle Type</strong></th>
<th><strong>Recommended Peak Amps</strong></th>
<th><strong>Ideal Capacity (Approx.)</strong></th>
<th><strong>Key Features to Prioritize</strong></th>
</tr>
</thead>
<tbody>
<tr>
<td>Small Sedans (4-cyl)</td>
<td>400-600A</td>
<td>8,000 – 12,000 mAh</td>
<td>Compact size, basic safety (reverse polarity), USB charge port.</td>
</tr>
<tr>
<td>Mid-size Sedans/Crossovers (4-6 cyl)</td>
<td>600-1000A</td>
<td>12,000 – 16,000 mAh</td>
<td>Robust safety features, LED flashlight, higher peak amps for cold starts.</td>
</tr>
<tr>
<td>Large SUVs/Trucks (V6-V8 Gas)</td>
<td>1000-1500A</td>
<td>16,000 – 20,000 mAh</td>
<td>High peak amps, durable clamps, potential for air compressor.</td<
</tr>
<tr>
<td>Heavy-Duty Trucks/Diesel Engines</td>
<td>1500A+</td>
<td>20,000 mAh+</td>
<td>Very high peak amps, larger battery, industrial-grade construction.</td>
</tr>
</tbody>
</table>
<p>Always check your vehicle’s battery CCA (Cold Cranking Amps) rating and compare it to the jump starter’s capabilities for the best match.</p>
<h2>Conclusion: Drive with Confidence</h2>
<p>There you have it! Knowing <strong>how to use a jump starter</strong> is a valuable skill that offers immense peace of mind. No more waiting helplessly for roadside assistance or a generous stranger. With a reliable portable jump starter and the confidence to use it correctly, you can quickly and safely get your car back in action, turning a frustrating situation into a minor inconvenience.</p>
<p>Remember the key takeaways: safety first, connect red to positive, black to a ground point (or negative as per instructions), and always disconnect in reverse order. Invest in a good quality jump starter, keep it charged, and you’ll be ready for whatever the road throws your way. Drive confidently, knowing you have the power to revive your car whenever you need to!</p>
Key Takeaways
- Read Instructions: Always consult your jump starter’s manual first.
- Ensure Safety: Wear protective gloves and eyewear before starting.
- Connect Red: Attach red clamp to dead battery’s positive (+) terminal.
- Connect Black: Attach black clamp to engine block or sturdy metal ground.
- Initiate Power: Turn on jump starter, then attempt to start the vehicle.
- Disconnect Safely: Remove clamps in reverse order (black, then red).
- Recharge Unit: Always recharge your jump starter immediately after use.
Frequently Asked Questions
How do I correctly connect a jump starter to my car battery?
First, connect the red (positive) clamp of the jump starter to your car’s positive battery terminal. Next, attach the black (negative) clamp to a clean, unpainted metal part of your engine block or chassis, away from the battery. This ensures a safe ground connection.
What safety precautions should I take when using a jump starter?
Always wear safety glasses and gloves to protect against sparks or acid. Ensure you’re in a well-ventilated area and confirm your jump starter’s voltage matches your car’s battery (typically 12V). Keep clear of moving engine parts once the car starts.
What should I do after my car successfully starts with the jump starter?
Once your car starts, immediately disconnect the black (negative) clamp from the engine block first, then the red (positive) clamp from the battery terminal. Let your car run for at least 15-30 minutes to allow the alternator to recharge the battery sufficiently. It’s advisable to get your battery tested soon after to check its health.
My car isn’t starting even after using the jump starter. What could be wrong?
First, double-check all connections to ensure they are secure and correctly placed (positive to positive, negative to ground). Make sure your jump starter itself is fully charged and powerful enough for your vehicle. If it still doesn’t start, the issue might be something other than a dead battery, such as a faulty starter motor or alternator.
How long should I leave the jump starter connected before attempting to start my car?
Most modern portable jump starters are designed for immediate use; you can typically attempt to start your car a few seconds after connecting. However, if your car battery is extremely drained, waiting 1-2 minutes after connection can allow for a small preliminary charge, improving your chances of a successful start. Always refer to your specific jump starter’s manual for optimal timing.
Can using a jump starter incorrectly damage my car’s electronics or battery?
Yes, improper use of a jump starter can indeed cause significant damage. Reversing the polarity (connecting positive to negative and vice versa) can short-circuit electrical systems, blow fuses, or even damage sensitive electronic components. Always carefully follow the correct connection sequence and your device’s instructions to prevent costly repairs.