Checking Your Car’s Alternator: A Simple Guide to Testing
Figuring out how to test car alternator can seem hard at first. It’s common to feel unsure about car repairs, especially if you’re new to them. Don’t worry! This guide makes it easy to check your alternator, even if you’re not a car expert. We’ll break down everything step-by-step so you can easily find out if your alternator is working correctly. Let’s start and find out how.
What Your Car Alternator Does
The car alternator is like the power plant for your vehicle. It generates electricity to run everything electrical, from your headlights to your radio. Plus, it keeps your car battery charged. When your alternator isn’t working right, you might see warning lights, the car might not start, or electrical parts could malfunction. It’s important to understand the role of the alternator in your car’s electrical system, because it’s a vital component that powers all the electrical accessories and keeps the battery charged. A failing alternator can cause several issues. Learning how to properly diagnose and assess the alternator can save you costly repairs and keep your car running reliably.
How the Alternator Works
Inside the alternator, a spinning rotor creates a magnetic field. This field induces an electric current in the stator, which is made up of copper wires. This AC (alternating current) electricity then gets converted to DC (direct current) by diodes. The DC power is what charges the battery and runs your car’s electrical system. This conversion is a crucial process, providing the stable power your car needs. The voltage regulator is another key part, ensuring the alternator supplies the correct voltage to avoid overcharging or undercharging the battery. It automatically adjusts the current output based on the car’s electrical load, such as when you turn on the lights or the air conditioning.
- Rotor: The rotating part inside the alternator, creating a magnetic field when current passes through its windings.
- Stator: The stationary part, where the magnetic field induces an electrical current.
- Diodes: They change AC electricity to DC, which your car uses.
- Voltage Regulator: This keeps the voltage steady.
The rotor is a key element in generating electricity in the alternator. It spins within the stator, creating a magnetic field that interacts with the stator windings to produce electrical current. This magnetic field is generated by an electromagnet, which consists of coils of wire wrapped around an iron core. As the rotor spins, the magnetic field changes, inducing an electromotive force (EMF) in the stator windings, and this force is what enables the alternator to generate electricity. The speed at which the rotor spins directly affects the alternator’s power output.
The stator is a critical element in the alternator, acting as the fixed component where the electrical current is generated. It houses a set of copper wire coils that surround the spinning rotor. As the rotor’s magnetic field cuts across these coils, it induces an electromotive force (EMF), generating alternating current (AC). The design of the stator is carefully constructed to maximize efficiency in converting mechanical energy from the engine into electrical energy. The stator’s size, number of windings, and their configuration all affect the alternator’s performance, influencing its output voltage and current capacity.
Diodes, a group of semiconductor devices, are essential components in the alternator’s ability to convert alternating current (AC) to direct current (DC). This conversion is critical because the electricity produced by the alternator is AC, but the car’s battery and electrical system require DC power. Diodes act as one-way valves, allowing current to flow in only one direction. This rectifies the AC current, transforming it into the DC power needed to charge the battery and run the car’s electrical systems. The number and type of diodes used in an alternator design can impact its overall efficiency and output capabilities.
The voltage regulator is a key component that ensures the alternator produces the correct voltage to charge the battery and supply power to the car’s electrical system. It’s like a smart control center, monitoring the output voltage and adjusting the alternator’s performance to maintain a consistent voltage, usually around 13.5 to 14.5 volts. This prevents overcharging or undercharging of the battery, which could damage it or cause electrical problems in the vehicle. The voltage regulator constantly monitors the battery’s condition and the electrical load of the car, adjusting the alternator’s output to meet its needs.
Signs of a Bad Alternator
A failing alternator shows itself in various ways. You may notice dimming headlights or flickering interior lights. Your car might struggle to start, or stall while driving. Unusual electrical issues, like a radio that cuts out, can also point to alternator problems. Often, the car’s battery warning light will come on, indicating there’s a problem with the charging system. Ignoring these signs can lead to being stranded or damage to the battery. Recognizing these common indicators can help you troubleshoot and decide if your alternator needs checking. Knowing these warning signs can prevent breakdowns.
- Dim or Flickering Lights: Headlights, interior lights, or dashboard lights might become dim or flicker.
- Difficulty Starting the Car: The engine may crank slowly or fail to start.
- Battery Warning Light: The battery-shaped light on your dashboard turns on.
- Electrical Component Problems: Unusual behavior in electrical accessories, such as the radio or power windows.
Dimming or flickering lights are a primary sign of an alternator issue. When the alternator can’t provide enough power, the electrical components start to struggle. Headlights often show this first, becoming dimmer as the alternator weakens. Interior lights, like dome lights and dashboard lights, might also start to flicker. This behavior indicates that the alternator is unable to maintain a steady electrical supply. The lights may pulse or change intensity, showing an inconsistency in voltage. The cause of the lights dimming is the voltage dips and fluctuations that a bad alternator causes.
If your car has difficulty starting, it can be a sign of a failing alternator. A weak alternator might not be supplying enough power to the battery, which is needed to start the car. When you turn the key, the engine might crank slowly, struggle to turn over, or just click without starting. This problem can be especially noticeable in colder weather when the engine requires more power to start. The alternator is critical for charging the battery, so a failing alternator won’t be able to provide the needed power to get the engine running. This symptom is often associated with a depleted battery.
The battery warning light is a clear signal that there’s a problem with your car’s charging system. This light looks like a battery and it illuminates when the car’s computer detects that the battery isn’t receiving enough charge. While the battery light could indicate a dead battery, it often points to a failing alternator. If the light comes on, it suggests that the alternator isn’t generating enough electricity to recharge the battery. When this light appears, it’s very important to check the alternator’s function, because the battery depends on the alternator to function. It’s a key indicator of alternator trouble.
When the alternator is failing, electrical components start malfunctioning. You might find issues with the radio, such as the sound cutting out or the screen dimming. Power windows could become slow, or not function. The car’s electrical system struggles when the alternator can’t supply enough power. These problems can be intermittent, making diagnosis tricky. If your electrical devices do not function properly, this could be because the alternator is not generating enough current to power them correctly. It is important to address these issues to avoid further electrical malfunctions.
Ways to Test Your Car Alternator
There are a few simple tests you can do to see if your alternator is working properly. You can check the voltage using a multimeter. You can also do a load test to see how the alternator performs under stress. These tests are relatively easy to perform at home. Always be careful and take safety precautions when working with car electrical systems. With the right tools and information, you can easily find out whether your alternator needs attention.
Testing with a Multimeter
A multimeter is a handy tool for testing your alternator. You can measure the voltage of the battery, with the engine off and running. You should also check the voltage with the car lights on. These measurements will help you determine the alternator’s performance. Knowing how to use a multimeter to test the alternator is a useful skill. A properly functioning alternator should produce a stable voltage when the engine is running. If the voltage readings are outside of the normal range, then it suggests an alternator issue.
- Gather Your Tools: Get a multimeter, a fully charged battery, and a clean place to work.
- Check Battery Voltage (Engine Off): Connect the multimeter to the battery terminals, setting it to DC voltage, and note the reading.
- Check Battery Voltage (Engine On): Start the engine and note the voltage reading again.
- Test with Electrical Load: Turn on headlights, and other accessories. Note the voltage reading again.
- Compare Readings: If the voltage doesn’t increase when the engine runs, or drops with load, your alternator may need attention.
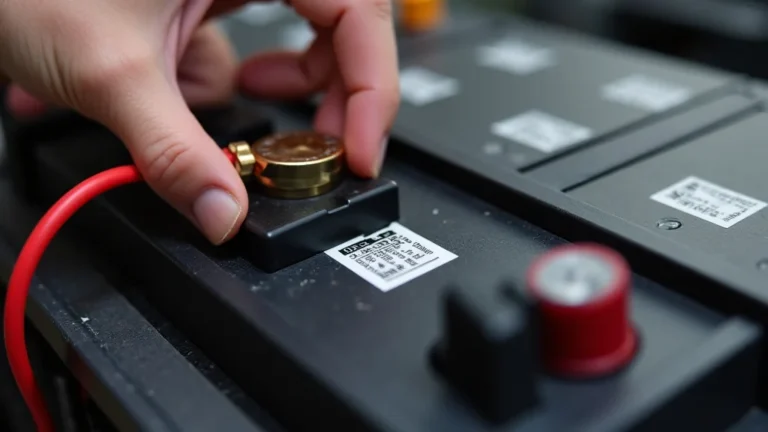
Before you begin testing your alternator, gather all necessary tools and ensure you have a safe and well-lit workspace. You’ll need a multimeter capable of measuring DC voltage, which is easy to find at any auto parts store. Make sure the car’s battery is fully charged beforehand; this helps ensure accurate readings. Also, prepare a clean, level surface to work on. Having these basic necessities ready helps to avoid interruptions during the testing procedure, making it easier to diagnose the alternator’s condition.
With the car off, connect the red probe of the multimeter to the positive (+) terminal of the battery and the black probe to the negative (-) terminal. Set the multimeter to measure DC voltage, often indicated by a ‘V’ with a straight line or a dashed line. The multimeter should display a voltage reading, which typically should be around 12.6 volts for a fully charged battery. This first reading gives a baseline to compare against. If the battery voltage is significantly lower than this, the battery itself may have problems, or it has been drained.
Once the engine is running, again place the multimeter probes on the battery terminals as before. Note the voltage shown on the multimeter display. A properly functioning alternator should boost the voltage, typically reading between 13.5 and 14.5 volts. The engine running reading is a critical test. This confirms if the alternator is charging the battery and supplying power to the vehicle’s electrical system. If the voltage remains near the battery’s original reading, the alternator isn’t generating enough power, indicating a possible malfunction.
To check the alternator’s performance under load, start the engine and then turn on the headlights, the radio, and the air conditioning. This increases the electrical demand on the alternator. Check the voltage reading again with the multimeter on the battery terminals. A healthy alternator should still maintain a voltage between 13.5 and 14.5 volts, even when handling the added electrical load. If the voltage drops significantly when adding these accessories, this could indicate that the alternator isn’t able to keep up with the power demands of the car, suggesting a problem.
The key to using these multimeter readings is to compare them. If the voltage remains the same or decreases after starting the engine, your alternator likely is not generating electricity. Compare the voltage readings from the different tests to pinpoint whether the alternator is the issue. If the alternator is working correctly, the voltage should be higher with the engine running compared to when it’s off. If it doesn’t meet these requirements, it’s a sign that the alternator is not functioning properly. Further diagnosis might be required to determine the exact cause of the alternator failure.
Checking Belt Condition
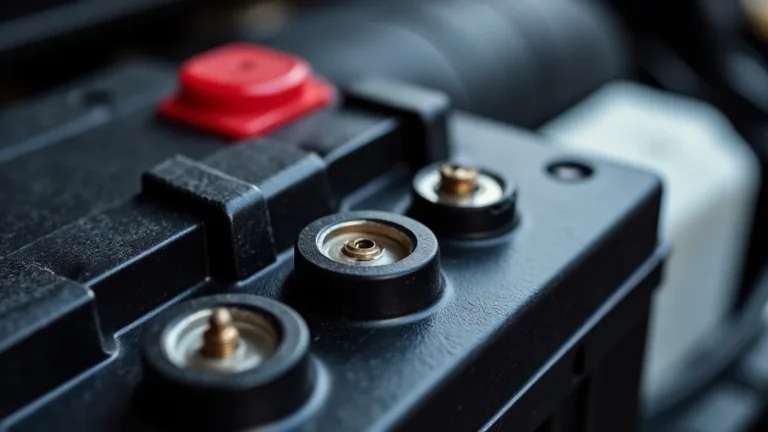
The serpentine belt is what drives the alternator. If the belt is worn or damaged, it won’t be able to turn the alternator properly. Inspect the belt for cracks, fraying, or wear. Checking the belt is an easy step that is often overlooked. A worn or damaged belt can cause problems even if the alternator is good. A well-maintained belt helps ensure that the alternator operates at peak efficiency. It’s a quick and simple way to ensure the alternator is functioning.
- Locate the Belt: Identify the serpentine belt that drives the alternator.
- Inspect the Belt: Look for cracks, wear, or fraying along the entire length.
- Check Tension: See if the belt has the correct tension and isn’t too loose.
- Replace if Needed: If the belt is damaged or worn, change it to ensure proper alternator operation.
Find the serpentine belt in your engine bay. This belt usually winds around multiple pulleys, including the alternator, the crankshaft, and other accessories like the power steering pump and air conditioning compressor. The belt will be easily visible in most vehicles. You can often trace it from the crankshaft pulley to the alternator pulley. This step is about visually identifying and confirming the belt’s presence and its pathway around the pulleys. A diagram under the hood might show the belt’s routing, if you’re not certain.
Carefully examine the entire length of the serpentine belt for signs of damage. Check for any cracks on the belt’s surface, especially where it bends around the pulleys. Look for fraying, where the edges of the belt are breaking apart, or wear on the contact surfaces. Any of these issues reduce the belt’s ability to grip the pulleys. It might cause the alternator to slip and not spin at the correct speed, affecting charging performance. Replace the belt if you see any signs of damage to prevent further problems.
Proper belt tension is important for ensuring the alternator turns correctly. If the belt is too loose, it can slip on the pulleys, reducing the efficiency of the alternator and affecting its ability to charge the battery. You should check the belt’s tension by trying to twist it between two pulleys. You should be able to twist it only a small amount, typically less than a quarter turn. If it is too easy to twist, the belt tension may need adjustment. Check the manufacturer’s recommendations for proper tension specifications, which often involve using a belt tension gauge.
If you see any signs of damage during the inspection, it’s a good idea to replace the serpentine belt. A damaged belt can cause various issues, including reduced alternator performance, or complete failure of the charging system. Replacing the belt is an easy job, and it’s a good preventative measure. Always replace a damaged belt to prevent further issues, like the car stalling. Always make sure to get the correct replacement belt by checking the car’s make, model, and year, to ensure compatibility. This will ensure proper performance of the alternator and other engine accessories.
Conducting a Load Test
A load test puts the alternator under stress to check its performance. This test involves using a tester that simulates a high electrical load. It helps to find out if the alternator can meet the car’s power needs. This test is a bit more advanced than using a multimeter, because it uses specialized equipment. The load test can help detect problems that a simple voltage test might miss. It gives a complete picture of the alternator’s performance and capabilities.
Here’s a comparison table:
| Test Method | Equipment Needed | Process | Outcome |
|---|---|---|---|
| Multimeter Test | Multimeter | Measure battery voltage with engine off, on, and with electrical load. | Voltage readings will indicate alternator’s charging capability. |
| Belt Inspection | Visual inspection | Check serpentine belt for cracks, wear, and tension. | Determines if the belt is causing alternator issues. |
| Load Test | Alternator Tester | Simulates a high electrical load to test the alternator’s output. | Reveals alternator’s performance under heavy electrical demand. |
- Get the Right Equipment: You’ll need an alternator tester.
- Connect the Tester: Attach the tester leads to the battery terminals, following the instructions.
- Start the Engine: Turn the engine on, and follow the tester’s prompts.
- Read the Results: The tester will show if the alternator is working correctly, or if it has issues.
- Interpret the Results: Look for any voltage drops or current output issues under load.
To perform a load test, you need an alternator tester, which you can usually get from an auto parts store. The testers typically have clamps that connect to the battery terminals, and they can measure the alternator’s output under load. Some testers can also check other parts of the charging system, like the diodes or voltage regulator. Make sure you use the tester according to the manufacturer’s instructions. That way, you ensure accurate results.
Connect the alternator tester to the car battery. This will usually involve attaching the red and black clamps of the tester to the corresponding terminals on the battery: red to positive (+), and black to negative (-). Make sure the clamps have a secure connection for accurate readings. The tester might have specific instructions on how to connect it, so read the manual before starting. Correct connections are essential to get an accurate reading.
Turn on the engine and follow the instructions on your alternator tester. Usually, the tester will have specific prompts and steps to follow. Some testers will start the engine. Others will ask you to rev the engine to a certain speed. This process ensures the alternator produces enough power. The tester will then measure the alternator’s output at different engine speeds and electrical loads. The goal is to see if the alternator can maintain the correct voltage and current.
The alternator tester will show the results, usually including the alternator’s voltage output, amperage, and any potential issues. The tester might display results like ‘Pass’ or ‘Fail’, or it might provide specific voltage and current measurements. If the results are within the normal range, the alternator is working well. If the readings are low, or if the tester indicates a problem, then the alternator is failing. This helps you to find out if the alternator needs replacing or requires more attention.
Carefully interpret the results displayed by the alternator tester. Look for any significant voltage drops under a load, which could indicate a weak alternator. Also, notice if the current output is too low, which can also be a sign of a problem. If the tester finds problems, then the alternator might have issues, such as a faulty diode or voltage regulator. These findings will help you determine if you need to replace your alternator, or if other parts of the charging system require attention.
How to Repair or Replace Your Alternator
When you find that your alternator is bad, you’ll need to decide whether to repair it or replace it. Replacing an alternator can involve removing the old unit and installing a new one. Repairing involves figuring out what is broken and replacing the bad parts. This can often be more cost-effective. Sometimes, a simple fix is possible. If the alternator is the issue, it’s necessary to resolve the issue to ensure the proper function of your car.
Getting Started
Before you start, make sure you have the right tools, like wrenches, sockets, and a new alternator, if you’re replacing it. Disconnect the battery’s negative terminal to prevent electrical shocks. Also, find the location of the alternator in your car. This often requires some basic mechanical skills. If you are not sure how to safely handle the electrical system, it’s best to take your car to a mechanic. Having a good understanding of your car’s electrical system will help you with this task.
- Safety First: Disconnect the negative battery cable before doing any work.
- Gather Your Tools: Collect the necessary wrenches, sockets, and any special tools.
- Locate the Alternator: Find the alternator in your engine bay.
- Document the Connections: Note the position of any wires and belt before removing anything.
Safety is the most important thing when you’re working on a car. Before you start to work on the alternator, disconnect the negative (black) battery cable from the car battery. This stops any electrical currents from running through the system, preventing the risk of electric shocks. Using gloves and eye protection is always a good practice. Removing the negative battery cable will also avoid any accidental shorts during the repair process. This step is a necessary precaution to protect you and your car.
Get all the tools you’ll need, like wrenches, sockets, and any other tools that the car’s manual says you should have. Make sure you have the right size wrenches and sockets to remove the bolts that hold the alternator in place and to disconnect the wires. If you are planning on changing the alternator, make sure you have the new one and compare it to the old one before starting. Having the correct tools helps make the job easier and keeps you from having to stop in the middle of it. This will help you get the job done properly and efficiently.
Find the alternator in the engine compartment. The alternator is often near the front of the engine, usually connected to the crankshaft pulley by a belt. Use your car’s manual if you can’t find it. The alternator’s location can vary from vehicle to vehicle. You might need to remove some components, like the air filter or other parts, to get to it. You will usually find it mounted to the engine block with bolts. This will make it easier to remove and replace the alternator.
Before removing the alternator, it is a great idea to make a note of how the wires are connected and the path of the belt. Take pictures or draw diagrams to help you remember how to put everything back together. It’s especially useful to make notes of the routing of the serpentine belt. Take note of any wiring or brackets to prevent errors during the reassembly process. If you are replacing the alternator, keep the old one handy, so you can compare the connections with the new one. This will help you to prevent mistakes and ensure you put everything back in the correct position.
Removing and Installing the Alternator
Removing and installing an alternator is usually done with some basic mechanical knowledge. You’ll need to disconnect the wires, remove the belt, and unbolt the alternator from the engine. Then, you’ll put the new alternator in place, connect everything back up, and test to ensure it works. Following each step correctly will help ensure a successful repair or replacement. It’s a good idea to seek help if you’re uncertain about any step. This will make sure that the alternator works well.
- Disconnect the Wires: Unplug or unbolt any electrical connectors attached to the alternator.
- Remove the Belt: Loosen the belt tensioner and remove the serpentine belt from the alternator pulley.
- Unbolt the Alternator: Take off the bolts holding the alternator to the engine.
- Install the New Alternator: Put the new or repaired alternator in place and secure it with the bolts.
- Re-attach the Belt and Wires: Put the belt back on, and reconnect all wires and connectors.
Carefully disconnect any wires or electrical connectors attached to the alternator. These wires will carry electricity, so avoid touching them when you’ve removed the negative battery cable. Take your time to carefully detach the wires, noting the positions to make sure you put them back in the correct locations. Some connectors may need to be pulled off, and others may be secured with bolts. It can be useful to label the wires, if needed, to prevent any mistakes when you reassemble everything. Always be cautious when working with electrical connections.
Loosen the belt tensioner to release the tension on the serpentine belt. Locate the tensioner, which is usually a pulley that can be moved using a wrench. Use the correct tool to carefully move the tensioner. You can then slip the belt off the alternator pulley. Be sure to note the belt’s routing path. If needed, you can use a diagram or take a picture to help you remember the belt’s path. Make sure the belt doesn’t touch any parts or surfaces. This step prevents the belt from getting in the way as you take out the alternator.
Use the correct size wrench or socket to remove the bolts that secure the alternator to the engine block. The bolts can be difficult to access in some cases, so you might need to use a variety of tools, such as extensions. Put the removed bolts in a safe place. Once the bolts are removed, gently remove the alternator from its mounting bracket. This step frees the alternator for removal. It can be a tight fit, so you may need to maneuver the alternator to remove it from the engine bay. Be careful not to damage any other components during this process.
Place the new or rebuilt alternator into position on the engine block. Line up the mounting points and thread the bolts back into their respective holes. Tighten the bolts securely with a wrench, following the torque specifications outlined in your car’s repair manual. Make sure the alternator is correctly aligned with the pulley system. Confirm that all bolts are firmly in place. This will ensure that the alternator is safely installed in the engine bay and will work correctly. Take your time and make sure that everything is secure.
Carefully route the serpentine belt around the pulleys. Use the diagram or the notes you previously made to ensure that the belt follows the proper path. Use a wrench or other tool to retract the belt tensioner. Once the belt is correctly positioned, release the tensioner, allowing the belt to sit firmly on all the pulleys. Reconnect all electrical connectors and wires to the alternator. Double-check all connections to ensure everything is secure and properly connected. After confirming all the connections are secure, you can now start your vehicle and test the charging system.
Frequently Asked Questions
Question: What’s the main function of the alternator?
Answer: The primary role of the alternator is to generate electrical power to keep your car’s battery charged and run all electrical accessories while the engine is running.
Question: How often should I check my alternator?
Answer: There is no set schedule. But it’s wise to test the alternator if you see warning signs, such as dimming lights or difficulty starting the car, or during routine maintenance.
Question: What tools are needed to test an alternator?
Answer: You’ll need a multimeter or an alternator tester, along with basic tools like wrenches to disconnect the battery and other parts.
Question: Is it safe to drive with a bad alternator?
Answer: Driving with a bad alternator is not a good idea. It can cause your car to stall or leave you stranded, so it’s best to get it fixed as soon as possible.
Question: Can I replace my car alternator myself?
Answer: Replacing an alternator is usually possible for someone with basic mechanical skills, but always take caution and consult a mechanic if needed.
Final Thoughts
Now you have a better idea of how to test car alternator performance. You can check the voltage with a multimeter, check the belt, or conduct a load test to pinpoint the problem. These steps are easy, even if you are not a car expert. If you find your alternator isn’t working right, don’t worry. You can repair it, or change it for a new one. Remember to always put safety first and disconnect the negative battery cable before any work. Take it slow, use this guide, and you’ll be able to fix the issue. Being able to test your car’s alternator is a useful skill. This knowledge can save you time, and money. Go ahead, and test your alternator today.