Car Alternator Troubles: Why It Stops Charging When Hot
Having a car alternator stops charging when hot can be a real headache. It’s a common issue that often confuses folks, especially if you’re new to car maintenance. The good news is, you’re not alone, and it’s usually fixable without major stress. This guide will take you step-by-step through the most common causes and give you simple solutions to get your car back on the road. We’ll look at the symptoms, find the source of the trouble, and guide you through fixing it all, so let’s get started!
What Causes a Car Alternator to Stop Charging When Hot?
When your car’s alternator fails to charge when warm, it means it’s not consistently providing power to your car’s electrical systems after it has reached a certain operating temperature. This can manifest as dimming headlights, a dead battery, or other electrical issues. This problem is often linked to the internal components of the alternator, specifically the diodes and the voltage regulator, which are sensitive to temperature changes. These components can develop faults when they become heated, leading to the alternator’s failure. Furthermore, the overall design and materials used in the alternator construction play a major role in its ability to withstand heat.
Diodes and Heat Sensitivity
Diodes are essential parts of your car’s alternator. They turn the AC (alternating current) power generated by the alternator into DC (direct current) power that your car uses. These diodes are very sensitive to heat. As the engine warms up and the alternator operates, the diodes can begin to break down, especially if they are already weakened or of a low quality. This breakdown can cause the alternator to lose its ability to charge the battery and power the car’s electrical systems. A faulty diode can also cause a short circuit within the alternator, further compounding the problem. They commonly fail in cars in areas that experience higher temperatures during the summer months.
- Diodes’ Function: Diodes are small electronic components that act as one-way valves for electricity. They allow current to flow in one direction only. In an alternator, diodes convert the alternating current generated by the spinning rotor into direct current, which can then charge the battery and power the car’s electrical systems.
- Overheating: The alternator can generate a lot of heat, particularly when working hard. This heat can be difficult for the diodes to handle and can cause them to fail.
- Testing the Diodes: Checking the diodes usually involves using a multimeter to test their resistance and voltage drop. You’ll need to disconnect the alternator and use the multimeter in diode test mode. The readings should be in a specific range; any deviations might indicate a problem.
- Replace the Diodes: Replacement of diodes is done by professional mechanics; it is not recommended that a DIY person handle these components because of their fragile nature and sensitivity to electrostatic discharge.
Voltage Regulator Issues
The voltage regulator is a crucial part that manages the voltage output of the alternator to keep it stable. This helps protect the car’s electrical components from being damaged by excessive voltage. It has an essential role in preventing overcharging or undercharging of the car’s battery. A voltage regulator that fails in heat may send incorrect signals to the alternator, leading to undercharging, or complete charging failure. Over time, the regulator may develop internal damage due to constant use and exposure to heat, impacting the alternator’s overall performance, resulting in the problem.
- Regulator’s Role: The voltage regulator maintains a steady voltage output to protect the car’s electrical system from voltage spikes and maintain an ideal charge to the battery. It adjusts the magnetic field in the alternator to control the voltage output.
- Heat and Failure: The voltage regulator is usually located inside the alternator and is therefore exposed to the same heat as other components. Excessive heat can damage the sensitive internal circuitry of the regulator, leading to inaccurate voltage control.
- Testing the Regulator: There is a way to test your voltage regulator using a multimeter. You can check the voltage output while the engine is running and the alternator is working. The voltage should be within a specific range, usually around 13.5 to 14.8 volts.
- Replacing the Regulator:
Worn-Out Components
Other parts in the alternator can also contribute to the problem. These components, such as bearings and brushes, can wear out over time, leading to operational issues. Worn bearings may cause the rotor to wobble, thus affecting the output. The brushes inside the alternator deliver power to the rotor, and as they wear, they can struggle to maintain a proper connection, especially when heated. Furthermore, the solder joints in the alternator can weaken and crack due to heat cycles, making the issue worse. Eventually, these worn-out parts can compromise the alternator’s function.
- Bearings and Brushes: Worn-out bearings increase friction, which generates more heat, and can affect the alternator’s performance, leading to charging issues. The brushes are designed to deliver power. Wear of these brushes can disrupt the electrical flow, causing inconsistent charging.
- Solder Joints: Solder joints are used to connect electrical components within the alternator. Heat can weaken these joints over time, causing them to crack or break, leading to electrical shorts or open circuits.
- Testing and Inspection: If you suspect worn parts, you may check for a grinding noise coming from the alternator, a key indicator of worn bearings. Inspecting the brushes involves checking their length. Shorter brushes mean they’re worn. You should also look for cracked or loose solder joints.
- Replacement: The parts inside the alternator can usually be replaced, but it’s often more cost-effective and easier to replace the entire alternator. This ensures that all components are new and working correctly.
Identifying the Symptoms of a Hot Alternator Problem
Understanding the signs of an alternator that is failing when hot is key to diagnosing the issue correctly. By recognizing the early warning signals, you can prevent more significant problems down the road. Common symptoms include fluctuating voltage readings, problems starting the vehicle, and the intermittent operation of electrical components. These indications provide important clues, thus helping you take the appropriate actions.
Dimming or Flickering Lights
One of the earliest symptoms of a problematic alternator is dimming or flickering headlights. When the alternator is struggling to produce enough power, it causes the lights to become less bright. This happens because the alternator is not providing enough power to the car’s electrical systems, so the lights don’t get sufficient power. This problem often becomes more noticeable when the engine is idling or under heavy load, when the alternator’s performance dips. The lights may fluctuate in brightness as the alternator struggles to meet the car’s power demands, which can be an annoying distraction while driving. It is something to quickly identify and fix so that it does not become a bigger problem.
- Why It Happens: When the alternator cannot supply enough current, the lights do not receive enough power, resulting in a dim or flickering effect.
- Recognizing the Signs: Headlights dimming when the engine is idling, particularly when other electrical components (like the air conditioner or radio) are in use, can be one indicator. Look for a consistent flickering pattern.
- Troubleshooting: Use a multimeter to measure the voltage at the battery terminals while the engine is running. A healthy alternator should maintain a voltage between 13.5 to 14.8 volts.
- Professional Inspection: If you notice these symptoms, have your alternator tested by a professional mechanic to confirm whether it is defective.
Starting Issues
If your car is hard to start or won’t start at all, it’s one of the most visible signs that your alternator is not charging properly. This usually happens because the battery isn’t getting enough power to operate the starter motor. It’s often more noticeable after driving for a while when the car has reached its operating temperature, showing that the alternator stops charging when hot. The battery may seem to have enough power to start the car when cold, but after the engine heats up, it can fail. This can cause frustration and inconvenience.
- Battery Drain: The alternator’s main job is to keep the battery charged. If it fails, the battery’s charge drains because the electrical systems continue to draw power.
- Slow Cranking: A weak battery can cause the engine to crank slowly.
- No-Start Condition: If the battery is completely drained, the car might not start at all. This is a common indication of alternator issues.
- Battery Testing: The battery should be checked for its voltage and its ability to hold a charge. Also, have the alternator tested to verify that it is charging the battery correctly.
Other Electrical Problems
The failure of an alternator can lead to many other electrical problems. These issues can include malfunctioning radios, power windows, or even the air conditioning not working correctly. These electrical components rely on the car’s electrical system, and they will start acting up if the alternator isn’t supplying enough power. The car’s electronic control unit (ECU) may also act up, leading to reduced performance or strange behavior from the engine. Because electrical issues can affect safety and convenience, it is important to address them as soon as possible.
- Electronic Malfunctions: Cars nowadays are full of electronic systems that rely on a steady power supply. When the alternator fails, these systems may begin to act strangely.
- Dashboard Warnings: Keep an eye on the warning lights on your dashboard. These might point to problems with the charging system.
- Diagnostic Tools: Using an OBD-II scanner can provide diagnostic trouble codes (DTCs), which can help identify the root of electrical problems.
- Systematic Checking: Check all electrical components when the engine is running. If you see some issues like flickering lights, the alternator may not be working correctly.
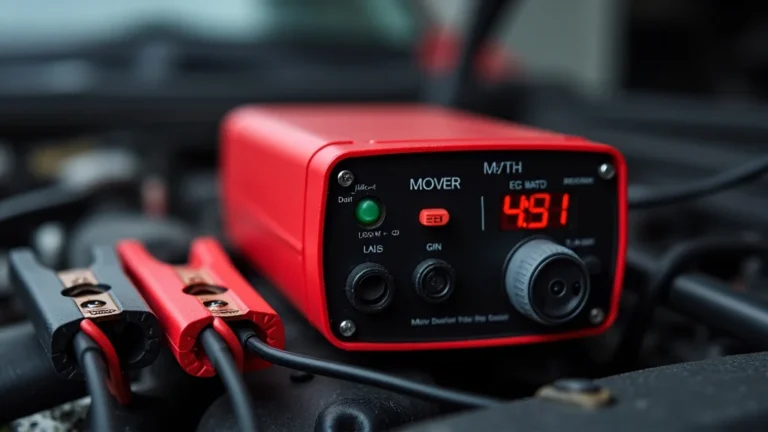
Simple Steps to Test Your Alternator
Testing your alternator is essential to confirm whether it is the source of the problem. This can be done by using a multimeter to measure voltage. These tests can help you diagnose and confirm that your alternator is not charging when hot. By using simple tests, you can collect essential data. Doing this helps you decide whether you need to repair or replace your alternator.
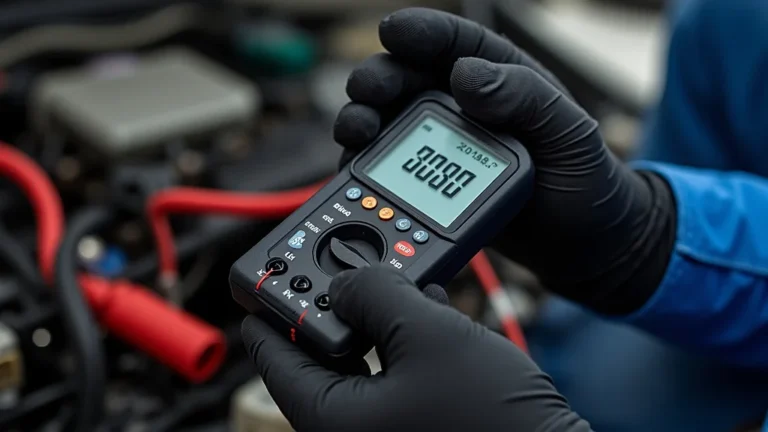
Voltage Test with a Multimeter
A multimeter is your go-to tool for testing the alternator’s output. Start by setting the multimeter to measure DC voltage. Connect the red probe to the positive (+) battery terminal and the black probe to the negative (-) terminal. Take the initial reading with the engine off to determine the battery’s resting voltage. Next, start the engine and let it run. Check the voltage readings again. If the alternator is working correctly, the voltage should increase above the battery’s resting voltage, usually between 13.5 and 14.8 volts. If the voltage stays the same or drops, the alternator might be failing. Perform this test when the engine is cold and again after it has warmed up to see if the charging characteristics change.
- Set Up the Multimeter: Choose the DC voltage setting that matches or exceeds your battery voltage.
- Initial Reading: Measure the battery voltage with the engine off. This will give you a baseline reading.
- Engine On Reading: Start the car and check the voltage again. You should see an increase in voltage. If not, the alternator may not be charging.
- Interpreting Readings: Anything below 13.5 volts suggests a potential issue, particularly if the voltage drops after the engine warms up.
Load Test for the Alternator
A load test puts the alternator under stress to see how well it functions when it is powering many devices at once. With the engine running, turn on high-power items like the headlights, the air conditioning, and the radio. Watch the multimeter readings while the electrical load increases. If the voltage drops dramatically or the alternator struggles to maintain a consistent voltage, it indicates a charging problem, possibly triggered by heat. This test helps find whether the alternator can provide enough power under the normal operating conditions of the car.
- Engine Running: Keep the engine running and the multimeter connected to the battery terminals.
- Turn On Electrical Loads: Turn on all the electrical devices you have access to.
- Monitor the Voltage: Observe whether the voltage output remains stable. A healthy alternator should maintain a steady voltage under load.
- Evaluate the Results: If the voltage drops significantly or the lights dim excessively when the devices are on, the alternator might have an issue, especially when hot.
Belt Inspection
The serpentine belt is essential for operating the alternator. Check for cracks, fraying, or any signs of damage. A damaged belt can slip, reducing the alternator’s performance. Also, check the belt tension. If the belt is loose, it might slip, especially when the engine is under load. Inspect the belt’s pulleys. Make sure they are not clogged or restricted. If the pulleys are misaligned, they will increase the wear and tear on the belt. A faulty belt will create performance issues, especially when the car heats up.
- Visual Check: Visually inspect the belt. Look for cracks, glazing, or wear. A worn belt needs to be replaced.
- Check Tension: A belt that is too loose can slip, especially under load.
- Pulleys Inspection: Check the pulleys for any damage or debris that might be affecting the belt’s operation.
- Belt Replacement: Replace the belt if it has issues or when it is recommended by the manufacturer.
Troubleshooting Car Alternator Problems
When you have determined that your alternator is not charging when hot, certain steps can be taken to diagnose and resolve the issue. By checking components, performing inspections, and running tests, you can locate the root cause. This section will guide you through fixing the most common issues and give you the knowledge to get your car running properly.
Inspect the Connections
Poor connections can disrupt the flow of current to and from the alternator. Check all electrical connections for corrosion or looseness. Check the main power wire connection at the alternator, the ground wires, and the connections at the battery terminals. Corrosion can prevent the flow of electricity, thus impacting alternator performance, especially when things heat up. Loose connections can also cause intermittent charging problems. Clean any corrosion with a wire brush or connection cleaner. Ensure that all connections are secure. Tightening the connections might be all it takes to fix the problem and is one of the easiest steps to take.
- Locate Connections: Identify the connections, including the main output wire on the alternator, the ground wires, and battery terminals.
- Look for Corrosion: Check for any white or green build-up on the terminals. This is a sign of corrosion.
- Tighten Connections: Make sure all connections are secure, and tighten them if necessary.
- Test the System: Test the alternator’s performance after cleaning and tightening.
Check the Battery
Although the alternator charges the battery, a damaged battery can negatively impact the alternator’s function and performance. A failing battery can draw more current than it should, making the alternator work harder, particularly when hot. Perform a load test on the battery to assess its health. This will reveal if the battery is holding a charge and is able to provide enough power to start the vehicle. A battery that cannot maintain a charge may cause the alternator to work harder, and the issue will seem to be the alternator when it is actually the battery. Replacing the battery might solve the charging issues, so it is a good step to take.
- Battery Test: Perform a load test using a battery tester.
- Voltage Check: Check the voltage of the battery using a multimeter to see if it is in the normal range.
- Battery Health: Evaluate the battery’s health. A battery that has trouble holding a charge should be replaced.
- System Test: After you have tested or replaced the battery, test the charging system again to confirm it is working correctly.
Component Replacement
If you’ve confirmed that the issue is within the alternator, replacing internal components, such as the voltage regulator or the diodes, might be necessary. This process involves opening the alternator, removing the defective parts, and putting in new ones. Replacing these components can restore the alternator’s charging ability. Replacing the entire alternator might be a more cost-effective solution, especially if other components are also showing signs of wear. Make sure the replacement parts match the make and model of your vehicle. Although you could have a professional do the work, you could also install it yourself if you have basic mechanical knowledge.
- Choose Parts: Buy high-quality components designed for your car’s make and model.
- Disassembly: Carefully disassemble the alternator to access the damaged components.
- Replace Parts: Install the new components, making sure everything is connected correctly.
- Reassembly: Put the alternator back together. Test to ensure it functions as intended.
Frequently Asked Questions
Question: What is the typical lifespan of a car alternator?
Answer: The lifespan of a car alternator varies but often ranges between 80,000 to 150,000 miles, or about 7-10 years. However, this may be affected by the driving conditions and the usage.
Question: Can a car alternator be fixed at home?
Answer: Some basic alternator issues, like replacing the voltage regulator or brushes, can sometimes be done at home with the right tools and knowledge. However, for more complex repairs, it’s often best to seek professional help.
Question: What are the signs of a failing car alternator?
Answer: Common signs include dimming headlights, slow engine cranking, frequent stalling, a battery warning light, and various electrical components malfunctioning.
Question: How much does it cost to replace a car alternator?
Answer: The price of replacing a car alternator ranges from $300 to $800, including parts and labor. The price will depend on the type of car and the repair shop’s rates.
Question: What could make a car alternator fail sooner than expected?
Answer: Factors that affect alternator life include driving in harsh conditions, such as extreme heat or cold, repeatedly jump-starting the car, and overworking the electrical system.
Final Thoughts
Having a car alternator stops charging when hot can be a source of frustration, but with the right knowledge, you can approach the problem head-on. By understanding the common causes, like faulty diodes and worn-out regulators, and knowing how to identify the symptoms, you’re now better prepared to deal with this issue. Remember to do some basic testing with a multimeter to diagnose the problem correctly. If you’re comfortable with some basic car care, you might be able to handle simple fixes yourself. However, for more difficult repairs, it’s always smart to have a mechanic do the work. By taking these steps, you can keep your car’s electrical system running smoothly and avoid bigger headaches down the road. If you’re experiencing these issues, don’t delay – get to work, check your car, and get back on the road!