Car Alternator Not Charging Causes and Simple Fixes
If your car won’t start, a common problem might be a flat battery. But what if you’ve jumped your car, and it still dies soon after? That’s where the issue of a car alternator not charging comes in. It can be tricky, especially if you’re new to car maintenance. Don’t worry, many drivers face this! This post simplifies the topic, making it easy to see the signs, understand the reasons, and get your car back on the road. We’ll explore step-by-step how to check for issues and show you the basic fixes.
Spotting the Signs of a Failing Car Alternator
Before jumping into fixes, knowing the clues your car gives is key. The most obvious sign is a dead battery after driving. But several other warnings can help you catch the problem before it leaves you stranded. Recognizing these symptoms early allows you to address the issue promptly and avoid bigger headaches.
In addition to a dead battery, the dashboard warning light, often shaped like a battery, can be a direct indicator. This light might flicker or stay on while the engine is running, pointing to charging trouble. Dimming or flickering headlights, especially when idling, is another telltale sign. As the alternator struggles, it can’t supply enough power to all electrical components, resulting in weak or erratic lighting.
You may also experience issues with your car’s electrical systems, like the radio or power windows. Electrical components may work intermittently or stop functioning altogether. These symptoms become more evident the longer the car is running. Unusual noises, such as a whining sound from under the hood, could also signal a failing alternator. Finally, any changes in your car’s behavior related to power should prompt a closer look at the charging system.
The Battery Warning Light: Your First Clue
The battery warning light is your car’s way of saying something is amiss. This light often comes on when the car is first started, then goes off. If it stays lit or comes on while you’re driving, the alternator isn’t properly charging the battery. This means the battery is draining instead of being recharged. The light might also flicker, especially when the engine is idling or under stress, like when using multiple electrical components simultaneously. This behavior is a strong hint of an alternator problem.
- Understanding the Light: The battery light is connected to sensors that monitor the charging system’s voltage. If the voltage drops below a certain level, the light will turn on.
- Common Causes: The light can come on due to a failing alternator, a bad connection, or a worn-out belt.
- Troubleshooting: Check the belt for wear and ensure all connections are secure. If the light persists, a professional inspection is needed.
- Early Detection: Pay attention to the light’s behavior. If it flickers or comes on, have it checked out before it leads to a dead battery.
Dimming Headlights and Other Electrical Issues
Dimming headlights offer another visual clue. If your headlights are noticeably dimmer than usual, especially when the engine is idling, it may show the alternator can’t provide enough electricity. The electrical system struggles to keep up with the car’s needs. This is because the alternator doesn’t generate enough power to run the lights and charge the battery at the same time.
Other electrical components, such as the radio, power windows, and air conditioning, might also show problems. These parts may function erratically, or cease working altogether. The alternator powers these elements. Any drop in charging ability affects their performance. This scenario can quickly turn a quick trip into a challenge. These symptoms often worsen as the alternator’s condition declines.
- Reduced Power: As the alternator fails, it supplies less power, which impacts all electrical systems.
- Load Demand: The more electrical components used, the greater the strain on the alternator.
- Intermittent Issues: Problems might come and go, depending on how much power is needed.
- Professional Inspection: These symptoms highlight a problem in the electrical system, requiring professional attention.
Strange Noises and Other Unusual Behavior
Besides visual and electrical signs, unusual sounds can be important clues. A whining noise from under the hood, especially when the engine is running, might be related to the alternator. This noise can indicate worn bearings within the alternator. As these bearings wear down, they create friction and noise. This indicates a problem within the alternator itself.
You might notice other behaviors, like the car’s engine hesitating when you accelerate. This is also something to investigate. These symptoms, combined with other electrical issues, could indicate the alternator is struggling to meet the car’s power needs. It’s important to address these issues to avoid more significant damage or a complete failure of the charging system.
- Bearing Noise: A whining sound is often caused by worn-out bearings in the alternator.
- Belt Slippage: Squealing sounds can point to a worn or loose belt that drives the alternator.
- Engine Hesitation: If the engine stutters, it might be due to insufficient power.
- Comprehensive Inspection: When these signs appear, have a mechanic assess the car.
Common Reasons for a Car Alternator Not Charging
Knowing the common reasons for a car alternator not charging can help you take the right steps to fix the problem. Issues can stem from mechanical faults, electrical problems, or even simple wear and tear. Here, we’ll explore some of the most frequent causes, giving you a good grasp of the technical aspects.
One primary culprit is a failed alternator itself. Alternators are responsible for generating the electrical power your car needs. As they age, their internal parts can wear out, causing them to fail. Another common issue is a worn or loose drive belt. This belt connects the alternator to the engine, allowing it to spin and generate power. If the belt is damaged or slipping, the alternator can’t work correctly. Other factors like faulty wiring, corroded connections, or a bad voltage regulator can also disrupt the charging process.
External factors, such as extreme temperatures or frequent short trips, can put additional stress on the alternator. Moreover, the car’s electrical demands play a vital role. Using many electrical devices simultaneously can strain the charging system. Understanding these various causes can help you troubleshoot the problem and avoid potential breakdowns. A proper diagnosis from a mechanic is best to ensure an accurate assessment.
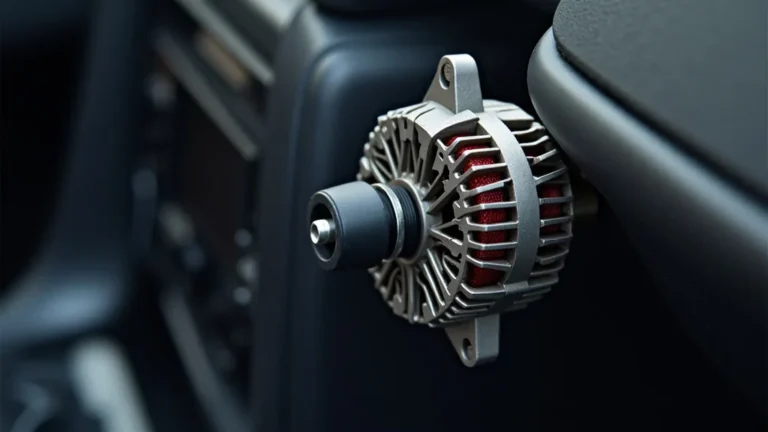
Alternator Failure and Internal Component Problems
An alternator’s job is to supply power to your car. Inside, various components work together to make this happen. These parts can fail with time. One common problem is the failure of the diodes. The diodes convert the alternating current (AC) generated by the alternator into direct current (DC) that the car uses. If the diodes are faulty, the alternator can’t supply the right type of power.
Another area of concern is the stator, a fixed part of the alternator. Damage to the stator windings can hinder its ability to generate electricity. Rotor issues are also common. The rotor spins within the alternator to create a magnetic field. Damage to the rotor or its brushes can significantly impair its charging ability. Replacing the entire alternator is often needed when these internal parts fail.
- Diodes: They convert AC to DC power, and their failure prevents proper charging.
- Stator: Damaged stator windings can reduce or eliminate power generation.
- Rotor: Worn brushes or rotor damage affect the magnetic field needed for charging.
- Bearings: Worn bearings can lead to friction and reduce the alternator’s efficiency.
The Drive Belt and Its Critical Role
The drive belt (also called a serpentine belt) is critical. It connects the engine’s crankshaft to the alternator. When the engine runs, the belt turns the alternator’s pulley, causing the alternator to generate electricity. If the belt is damaged, worn, or loose, it can’t transmit the necessary power.
Common problems include cracking, fraying, or slipping of the belt. A worn belt might slip on the pulley, preventing the alternator from spinning fast enough. This reduces its charging capacity. A loose belt can also slip. Regular inspections of the belt are important. You should check the belt for wear, cracks, and proper tension. Replacing the belt is generally an easy and inexpensive task that can help keep your car running smoothly.
- Belt Wear: Cracks and fraying can cause the belt to break, stopping the alternator.
- Tension: A loose belt will slip, decreasing charging efficiency.
- Belt Material: Over time, the rubber degrades, leading to failure.
- Regular Inspection: Inspecting the belt is a simple way to avoid charging issues.
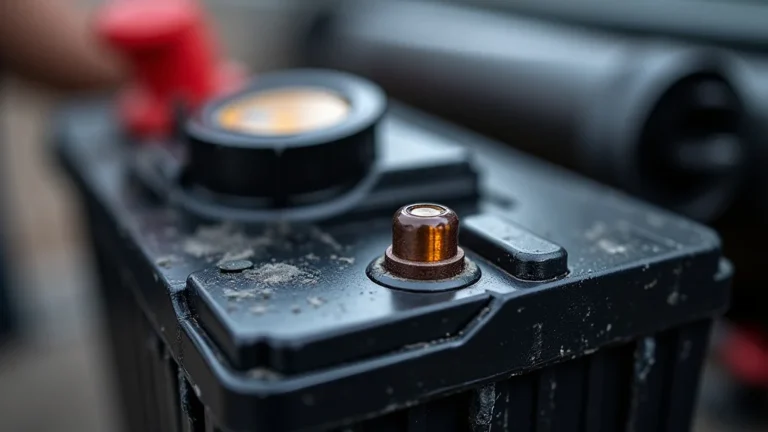
Electrical Connections and Wiring Problems
Electrical connections and wiring are essential for the alternator to work correctly. Corroded or loose connections can interrupt the flow of electricity. This includes connections at the alternator, the battery, and other points in the charging circuit. A poor connection can lead to the battery not getting charged properly.
Faulty wiring can also lead to charging issues. Damaged wires, frayed insulation, or shorts in the wiring harness can affect the alternator’s performance. These problems can cause power loss and battery drainage. Inspecting the wiring for any damage or corrosion is a basic step. Cleaning or replacing any affected parts might resolve the issue. In cases of significant wiring damage, a professional inspection is needed.
- Corrosion: Corroded connections create resistance, reducing power flow.
- Loose Connections: Loose connections can interrupt the electrical circuit.
- Damaged Wiring: Frayed or damaged wires can cause shorts or prevent charging.
- Preventive Measures: Regularly inspect and clean electrical connections.
Diagnosing and Testing the Car Alternator
Correctly diagnosing the problem is crucial before trying to fix the car alternator not charging. This part covers the diagnostic steps needed. You can check the voltage output and see if the alternator is working properly. The procedures we cover help you isolate the problem. By going through these methods, you’ll gain confidence in dealing with your car’s charging system.
One of the easiest tests is a voltage check. You can use a multimeter to measure the battery voltage when the engine is off and then running. This measurement will show how well the alternator is charging. Another approach is to check the drive belt and connections. Make sure the belt is in good condition and not slipping, and all connections are tight and corrosion-free. Checking fuses and relays related to the charging system is also very important. These components protect the electrical system. By carefully following these steps, you can pinpoint the issue and take action.
Voltage Test with a Multimeter
A multimeter is a handy tool. You can use it to measure the battery voltage. You’ll measure the battery voltage when the engine is off and then when it’s running. This will give you important information about the car’s charging system. When the engine is off, a healthy battery should have a voltage of around 12.6 volts. This is the battery’s resting voltage, indicating that it’s fully charged.
With the engine running, the alternator should increase the voltage. This increase shows the alternator is charging the battery. The voltage should be around 13.5 to 14.5 volts. If the voltage remains the same, or goes down when the engine runs, the alternator is not charging. Testing with a multimeter is an easy method to assess the alternator’s performance. The multimeter should be set to measure DC voltage. Place the red probe on the positive terminal and the black probe on the negative terminal.
- Prepare the Multimeter: Set the multimeter to measure DC voltage, often marked with a “V” with a straight and dashed line above.
- Battery Voltage (Engine Off): Place the red probe on the positive battery terminal and the black probe on the negative terminal. The reading should be around 12.6 volts.
- Alternator Charging (Engine On): Start the engine and retest the voltage at the battery terminals. The reading should increase to 13.5-14.5 volts.
- Interpret the Results: If the voltage remains at 12.6 volts or drops, the alternator might not be charging.
Checking the Drive Belt and Connections
Checking the drive belt and electrical connections is a basic diagnostic step. Inspect the drive belt for wear and proper tension. The belt should be free from cracks, fraying, or any signs of damage. Any damage can cause the belt to slip, stopping the alternator from spinning. Check the belt’s tension. It should be firm, with minimal play when you press on it.
Look at the electrical connections at the alternator and the battery. These connections can corrode over time, hindering electrical flow. Check for any corrosion, rust, or loose connections. Clean the terminals with a wire brush if there’s corrosion. Ensure the connectors are tightly attached to prevent electrical resistance. These inspections are a vital part of your car maintenance routine. A properly functioning belt and clean connections are essential for proper alternator charging.
- Drive Belt Condition: Look for cracks, wear, and fraying on the drive belt.
- Belt Tension: Check for proper tension; a loose belt won’t drive the alternator effectively.
- Alternator Connections: Check the wiring connections on the alternator for any corrosion or damage.
- Battery Terminals: Inspect the battery terminals for corrosion, ensuring they are clean and secure.
Inspecting Fuses and Relays in the Charging System
Fuses and relays are important parts of your car’s electrical system. They safeguard components like the alternator. Checking them is a smart step when diagnosing problems. Your car’s fuse box contains fuses of different ratings. The fuse box location is usually found under the hood or inside the car. Look for the fuse related to the alternator or charging system. A blown fuse means the circuit is broken, which will stop charging.
Relays are also critical. These act as switches. They control the power flow. The charging system might include a relay for the alternator. Locate the relay and examine it for any signs of damage. If you have any doubts, you can swap it with a known working relay. This can help you figure out if the original relay is faulty. Keep in mind that a blown fuse or a bad relay will hinder the proper charging function of the alternator.
- Locate the Fuse Box: Check the owner’s manual for the fuse box location.
- Identify Charging System Fuses: Find the fuses related to the charging circuit.
- Inspect the Fuses: Look for blown fuses, which can prevent charging.
- Check the Relays: Examine the relays in the charging system, swapping them if needed.
Step-by-Step Fixes for Car Alternator Not Charging
Once you’ve identified the problem, it’s time to fix it. This part offers straightforward steps you can take to address common car alternator not charging issues. The approach to fixes starts with simple things, such as cleaning connections and checking belts. We’ll show you how to replace parts, as needed. Keep in mind that for more complicated issues, or if you aren’t comfortable working on cars, it’s best to get help from a professional.
Start by ensuring that all electrical connections are secure and clean. Corroded or loose connections can prevent the proper flow of electricity. Clean the battery terminals, alternator terminals, and any other relevant points with a wire brush. Next, check the drive belt. If it’s worn or damaged, replace it. It’s an inexpensive fix that can solve your issue. Replacing a faulty alternator can be more involved. Following these steps, you’ll be able to work through and resolve the problem.
Cleaning and Securing Electrical Connections
Cleaning and securing the electrical connections is one of the first steps you should take. This helps avoid many charging problems. These connections are prone to corrosion and can loosen over time. Get a wire brush and clean the battery terminals, both the positive and negative terminals. Remove any corrosion or buildup. Also, check the connections on the alternator itself.
Once cleaned, ensure all connections are tight. Loose connections can interrupt the flow of electricity. If your terminals are corroded, you can buy terminal cleaner and apply it to remove rust and other deposits. Also, make sure all the wires are firmly seated. Loose or corroded connections can cause significant problems. Cleaning and tightening these connections can often solve your charging problems and bring your car back to life.
- Battery Terminals: Clean any corrosion on the terminals to allow a good connection.
- Alternator Connections: Inspect and clean the wiring connections at the alternator.
- Wire Brush: Use a wire brush to remove rust and corrosion from connections.
- Tighten Connections: Make sure all the connections are secure and tight to eliminate power loss.
Replacing the Drive Belt
Replacing the drive belt can be a straightforward solution. If your belt shows signs of wear, replacing it is necessary. Start by getting the right replacement belt. Check the car’s manual to find the right belt for your car. Then, find the alternator and the drive belt routing. Some cars have diagrams showing how the belt should be positioned.
Once you have the new belt and the diagram, remove the old belt. Use a wrench or a special tool to relieve the tension on the belt tensioner. Carefully remove the old belt, paying attention to its path. Install the new belt, following the diagram or the original routing. You must make sure that it goes around all the pulleys correctly. Finally, release the tensioner to secure the new belt. After you’ve replaced the belt, start the car and check if the alternator is charging properly.
- Get the Right Belt: Check your car’s manual for the correct replacement belt.
- Relieve Tension: Use a wrench or tool to release the tension on the belt tensioner.
- Remove the Old Belt: Carefully remove the old belt, noting the routing.
- Install the New Belt: Place the new belt, making sure it goes around all pulleys correctly, and then release the tensioner.
Replacing a Faulty Alternator
Replacing a faulty alternator is a more involved repair. It can be necessary if other fixes have not worked. First, disconnect the negative battery cable. Then locate the alternator, which is typically found near the engine. Disconnect the electrical connectors attached to the alternator. Loosen and remove the drive belt from the alternator pulley. Unbolt the alternator from its mounting bracket. Keep track of the bolts and the order in which they were removed.
Now you can remove the alternator from the car. Put the new alternator in place and secure it. Reconnect the wiring connectors and the drive belt. Check the belt tension. Reconnect the negative battery cable and start the car. Use a multimeter to confirm that the alternator is charging. While this process might seem difficult, with careful attention, replacing the alternator can be achieved successfully.
- Disconnect the Battery: Begin by disconnecting the negative battery cable.
- Disconnect Electrical Connectors: Remove the wiring connectors from the alternator.
- Remove Drive Belt: Detach the drive belt from the alternator pulley.
- Unbolt and Replace: Unbolt the old alternator and install the new one, reconnecting all components.
Frequently Asked Questions
Question: Why is my battery light on even though I just replaced the battery?
Answer: If your battery light remains on after a battery
Question: How long does an alternator typically last?
Answer: An alternator can last from 80,000 to 150,000 miles, depending on the car, driving conditions, and quality of the alternator. Regular maintenance can extend its lifespan.
Question: What’s the difference between an alternator and a starter?
Answer: The starter motor is used to initially crank the engine to start it. The alternator then takes over, providing power to the car’s electrical systems and recharging the battery while the engine is running.
Question: Can I drive my car with a faulty alternator?
Answer: You can drive your car for a short time, but only as long as the battery holds a charge. The car’s electrical components will eventually drain the battery. Driving with a faulty alternator can leave you stranded.
Question: How much does it cost to replace an alternator?
Answer: The cost to replace an alternator varies, but it can range from $300 to $800, including parts and labor, depending on the car’s make and model and where you get the work done.
Final Thoughts
Dealing with a car alternator not charging can seem hard. Yet, taking a systematic approach makes it much easier to solve. We’ve covered everything from detecting the warning signs, like the battery light and dim headlights, to understanding the most common causes, such as alternator failure and belt issues. Identifying the key clues in the charging system’s behavior is vital. Then, diagnosing the problem by checking voltage, the drive belt, and the electrical connections will help you zero in on what’s wrong.
The repairs can range from simple fixes, such as cleaning connections or replacing a drive belt, to the more involved task of replacing the alternator. By following the steps outlined here, you can address common problems yourself. If you are unsure or the issue seems complex, a mechanic can help. Regular check-ups are key to avoiding future issues. You now have the knowledge to troubleshoot and keep your car’s charging system healthy.