Jump Starter Screen Won’t Turn On? Troubleshoot Here!
Having a jump starter screen not turning on can be frustrating! It’s a common problem, especially for people who are new to using these handy devices. Many things can cause it, from simple issues like a dead battery to more technical problems. Don’t worry, though; it’s usually something that can be fixed. We’re going to explore all the potential causes and give you simple, step-by-step solutions to get your jump starter working again. First, we’ll start with the most obvious.
Checking the Basics: Power Source and Connections
Before you start taking things apart, let’s check the easy stuff. Sometimes, the simplest solutions are the best. We’ll look at the power source, like the jump starter’s battery, and make sure all the connections are good. This first step can quickly resolve many problems related to a jump starter screen not turning on. It often prevents you from wasting time on more complex repairs.
Examining the Jump Starter’s Battery Charge
The first thing to investigate when the jump starter screen not turning on is its power source. Make sure the device has enough charge. A fully depleted battery is a frequent cause of a non-functional screen. The screen needs power to light up and display information. If the internal battery is dead, there won’t be enough electricity to operate the screen or any of the device’s features. Many jump starters have an indicator to show the charge level, either through an LED light or another display. Charge the jump starter fully and then try again. Sometimes, a short charge is enough to get the screen working, allowing you to confirm if other functions work as well.
- Check the Charging Cable and Adapter: Ensure your charging cable is securely plugged into both the jump starter and a working power outlet. Inspect the cable for any damage like frays or cuts. A damaged cable won’t deliver power correctly, preventing the battery from charging.
- Verify the Power Outlet: Test the outlet with another device to make sure it’s working. Sometimes, the outlet itself might be the problem. If you’re using a USB adapter, confirm it’s providing the proper voltage (usually 5V).
- Check the Jump Starter’s Charging Port: Look at the charging port on the jump starter. Make sure there’s no debris or damage inside. This can block the connection.
- Charging Time: Know how long your jump starter takes to charge. Read the device’s manual to determine the proper charging time. This can help you understand if the charging process is working properly.
- Use a Different Charger: If possible, try charging your jump starter with a different charger. This helps you identify if the charger is the problem.
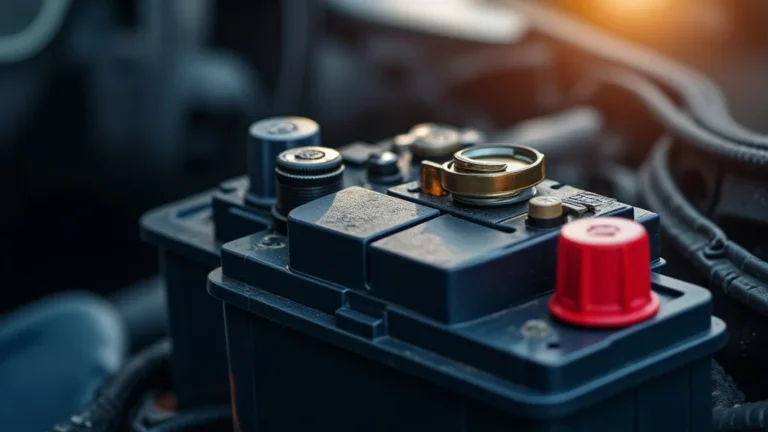
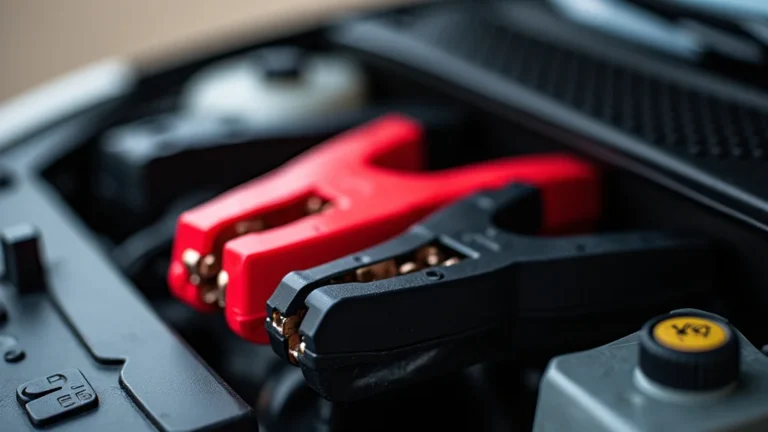
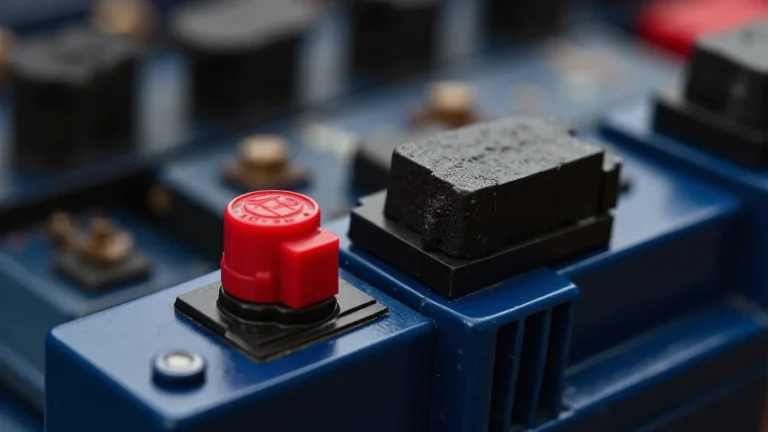
Inspecting the Connection Terminals
The connection terminals are essential for the jump starter to function. They connect to the car battery. Before you use the jump starter, you should visually check these connections. Corroded or loose connections often result in a failure of the device. This lack of proper electrical contact could prevent the screen from lighting up, even if the jump starter’s battery is fully charged. Clean the terminals and ensure a strong connection.
- Check for Corrosion: Corrosion on the terminals can prevent a good electrical connection. Look for a white or green powdery substance. If you spot corrosion, clean the terminals using a wire brush or a mixture of baking soda and water.
- Verify Terminal Tightness: Ensure the clamps are securely attached to the car battery terminals. Loose clamps can interrupt the flow of electricity. They can also cause sparks, creating potential safety hazards.
- Examine the Clamps: Inspect the clamps for any damage. Check for broken parts or loose springs that affect their grip on the battery terminals.
- Secure the Connection: Make sure the clamps are making good contact. Wiggle the clamps slightly to ensure they’re firmly attached. You should feel a solid connection.
- Correct Polarity: Confirm you’re connecting the positive (+) clamp to the positive terminal and the negative (-) clamp to the negative terminal on the car battery. Reversing the polarity can lead to damage.
Screen Malfunction: Troubleshooting Display Issues
If the basics check out, and your jump starter screen not turning on, it’s time to investigate the screen itself. We’ll explore potential screen malfunctions, from simple fixes to more advanced troubleshooting. This will help you identify if the issue lies with the screen’s internal components.
Checking for Display Damage
Physical damage is a key factor to consider. External impacts, such as drops or impacts, can damage the display. This damage might include cracks, chips, or dents. If the jump starter has been exposed to extreme temperatures or moisture, this could also cause problems. Any of these could lead to the screen failing to light up.
- Visual Inspection: Carefully examine the screen for any visible damage. Look closely at the surface of the screen.
- Internal Component Checks: The internal components can also fail. This includes the backlight or display driver. These issues might not be visible, but they could cause the screen to stay off.
- Liquid Damage: Check for signs of liquid damage. Even a small amount of water or other liquids can cause damage to the internal components.
- Temperature Extremes: Prolonged exposure to extreme heat or cold might affect screen function. Jump starters are built for the vehicle environment, but certain conditions may cause problems.
- Screen Resolution: The resolution or internal workings of the screen may be damaged. A professional repair might be necessary.
Screen Control and Settings
Jump starters often have screen controls. Check the settings to ensure the screen isn’t dimmed or turned off accidentally. Some have an auto-off feature that might be the reason for your jump starter screen not turning on. By exploring the settings, you can check that your screen is set up to function correctly. This could involve checking brightness levels, contrast adjustments, and power-saving modes.
- Brightness Controls: Look for brightness settings in the device’s menu. It might be set too low. Adjust the brightness to see if the screen appears.
- Contrast Settings: Some screens have contrast controls that might be incorrectly configured. Adjust the contrast to see if the display improves.
- Power Saving Mode: Check if the device has a power-saving mode. The screen might turn off after a period of inactivity. This is by design, and not a malfunction.
- Automatic Shutoff: Many devices have an automatic screen shutoff setting. The screen could turn off after a set period.
- Factory Reset: If possible, try a factory reset. This can reset settings that might be causing the screen issues.
Internal Component Issues: Diagnosing Problems Within
Sometimes, the issue is not external, but lies within the device’s internal components. This section will explore the internal parts that might cause the jump starter screen not turning on. We’ll cover the battery, the circuit board, and other related components. These problems can be more challenging to diagnose but are essential to check for a comprehensive solution.
Evaluating the Internal Battery
The internal battery is key to the jump starter’s operation. Even if the device has an external power source, the internal battery may be the root cause of the screen not functioning. The battery may be failing, failing to hold a charge, or may have a faulty connection. These issues could all result in the screen not working. A thorough evaluation of the battery will help determine whether a replacement is required.
- Battery Health: Many devices have a way to display the health of the internal battery. If your jump starter does, check this.
- Battery Aging: Batteries wear out over time. If your jump starter is old, its battery may be at the end of its life.
- Battery Replacement: If the battery is the issue, it will require replacement. Make sure the replacement battery is the correct type and that you follow instructions.
- Charging Circuit: The charging circuit, a part of the jump starter, can fail. If this circuit fails, the battery won’t charge.
- Battery Connections: The connections between the battery and the circuit board can become loose. Check that they’re secure.
Circuit Board Examination
The circuit board is the central ‘brain’ of the jump starter. All the components connect to the circuit board. Problems on the circuit board can disrupt the screen’s function. Identifying these issues requires some knowledge and a careful inspection. Any damage to the circuit board may affect the screen. This could be due to physical damage, water damage, or component failure. The more you know, the better prepared you’ll be to assess the situation.
- Visual Inspection: Look closely at the circuit board. Look for any visible damage like burnt components, loose connections, or corrosion. Use a magnifying glass to check in more detail.
- Component Failure: A component on the circuit board, like a resistor or a capacitor, may have failed. This could stop the screen from turning on.
- Water Damage: Water damage can cause shorts and damage components. Look for any signs of liquid or corrosion.
- Loose Connections: Ensure all components are securely soldered to the board. Loose connections can interrupt the electrical flow.
- Professional Help: If you spot significant damage or aren’t sure how to proceed, seek help from a qualified technician.
Seeking Professional Assistance
Sometimes, the problem exceeds the scope of DIY repair. This section guides you on when to seek professional help. It will help you understand the benefits of professional services and where to locate qualified technicians. Professional help is useful when the issues become complex or if you are not comfortable with internal repairs.
Finding Qualified Repair Services
Locating a reliable repair service is vital. Not all service centers are equal. It is important to find a service with the experience and the right tools. When your jump starter screen not turning on and you have exhausted other options, it is time to seek professional advice. Look for centers that have experience with similar devices, good customer reviews, and a clear pricing structure. Do your research to ensure the best repair services.
- Search Online: Search online for local repair services in your area. Look at their websites, customer reviews, and ratings.
- Ask for Recommendations: Seek recommendations from friends, family, or other vehicle owners. Personal recommendations can be very helpful.
- Check Qualifications: Confirm that the service technicians are certified or have the required qualifications. This will help ensure quality work.
- Compare Quotes: Get quotes from multiple services. Compare prices, services, and warranty details.
- Warranty: Ensure that the repair service offers a warranty on their work. This gives you peace of mind.
When to Contact a Professional
There are specific situations where professional help is necessary. These situations often include complex internal issues that might require specialized tools, in-depth knowledge, or experience. Ignoring these recommendations might lead to further damage. Knowing when to call in the professionals will save time and could prevent more serious damage to your jump starter. Here are some of the typical situations:
- Complex Circuit Board Issues: If you find damage to the circuit board or suspect component failure, seek professional help. Circuit board repairs may require specific equipment, such as soldering equipment, that you may not have.
- Internal Battery Problems: While replacing a battery is doable, if you’re not comfortable with the process, or if the battery is deeply integrated with other components, a professional can provide safe, reliable service.
- Screen Damage: If the screen is physically damaged, or the underlying display technology has issues, replacing the screen usually requires a specialist.
- Unexplained Issues: If you’ve tried all the troubleshooting steps and the screen still won’t turn on, a professional might be necessary to diagnose and repair the issue.
- Safety Concerns: If you feel unsafe working with the device, especially near electrical components, call a professional. Working with electricity has risks, and your safety is important.
Frequently Asked Questions
Question: Why isn’t my jump starter’s screen lighting up?
Answer: There are many reasons, including a dead battery, a faulty charging cable, physical damage to the screen, or problems with internal components.
Question: How can I tell if my jump starter battery is dead?
Answer: Check the device for a battery indicator. If it shows low charge or doesn’t turn on at all, the battery is likely dead.
Question: Is it safe to try and repair my jump starter myself?
Answer: If you’re comfortable with electronics and follow safety procedures, you can attempt some repairs. However, if you’re unsure or the issue is complex, seek professional help.
Question: What should I do if my jump starter is showing a low battery level?
Answer: Charge your jump starter fully. Then, try turning it on again. Check to see if your screen now works. If it does not, there may be other problems to address.
Question: Can I replace the screen myself if it’s broken?
Answer: You can replace the screen if you have the technical knowledge and the right tools. But, professional repair is often safer and can ensure that you get the correct parts.
Final Thoughts
Knowing what to do when your jump starter screen not turning on is an important skill for any vehicle owner. Start by checking the battery charge and the connections. Then, examine the screen for damage and look at the settings. If you’re comfortable, try to evaluate the internal components. However, don’t hesitate to seek professional assistance. It’s often safer and can help ensure your jump starter is fixed correctly. Keeping a jump starter in good working condition is a useful safety measure to protect you on the road.