Jump Starter No Output Troubleshooting Guide for Beginners
Getting a jump starter no output can be a frustrating experience, especially when you’re stranded. It’s a common issue because jump starters can sometimes have hidden problems, and it’s not always obvious where to start. Don’t worry, many people face the same problem, and fixing it is often easier than you think. This guide will help you understand why your jump starter might be failing and offer simple, step-by-step solutions to get it working again. Let’s explore how to get your jump starter back in action.
Common Causes of Jump Starter No Output
A “jump starter no output” situation means that when you try to use your jump starter, it’s not delivering any power to your car battery. This can happen for several reasons, ranging from simple issues like incorrect connections to more complex problems within the jump starter itself. Identifying the specific cause is the first key step toward fixing the problem. This initial diagnosis will determine how to proceed with troubleshooting and restoring your jump starter’s function. The most common causes are often easy to address once you know what to check.
Faulty Connections and User Errors
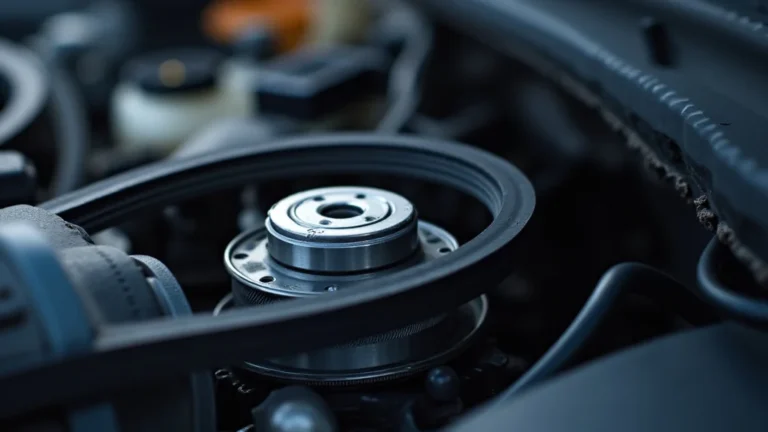
One of the most frequent causes of a jump starter no output is a poor connection between the jump starter and your car battery. This is frequently due to user error, resulting in a failure to deliver the needed electrical current. It’s important to make secure and accurate connections before trying to start your car. The clamps must make solid contact with the battery terminals. Loose clamps, corrosion on the terminals, or incorrect clamping can all prevent the flow of electricity, and the jump starter will act like it has no output.
-
Loose Clamp Connection: Ensure that the clamps are tightly fastened to the battery terminals. Wiggle them gently to confirm a secure grip.
Loose connections can prevent power transfer. This is a common issue and is easily fixed.
-
Incorrect Polarity: Double-check that the positive (+) clamp is connected to the positive terminal and the negative (-) clamp is connected to the negative terminal.
Reversing the polarity will usually cause the jump starter to not deliver any output and can potentially damage it and the vehicle’s electrical system.
-
Corrosion on Terminals: Corrosion can build up on battery terminals, acting as an insulator and preventing electrical contact. Clean the terminals before connecting the jump starter.
Using a wire brush or a specialized terminal cleaner helps remove corrosion. Improved contact increases the output effectiveness.
-
Faulty Cables or Clamps: Inspect the cables and clamps for damage, such as cuts or fraying. Any damage can interrupt the electrical flow.
Replace any damaged components. A faulty connection point will prevent the jump starter from providing an output.
Internal Jump Starter Battery Problems
The battery inside your jump starter is what provides the power, so any issue with it can lead to jump starter no output. Over time, batteries can degrade due to many factors such as age, usage, and how they’re stored. A battery that isn’t fully charged or one that has reached the end of its lifespan won’t provide enough power. Internal problems, such as cell damage or internal shorts, can also prevent the jump starter from working correctly. Battery maintenance and proper care are therefore essential for extending the product’s life and making sure it can function as intended.
-
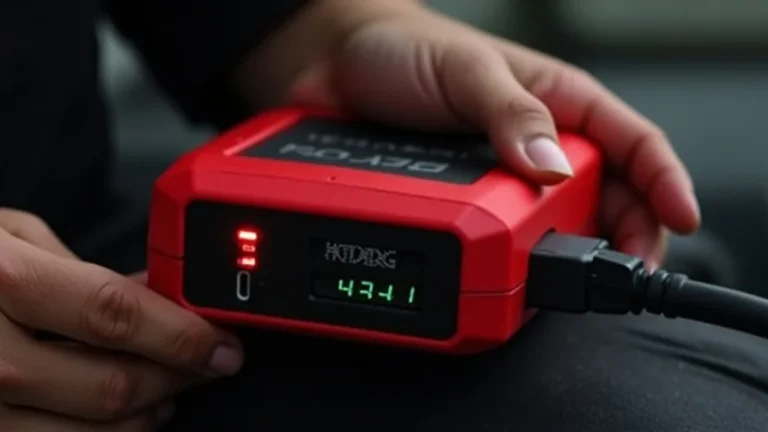
Battery Not Fully Charged: Check the charge level of the jump starter. Most jump starters have LED indicators to show the charge status.
Recharge the jump starter completely before using it. A low charge will result in no output.
-
Battery Age and Degradation: Jump starters have a limited lifespan. Over time, the internal battery will lose its capacity to hold a charge.
The average lifespan of a jump starter battery is 3-5 years. If it’s old, it may be time for a replacement.
-
Battery Damage: Internal damage can cause a jump starter to fail. This can result from overcharging, extreme temperatures, or physical damage.
If the jump starter shows signs of physical damage, such as swelling or leaks, discontinue use immediately.
-
Internal Short Circuit: A short circuit within the jump starter’s battery can prevent it from delivering any power to the output.
This is often a result of component failure. In most cases, it is not repairable and a replacement will be needed.
Overload Protection and Safety Features
Jump starters are built with safety features to protect both the device and the vehicle. These features can sometimes cause a jump starter no output if triggered. Overload protection, for example, prevents the jump starter from delivering too much current at once, which can damage the car’s electrical system. Understanding these safety mechanisms can help troubleshoot and reset the device to ensure it’s functioning as it should. Knowing how these systems work can also ensure the safe use of the jump starter.
-
Overload Protection Activation: If the jump starter senses an excessive current draw, it will shut down to protect itself and the car.
This is often triggered if the car battery is severely discharged or has internal problems. Disconnect the jump starter and check the car battery’s condition.
-
Reverse Polarity Protection: Most jump starters have reverse polarity protection to prevent damage if the clamps are connected incorrectly.
If the clamps are reversed, the jump starter will not output any power. Make sure to connect the clamps to the correct terminals.
-
Short Circuit Protection: Jump starters are designed to shut down if they detect a short circuit.
This protection prevents electrical fires. If short-circuit protection is activated, inspect the clamps and connections for any issues.
-
Temperature Protection: Some jump starters include temperature sensors that prevent operation in extreme heat or cold.
Operating outside of the recommended temperature range can cause the jump starter to shut down. Let the device adjust to a more suitable temperature before use.
Step-by-Step Troubleshooting Guide for Jump Starter No Output
Now, let’s explore a practical, step-by-step approach to resolve the problem when your jump starter isn’t providing any output. This guide will walk you through each step systematically, making sure to cover all the potential causes and solutions. Following this guide will help you quickly and effectively troubleshoot your jump starter and hopefully get it working again. Each step builds on the previous one, and by the end, you should be able to identify the root cause of the problem.
Initial Checks and Visual Inspection
Before doing anything else, it’s crucial to begin with a visual inspection. Start by checking the jump starter itself for any signs of physical damage. Look over the cables, clamps, and the housing for visible problems. This preliminary review can often identify the most obvious issues, saving time and potential further troubleshooting steps. A quick glance can reveal if there are any immediate reasons for the jump starter no output situation.
-
Inspect the Jump Starter: Look for any signs of physical damage such as cracks, swelling, or leaks.
Physical damage can indicate that the internal components are compromised, causing the device to fail.
-
Check the Cables and Clamps: Examine the cables for cuts, frays, or damage. Make sure the clamps are in good condition and close properly.
Damaged cables or clamps can prevent the transfer of power, resulting in no output.
-
Check the LED Indicators: Observe the LED indicators on the jump starter. They provide information about the charge level and any potential error messages.
The indicators can show whether the device is charged, if there are any errors or if the protection circuits are active.
-
Smell Test: Sniff the jump starter for any unusual odors, like burning plastic or a chemical smell.
Unusual odors may indicate internal damage or component failure.
Battery Charging and Maintenance
Ensuring that the jump starter is fully charged is one of the most basic but often overlooked steps in troubleshooting. If the device isn’t fully charged, it won’t deliver the power needed to start a car. Regular maintenance, including periodic charging, is also key to preserving the battery’s health and increasing its life. This part of the troubleshooting focuses on making sure your device has enough power and is well-cared for.
-
Fully Charge the Jump Starter: Connect the jump starter to a power source and allow it to charge completely.
Use the provided charger and follow the manufacturer’s charging instructions. A fully charged jump starter is a must before attempting to start a car.
-
Check the Charging Port: Make sure the charging port on the jump starter is clean and in good working condition.
A damaged or blocked charging port can prevent the device from charging properly.
-
Test with a Multimeter (Optional): If you have a multimeter, measure the voltage of the jump starter battery. This will help determine if it is holding a charge.
The voltage should be within the specified range (usually around 12V or higher). A multimeter can precisely confirm the status of the battery.
-
Maintenance Charging: If you don’t use your jump starter often, recharge it every few months to keep the battery in good condition.
Regular charging prevents the battery from discharging and extends its service life.
Connection and Polarity Verification
Correct connections are absolutely necessary for the jump starter to function properly. Improper connection can result in a jump starter no output situation. Verifying the connections, specifically polarity, ensures that the electrical flow is correct and safe. Double-checking these aspects can often be the solution for the problem. This part of the process is about ensuring a good connection to your car battery.
-
Verify Clamp Connections: Make sure that the clamps are securely attached to the battery terminals.
Ensure a strong connection, and try wiggling the clamps to check for any looseness.
-
Check Polarity: Verify that the positive (+) clamp is connected to the positive terminal and the negative (-) clamp is connected to the negative terminal.
Incorrect polarity will prevent the jump starter from delivering power and might damage the device.
-
Clean Battery Terminals: Clean the battery terminals with a wire brush or terminal cleaner if there is any corrosion.
Corrosion can prevent good electrical contact, so cleaning it improves the chances of output.
-
Test with a Different Battery: If possible, try connecting the jump starter to a different battery to rule out a battery-related problem with the car.
This can confirm if the issue is with the jump starter or the car battery.
Testing Overload and Short-Circuit Protection
Jump starters are equipped with safety mechanisms that might trigger if they detect an overload or short circuit. If your jump starter has these functions, it’s important to make sure they are not the cause of the jump starter no output. This step involves testing the built-in protection circuits, making sure they aren’t activated unnecessarily. Recognizing these protection measures is key to guaranteeing the safe and effective operation of the device.
-
Check for Overload Indicators: Look for any indicator lights or error messages on the jump starter related to overload protection.
These indicators alert you if the jump starter’s protection circuits have activated.
-
Inspect for Short Circuits: Examine the clamps and cables for any signs of a short circuit, such as exposed wires or damage.
A short circuit could activate the short-circuit protection and prevent power from reaching the car battery.
-
Reset the Jump Starter (If Possible): Some jump starters have a reset function to clear errors or protect mode. Follow the manufacturer’s instructions to reset the device.
Resetting the jump starter could solve the problem if an overload or short-circuit protection was activated.
-
Check the Car Battery: Test the car battery separately to see if it is severely discharged or faulty, which could cause the overload protection to activate.
Check the voltage or try jump-starting the car with another device to verify the battery condition.
Advanced Troubleshooting Steps
If the simple steps don’t solve the problem, you may need to go further in the troubleshooting process. These advanced steps can identify more subtle internal issues that may prevent the jump starter from working. This stage often requires greater understanding and possibly specific tools, but it can still help resolve the jump starter no output situation.
Internal Component Inspection (If Possible)
Internal component inspection is usually done by people familiar with the internal workings of electronics. This involves looking inside the jump starter to visually inspect the internal components for damage or failure. This should only be attempted if you have experience with electronics and feel comfortable working with them. Opening the device could void the warranty and lead to further issues if done incorrectly. It can help identify the source of the malfunction.
-
Open the Jump Starter: Carefully open the jump starter casing, following the manufacturer’s instructions if available.
Care must be taken, as incorrect opening might damage the device or pose a safety risk.
-
Inspect the Circuit Board: Look for any signs of burnt components, loose connections, or damaged wires on the circuit board.
Visual inspection can reveal any obvious problems that might be preventing output.
-
Check the Battery Connections: Examine the battery connections within the device. Make sure they are secure and not corroded.
Loose or corroded connections can interrupt the flow of power.
-
Test Components with a Multimeter (Advanced): Use a multimeter to test internal components (capacitors, diodes, etc.) if you have the expertise.
This requires knowledge of electronic circuits and the ability to use a multimeter.
Battery Replacement Considerations
Replacing the battery within a jump starter might be a practical solution if the internal battery is faulty. This can sometimes restore full functionality. Battery replacement is the only solution if the original battery is dead or degraded beyond repair. Consider the following points to make sure the replacement is done safely and correctly.
-
Identify the Battery Type: Determine the type of battery needed (e.g., lead-acid, lithium-ion) and the voltage and capacity.
Consult the jump starter’s specifications or the original battery markings.
-
Purchase a
Purchase the battery from a reputable source to guarantee quality and safety.
-
Make certain you disconnect the old battery before connecting the new battery to avoid accidents.
-
Test the Jump Starter: After the replacement, fully charge the jump starter and test its functionality.
Make sure the jump starter delivers power correctly.
Seeking Professional Assistance
If you’ve followed the troubleshooting steps and still experience jump starter no output, you may need to seek professional assistance. This is usually the best approach if you are uncomfortable working with electronics or you are unable to find the issue. A qualified technician can do a thorough diagnostic and fix the issue or suggest a replacement. Professional help can also guarantee your safety and prevent any further damage to the device.
-
Contact the Manufacturer: Contact the jump starter manufacturer to inquire about warranty repairs or troubleshooting guidance.
The manufacturer can provide support based on the product’s warranty.
-
Find a Qualified Repair Technician: Take the jump starter to a reputable electronics repair shop.
Make sure the repair shop is qualified to fix this specific kind of equipment.
-
Get a Diagnostic Report: Ask the technician to provide a diagnostic report that describes the issue and the recommended solution.
This report will help you understand the problem and make an informed decision.
-
Consider Replacement: If the cost of repair is too high, or if the jump starter is old or damaged, consider replacing it.
Assess if replacing the jump starter is more practical.
Frequently Asked Questions
Question: Why is my jump starter not charging?
Answer: Several factors could prevent your jump starter from charging. These can include a faulty charger, a damaged charging port, or an internal battery problem. Always check the power source, the charging cable, and the charging port. Make sure the charger is properly connected and that the jump starter’s charging indicator lights are working correctly. It might be time for a new charger or a battery replacement.
Question: Can I jump-start my car if the jump starter is low on charge?
Answer: It’s not generally recommended. A jump starter that is low on charge might not provide enough power to start your car. Always make sure your jump starter is fully charged before use. Insufficient power can lead to a “jump starter no output” situation. A full charge ensures you have enough power for a successful jump-start and prevents potential damage to your jump starter.
Question: What does it mean if my jump starter gives no output but the lights are on?
Answer: Even if the lights are on, there might be internal issues preventing the power from reaching the output terminals. The lights could be for other functions, like showing the charge level or the status of safety features. The core issue could be a faulty connection inside, a damaged battery, or a triggered protection circuit that is shutting off the current. You should troubleshoot the connections, battery, and safety systems.
Question: How long does a jump starter typically last?
Answer: The lifespan of a jump starter varies based on the type, the quality of the components, and how it’s used. On average, a jump starter will last between 3 and 5 years. Regular maintenance, such as charging the jump starter every few months, can extend its life. The conditions in which it is stored and how frequently it is used also impact how long it lasts.
Question: What should I do if my jump starter gets wet?
Answer: If your jump starter gets wet, immediately disconnect it from any power source and any vehicle. Let it completely dry before attempting to use it again. If it was fully submerged, it may be internally damaged and may need to be replaced. Water can cause corrosion, short circuits, and damage the device’s internal components. After the device is dry, check for damage, and then test the output.
Final Thoughts
When you’re dealing with a jump starter no output situation, the initial reaction might be frustration, but you now have a step-by-step approach to restore your jump starter’s function. By checking connections, verifying the charge, and exploring potential safety feature triggers, you can usually identify and fix the problem. Remember to start with the easiest steps first, such as confirming the proper connection of the clamps. Addressing problems like battery degradation or internal faults can require more in-depth troubleshooting. Ultimately, understanding the causes and following this guide will increase your chances of getting your jump starter working again. If everything else fails, don’t hesitate to seek professional assistance for a complete solution. With a little effort, you can quickly get back on the road.