Jump Starter USB Port Not Working Troubleshooting Guide
It can be super frustrating when your jump starter usb port not working. Many people find this tricky because jump starters have so many parts. Don’t worry, it’s often a simple fix! We’ll explore why this happens and give you easy, step-by-step instructions. We will walk through how to diagnose the issue and get that USB port working again. Let’s get started!
Possible Causes for a Non-Functional USB Port
When the USB port on your jump starter fails, several factors could be responsible. These issues range from simple connection problems to more complex internal faults. By examining the potential causes, you can narrow down the issue and begin the troubleshooting process. Some problems may involve physical damage, while others could stem from electronic malfunctions or overload. It’s essential to check each area methodically to get your jump starter functioning properly again. This process will involve a close look at the device’s build, its power source, and the way it handles electrical currents.
Physical Damage to the USB Port
Physical damage is a common culprit when a USB port fails. The port is a delicate point of entry for electrical connections, and it’s vulnerable to various types of trauma. Over time, frequent use can lead to wear and tear. Accidental drops or impacts can damage the internal components of the port, or even break the solder joints that connect the port to the circuit board. These damages disrupt the electrical pathways, preventing the port from providing power or data transfer. If you see signs of physical damage, like bent pins, loose parts, or cracks, it’s highly probable this is the problem. These damages might need a professional repair or the replacement of the jump starter.
- Bent Pins: USB ports have tiny pins inside. If these pins are bent, the electrical connection is lost.
- Loose Connection: The USB port may have become detached from the circuit board inside the jump starter due to physical stress.
- Cracked Plastic: The plastic casing of the USB port can crack from impact or extreme temperatures, which can also affect its function.
Consider a situation where a user regularly plugs and unplugs their charging cable in their vehicle. Eventually, the constant use causes the pins inside the USB port to bend, disrupting the connection and rendering the port non-functional. In this instance, a simple inspection can reveal the problem, and a replacement port might be the solution.
Internal Electronic Component Issues
Beyond physical damage, the internal components of the jump starter’s USB charging circuit can fail. This includes components like the voltage regulator, resistors, and capacitors. A voltage regulator is crucial because it ensures the USB port receives the right amount of power, typically 5 volts. Resistors can burn out, and capacitors can fail due to age, heat, or manufacturing defects. These failures can cut off the power supply to the USB port. Problems in the components often require electronic expertise to diagnose and repair or, alternatively, replacing the jump starter is often a better option. It is essential to ensure that the jump starter is protected from overload and overheating for prolonged life.
- Voltage Regulator Failure: This component manages the power output. If it fails, the port may not receive the necessary voltage.
- Damaged Resistors: Resistors manage the current flow. If damaged, they can disrupt the flow, rendering the port useless.
- Faulty Capacitors: Capacitors store electrical energy and help to stabilize the voltage. Defective capacitors can lead to unstable power.
Imagine a scenario where the jump starter is often used in high-temperature environments. Over time, the heat could damage the capacitors, leading to an inconsistent power supply to the USB port. The port might work sometimes but not others, or it might not work at all. This situation points to component failure, necessitating a deeper examination of the internal circuitry.
Overload and Short Circuit Protection
Modern jump starters usually have protections built-in to prevent overloads and short circuits, which can prevent jump starter usb port not working. When the device tries to draw too much current or detects a short circuit, these protections kick in to cut off power, safeguarding the device and any connected gadgets. If you’ve ever plugged a device into your jump starter and it suddenly stopped working, this might be due to a faulty cable or device, which caused an overload or short. Once these protections activate, the USB port may become disabled, and you’ll have to reset it or address the root cause of the problem. Understanding and troubleshooting these systems is important to restoring the USB functionality.
- Overcurrent Protection: This feature cuts off the power if the current draw exceeds the set limit.
- Short Circuit Protection: This protects the device if a short circuit is detected.
- Resetting the Device: Jump starters may have a reset function to restore the USB port’s functionality after an overload.
A driver plugs a phone with a damaged charging cable into the jump starter. The damaged cable causes a short circuit, triggering the jump starter’s protection mechanism. As a result, the USB port stops working, and the user must find and replace the defective cable before the USB port can be used again. This example shows the importance of using high-quality cables and ensuring that the devices plugged into the port are in good working order.
Troubleshooting Steps to Resolve a Non-Functional USB Port
If the USB port isn’t working, a systematic approach is needed to fix the problem. Start by inspecting for visible damage and then move on to checking the power source and devices. This method will help you understand the issue and identify a solution. These steps cover physical checks and electronic diagnostics, ensuring you don’t miss anything. Always prioritize safety and consult a professional if you’re not comfortable working with electronics.
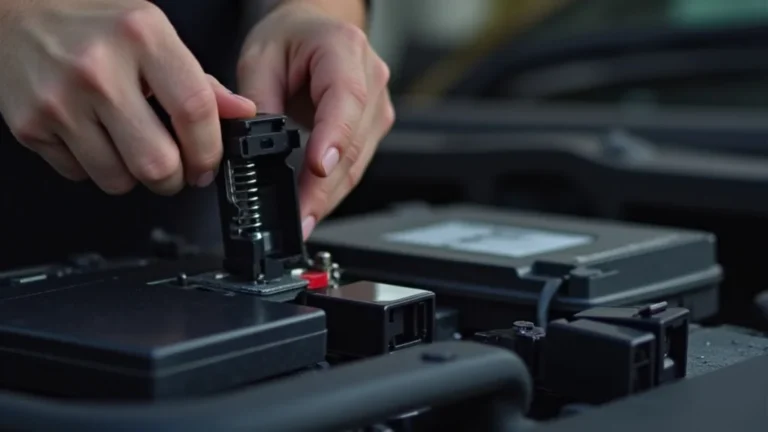
Visual Inspection of the USB Port and Cable
The first step in troubleshooting the USB port is a close visual inspection. Look for any visible damage on the port itself. Check the physical state of the port and the cable used for connections. Sometimes, simply identifying a loose connection or damaged cable can solve the problem quickly. Be cautious when looking into the port to ensure you do not cause any further harm or injury. Use a flashlight if needed to have a clear view and to see what is going on inside the port. Also, check for any obstructions like dust or debris that could be preventing a good connection.
- Check for Bent Pins: Use a flashlight to examine the pins inside the USB port. Bent pins are a common cause of failure.
- Inspect the Cable: Carefully examine the charging cable for any signs of damage like cuts, fraying, or exposed wires.
- Look for Debris: Ensure there is no dust or dirt in the USB port preventing a good connection.
A car owner tries to charge their phone using the jump starter’s USB port, but it does not work. A visual inspection reveals a bent pin in the USB port, which prevents the connection. Replacing the damaged port may fix the problem. This shows how crucial a visual inspection is as a starting point.
Testing With Different Cables and Devices
The next step is to test the jump starter with different cables and devices. This is important because the problem might not be with the jump starter but with a faulty cable or the device being charged. By trying multiple cables and devices, you can isolate the issue. If the jump starter works with one cable but not another, the first cable is the problem. Likewise, if the port works with one device but not another, the device might be the issue. This method confirms whether the port can supply power and is helpful to find the root cause.
- Try Different Cables: Use multiple USB cables to test the jump starter.
- Test with Another Device: Try charging a different device to determine if the problem is specific to one device.
- Use a Known Working Device: If possible, use a cable and device that are known to work.
A user tries to charge their phone with the jump starter. The port doesn’t work. The user then tries a different cable and a different phone. The second phone charges successfully, showing that the issue is with the first phone or its cable.
Checking the Jump Starter’s Power and Charging Status
The jump starter usb port not working could be because it doesn’t have enough power to charge any devices. Ensure the jump starter is fully charged before you start charging other devices. The device may have indicators, such as LED lights, that tell you how much power it has. Refer to the user manual to learn how to check the power level. If the jump starter is low on power, the USB port may be disabled to conserve energy for starting the car. Ensuring the jump starter is fully charged will help to eliminate this as a potential cause of the problem.
- Check the Battery Level: Verify the jump starter has a sufficient charge.
- Check the Indicator Lights: Note any blinking or unusual behavior of the indicator lights, as this can give you information.
- Review the Manual: Find out how your jump starter displays its charging status and any error indicators.
A driver’s jump starter’s USB port fails to charge a phone. The driver then notices the battery indicator is low. After charging the jump starter, the USB port works fine. This case indicates a simple solution: ensuring the jump starter is charged.
Advanced Troubleshooting and Repair Options
If the steps above don’t work, you might be facing a deeper problem. This part dives into more advanced troubleshooting, including testing voltage, and when to seek professional repair or
Using a Multimeter to Test Voltage Output
If you’re comfortable with electronics, a multimeter can help diagnose the USB port issue. A multimeter is a tool that measures voltage, current, and resistance. To test the USB port, set the multimeter to DC voltage mode (usually marked as V- with a straight line or dotted line). Place the probes on the USB port’s power contacts: the red probe on the positive (+) terminal, and the black probe on the negative (-) terminal. Ideally, the multimeter should read around 5 volts, which is the standard voltage for USB charging. If there is no reading or a very low reading, the port may be faulty. The use of a multimeter helps pinpoint internal electrical failures and confirm the actual power output of the port.
- Safety First: Always disconnect the jump starter from any power source before using a multimeter.
- Set the Multimeter: Choose the correct voltage setting (DC voltage, around 20V) on the multimeter.
- Connect the Probes: Place the multimeter probes on the USB port’s contacts.
A car owner is having problems with the USB port and uses a multimeter to test it. The reading is 0 volts, confirming a fault. This data helps find an internal problem that requires professional attention, or possibly replacement.
Seeking Professional Repair or Replacement
If you’ve tried all the troubleshooting steps and the jump starter usb port not working, it may be time to seek a professional repair. Attempting to repair the device yourself, especially if you’re not experienced in electronics, can be risky. Professionals have the tools and expertise to identify and fix internal issues that you might miss. However, the cost of repair might sometimes exceed the price of a new jump starter. Weigh the cost of repair against the cost of buying a new one. Consider any warranties or guarantees before making your decision. Ultimately, the choice depends on your budget and the complexity of the damage.
- Check Warranty: See if the jump starter is still covered by a warranty.
- Research Repair Services: Find a reputable electronics repair shop.
- Consider Replacement: Compare the repair cost to the price of a new jump starter.
If the USB port malfunctions, and a multimeter test shows no voltage, and an inspection finds no obvious damage, the user might take the jump starter to a professional for evaluation. The professional determines an internal component has failed and recommends replacement rather than repair due to cost.
Tips for Preventing USB Port Problems
Preventing problems with the USB port can help extend its life and save you from troubleshooting. This includes safe charging practices, proper storage, and regular maintenance. Implementing these tips can avoid common problems and ensure your jump starter remains reliable. Preventive steps are helpful in the longevity of your device. These steps focus on the ways you can use and store the jump starter to minimize the risks of damage or failure.
Safe Charging Habits
Safe charging practices are essential for the lifespan of your USB port and the devices that it charges. Always use the proper cables. Using low-quality or damaged cables can harm the USB port and devices. It’s important to avoid overcharging your devices, because it can cause the jump starter to overheat. Make sure you don’t overcharge, and never leave devices connected to the jump starter for long periods. Follow these practices to protect both your devices and the jump starter.
- Use the correct cables: Always use the USB cable that comes with the device.
- Avoid Overcharging: Disconnect devices when fully charged.
- Monitor Heat: Make sure the jump starter stays cool while charging.
A driver frequently charges their phone using the jump starter’s USB port. They decide to use a better quality cable, which prevents overcharging and potential damage to the port. This proactive measure extends the life of the jump starter and keeps the phone safe.
Proper Storage and Maintenance
How you store and maintain your jump starter influences the condition of the USB port. The device should be kept in a dry, cool place and protected from extreme temperatures. Extreme heat or cold can harm the internal components. Regularly clean the USB port of dust and debris. Do this gently with a soft brush or compressed air. The better you care for the jump starter, the less likely problems will occur. Following these maintenance guidelines ensures the device is ready when needed.
- Store in a Cool Place: Keep the jump starter away from direct sunlight and extreme temperatures.
- Clean Regularly: Gently clean the USB port and the jump starter’s body to prevent buildup of dirt and debris.
- Check Connections: Periodically inspect the USB port and cable connectors for any signs of damage.
A car owner keeps their jump starter in the trunk of their car, and they take time to clean the device and the USB port. This simple maintenance helps prevent dust and corrosion from building up, which will extend the usability of the jump starter and its USB port.
Frequently Asked Questions
Question: Why isn’t my phone charging from the jump starter?
Answer: Check if your jump starter has sufficient power, the USB port is working, and the charging cable is in good shape. Also, make sure your phone’s charging port isn’t damaged.
Question: Can I use any USB cable to charge my device?
Answer: Ideally, use the USB cable that came with your device. If you don’t have that, make sure the cable supports charging and data transfer.
Question: My jump starter charges other devices, but not mine. Why?
Answer: The problem is likely with your device or its charging cable. Try a different cable or device to test this.
Question: What should I do if the USB port is physically damaged?
Answer: If you notice the port has bent pins or is broken, it may need to be fixed or, most likely, replaced, which is best done by a professional.
Question: How often should I charge my jump starter?
Answer: It’s a good idea to charge your jump starter every 1-3 months to keep it ready.
Final Thoughts
Dealing with a jump starter usb port not working can be irritating, but by following a step-by-step approach, you can often fix the issue. First, inspect the port for any visual damage, and test with different cables and gadgets. If you still have problems, check the jump starter’s power level. If it’s not the cables or devices, and the problem still persists, you might need to look deeper. Use a multimeter to assess the power output. If you’ve tried everything and the USB port still doesn’t work, consider professional help or replacing the jump starter. Remember to use the correct cables and store the device in a cool place, taking the necessary steps to keep it functioning and ready.