Jump Starter Stopped Working Suddenly What To Do Next
It’s frustrating when your car won’t start, and even more so when your jump starter stopped working suddenly. If this has happened to you, don’t worry! This can happen to anyone, especially if you’re new to using them. We’ll explore the common reasons why these tools might fail and give you a simple, step-by-step plan to get yours working again. We’ll cover everything from the obvious to the less obvious, helping you troubleshoot and potentially revive your jump starter. Let’s get started!
Possible Causes for a Non-Functional Jump Starter
A jump starter stopped working suddenly can be a real headache, leaving you stranded. There are several possible culprits behind the issue, ranging from simple fixes to more complex component failures. Exploring these causes will help you diagnose the problem. This way, you can figure out how to get your device back up and running. Common problems include low battery, connection issues, or internal component problems.
Battery Issues and Their Impact
One of the most frequent reasons a jump starter fails is related to its internal battery. Jump starters use rechargeable batteries, usually lithium-ion or lead-acid. These batteries have a limited lifespan and can degrade over time. If your jump starter sits unused for a long time, the battery can self-discharge. This means it slowly loses its charge even when not in use. This slow discharge can be accelerated by extreme temperatures. High heat or freezing cold can damage the battery. Also, frequent deep discharging, such as repeatedly using the jump starter to start a vehicle without allowing it to recharge fully, can reduce the battery’s overall capacity and lifespan.
- Battery Age and Degradation: Over time, batteries lose their ability to hold a charge. This is called degradation.
- Improper Charging Habits: Not charging the jump starter fully or frequently can lead to problems.
- Battery Sulfation: For lead-acid jump starters, sulfation can occur if the battery is left discharged for extended periods.
Battery degradation is a natural process. It happens even with proper care. Heat and cold exposure can accelerate this process. If your jump starter is older, its battery might simply be worn out. If the battery is old, it might not provide enough power to start a car.
Charging habits matter a lot. Charging the device after each use is a good practice. Fully charging the device is best before you store it. Partially charged batteries degrade quicker. Also, leaving a jump starter plugged in for too long can harm it, too. Overcharging can affect its lifespan and capacity.
This happens when sulfate crystals form on the battery plates. It prevents the battery from accepting and holding a charge. Sulfation reduces the battery’s ability to deliver power. It’s more common in lead-acid jump starters than in lithium-ion ones. To avoid this, keep the battery charged. This helps to extend its life.
Connection Troubles and Their Symptoms
Faulty connections can also be the cause of your jump starter stopped working suddenly. The cables, clamps, and internal wiring all need to work properly to deliver power. Corrosion, loose connections, or damaged wires can disrupt the flow of electricity. It means the jump starter won’t be able to provide the necessary boost to start a car. Careful examination of these components can help you pinpoint the issue. Regularly check for signs of damage or wear to ensure reliable performance.
- Corroded Clamps: Corrosion on the clamps prevents a good connection with the car battery terminals.
- Loose Cable Connections: Cables that are loose or poorly attached can interrupt the flow of power.
- Damaged Wires: Wires that are cut, frayed, or damaged internally can prevent the jump starter from working.
Corrosion can build up on the clamps. This often happens if the jump starter is stored in a humid environment or if battery acid has leaked. This corrosion acts as an insulator, stopping the electricity from flowing. Cleaning the clamps is often the first step in troubleshooting.
Over time, the wires can become loose from the clamps or the jump starter itself. Vibrations during use can make the problem worse. Always make sure the connections are secure. A loose connection will cause the jump starter to fail.
Wires can get damaged from use or from being stored improperly. They can also be affected by extreme temperatures or being crushed. Inspect the entire length of the cables for any damage. Replacing damaged wires is important for safe and effective operation.
Internal Component Failures
Sometimes, the problem lies within the jump starter itself. Internal components can fail due to age, overuse, or manufacturing defects. Understanding these components can help you understand the potential problems. Internal issues are often more challenging to diagnose without specialized tools. However, identifying them is crucial to determining whether your jump starter can be repaired or if it needs replacement.
- Faulty Circuit Board: The circuit board manages the charging, discharging, and safety features of the jump starter.
- Failed Internal Fuse: Jump starters have fuses to protect them from electrical surges.
- Motor Failure: Some jump starters have small motors or internal fans.
The circuit board is the central “brain” of the device. If it fails, the jump starter might not charge, discharge, or even power on. Electrical surges or extreme temperatures can damage it. A damaged circuit board will likely require professional repair.
Fuses are safety components that break the circuit if there is too much current. If a fuse blows, the jump starter won’t work. The fuse can blow due to an overload or a short circuit. Replacing the fuse might fix the problem.
These motors might fail due to wear and tear. Overheating is a common cause. When a motor fails, it can prevent the jump starter from operating correctly. In many cases, it will require replacement by a qualified technician.
Troubleshooting Steps to Revive Your Jump Starter
Now, let’s explore how you can troubleshoot your jump starter. Diagnosing the problem can help you determine the best course of action. This might involve simple fixes or require more involved repairs or even replacement. These steps are a practical guide. They help you find out what’s wrong and guide you toward a solution.
Visual Inspection and Basic Checks
Start with a good look. This is the first step when your jump starter stopped working suddenly. Often, a quick visual inspection can spot the problem. Look for obvious signs of damage. This simple step can save you time and effort.
- Examine the Cables and Clamps: Look for any signs of damage to the cables and clamps.
- Check the Jump Starter Body: Examine the body of the jump starter for any cracks or damage.
- Inspect the Charging Port: Verify that the charging port isn’t damaged.
Check the entire length of the cables. Look for cuts, frays, or areas where the insulation is damaged. Inspect the clamps for corrosion, rust, or damage. Replace any damaged cables or clamps. Ensure they are securely attached to the jump starter.
Look for any physical damage, such as cracks, dents, or signs of water damage. Make sure the power button or switch functions correctly. A damaged housing can indicate potential internal problems. It may require further investigation.
Make sure the charging port is clean and free of debris. Examine the pins inside the port for any bending or damage. A damaged port can prevent the jump starter from charging correctly. It will also stop the device from working properly.
Charging and Battery Testing Methods
Checking the battery is a key part of troubleshooting. If the battery is the issue, charging it might be enough to get the jump starter working again. If not, then a deeper examination of the battery might be needed. Testing methods will help you evaluate the battery’s condition. These steps can guide you toward the proper solution.
- Charge the Jump Starter: Connect the jump starter to a power source and allow it to charge fully.
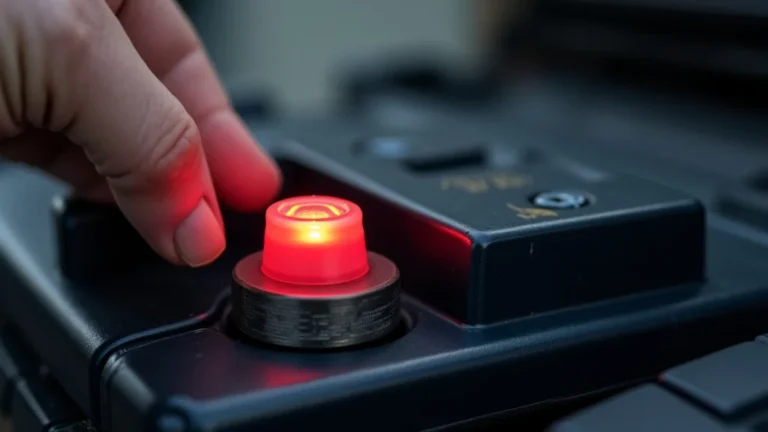
- Check the Charging Indicator: Observe the charging indicator lights to see if the jump starter is charging.
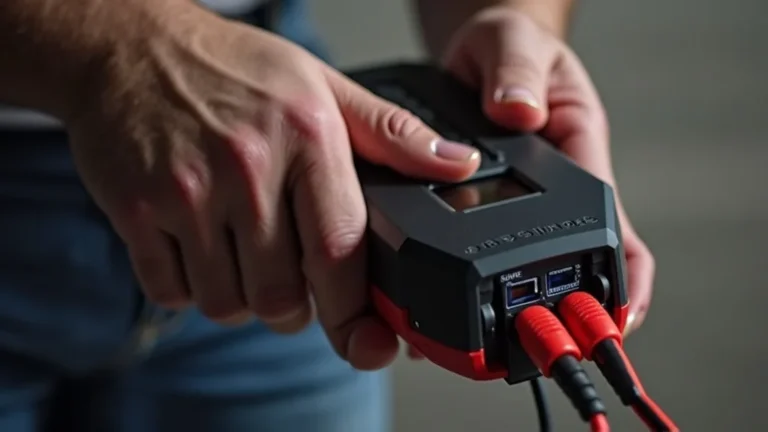
- Test the Battery Voltage: Use a multimeter to measure the battery voltage.
Plug the charger into a wall outlet and the jump starter. Follow the manufacturer’s instructions for charging time. Check for any indicator lights that show charging status. It can help you to decide if the charging system works correctly.
Look for the LED lights on the jump starter that show charging status. If there is no indication that the jump starter is charging, try a different charger or power outlet. If the indicator lights don’t work, it may be a charging problem.
Use a multimeter to measure the voltage of the battery. Ensure the jump starter is turned off. Then, attach the multimeter probes to the battery terminals. Compare the voltage reading to the specifications listed by the manufacturer. If the voltage is too low, the battery might not hold a charge.
Connection and Clamping Procedures
Correct connections are necessary to deliver power to the car battery. Even a good jump starter can fail if the connections are bad. Following the right procedure is essential. Bad procedures can damage the device or, worse, cause harm. Knowing the right way to connect the clamps is important.
- Clamp Placement: Connect the red clamp to the positive (+) terminal of the car battery, and the black clamp to a grounded metal surface on the car chassis.
- Clamp Security: Ensure the clamps are firmly attached to the battery terminals.
- Connection Order: Always connect the clamps in the correct order: positive (+) first, then negative (-).
Be careful when attaching the clamps. Make sure the clamps are making good contact with the car battery terminals. Ensure the clamps do not touch each other or any other metal parts of the vehicle. This could create a short circuit.
Check that the clamps are securely attached to the battery terminals. Loose clamps can result in poor contact and prevent the jump starter from delivering power. Give the clamps a slight tug to confirm they are firmly in place.
Connecting the clamps in the right order will reduce the risk of sparks. Always connect the positive (+) clamp to the positive terminal of the car battery. Connect the negative (-) clamp to a grounded metal part of the vehicle, away from the battery. This reduces the risk of explosions.
Advanced Diagnostic Strategies
When the basic troubleshooting steps don’t resolve the issue, more advanced methods are needed. These methods help to identify hidden problems. They might involve professional help or the use of specific tools. Understanding these strategies can help you determine the next steps.
Using a Multimeter for Detailed Testing
A multimeter is a valuable tool for diagnosing electrical problems. It can measure voltage, current, and resistance. These measurements can reveal issues that are not always obvious. Using a multimeter helps you examine different parts of your jump starter. It gives you a deeper look into its functionality.
- Voltage Testing: Check the voltage of the jump starter’s battery and charging system.
- Continuity Testing: Use the continuity setting to test the cables and internal fuses.
- Current Testing: Measure the charging current to determine if the jump starter is receiving power.
Set your multimeter to measure DC voltage. Touch the probes to the positive and negative terminals of the jump starter’s battery. Compare the reading to the manufacturer’s specifications. If the voltage is too low, the battery may not be charging correctly or may be damaged.
Set your multimeter to the continuity setting (often marked with a symbol that looks like a speaker or a diode). Touch the probes to each end of a cable. If the meter beeps or shows a low resistance value, there is good continuity, and the cable is working. Repeat this for the fuses to see if they are blown.
Set the multimeter to measure DC current. Disconnect the jump starter’s charger from the wall outlet. Then connect the multimeter in series with the charging circuit. The charging current should be within the range specified by the manufacturer. If there is no current or if it is too low, there might be an issue with the charger or internal circuitry.
Internal Component Inspection
Sometimes, the issue may be inside the jump starter. Inspecting internal components can reveal hidden problems. This requires some basic knowledge of how the device works. It might include opening the jump starter case. This can often help pinpoint the problem. However, it is important to exercise caution and follow safety precautions. This approach can help you decide on the next course of action, which could be repair or replacement.
- Opening the Case: Carefully open the jump starter case to inspect the internal components.
- Circuit Board Check: Examine the circuit board for any visible damage.
- Fuse and Component Inspection: Inspect fuses and other components for signs of failure.
Remove the screws or clips holding the case together. Be careful not to damage the case or internal components during disassembly. If you’re not comfortable opening the device, consider having it inspected by a professional. This can also save you time and frustration.
Look for signs of damage, such as burnt components, cracked traces, or loose connections. Inspect the capacitors for bulging or leaking. If any damage is found, it may indicate a problem with the circuit board, which could require professional repair.
Locate the internal fuses and check them for being blown or damaged. Look for other components like resistors, capacitors, and diodes that may show signs of damage. Replacing a blown fuse might be a simple fix. However, other component failures may require more advanced repair skills.
Professional Assistance and Repairs
If you have tried the basic troubleshooting steps and are still facing problems, it might be best to seek professional help. Professionals have the tools and expertise to identify and fix complex issues. It’s often safer and can save you time. Repairing electrical devices can be risky if you’re not trained. In this case, professional help is important.
- Finding a Qualified Repair Shop: Seek a professional who specializes in electrical devices or automotive electronics.
- Repairing the Device: A qualified technician will diagnose and repair the problem.
- Considering Replacement: If repairs are too expensive or if the jump starter is old, replacement might be the best option.
Look for a reputable repair shop. Check reviews or ask for recommendations. Make sure they have experience working with jump starters or similar devices. Consider repair shops that specialize in electronics or automotive electrical systems.
A professional will have the skills and tools needed to diagnose the problem accurately. They can also repair the damaged components or replace them. Make sure the technician gives you a clear explanation of the problem and the repair plan. Ask about the cost and estimated repair time.
Sometimes, the cost of repair can be close to the cost of a new jump starter. Think about the age and condition of your device. If it’s old or if it has experienced repeated problems, it might be time to replace it. A newer model might have better features and safety features.
Safety Precautions and Best Practices
Safety should be your priority when working with electrical devices. Always follow safety precautions. These precautions are especially important when dealing with jump starters and car batteries. Remember that improper use can lead to injury or damage to your equipment. Proper safety steps ensure a safer experience.
Avoiding Electrical Hazards
Car batteries and jump starters contain electricity. Incorrect handling can lead to electrical shocks or short circuits. Knowing how to prevent electrical hazards is key to staying safe. Following these rules can reduce the chances of accidents. It makes the procedure safer.
- Disconnect Power: Always disconnect the jump starter from the power source before performing any repairs.
- Insulated Tools: Use insulated tools to handle wires and components.
- Prevent Shorts: Be careful to avoid creating short circuits.
Make sure the jump starter is unplugged. Never work on electrical devices when they are connected to a power source. This reduces the risk of electric shock.
Always use tools with insulated handles. This will reduce the risk of electric shock if you accidentally touch a live wire. Insulated tools include screwdrivers, pliers, and wire strippers.
Be careful when working around exposed wires or terminals. Make sure that the positive and negative terminals do not touch each other. This can cause a dangerous spark or damage the jump starter.
Proper Handling and Usage
Knowing how to use and handle your jump starter correctly is very important. Always follow the manufacturer’s instructions. Incorrect use can damage the device or injure you. It also prevents potential damage to your vehicle’s electrical system. This can guarantee a safer experience.
- Read the Manual: Always read the manufacturer’s instructions before using the jump starter.
- Clamp Placement: Connect the clamps in the correct order. Red to positive (+), black to a good ground.
- Ventilation: Use the jump starter in a well-ventilated area.
Get familiar with the jump starter’s controls, indicators, and safety features. Understand the proper charging and operating procedures. The manual gives detailed information about how to use the device safely.
Always connect the red clamp to the positive (+) terminal of the car battery and the black clamp to a grounded metal surface. Connecting the clamps in the reverse order can cause sparks and damage the jump starter. Make sure the clamps are making good contact with the battery terminals.
When charging or using the jump starter, do so in a well-ventilated space. This can prevent a buildup of explosive gases that are released during charging. This is especially important when using lead-acid jump starters.
Maintenance and Storage Tips
Proper maintenance and storage are important for the longevity of your jump starter. Regular care and storing your device properly can extend its lifespan. It also ensures it’s ready to work when you need it. These simple tips can prevent issues and help your device function when you need it.
- Regular Charging: Charge the jump starter regularly.
- Clean the Clamps: Clean the clamps periodically to prevent corrosion.
- Proper Storage: Store the jump starter in a cool, dry place.
To keep the battery healthy, charge the jump starter after each use. Fully charge it before storing it for long periods. Regular charging prevents deep discharging and maintains battery performance.
Inspect the clamps for corrosion, rust, or dirt. Use a wire brush or sandpaper to clean them. This can ensure a good connection. This helps improve electrical performance.
Keep the jump starter in a temperature-controlled environment away from extreme temperatures. Extreme heat or cold can harm the battery. Store the device away from direct sunlight and moisture.
Frequently Asked Questions
Question: Why won’t my jump starter turn on at all?
Answer: The most common reasons are a completely drained battery, a blown fuse, or internal component failure. Check the battery voltage with a multimeter, replace the fuse if blown, and consider professional repair if necessary.
Question: Can I use a jump starter on any car?
Answer: Yes, most jump starters are designed to work with a range of vehicle types, from small cars to larger trucks. Always verify the jump starter’s specifications. Make sure it is compatible with your vehicle’s engine size and battery type before use.
Question: How long does it take to charge a jump starter?
Answer: Charging times vary. It depends on the jump starter’s capacity and the charger’s output. Typically, a full charge can take anywhere from 2 to 12 hours. Refer to the manufacturer’s instructions for specific charging times.
Question: What should I do if the clamps spark when I connect them?
Answer: Stop immediately and disconnect the clamps. Make sure you’re connecting the clamps to the correct terminals (positive to positive, negative to a ground). If the terminals are corroded, clean them. If the sparking continues, there might be a short circuit. Get professional assistance.
Question: Is it safe to leave a jump starter plugged in all the time?
Answer: It’s generally not recommended. Leaving the jump starter plugged in constantly can lead to overcharging, which could damage the battery. Disconnect the charger once the jump starter is fully charged, as specified by the manufacturer.
Final Thoughts
Dealing with a jump starter stopped working suddenly can be frustrating, especially when you need it most. We’ve explored the common causes behind this issue, from battery problems and connection troubles to internal component failures. We’ve also provided a systematic approach to troubleshooting. Start with visual inspections, check the battery, examine connections, and if needed, explore more advanced diagnostics. Remember the importance of safety. Use the jump starter with care and in a safe environment. While some fixes can be managed at home, don’t hesitate to seek professional help when needed. By taking these steps and practicing regular maintenance, you can keep your jump starter ready to go. This can help you stay prepared for those unexpected moments when your car needs a boost.