How to Reset Jump Starter Units: A Simple Guide for Everyone
Figuring out how to reset jump starter can sometimes feel tricky, especially when you’re just starting. Don’t worry, it’s a common issue! Many people find themselves in a similar spot, wondering how to get their jump starter working again. This guide will walk you through the process step-by-step. Get ready to learn how to troubleshoot and get back on the road in no time. Let’s get started!
What Causes a Jump Starter to Need Resetting?
Jump starters, those handy devices that give your car battery a boost, sometimes need a little help to get back on their feet. There are a few key reasons why you might need to know how to reset jump starter. Overuse is one possibility; if you’ve used it multiple times in a short period, it might shut down to protect itself from overheating. Another reason could be a low charge. Jump starters need to be charged themselves, and if their internal battery is depleted, they might enter a protected state. Additionally, improper use, like connecting the clamps incorrectly or trying to jump-start a battery that’s too far gone, can trigger a reset.
Overload Protection and Its Role
Jump starters are built with overload protection, a crucial safety feature. This feature acts like a circuit breaker in your home, preventing damage to the device and the vehicle’s electrical system. When an overload occurs, such as a short circuit or attempting to jump-start a battery that is severely discharged or damaged, the jump starter will automatically shut down. The purpose of this function is to protect components like the internal battery, the electronic circuits, and the vehicle’s electrical system from potential damage. The overload protection is a necessary aspect that every user must be aware of to prevent the jump starter from being damaged.
- Short Circuit Detection: If the clamps touch each other or a short circuit is detected elsewhere, the jump starter will shut down.
- Overcurrent Protection: If the jump starter attempts to supply too much current, it will switch off. This guards the internal components and the car’s battery.
- Overheat Prevention: Extended use or high ambient temperatures can cause overheating. The device will cease functioning to protect itself.
- Reverse Polarity Protection: The jump starter has protection to prevent you from connecting the clamps incorrectly (positive to negative or vice versa).
The overload protection system is a key element in jump starter design. It’s responsible for protecting the jump starter from damage and ensuring safety. If your jump starter stops working, it could be the overload protection activating.
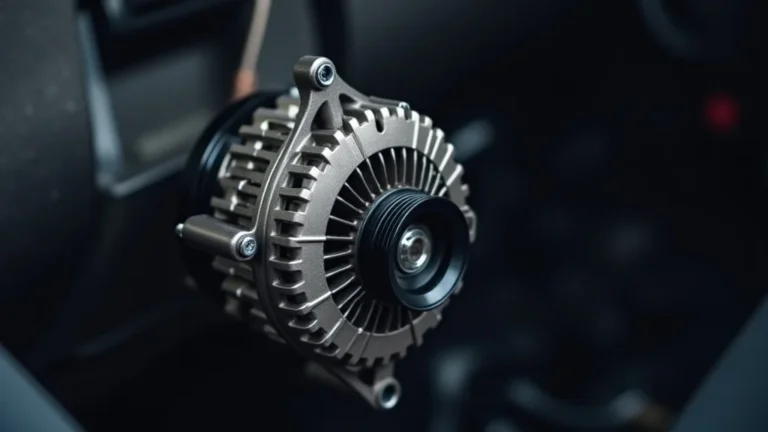
Battery Health and Jump Starter Compatibility
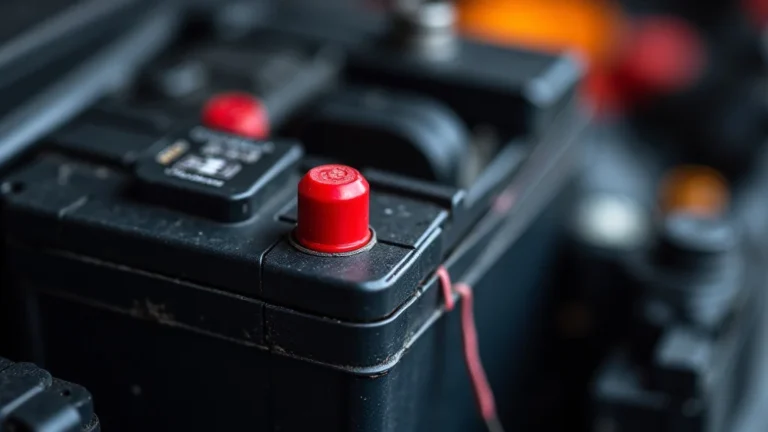
Not all car batteries are created equal, and knowing the state of your battery is important before using a jump starter. A battery that is deeply discharged or damaged might not respond well to a jump, and it could even damage the jump starter. Jump starters are designed to provide a burst of power to start a car with a weak battery, but they are not a substitute for a battery replacement. Understanding the state of your car battery is vital for using your jump starter effectively. A battery that has internal damage or has been left discharged for an extended period may not hold a charge, and attempting to jump-start it could be futile.
- Check Battery Voltage: Use a voltmeter to assess the battery voltage. A reading below 12V often indicates a need for a jump.
- Look for Corrosion: Clean terminals are essential for a good connection. Remove any corrosion with a wire brush or baking soda solution.
- Battery Age: Older batteries might not hold a charge as well. Consider replacing batteries that are more than five years old.
- Jump Starter Power: Make sure your jump starter has sufficient cranking amps (CA) or cold cranking amps (CCA) for your car’s needs.
Knowing your battery’s condition is a key step in resolving issues with your jump starter. It will save you time and possible damage to your car and your jump starter.
Simple Steps: How to Reset Jump Starter Units
If your jump starter isn’t working, it’s time to troubleshoot. Many issues, from a device shutting down to malfunctioning, can be fixed with a reset. Learning how to reset jump starter is much easier than it appears. This section will give you a clear, straightforward process.
Basic Resetting Techniques
The procedure for resetting a jump starter differs depending on its design. However, there are a few standard methods that work with many devices. A basic reset typically involves a power cycle. This is similar to restarting your computer or phone. It can clear any temporary errors or issues that might be preventing the device from working correctly.
- Power Button: Press and hold the power button for a few seconds. If there’s an issue, this simple action will often reset it.
- Unplugging and Plugging: Remove the jump starter from any charging source and let it sit for a few minutes. Then, plug it back in.
- Check for Indicators: Look for any lights or beeps that might indicate an error. Refer to your manual for what these signals mean.
- Inspect the Clamps: Ensure the clamps are clean and free from corrosion, and that the connections are secure.
Start with these simple techniques before moving on to more advanced steps. Often, a quick power cycle is all that is needed to restore functionality. These are the basic steps you should take when addressing a non-responsive jump starter.
Advanced Resetting and Troubleshooting
If the basic methods don’t work, you might need to dig a little deeper. Some jump starters include specific reset buttons or procedures outlined in their manual. Additionally, you should inspect the device for visible signs of damage, such as swollen batteries or damaged ports. The troubleshooting steps may vary, depending on the model and the specific problem. It’s important to familiarize yourself with the features and limitations of your jump starter.
- Check the Manual: Find the user manual. It often has troubleshooting tips specific to your model.
- Reset Button: Some jump starters have a dedicated reset button; find it and press it.
- Internal Fuse: Some have a replaceable internal fuse. Check it and change it if necessary.
- Charging Issues: Ensure the charger is working correctly. Try a different outlet or charger.
Advanced troubleshooting may involve more steps, so it’s a good idea to consult the manual for your specific jump starter model. If all attempts fail, and the device is still under warranty, contact the manufacturer or the store where you bought it for assistance.
Charging and Maintenance Tips
Taking care of your jump starter means it will last longer and be ready when you need it. This section focuses on how to reset jump starter by emphasizing preventative care. Regularly charging and keeping your jump starter in good condition will help prevent the need for resets. Simple steps can greatly extend its lifespan.
Optimal Charging Practices
Proper charging is crucial for the health and performance of your jump starter. Regular charging keeps the internal battery ready to go and will help prevent damage. Different models have different charging requirements, so it’s best to follow the manufacturer’s guidelines. These guidelines generally include how often to charge and what type of charger to use. It is wise to have a charging routine, especially if you live in an area with dramatic temperature swings, as these can affect battery performance.
- Charge Regularly: Charge your jump starter after each use and at least every 3–6 months, even if you haven’t used it.
- Use the Right Charger: Use the charger that came with the jump starter or one recommended by the manufacturer.
- Avoid Overcharging: Don’t leave it connected to the charger for extended periods, as this can damage the battery.
- Charging Time: Follow the manufacturer’s recommendations for charging time, which can vary.
These practices keep your jump starter in top condition, meaning it’ll be ready for use whenever you need it. Keeping your jump starter charged is crucial for its longevity.
Storage and Environmental Factors
Where and how you store your jump starter can affect its performance and lifespan. Extreme temperatures, humidity, and direct sunlight are all things to be mindful of. A dry, moderate-temperature environment is ideal for long-term storage. By following these guidelines, you can protect your device from damage and make sure it’s ready when you need to use it. A little care can make a big difference.
- Temperature Control: Store in a cool, dry place. Avoid extreme temperatures.
- Humidity: Keep it away from humid areas, which can cause corrosion.
- Sunlight: Avoid direct sunlight, which can damage the housing and internal components.
- Regular Inspections: Check for any signs of damage or wear, especially before long storage periods.
These storage practices will protect your jump starter and ensure its readiness when you need it. A little care goes a long way when it comes to preserving the life of your device.
Real-Life Examples and Scenarios
To really drive home the concepts, let’s go through some real-life scenarios. These cases show how easy it is to learn how to reset jump starter units. Knowing how to troubleshoot and apply these methods can save you time and stress, especially during an emergency.
Scenario 1: Overuse in Cold Weather
Imagine you live in a cold climate. Your car battery is old, and it struggles to start on frosty mornings. You use your jump starter a few times in one day to get your car running. After the third jump, the device shuts down. This scenario is a classic example of overload protection. The jump starter’s internal components likely overheated due to the repeated use in a short time. You will need to allow the jump starter to cool down, then reset it. This will get it working again. Always wait between jumps.
- The user attempts to start their vehicle multiple times.
- The jump starter shuts off, and the device’s display shows an error.
- The user consults the manual and lets the jump starter rest for about 30 minutes to cool.
- The user resets the jump starter and successfully starts the car.
This example highlights the importance of letting the device cool down and not overusing it. It also shows the benefit of the overload protection system in action. Taking a break is often the solution.
Scenario 2: Incorrect Clamp Connection
Let’s say you’re in a hurry and accidentally connect the jump starter clamps in reverse, positive to the negative terminal and vice versa. Your jump starter instantly shuts down, and you see a warning on the display. This is a common situation where the reverse polarity protection kicks in. The jump starter is designed to prevent this exact issue, as connecting the clamps incorrectly can cause serious damage to both the jump starter and your car’s electrical system. This safety feature is designed to prevent sparks and damage. The immediate shutdown is a sign of your jump starter’s safety system working correctly. It is often a case of a simple reset.
- The user attaches the clamps to the car battery.
- The device shuts down and displays a reverse polarity error message.
- The user disconnects the clamps.
- The user checks the manual for reset instructions.
This situation shows the importance of correct clamp placement and how your jump starter’s safety features protect against errors. Always take your time and double-check connections before trying to jump-start your vehicle.
Comparing Jump Starters: Features and Reset Methods
Jump starters are available in a range of designs and with many features. Understanding the differences can help you pick the best one. Some models have advanced features, while others are designed to be as simple as possible. Understanding how to reset a jump starter depends on the make and model. This section will compare different types of units and their reset options. Different devices have different levels of protection, battery capacity, and additional features.
| Feature | Standard Jump Starter | Premium Jump Starter |
|---|---|---|
| Battery Capacity | Smaller, typically sufficient for smaller vehicles | Larger, able to jump-start larger vehicles multiple times |
| Reset Method | Usually power button or simple reset button | More sophisticated reset functions, often with more detailed diagnostics |
| Additional Features | May include LED lights, USB charging ports | May include USB charging, digital displays, and safety features |
| Price | Lower | Higher |
By comparing the features of different jump starters, you can make a selection that fits your needs. Choosing the right jump starter can give you the functionality you need. Consider your use, your vehicle size, and the additional features that matter most to you.
Jump Starter Types
Jump starters come in several varieties, from basic models to those with advanced features. Each type offers different levels of power, protection, and ease of use. The choice that’s best for you will depend on your budget, your vehicle’s requirements, and your individual needs. The type of device is often linked to the reset process. Understanding the differences can help you to troubleshoot issues.
- Lithium-Ion Jump Starters: These are popular because they are lightweight and compact. They offer good performance and are generally easy to reset, often with a simple power button or reset button.
- Lead-Acid Jump Starters: These are often more affordable but heavier. Reset methods can be similar to lithium-ion models, but you should check the user manual.
- Hybrid Jump Starters: Some jump starters combine features for added functionality. Reset procedures may be more involved.
When selecting a jump starter, think about the type of vehicle you have, the situations you are likely to encounter, and how important portability and ease of use are to you.
Advanced Features and Their Reset Procedures
Jump starters that have extra features provide added benefits, such as USB charging, LED lights, and digital displays. Each of these features can improve the device’s functionality. The reset process may differ based on these features. Advanced models may require a more specific reset procedure, which might include specific button combinations or diagnostic tests. These advanced options may also provide detailed diagnostic information, such as the battery’s voltage and the device’s charging status. All of the device’s functions are designed to streamline the process.
- Digital Displays: Digital displays provide real-time information, such as the battery’s charge level and error messages.
- USB Charging: Many jump starters come with USB ports, which let you charge your phone or other devices.
- LED Lights: Built-in LED lights can be useful for illuminating the engine bay.
- Safety Features: Advanced protection against reverse polarity and overcharging.
Choosing a model with advanced features might make the reset process a bit more complex. Consult the user manual for details. Always know what your device can do and the proper steps to take when troubleshooting.
Frequently Asked Questions
Question: What do I do if my jump starter won’t turn on at all?
Answer: Check the charge level. If it’s low, plug it into a charger. Also, ensure the power button isn’t stuck and that there is no visible damage to the device.
Question: My jump starter has a display. Why does it show an error message?
Answer: Refer to your user manual to decipher the error code. It could relate to reverse polarity, an overloaded circuit, or low battery voltage. Addressing the source of the error is vital.
Question: Can I use my jump starter to charge my phone or other devices?
Answer: Many jump starters come with USB charging ports. Check your model’s specifications. This can provide a power source in an emergency situation.
Question: What should I do if my jump starter is making unusual noises?
Answer: Disconnect the device immediately and check the manual. If the sounds are persistent or loud, consider contacting the manufacturer or a repair shop.
Question: How often should I charge my jump starter if I don’t use it?
Answer: Charge it every 3–6 months, or as recommended by the manufacturer. This keeps the battery in optimal condition and extends its life.
Final Thoughts
Knowing how to reset jump starter units is an important skill for any car owner. It not only saves you from being stranded but also helps you to maintain and get the most from your device. Most reset methods involve simple steps, such as pressing a power button or checking the connections. By following this guide, you should be able to get your jump starter working again. Remember to practice preventive care: charge your device regularly, store it in a cool and dry place, and refer to your user manual.
When your jump starter is not working, don’t panic! Follow the steps outlined here, and you should be able to solve most issues. By understanding the basics, you are now well-prepared to tackle the most common problems. You are now equipped with the knowledge and know-how to keep your jump starter ready for action. Be sure to keep your device charged, and you will be ready for unexpected situations. You can drive with confidence!